Hello rhubarb! You and me? Hm?! I’ll make you a fluffy bed to lay down and you… well you can stay as you are – delicious! ;P
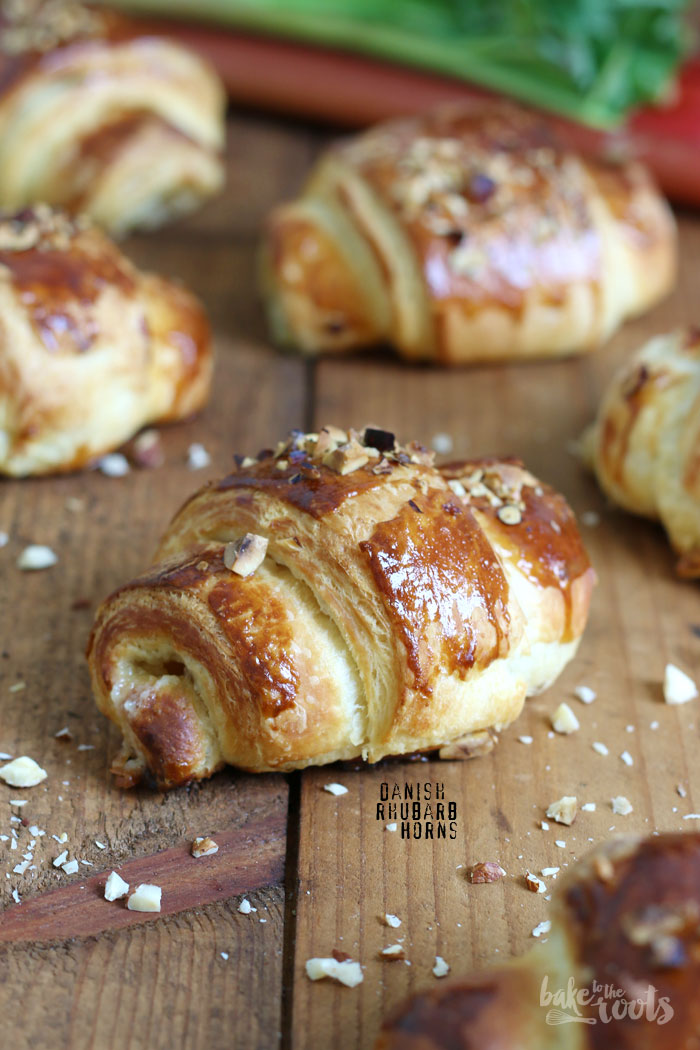
Today is rhubarb day! To be a bit more precise – danish rhubarb day! ;) Why danish – rhubarb is something you can get pretty much everywhere… well the story for these little beauties starts in.. guess where? Denmark. Right ;P
I’ve been to Copenhagen not too long ago. Beautiful city – beautiful houses, beautiful design, beautiful human beings and beautiful-delicious food! :) One of the gifts I got last Christmas, was a pottery workshop at Tortus Copenhagen – which brought me to Copenhagen again. BTW – one of the best gifts in a long time! Unfortunately I did not do soooooo well on the spinning wheel, but it was a lot of fun – some pictures can be found on my Instagram account ;)
The pottery workshop was the highlight of the trip to Denmark, but right after that the food was one of the best things in Copenhagen :) We’ve been to the Meatpacking District and several Streetfood Markets – all great locations with awesome food! One thing I liked most: Danish pastry! Denmark is a paradise for people like me that love all sorts of baked goods ;) Oh boy – those cinnamon rolls, danish pastry, little cakes and all – if it wasn’t so expensive, you could have rolled me to the airport, cause I would have eaten constantly! Maybe it is a good thing after all, that food is not cheap in Copenhagen :P
These rhubarb horns are my tribute to the delicious food from Copenhagen, but I made them actually for some other reason. There will be a week dedicated to Danish Food coming soon – so prepare for that ;)
I made these horns here for Lixie from photolixieous.com as a little guest contribution. Some maybe remember her from my Cookie Friday – she made delicious Brookies for me! Now I have the honors to surprise her readers with one of my recipes – these little rhubarb beauties. Lixie has an awesome blog dedicated to recipes (cooking and baking) that are suitable for a low-histamine diet (sorry, but these horns here are not low-histamine). If you want to know more about this topic, you should go and visit her blog. If this is nothing you have to worry about, you should still go to her blog – her food pictures are awesome :) She is one of my Food Photography Goddesses – her “dark & moody” pictures are plain awesome! :D
Did we talk about the recipe yet? I think not ;) Well the horns are filled with rhubarb AND marzipan – an awesome combination! About the danish pastry is not much to say – one of my favorites. Bit time consuming, but the result is definitely worth some hours of hard labour :P
INGREDIENTS / ZUTATEN
For the butter layer:
8.8 oz. (250g) cold butter, diced
1/3 cup (40g) all-purpose flour
For the dough:
(500g) all-purpose flour
1/4 cup (50g) sugar
1 1/2 tsp. salt
1.5 oz. (42g) fresh yeast
1 oz. (30g) butter, at room temperature
1 egg
2 egg yolks
6 oz. (170g) cold milk
For the filling:
7 oz. (200g) rhubarb
1/2 cup (120ml) water
1/4 cup (50g) brown sugar
3.5 oz. (100g) almond paste or marzipan
1/4 cup (55g) butter, at room temperature
1/4 cup (50g) sugar
For the decoration:
1 egg yolk
chopped hazelnuts
Für die Butterschicht:
250g kalte Butter
40g Mehl (Type 405)
Für den Teig:
500g Mehl (Type 405)
50g Zucker
1 1/2 TL Salz
1 Würfel (42g) Hefe
30g weiche Butter
1 Ei
2 Eigelb
170g kalte Milch
Für die Füllung:
200g Rhabarber
120ml Wasser
50g brauner Zucker
100g Mandelpaste oder Marzipan
55g weiche Butter
50g Zucker
Für die Dekoration:
1 Eigelb
gehackte Haselnüsse
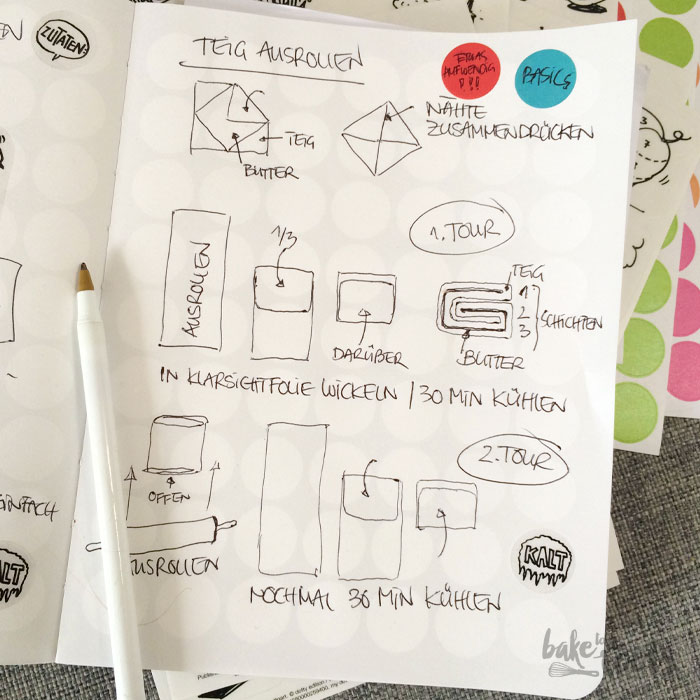
Here is a graphic to show you how to roll and fold the dough. It is not very complicated, it just takes some time rolling, folding, cooling, rolling, folding and cooling again ;)
DIRECTIONS / ZUBEREITUNG
2. For the dough add flour, sugar and salt to a large bowl and mix. Crumble the fresh yeast into pieces and add together with the butter, egg, egg yolks and the cold milk to the bowl. Knead until you get a nice smooth dough. Wrap loosely in plastic wrap and place in the fridge for at lest 1 hour.
3. Take the dough out of the fridge and roll out on a floured surface to a square – about double the size of the butter square. Add the butter (without the plastic wrap) on top of the dough – the edges should point to the sides of the dough square (45° rotation). Fold the dough edges over the butter so it looks like an envelope. Press the seams together so the butter is completely sealed in. Roll out to a rectangle with triple the length of the square before. Fold the ends towards the center on top of each other so you get a square again with three layers. Wrap in plastic wrap and place in the fridge for about 30 minutes. Take the dough out of the fridge and repeat the process. Roll out again (let the open side of the package face you when rolling out) and fold again. Place in the fridge for another 30 minutes.
4. For the filling wash and dry the rhubarb, cut into small pieces and add to a small pot together with the water and sugar. Heat up and let gently cook until bit softer, but not mushy – the rhubarb pieces should still hold together. Let drain and set aside. For the almond part of the filling mix the almond paste with the butter and sugar in a small bowl until well combined. Set aside.
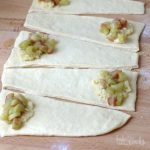
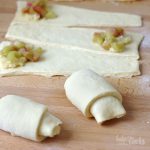
5. Line two baking sheets with baking parchment and set aside. Roll out the dough on a floured surface to a long rectangle – the short side should be around 8 inches (20cm). Cut the dough into 12 “kind of” triangles with a cut off tip – basically stripes with one side wider than the other. Place some of the almond filling on the wider side of the stripes and top with some rhubarb pieces, then roll up tight – the end of the stripe should be unterneath the horn when you place it on the baking sheet (keep enough space in between because they are rising a lot). If there is filling leeking out, press the sides a bit together. Continue with the remaining stripes and fillings. Cover the horns loosely with plastic wrap and let rest for about 10-15 minutes.
6. While the horns are resting, preheat the oven to 390˚F (200°C). Whisk the egg yolk with some drops of water and brush the horns with it, then sprinkle with the chopped hazelnuts. Place in the oven and bake for 15-17 minutes. Take out of the oven and let cool down on a wire rack. Best on the same day but can be kept in an airtight container for the next day.
2. Für den Teig das Mehl mit dem Zucker und Salz in einer großen Schüssel vermischen. Hefe zerbröckeln und zusammen mit der Butter, Ei, Eigelben und der kalten Milch zugeben und alles zu einem glatten Teig kneten. Locker in Klarsichtfolie wickeln und für etwa 1 Stunde in den Kühlschrank legen.
3. Den Teig aus dem Kühlschrank nehmen und auf einer bemehlten Fläche zu einem Quadrat ausrollen – der Teig sollte etwa die doppelte Größe des Butterblocks haben. Den Butterblock (ohne die Folie) so auf das Teigquadrat legen, dass die Ecken auf die Seiten zeigen (45° Drehung) und dann die Ecken des Teiges über die Butter schlagen – wie bei einem Briefumschlag. Die Nähte gut verschließen und dieses Quadrat dann zu einem Rechteck ausrollen (sollte in etwa die dreifache länge des ursprünglichen Quadrats haben). Die Enden zur Mitte hin übereinander schlagen, so dass wieder ein Quadrat ensteht, das 3 Lagen hat. In Klarsichtfolie einschlagen und für 30 Minuten in den Kühlschrank legen. Den Teig aus dem Kühlschrank nehmen und erneut “tourieren” – also noch einmal ausrollen (die offene Seite des Teigpakets sollte zu einem zeigen) und die Teigenden wieder übereinander schlagen und erneut 30 Minuten in den Kühlschrank legen.
4. Für die Füllung den Rhabarber waschen und trocknen, in kleine Stücke schneiden und dann zusammen mit dem Wasser und Zucker in einen kleinen Topf geben und erhitzen. Der Rhabarber soll nicht komplett durchgekocht sein und zuerfallen, er soll nur etwas weicher werden, also nicht zu lange/zu stark erhitzen. Abtropfen lassen und zur Seite stellen. Für die Mandelfüllung die Mandelpaste/Marzipan zusammen mit der weichen Butter und dem Zucker in einer kleinen Schüssel verrühren und dann zur Seite stellen.
5. Zwei Backbleche mit Backpapier auslegen und zur Seite stellen. Den Teig auf einer bemehlten Fläche zu einem langen Rechteck ausrollen – die kurze Seite sollte dabei etwa 20cm (8 inches) breit sein. Den Teig in 12 Dreiecke mit abgeschnittener Spitze schneiden – oder anders gesagt in Streifen, bei denen das eine Ende breiter ist als das andere. Etwas Mandelfüllung auf das breite Ende eines Streifens geben und ein paar Stücke Rhabarber darauflegen. Das Hörnchen relativ fest aufrollen und dann auf das vorbereitete Backblech setzen – das Ende des Teigstreifens sollte dabei unter dem Hörnchen sitzen. Lasst den Hörnchen genug Platz auf dem Blech, weil sie noch einiges aufgehen. Sollte seitlich etwas Füllung auslaufen, drückt die Enden leicht zusammen. Mit dem restlichen Teig und der Füllung fortfahren und dann alle Hörnchen locker mit etwas Klarsichtfolie abdecken und für ca. 10-15 Minuten ruhen lassen.
6. Während die Hörnchen ruhen, den Ofen auf 200°C (390°F) vorheizen. Das Eigelb mit etwas Wasser verrühren, damit dann die Teigstücke einpinseln und mit den gehackten Haselnüssen bestreuen. In den Backofen schieben und für 15-17 Minuten backen. Aus dem Ofen nehmen und auf einem Kuchengitter abkühlen lassen. Die Hörnchen schmecken am ersten Tag am Besten, können aber auch für den nächsten Tag in einem luftdichten Behälter gelagert werden.
Craving more? Keep in touch on Facebook, Twitter, Instagram and Pinterest for new post updates and more. You can also contact me with any questions or inquiries!
Here is a version of the recipe you can print easily.
Print
Danish Rhubarb Horns
- Prep Time: 50
- Cook Time: 17
- Total Time: 180
- Yield: 12 1x
Ingredients
For the butter layer
- 8.8 oz. (250g) cold butter, diced
- 1/3 cup (40g) all-purpose flour
For the dough
- (500g) all-purpose flour
- 1/4 cup (50g) sugar
- 1 1/2 tsp. salt
- 1.5 oz. (42g) fresh yeast
- 1 oz. (30g) butter, at room temperature
- 1 egg
- 2 egg yolks
- 6 oz. (170g) cold milk
For the filling
- 7 oz. (200g) rhubarb
- 1/2 cup (120ml) water
- 1/4 cup (50g) brown sugar
- 3.5 oz. (100g) almond paste or marzipan
- 1/4 cup (55g) butter, at room temperature
- 1/4 cup (50g) sugar
For the decoration
- 1 egg yolk
- chopped hazelnuts
Instructions
- Cut the cold butter into pieces and mix with the flour. Knead until well combined – do this quickly, so the butter does not get warm. Place between two pieces of plastic wrap or baking parchment and form into a square with a thickness of about 0.4 inch (1cm) – works best with a rolling pin. Cover and place in the fridge until needed.
- For the dough add flour, sugar and salt to a large bowl and mix. Crumble the fresh yeast into pieces and add together with the butter, egg, egg yolks and the cold milk to the bowl. Knead until you get a nice smooth dough. Wrap loosely in plastic wrap and place in the fridge for at lest 1 hour.
- Take the dough out of the fridge and roll out on a floured surface to a square – about double the size of the butter square. Add the butter (without the plastic wrap) on top of the dough – the edges should point to the sides of the dough square (45° rotation). Fold the dough edges over the butter so it looks like an envelope. Press the seams together so the butter is completely sealed in. Roll out to a rectangle with triple the length of the square before. Fold the ends towards the center on top of each other so you get a square again with three layers. Wrap in plastic wrap and place in the fridge for about 30 minutes. Take the dough out of the fridge and repeat the process. Roll out again (let the open side of the package face you when rolling out) and fold again. Place in the fridge for another 30 minutes.
- For the filling wash and dry the rhubarb, cut into small pieces and add to a small pot together with the water and sugar. Heat up and let gently cook until bit softer, but not mushy – the rhubarb pieces should still hold together. Let drain and set aside. For the almond part of the filling mix the almond paste with the butter and sugar in a small bowl until well combined. Set aside.
- Line two baking sheets with baking parchment and set aside. Roll out the dough on a floured surface to a long rectangle – the short side should be around 8 inches (20cm). Cut the dough into 12 “kind of” triangles with a cut off tip – basically stripes with one side wider than the other. Place some of the almond filling on the wider side of the stripes and top with some rhubarb pieces, then roll up tight – the end of the stripe should be unterneath the horn when you place it on the baking sheet (keep enough space in between because they are rising a lot). If there is filling leeking out, press the sides a bit together. Continue with the remaining stripes and fillings. Cover the horns loosely with plastic wrap and let rest for about 10-15 minutes.
- While the horns are resting, preheat the oven to 390˚F (200°C). Whisk the egg yolk with some drops of water and brush the horns with it, then sprinkle with the chopped hazelnuts. Place in the oven and bake for 15-17 minutes. Take out of the oven and let cool down on a wire rack. Best on the same day but can be kept in an airtight container for the next day.
Notes
- Enjoy baking!


