
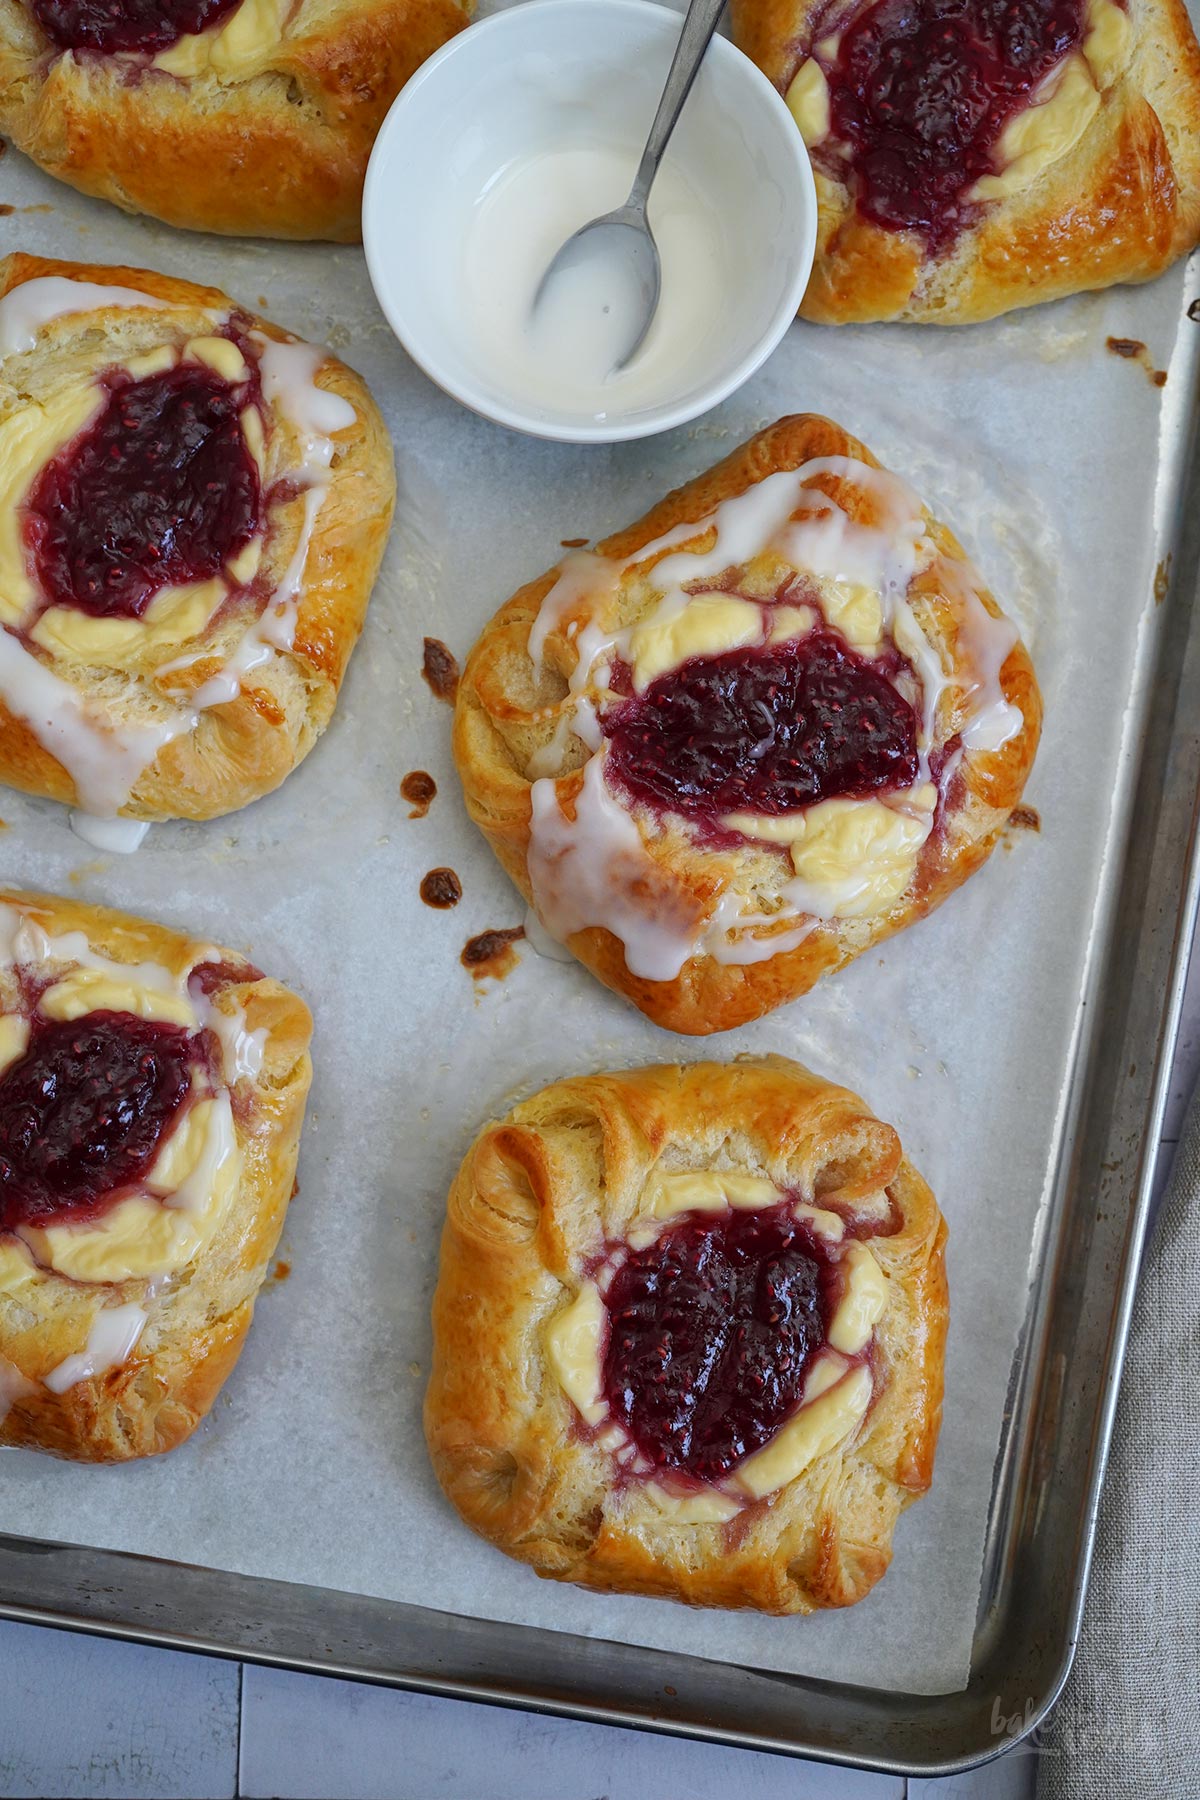
The name for these little sweet delights could cause some confusion I think. They are called »Spandauer«. Spandauer with Marzipan, Vanilla Custard and Raspberry Jam to be precise. The name Spandauer refers to a district in Berlin but these fellas are not German. Not at all. You could almost say »something is rotten in the state of Denmark«.
I don’t know whether William Shakespeare (who came up with the line about Denmark) or his character Hamlet would have known Danish pastries by the name of »Spandauer«, but I’m pretty sure that wasn’t the case. As far as I know, Danish pastries like this one here only became popular in the middle of the 19th century and William was already dead for a few centuries by then. Hamlet knew nothing anyway.
Danish pastries, like these Spandauer, are also called »Kopenhagener Gebäck« here in Germany. In Denmark you would say »Wienerbrød« aka. »Viennese Bread« refers to the type of dough used to make the small pastries. The shape of the Spandauer is supposedly reminiscent of the former military prison in Spandau (yes, the district in Berlin). So the pastries themselves are not from Berlin or Germany, but could possibly, somehow, maybe not… have gotten their name from the district Spandau. Who knows?! I wasn’t there when it was decided how to call them in Danish. Here in Berlin we call them »Kopenhagener«. Or simply Danish (»Plunder« in German).
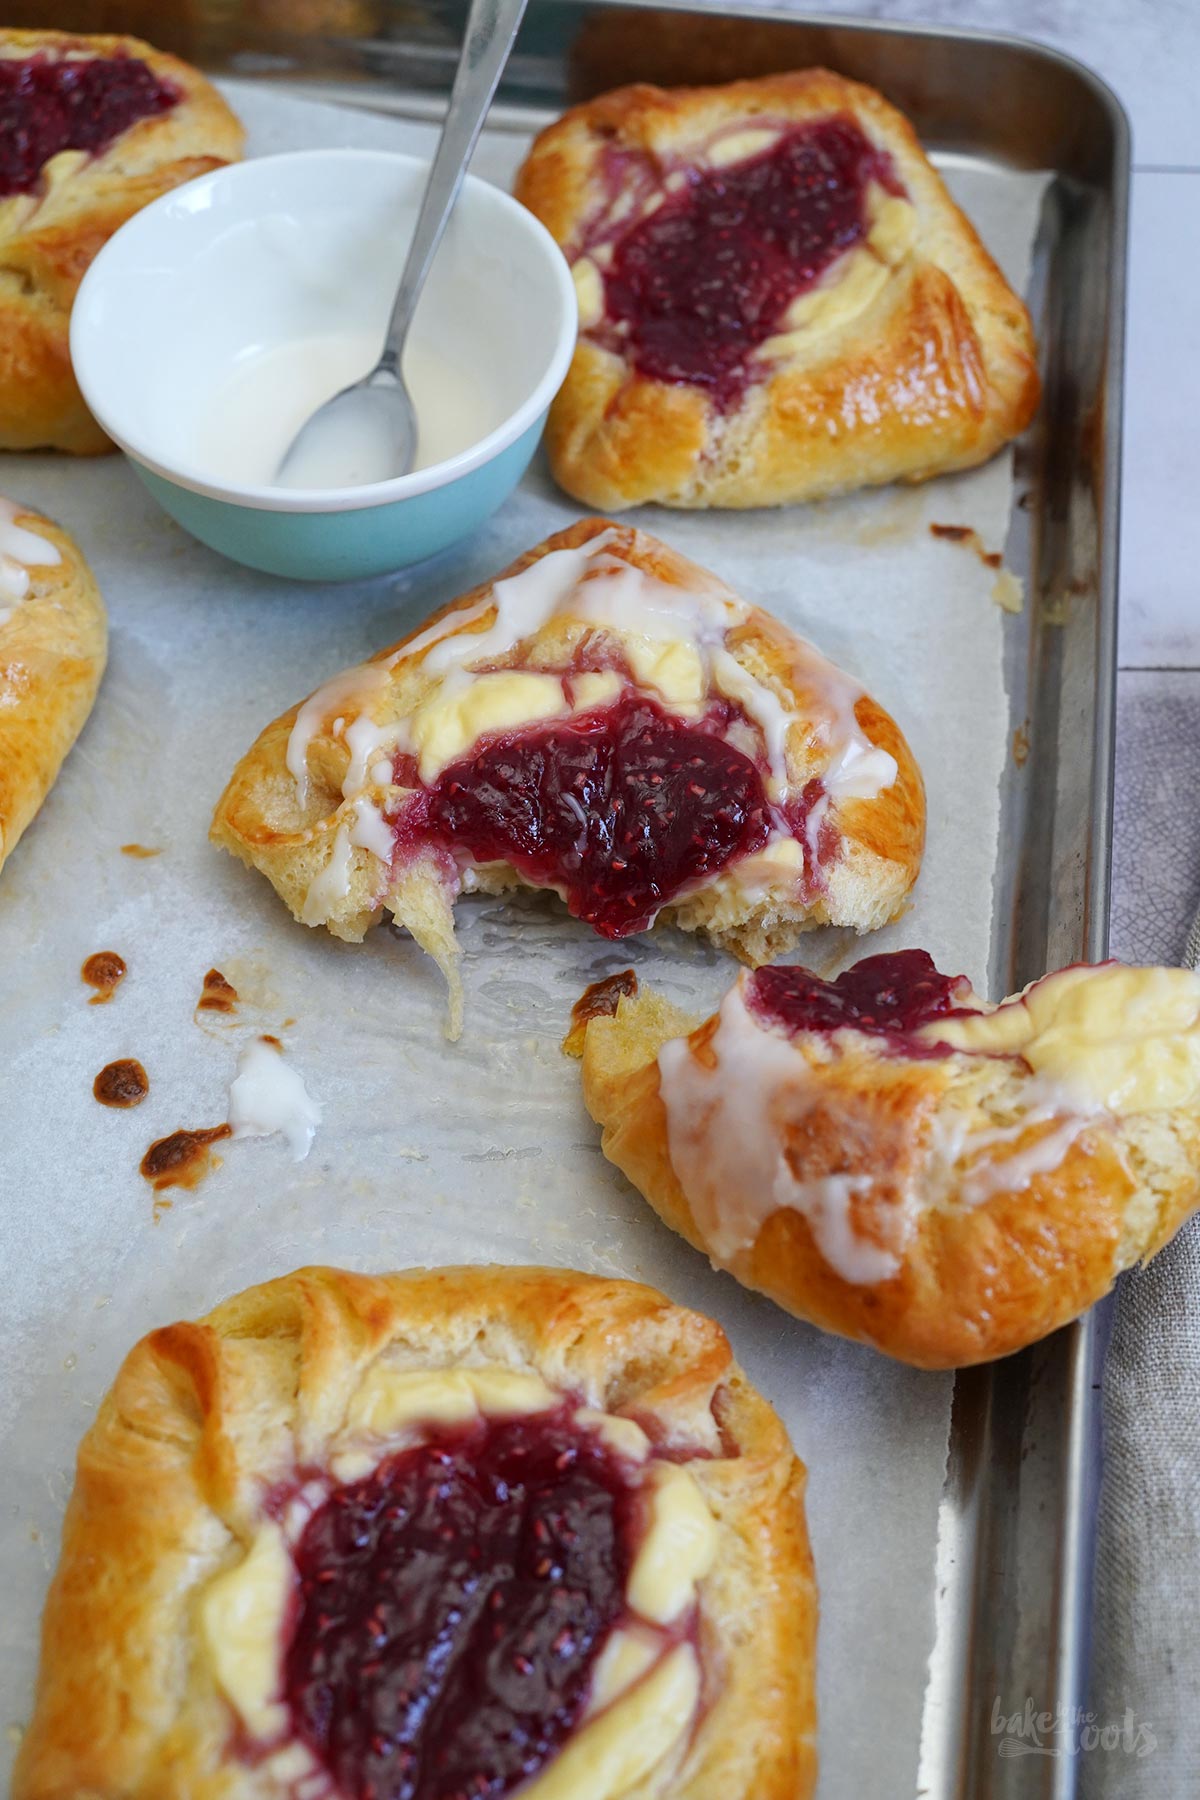
Danish pastry (Wienerbrød) and puff pastry are close relatives. Both are known for their buttery, fluffy texture. In both cases you have layers of butter and dough, which creates the airy texture. The only difference here – the Danish pastry dough is made with yeast. This improves the taste (in my opinion) and adds a little extra »fluffiness«. Puff pastry quickly gets dry and crumbly after baking – Danish pastries stay fluffy and soft for much longer…. I’m afraid I can’t describe it any other way than saying »fluffy« over and over. It’s so fluffy, I’m gonna die! U know?!
Unfortunately, Danish pastries are quite an elaborate baking project. I think you can guess that from the length of the recipe text. Danish pastry dough is not particularly complicated, don’t get me wrong, but you have to follow a few rules to make it work. A lot of waiting is also needed, so make sure you allow yourself two days for the whole shablam. On day 1 you have to prepare the dough and butter, leave it in the fridge overnight. You can also prepare the fillings at this point if you like. On the second day, bring the dough and butter together, roll out, fold, fill and many hours later you will have Danish pastries on your plate. Simple as that.

Even though I really like working with yeast dough, this Danish pastry dough stressed me out a little. My blogger colleague Andrea from Zimtkeks & Apfeltarte and I celebrate our »Bake Together – The Baking Surprise« once a month, where we pick at topic, bake something and then surprise each other with the results. If you put 1+1 together, you’ll be able to guess this month’s theme: Danish pastries.
January can be very busy after doing nothing for weeks around Christmas. That means I had only a few days to do the baking and take pictures here. No room for errors or second batches. On top of that there is almost no daylight here in Berlin in January – and I normally only take pictures with natural light. My stress level was at a 99 out of 100. Well… it somehow worked. Not perfect but well… I got something done.
Anyway. The recipe is quite extensive, even if there isn’t that much to do tbh. It’s just a bit complicated to describe everything in detail, so everyone can understand it right away. At least I hope that’s what I delivered. I don’t want anyone to get stuck in the middle of the recipe without knowing how to continue.
I hope the pictures below of the individual steps help a little to illustrate the recipe text. If you have any questions, please comment below the recipe. Maybe I can help answer questions that come up.
If you like Danish pastries, croissants and stuff like that you should also try some of my other recipes here on the blog. These two recipes here are a little easier to prepare but no less delicious: Easy Peasy Almond Croissants and Salted Caramel Chocolate (Brioche) Croissants. Both sooo good!


INGREDIENTS / ZUTATEN
(12 Danish pastries)
For the dough:
9 oz. (250g) cold butter
17.6 oz. (500g) spelt flour*, plus some more
1/4 cup (50g) sugar (fine)*
1 1/2 tsp. salt
6 oz. (170g) cold milk (3.8% fat)
1 oz. (30g) butter, at room temperature
1 medium egg
2 medium egg yolks
1.4 oz. (40g) fresh bakers’ yeast
For the custard cream (Kagecreme):
7 oz. (200g) milk (3.8% fat)
0.5 oz. (15g) cornstarch*
1 tbsp. sugar (fine)*
1 pinch of salt
1 tsp. vanilla extract*
1 tbsp. butter
1 medium egg yolk
For the marzipan filling (Remonce):
3.5 oz. (100g) marzipan paste
1.8 oz. (50g) butter, at room temperature
2 tbsp. sugar (fine)*
1 tbsp. vanilla sugar*
1 medium egg yolk & some heavy cream
4-5 tbsp. raspberry jam (or any other jam)
some sugar icing for the decoration (optional)
(12 Plunder)
Für den Teig:
250g kalte Butter
500g Dinkelmehl (Type 630)* plus etwas mehr
50g Zucker (fein)*
1 1/2 TL Salz
170g kalte Milch (3,8% Fett)
30g weiche Butter
1 Ei (M)
2 Eigelb (M)
1 Würfel (40g) frische Hefe
Für die Puddingfüllung (Kagecreme):
200g Milch (3,8% Fett)
15g Speisestärke*
1 EL Zucker (fein)*
1 Prise Salz
1 TL Vanille Extrakt*
1 EL Butter
1 Eigelb (M)
Für die Marzipan Füllung (Remonce):
100g Marzipanrohmasse
50g weiche Butter
2 EL Zucker (fein)*
1 EL Vanillezucker*
1 Eigelb (M) & etwas Sahne
4-5 EL Himbeermarmelade (oder andere Marmelade)
etwas Zuckerguss für die Dekoration (optional)
Step-by-Step Instructions
I hope the pictures help a bit with the recipe.
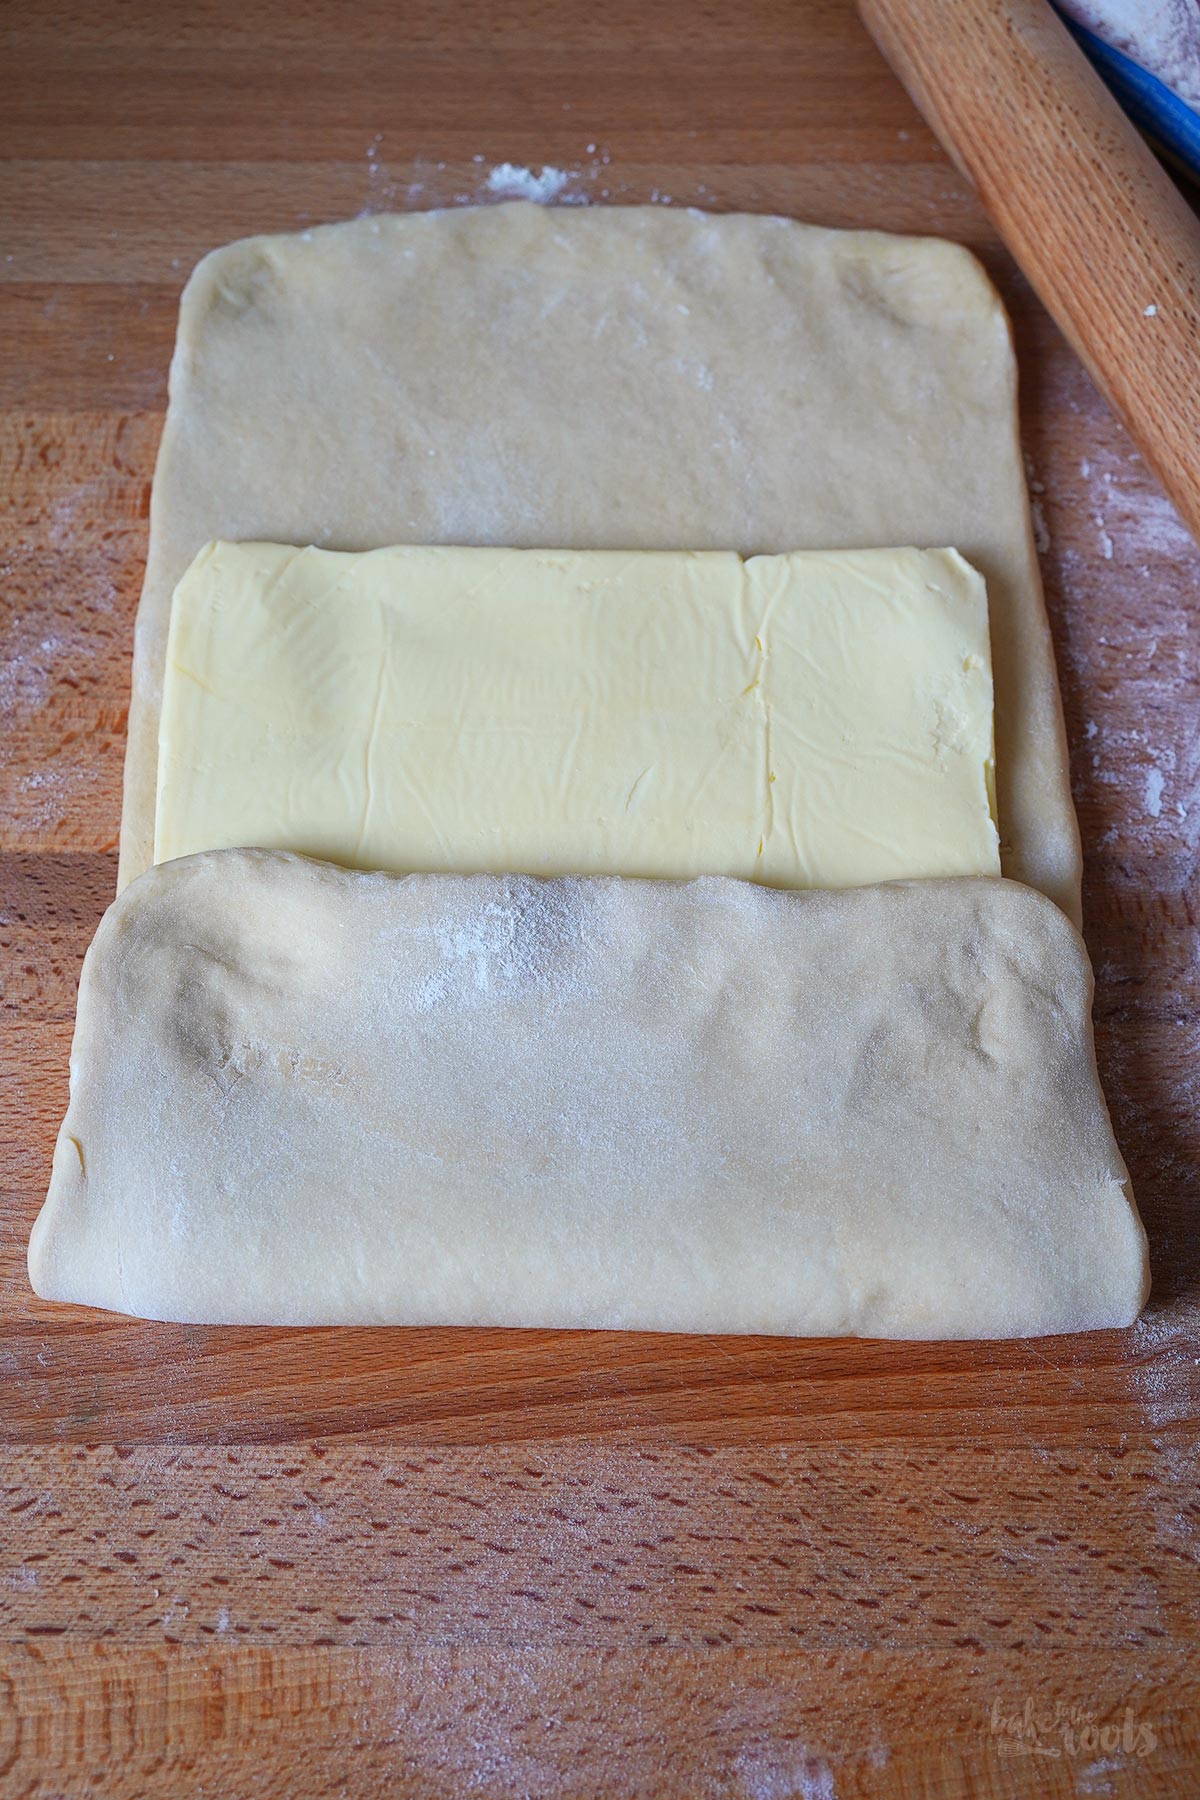
Once the dough and butter layer have had time to rest and cool overnight, roll out the dough to about twice the size of the butter layer. The butter has to be covered completely with dough in the first step.
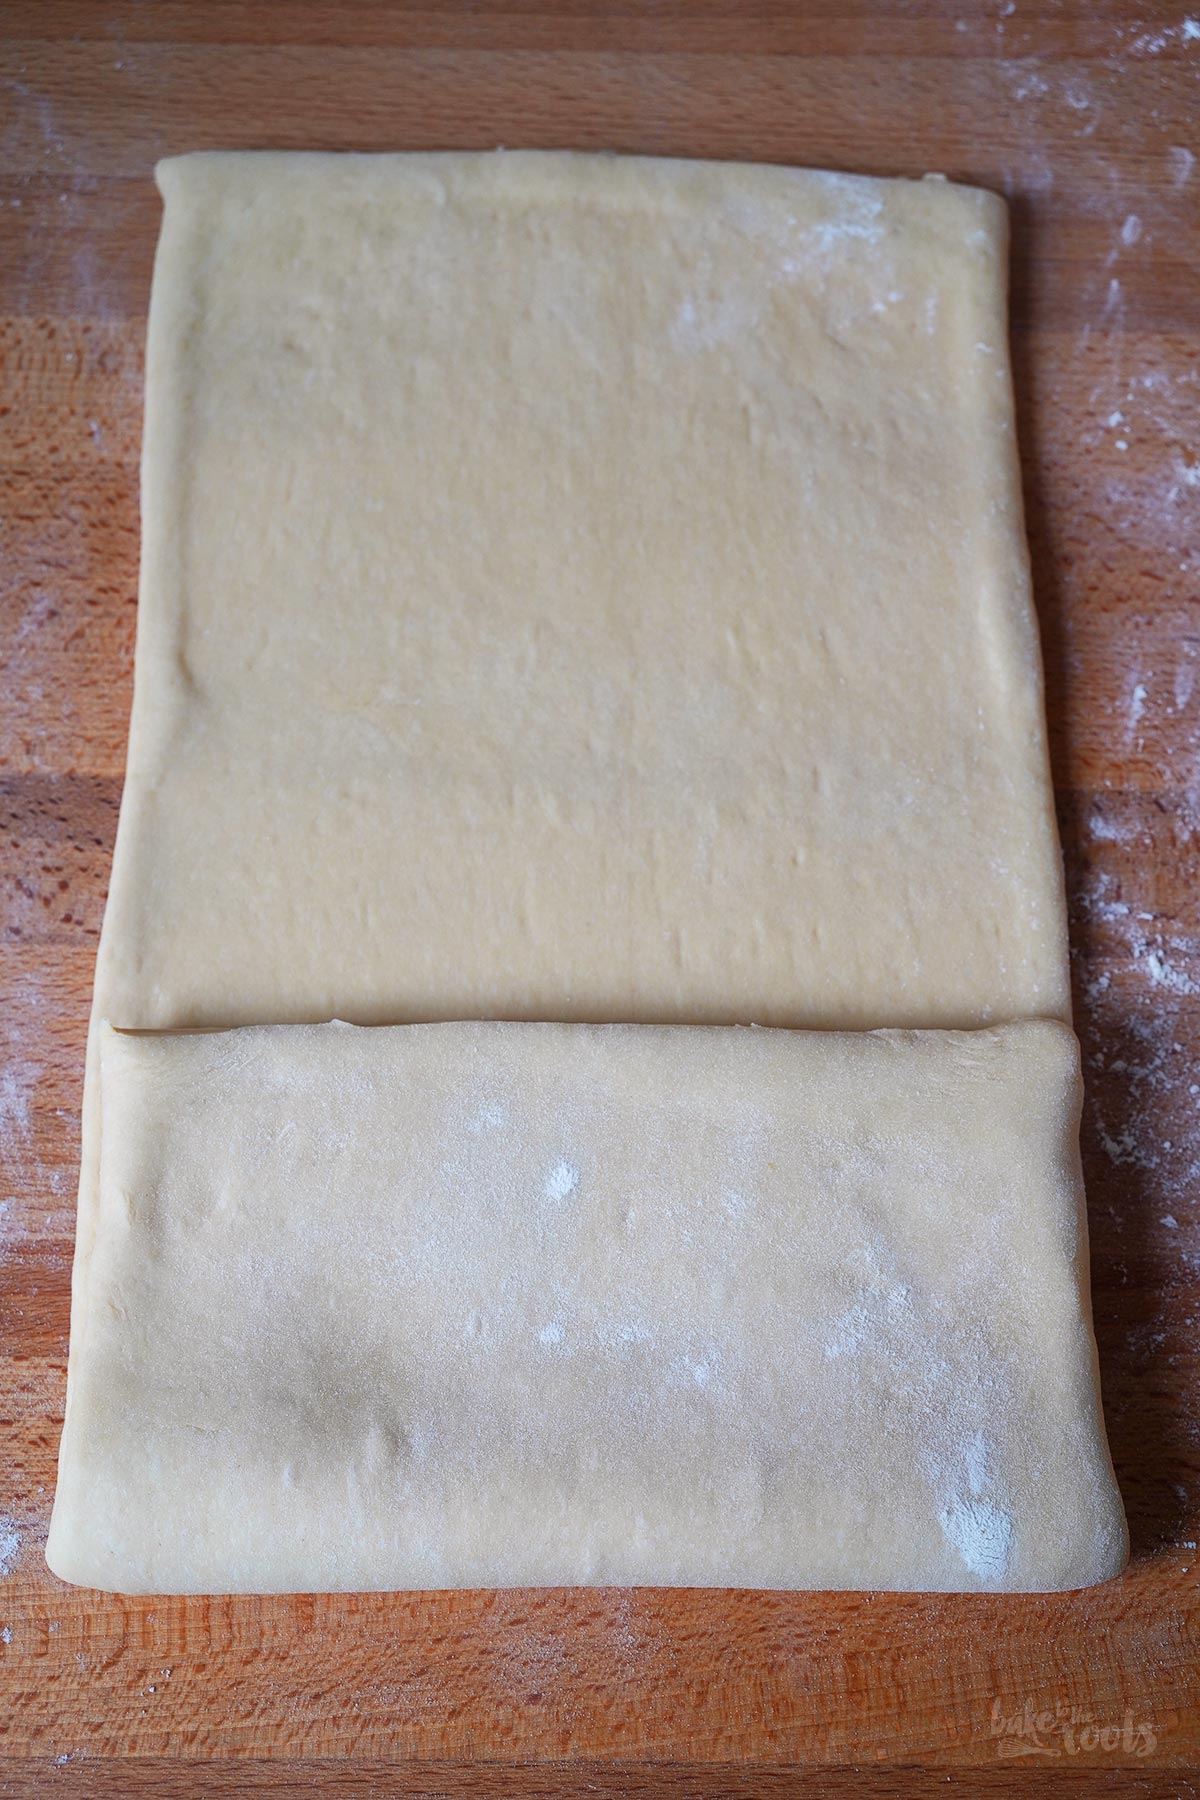

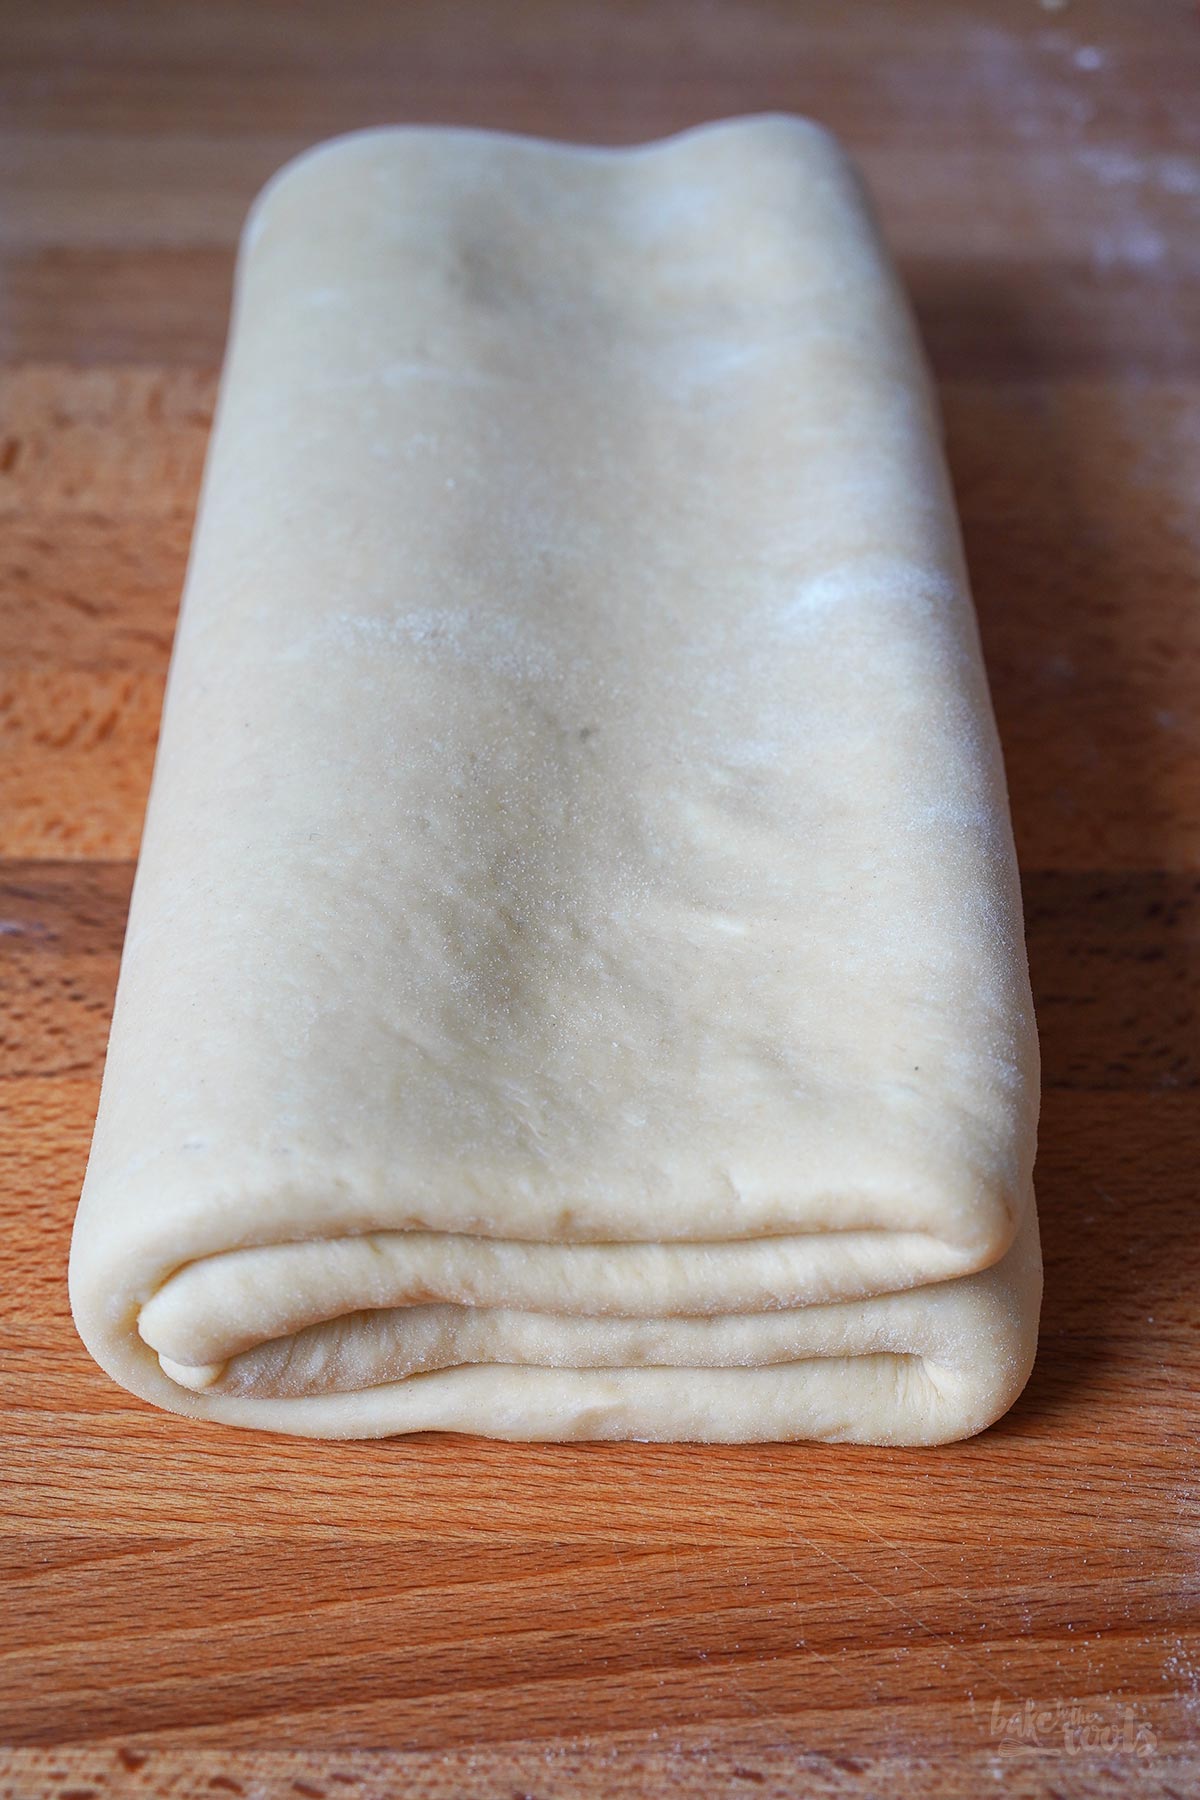
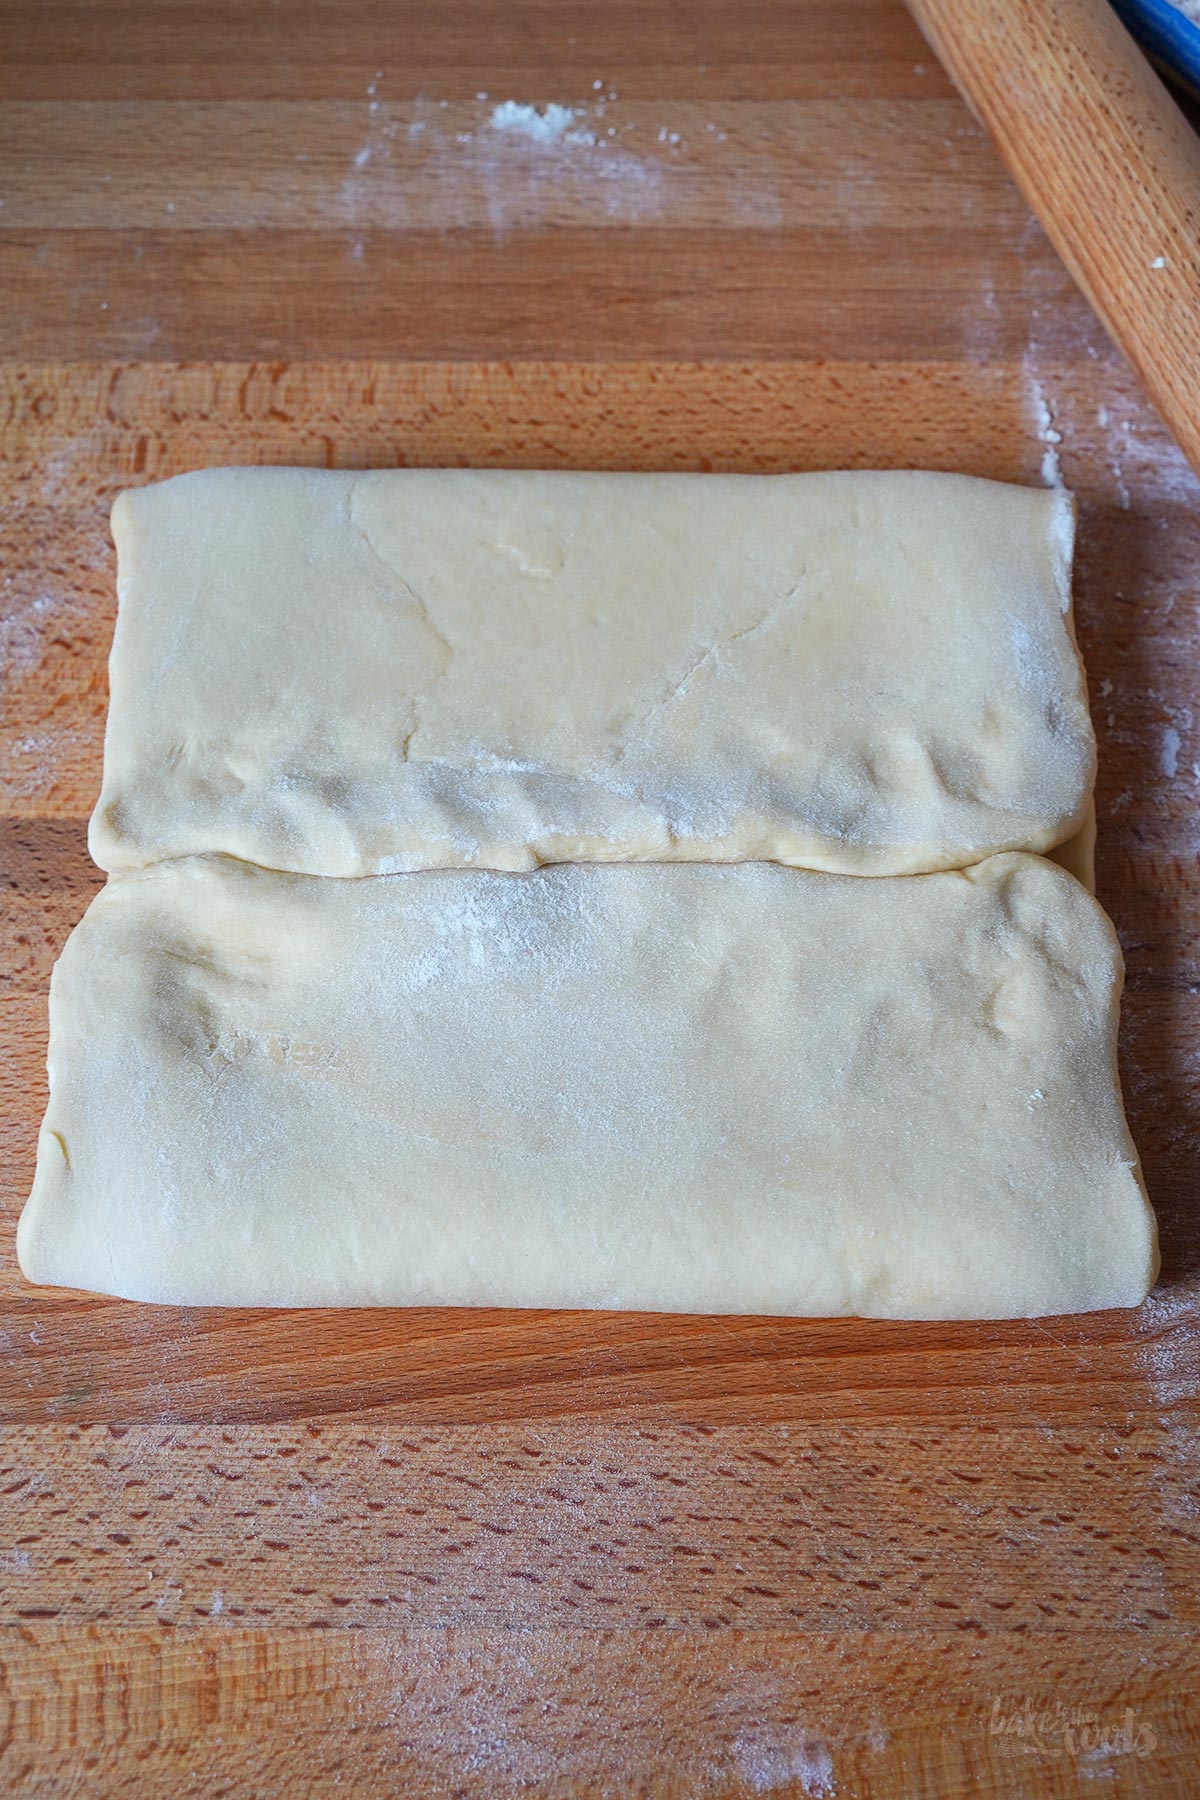
The next step is to roll out and fold this butter-dough package. This process is called »laminating«. In the first round, the dough is folded like a book to create 4 layers. It then needs some time in the fridge to cool down. In the second round (not shown in the pictures here), the dough is folded again to create three more layers (this time like folding a towel).
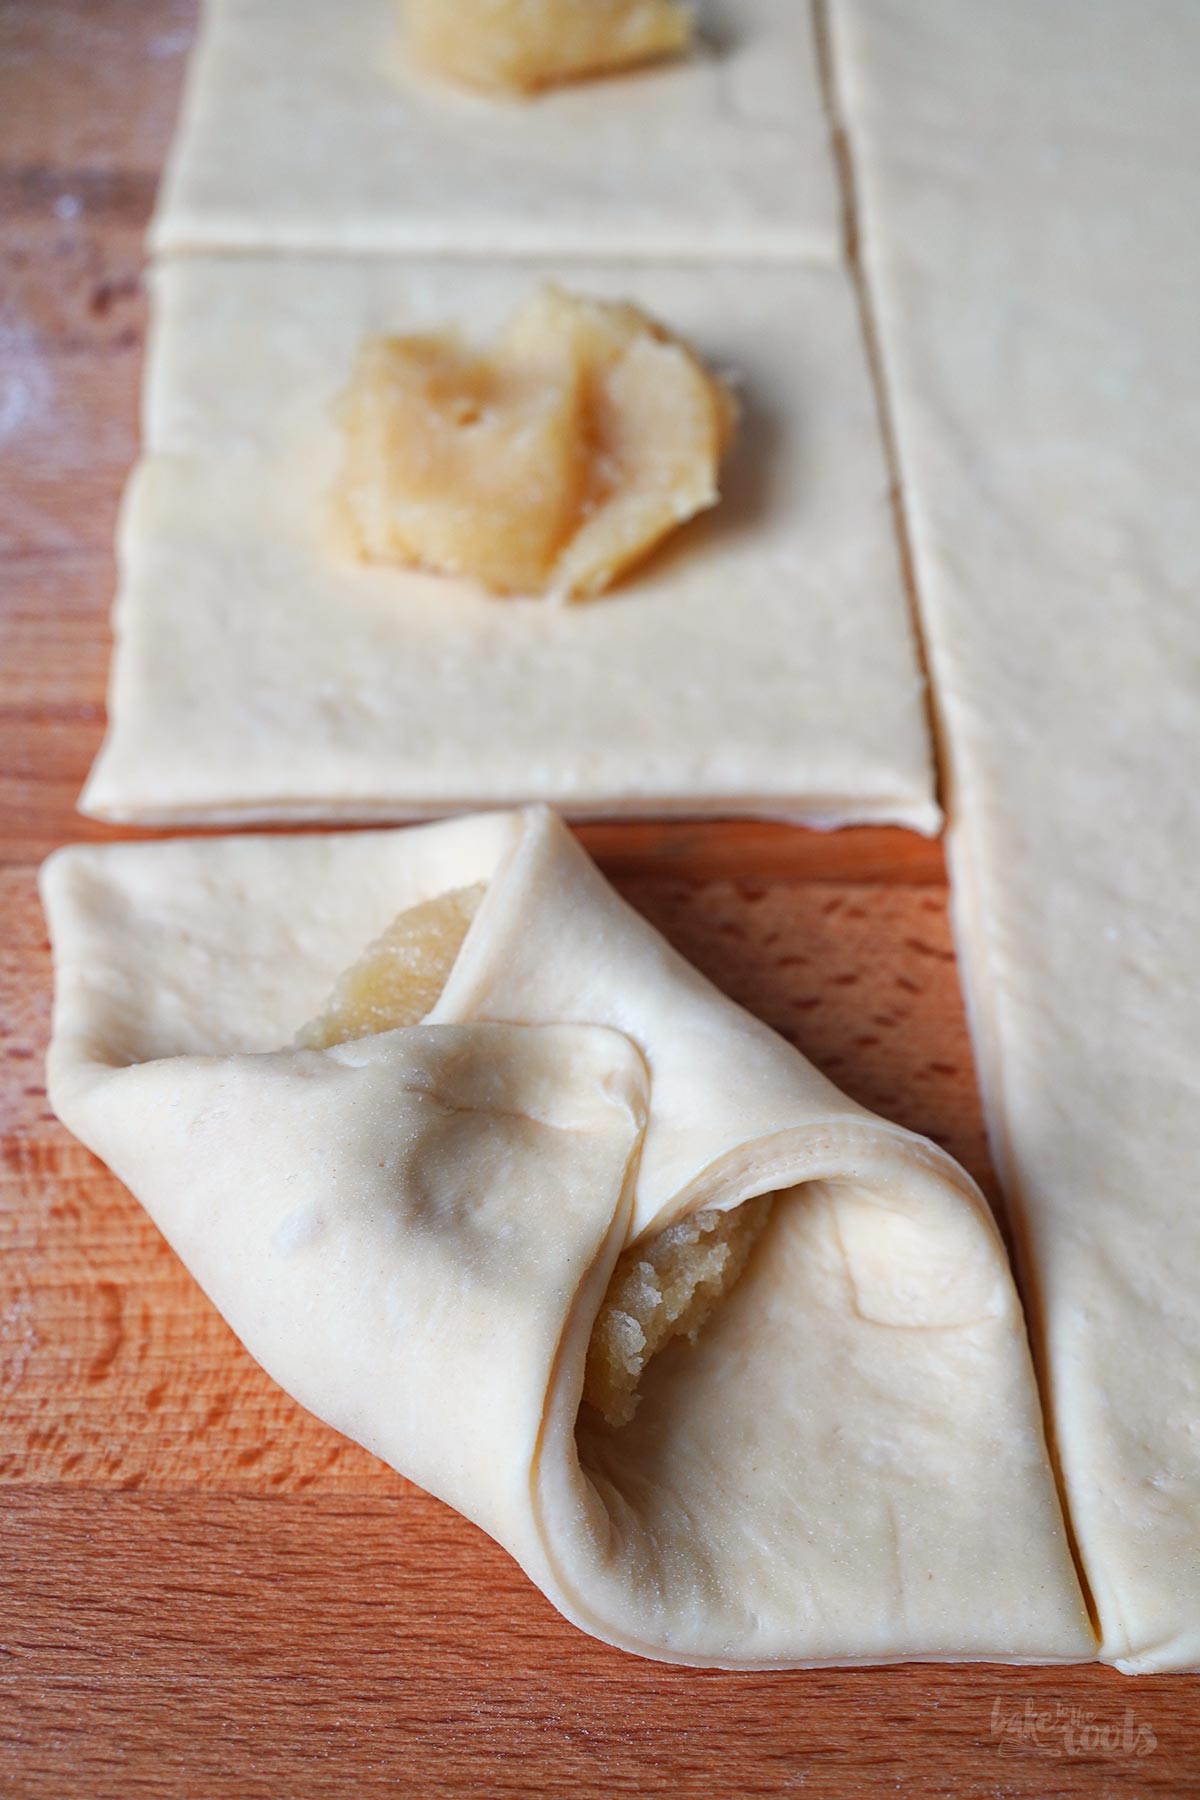
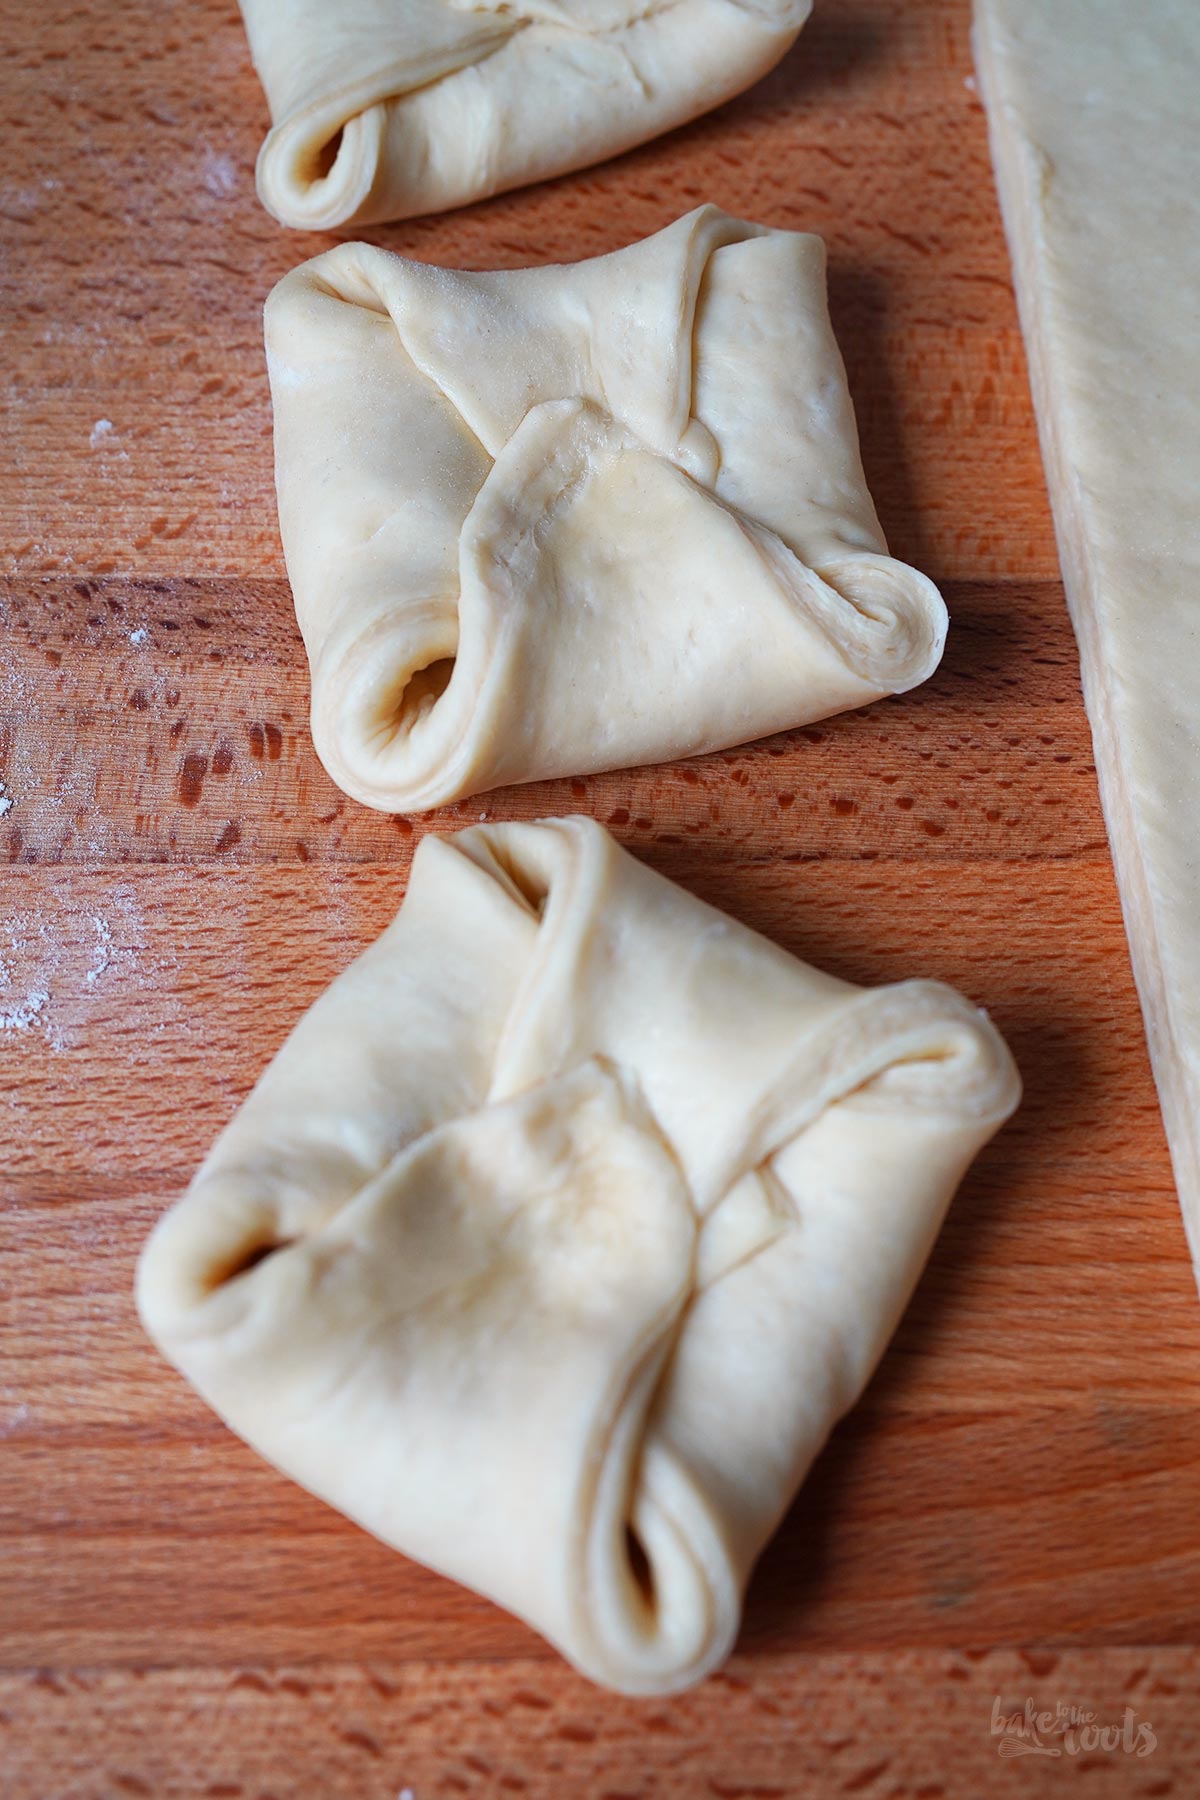
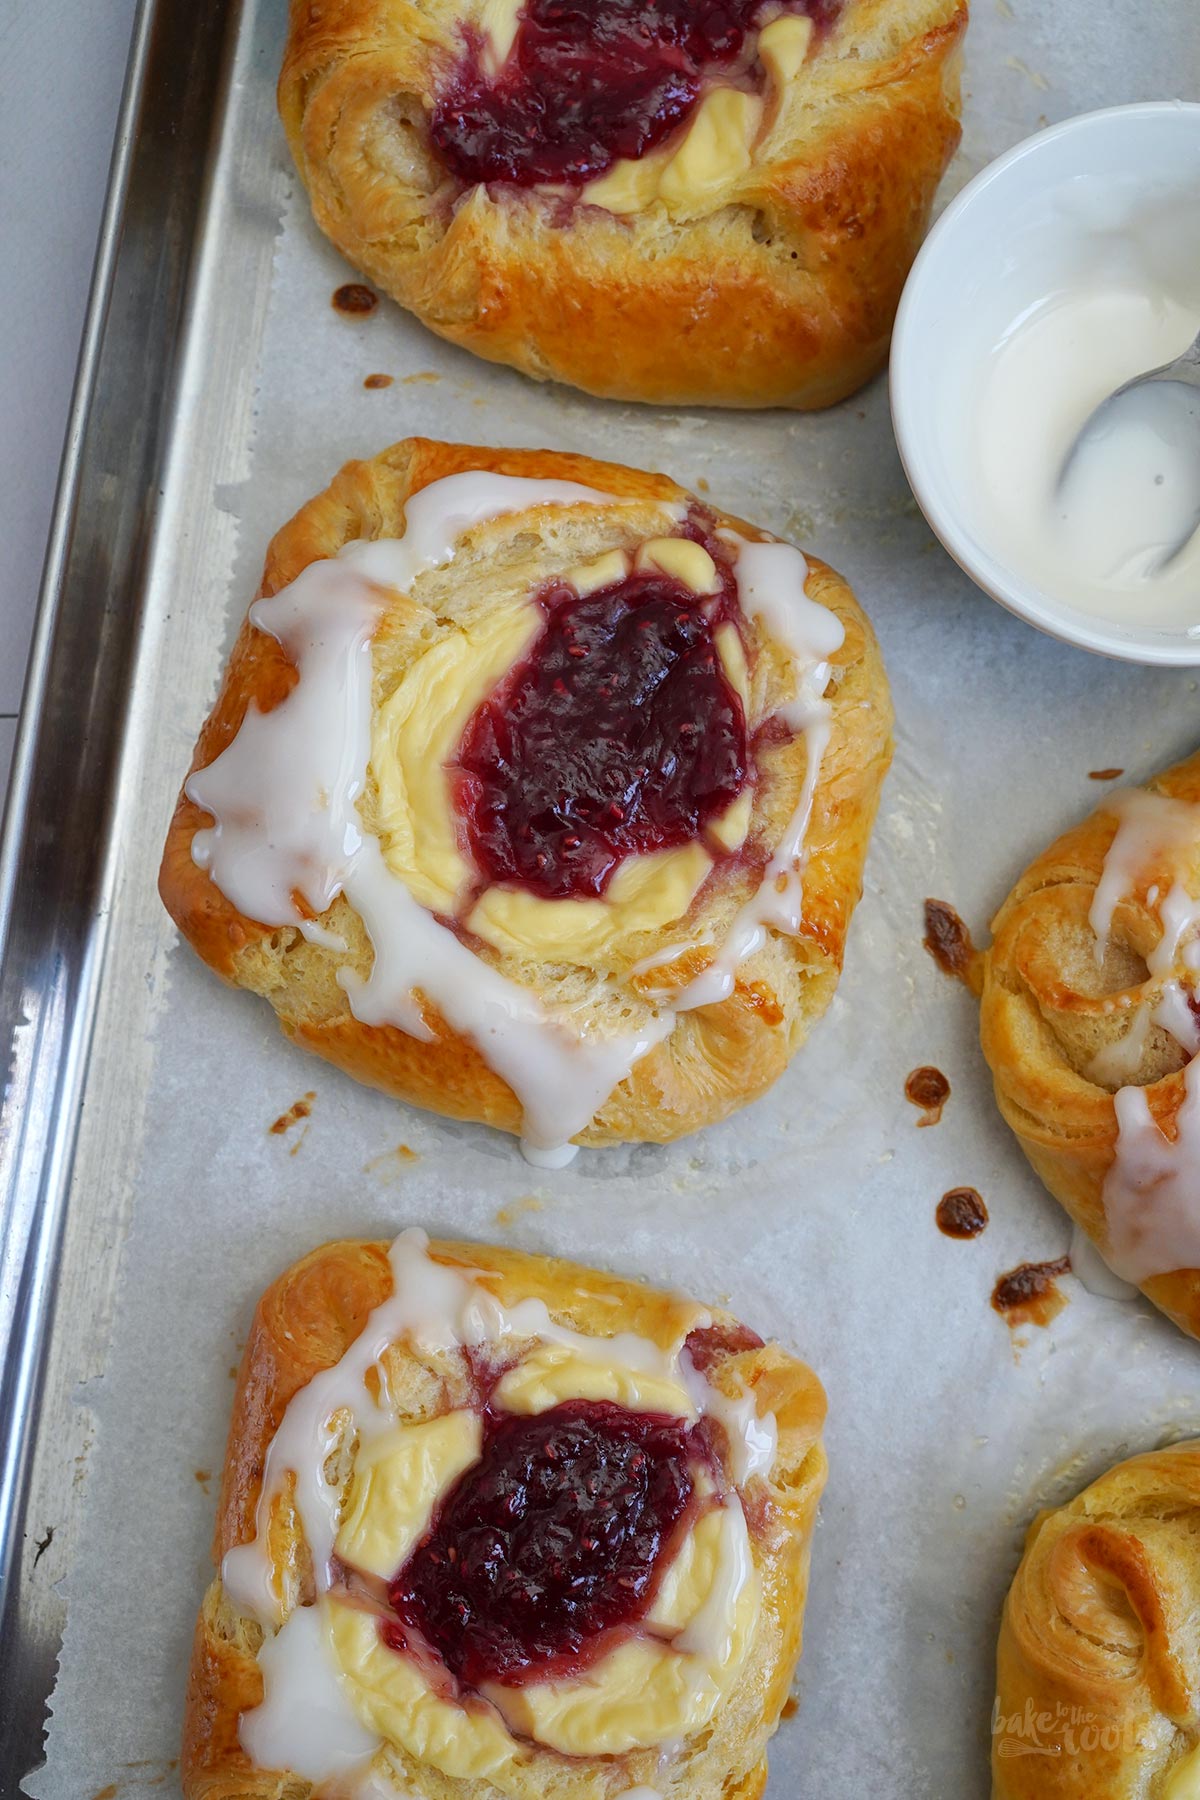
After the dough has had more time in the fridge, you can start shaping the Danishes. This is quite easy with Spandauers. Cut the dough into squares, place some marzipan filling on the dough and then fold the corners of the dough square over the filling and press down in the middle to create small parcels.

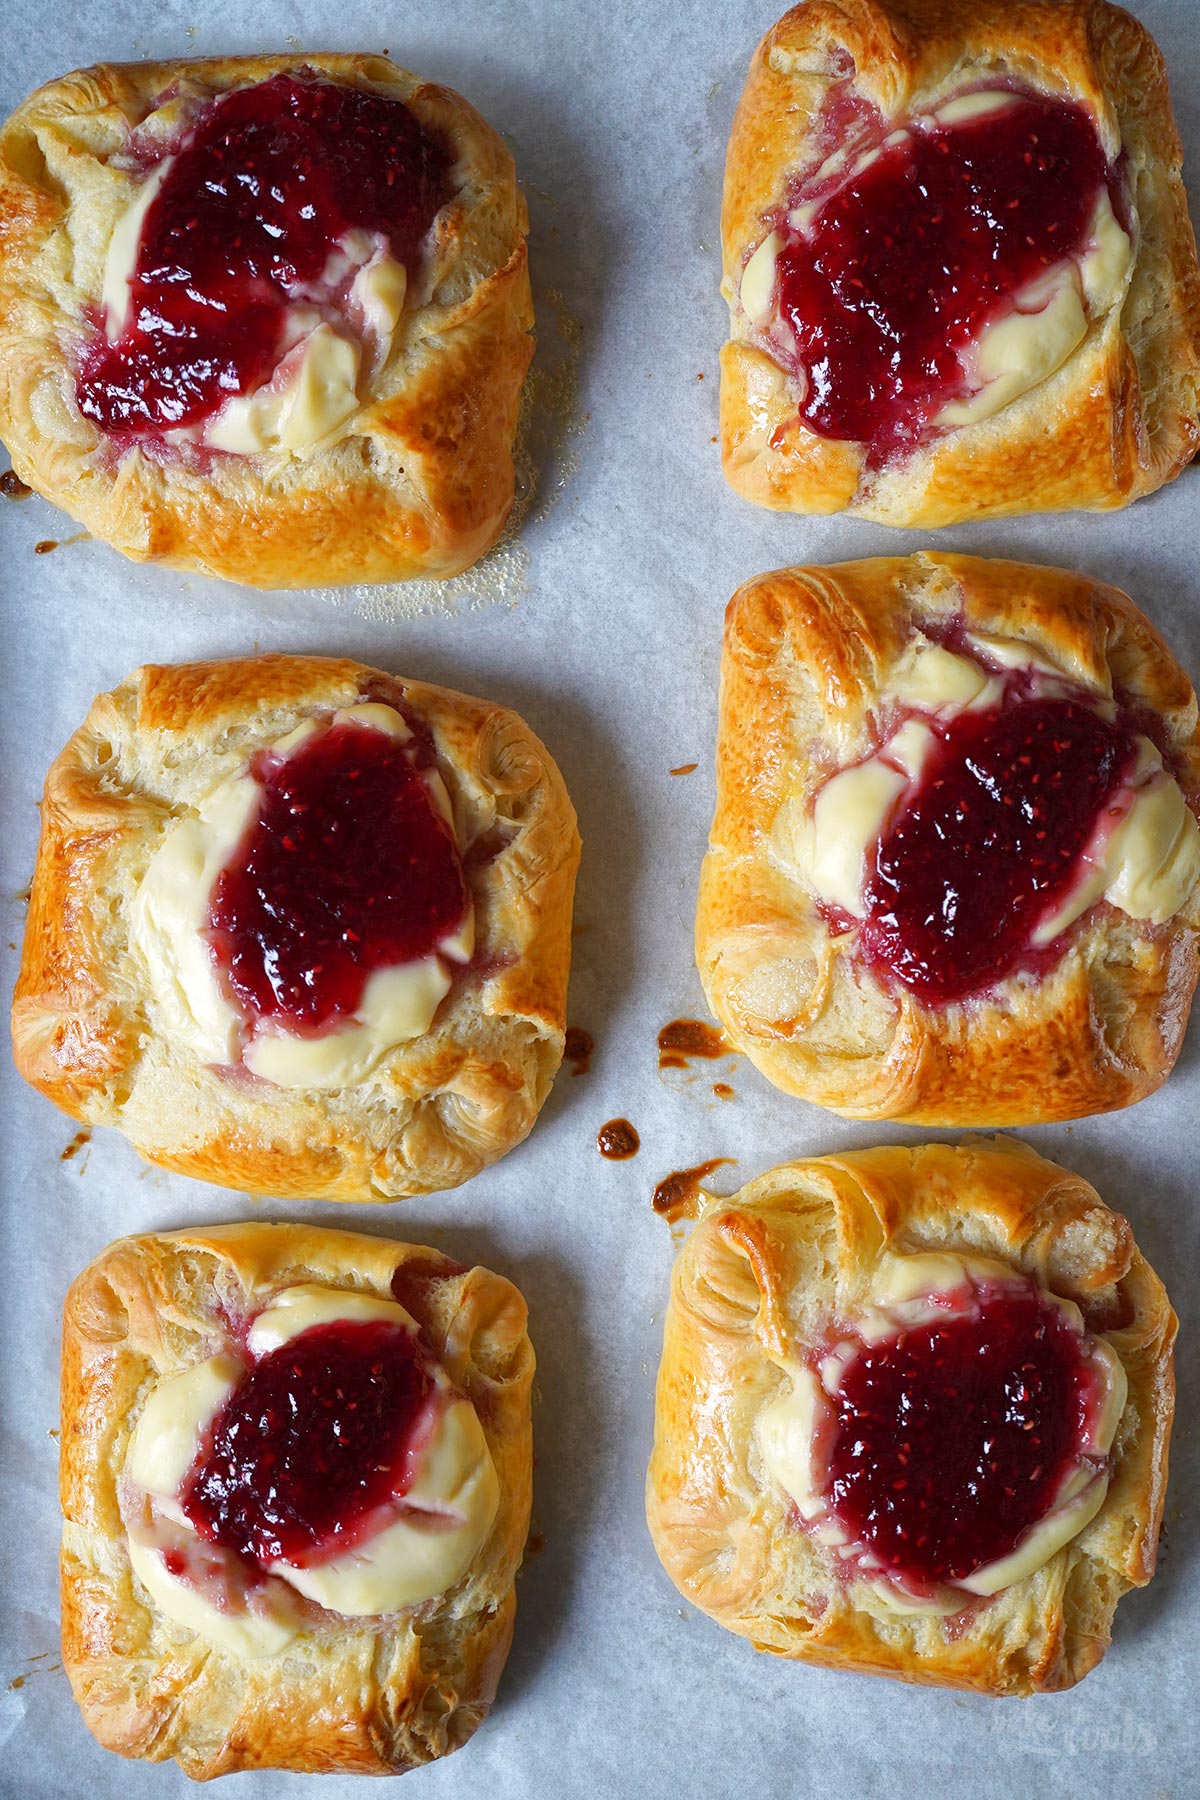
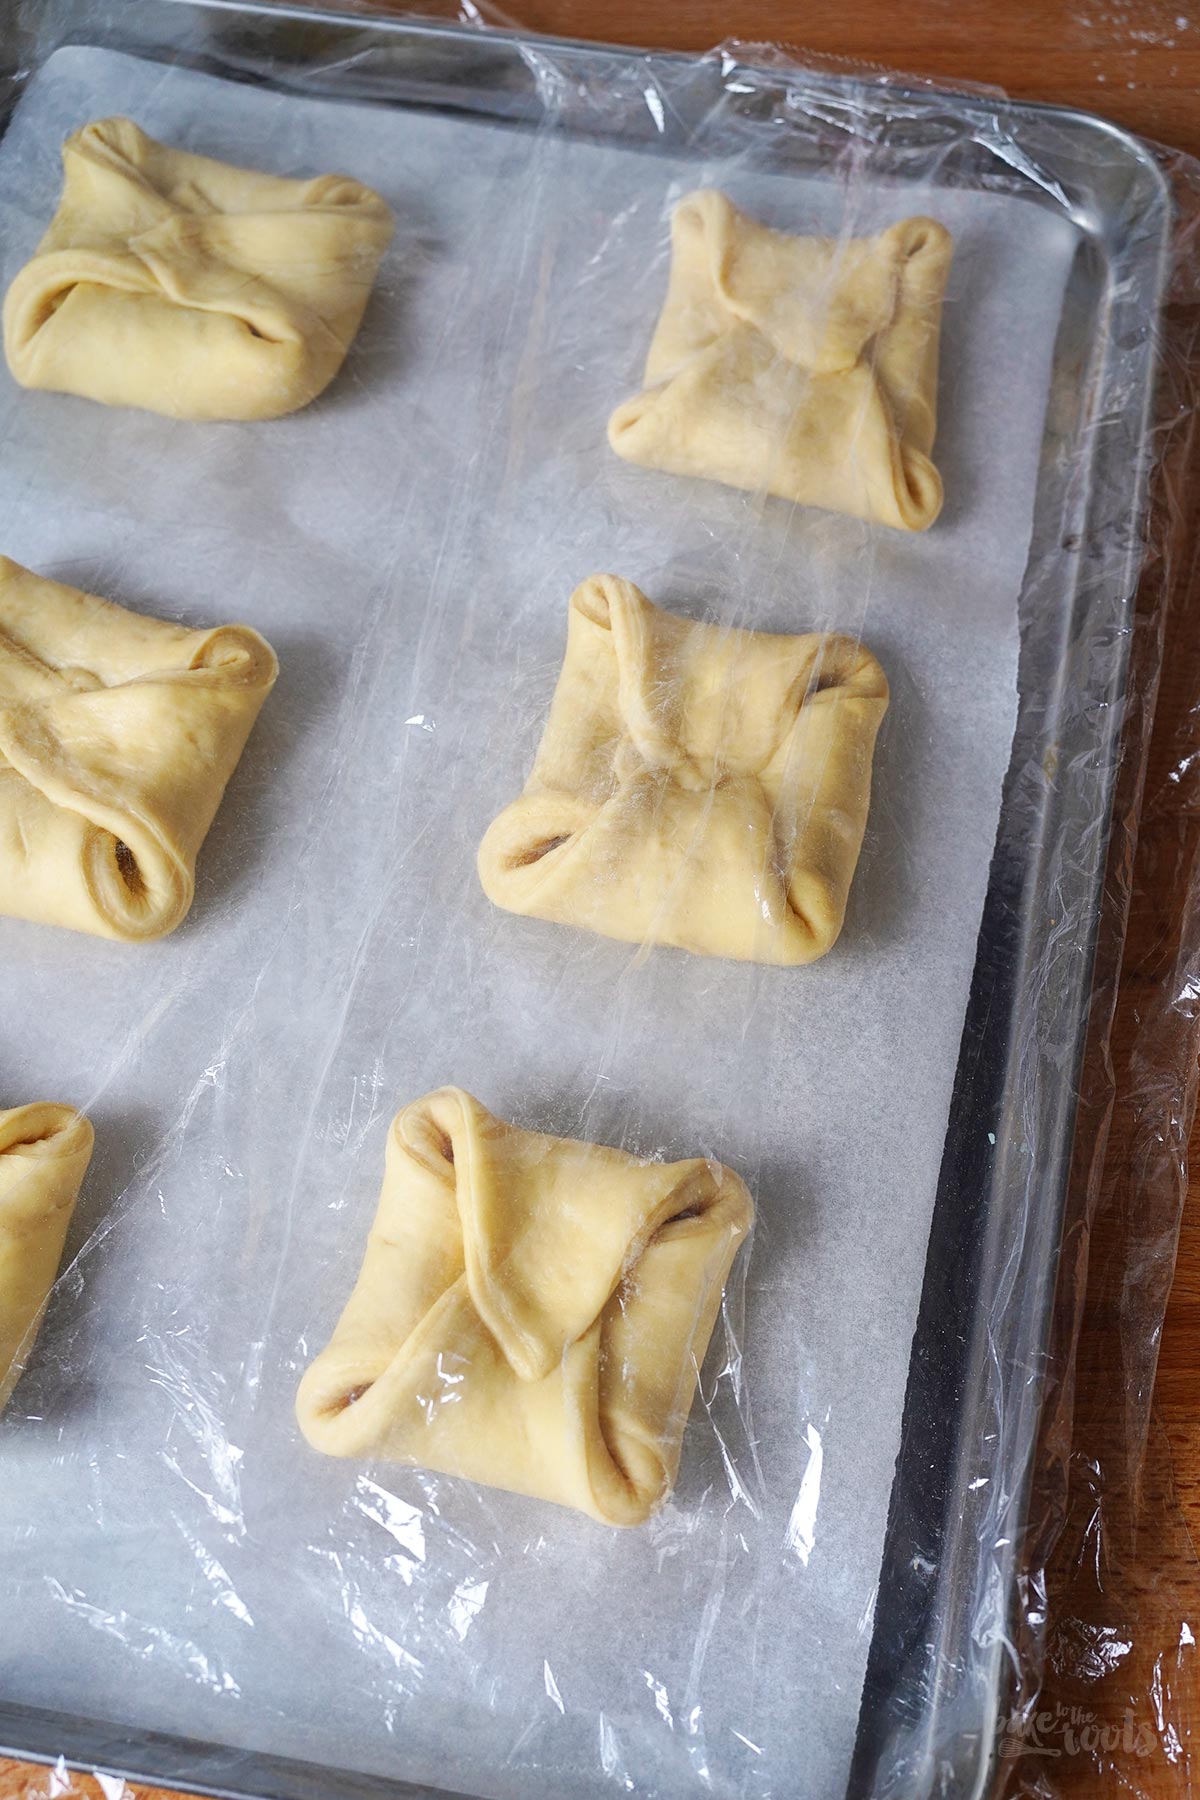
After the Danish pastries have had time to rise and increase their volume, they are brushed with some egg wash and topped with custard and jam. That’s it. Bake them and enjoy them.
Have fun baking these Danish pastries!
DIRECTIONS / ZUBEREITUNG
1. You have to start in the evening with the preparations, so you can bake the next day. The dough needs time to rest and rise overnight. I recommend reading the whole recipe first.
2. Start with the butter package you need to laminate the dough. Cut the butter into 1cm thick strips and place them next to each other on a large piece of baking parchment. Fold the paper over the butter and create a square package with a size of 18x18cm. If you have sharp edges you can now simply roll/press the butter into shape with a rolling pin. You need a butter package/layer to have that exact dimensions. Place in the fridge overnight.
3. For the dough add spelt flour, sugar, and salt to the bowl of a food processor (with dough hook) and mix to combine. Add milk, butter, the egg, and egg yolks. Crumble the fresh yeast and add it to the bowl as well. Knead for about 8-9 minutes until you get a nice and smooth dough. Take the dough out of the bowl and knead it again briefly with your hands on a lightly floured surface, then shape it into a ball. Use a sharp knife and cut a cross into the dough (about 5cm deep). Place in a large bowl and cover (e.g. with cling film). Place in the fridge overnight (about 10 hours).
4. For the custard filling mix cornstarch, sugar, salt, and vanilla extract with a few tablespoons of the milk until well combined. Heat the remaining milk together with the butter in a small saucepan. As soon as the milk starts to boil, stir in the cornstarch mixture and allow the custard to thicken. Let it bubble for a moment while stirring constantly, then remove it from the heat and leave it to cool for a minute or so. Stir in the egg yolk, then immediately place a piece of plastic wrap directly on top of the custard (to prevent skin from forming) and let it cool down completely.
5. For the marzipan filling, mix the marzipan paste with butter, sugar and vanilla sugar until smooth. Cover and leave it on the counter at room temperature until needed. The butter, dough, custard, and marzipan filling can all be prepared in advance.
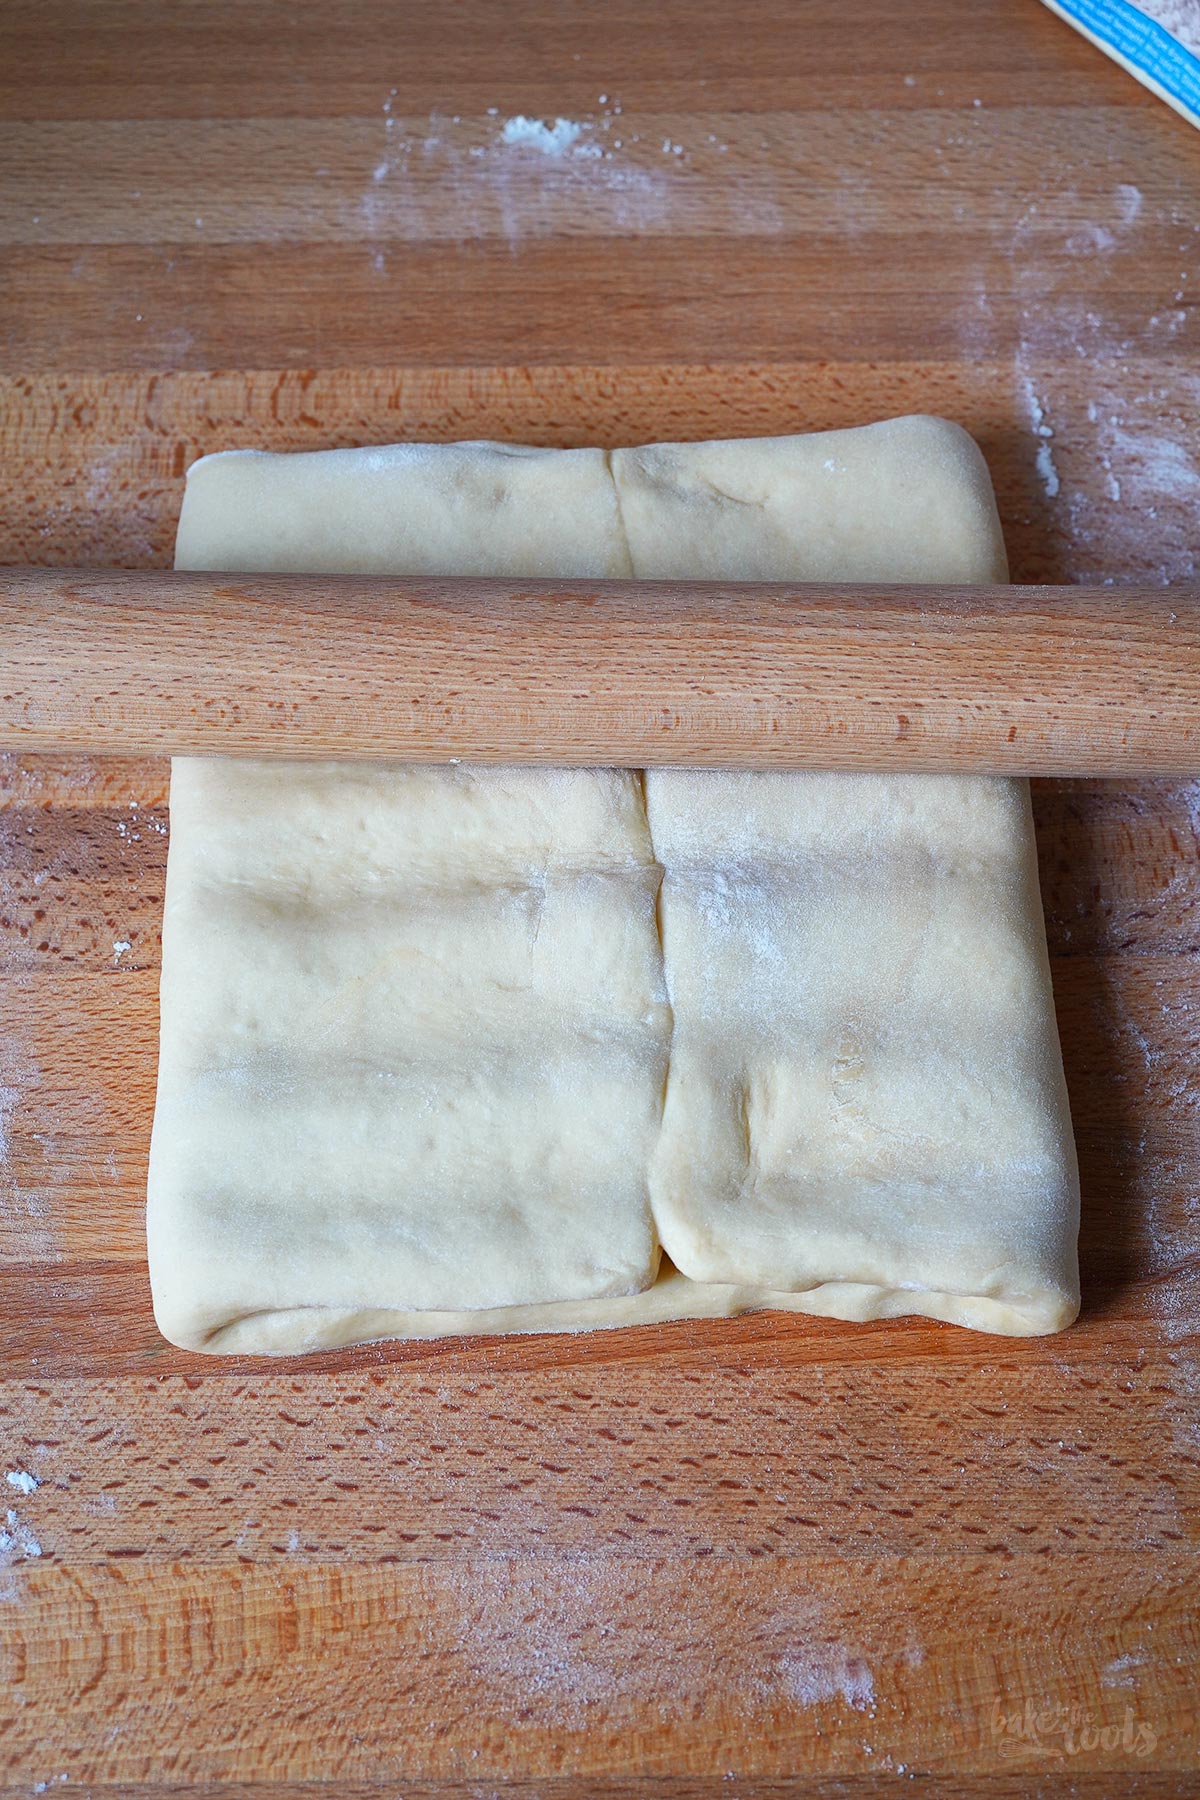
6. The next morning, take the dough out of the fridge and roll it out into a rectangle (36x18cm) on a lightly floured surface. Place the butter (without the paper) in the center of the rectangle. The butter should be flush with the long edges of the dough on the left and right. Fold the dough over the butter to enclose it completely. Press the edges together. Turn the package at a 90° angle. Use the rolling pin to carefully press the butter and dough together and then roll out to create another long rectangle. If the shorter sides are a bit wonky due to the shaping of the dough, trim them a little to get straight edges.
7. Fold the short sides of this long rectangle towards the center so they meet exactly in the middle. Fold once more together as if you were closing a book – you should now have a total of four layers of dough stacked on top of each other. This is the first »tour« to get a nice lamination. Wrap the dough loosely in plastic wrap and place in the fridge for about 30-45 minutes.
8. For the second »tour«, roll out the dough once again on a lightly floured surface. Make sure the side of the package that shows all four layers is facing you, then roll it out, working away from you. You want a long rectangle again, a bit shorter than the first time. This time you have to fold the dough only once towards the center and the other side on top of that – this will create three layers. Wrap in plastic wrap once again and place in the fridge for another 30-45 minutes.
9. Roll out the chilled dough on a lightly floured surface into a rectangle with a size of about 45x35cm. Cut out squares with a size of about 11x11cm. The rectangle is slightly larger than you need so you can smooth out any unsightly edges, if necessary. Add a small portion of marzipan onto each dough square and fold all four corners towards the center to enclose the filling completely. Place the Danish pastries on two baking sheets lined with baking paper (6 pieces per baking sheet) and cover loosely with plastic wrap. The dough has to be able to rise undisturbed. Let the pieces rise in a warm place for about 1 1/2-2 hours – the volume of the dough should have visibly increased. The rising times depend greatly on the room temperature.
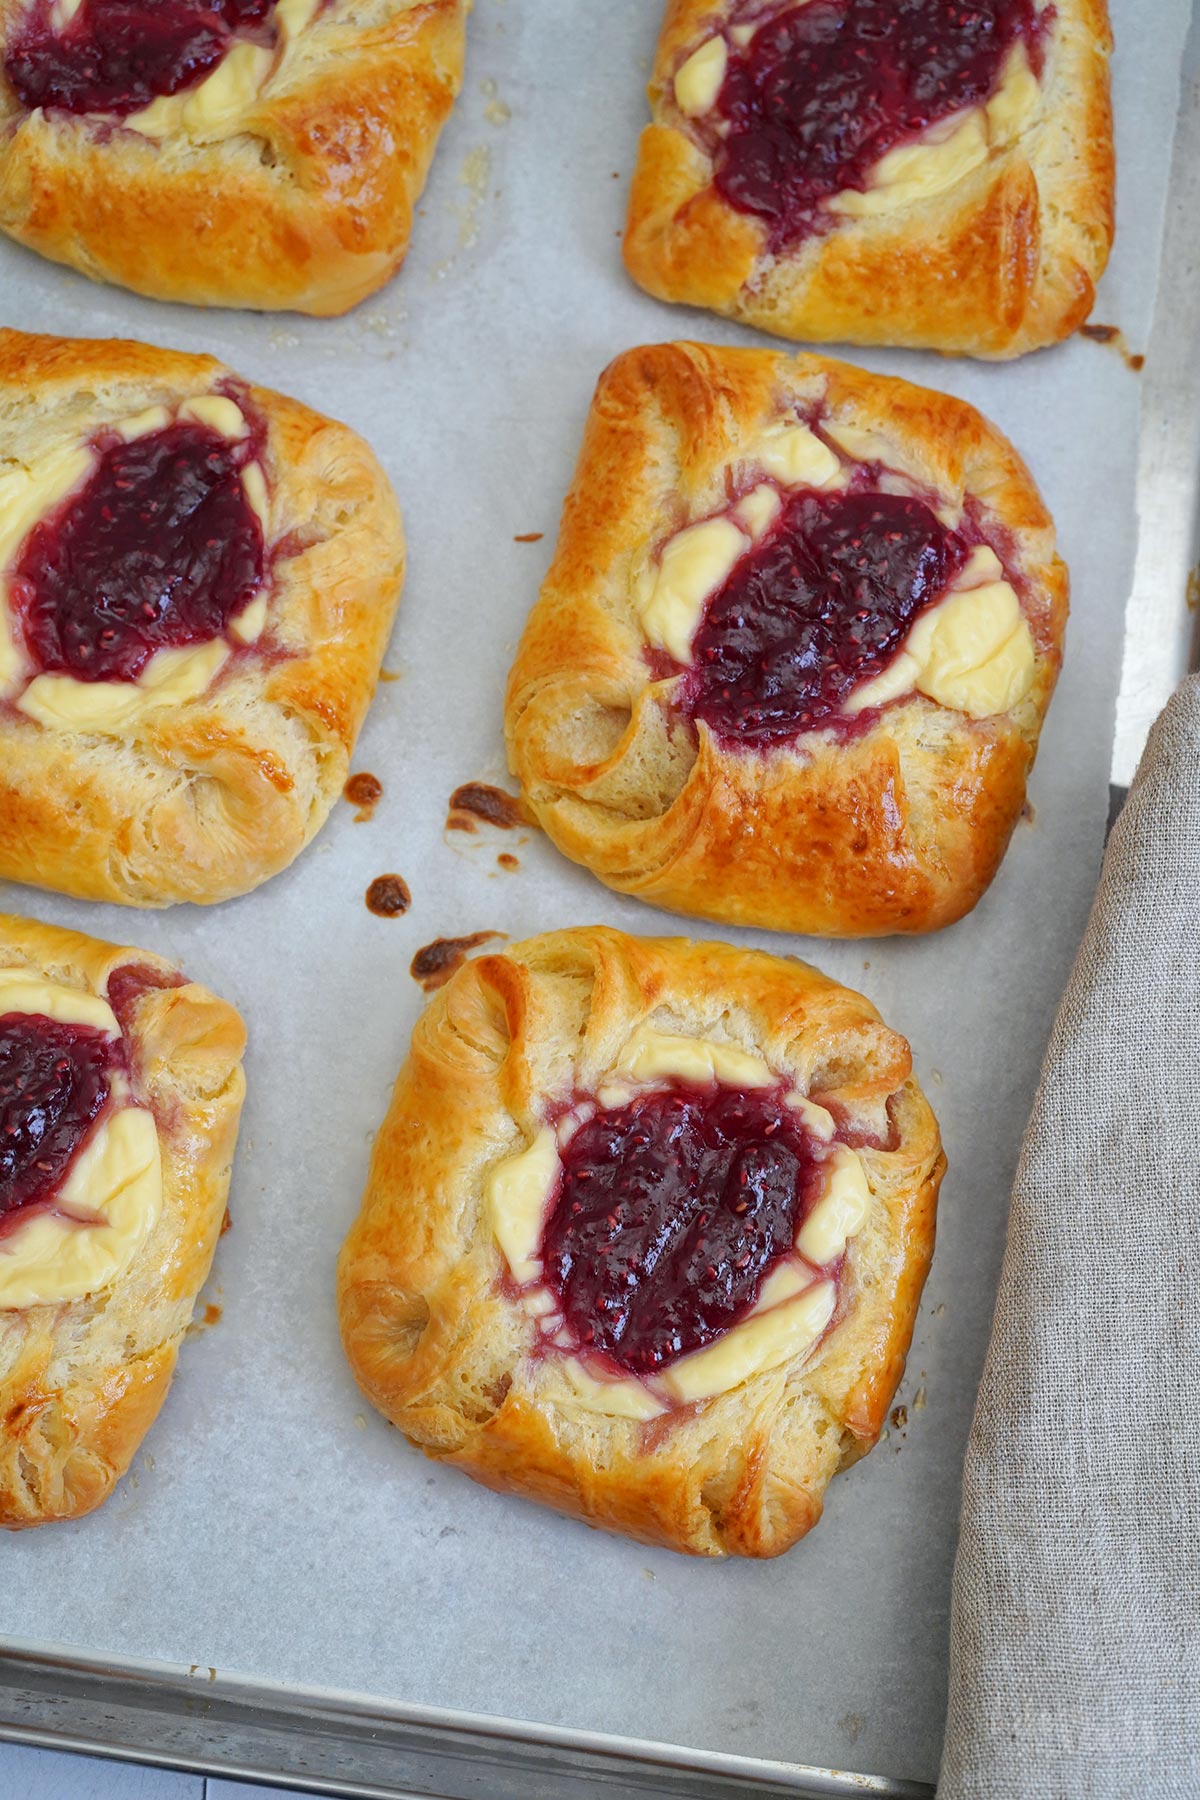
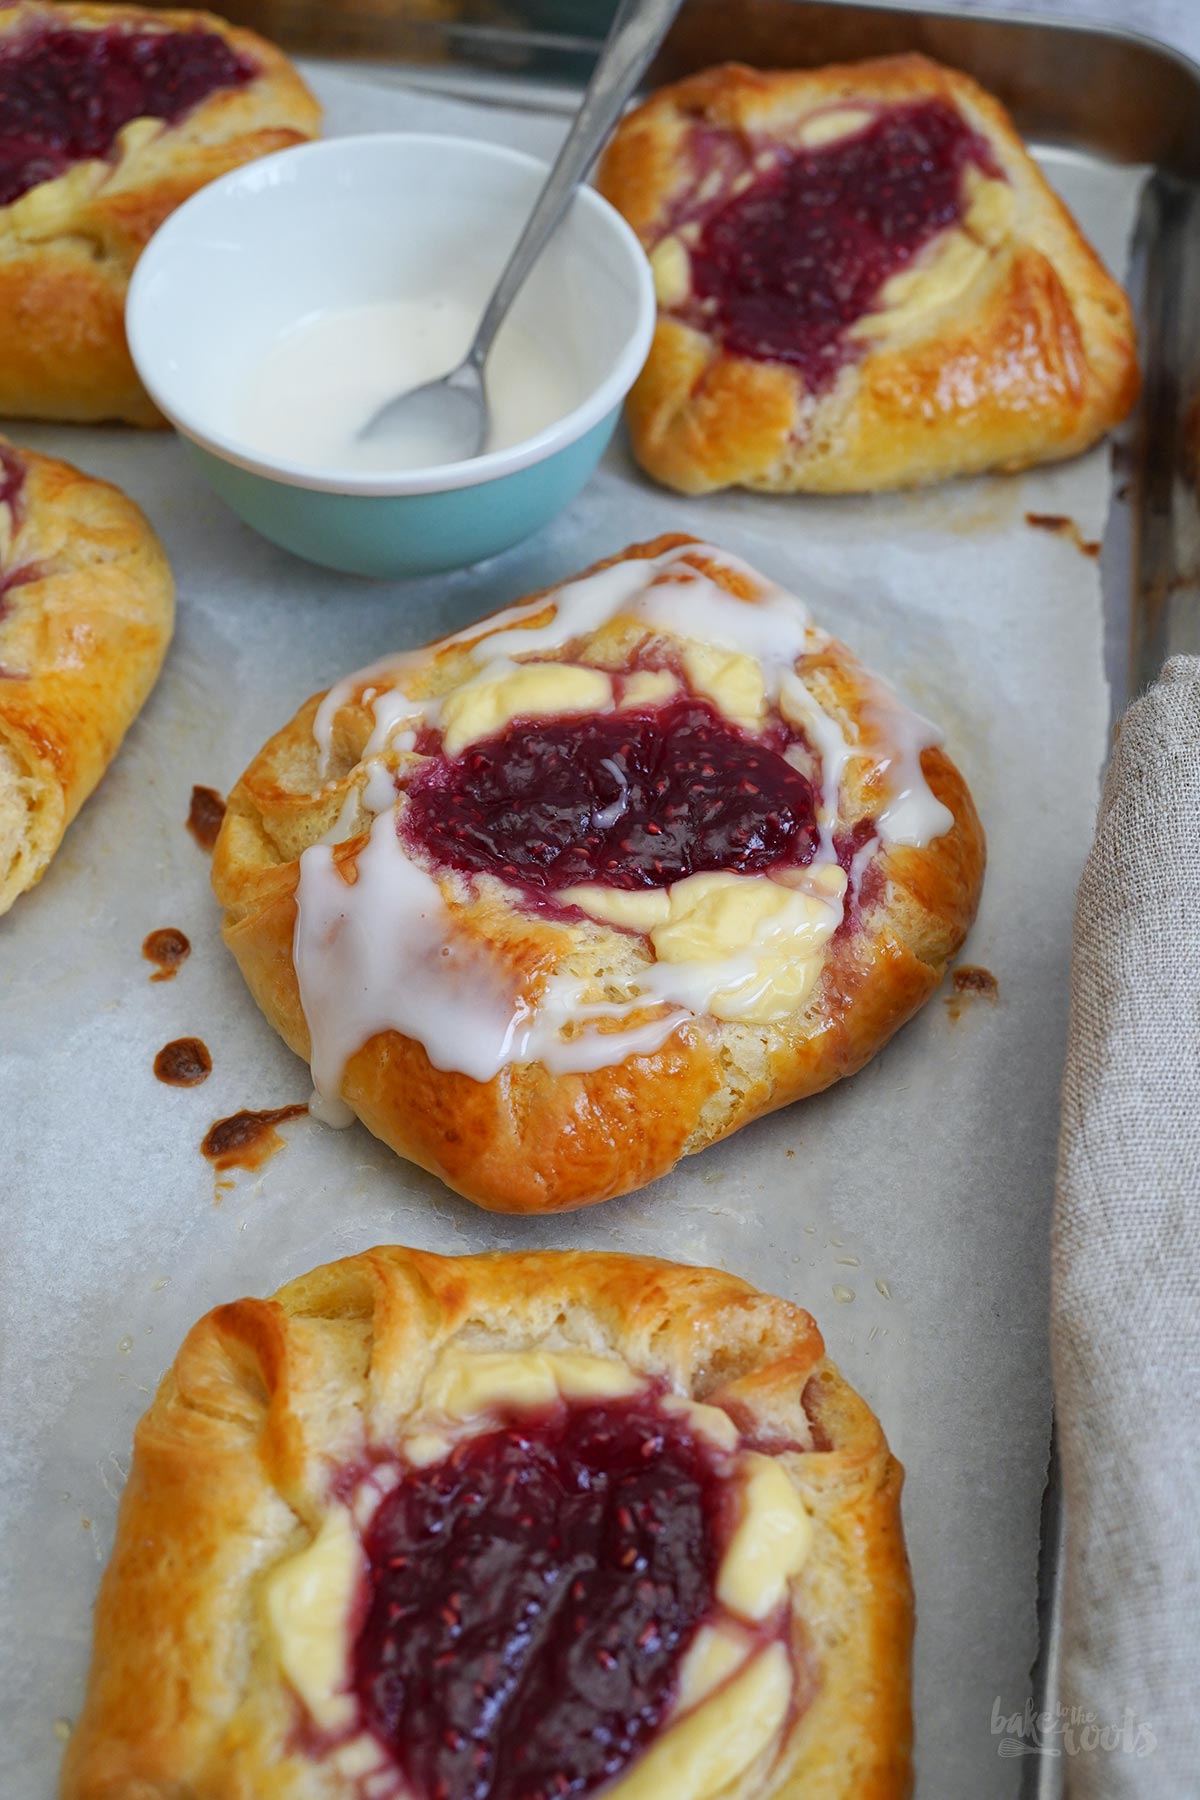
10. Preheat the oven to 190°C (375°F). Mix the custard once again to get rid of any lumps (e.g. with an immersion blender). Whisk egg yolk and some heavy cream to create an egg wash and brush the risen Danishes with it – be gentle. Use a spoon (or your fingers) and carefully press an indention into the centers of the Danish pastries. Add about 1 tablespoon of custard and a small amount of jam into each indention. Place the first tray of Danishes in the center of the oven and bake for about 20-23 minutes. The pastries should have risen nicely with a nice golden brown color. Bake the second baking sheet the same way. Transfer the Danishes to a wire rack and let them cool down completely. Decorate with some sugar glaze, if desired.
1. Für das Rezept sollte man am Vorabend anfangen, da alles etwas länger dauert mit den Gehzeiten für den Teig. Ich empfehle, das komplette Rezept einmal durchzulesen.
2. Als Erstes die Butter in etwa 1cm dicke Streifen schneiden und diese dann nebeneinander auf ein großes Stück Backpapier legen. Das Backpapier dann über die Butter falten und die Butter damit komplett einpacken. Das Paket sollte eine Grundfläche von etwa 18x18cm haben. Wenn man glatte Kanten in das Papier gefaltet hat, kann man jetzt die Butter einfach mit einem Nudelholz ein wenig ausrollen/drücken, damit sie die Form und Größe des Papierpakets bekommt. Über Nacht in den Kühlschrank legen.
3. Für den Teig das Dinkelmehl mit Zucker und Salz in der Schüssel einer Küchenmaschine (mit Knethaken) vermischen. Milch, weiche Butter, Ei und Eigelb dazugeben. Die Hefe zerbröckeln und ebenfalls zur Schüssel dazugeben. Alles für etwa 8-9 Minuten zu einem glatten Teig verkneten. Den Teig auf einer leicht bemehlten Fläche dann noch einmal kurz mit den Händen durchkneten und zu einer Kugel formen. Mit einem scharfen Messer ein Kreuz in den Teig schneiden (etwa 5cm tief) und dann in eine Schüssel setzen und abdecken (z.B. mit Klarsichtfolie). Den Teig über Nacht in den Kühlschrank stellen (etwa 10 Stunden).
4. Für die Puddingfüllung einige Esslöffel der Milch mit Stärke, Zucker, Salz und Vanille Extrakt verrühren. Die restliche Milch zusammen mit der Butter in einem kleinen Topf erhitzen. Sobald die Milch anfängt zu kochen, die Stärkemischung einrühren und den Pudding andicken lassen. Für einen Moment unter ständigem Rühren blubbern lassen, dann vom Herd ziehen und etwa eine Minute abkühlen lassen. Das Eigelb unterrühren, dann sofort ein Stück Klarsichtfolie direkt auf den Pudding legen (damit sich keine Haut bildet) und komplett abkühlen lassen.
5. Für die Marzipanfüllung die Marzipanrohmasse mit Butter, Zucker und Vanillezucker glatt rühren. Bis zur weiteren Verwendung abgedeckt (bei Raumtemperatur) stehen lassen. Butter, Teig, Pudding und Marzipanfüllung können alle am Vorabend zubereitet werden.
6. Am nächsten Morgen den Teig aus dem Kühlschrank nehmen und auf einer leicht bemehlten Fläche zu einem Rechteck (36x18cm) ausrollen. Die Butter (ohne Papier) in die Mitte des Rechtecks legen – rechts und links sollte die Butter mit dem Teigrand abschließen – und dann den Teig über die Butter schlagen und die Butter somit komplett einschließen. Den Teig an den Kanten zusammendrücken. Das Paket einmal um 90° drehen und dann mit dem Nudelholz die Butter und den Teig erst vorsichtig zusammendrücken und dann noch einmal zu einem langen Rechteck ausrollen. Die Seiten, an denen das Paket offen war, sollten hier die kürzeren Seiten des Rechtecks sein. Wenn diese kurzen Seiten durch das Ausrollen nicht ganz gerade sind, einfach ein klein wenig zurechtschneiden.
7. Bei diesem langen Teig-Rechteck jetzt die kurzen Seiten so zur Mitte hin einschlagen, dass sie sich in der Mitte treffen. Dieses Paket dann noch einmal (wie ein Buch) zusammenfalten. Jetzt sollte man insgesamt vier Teigschichten übereinandergestapelt haben – das ist die erste »Tour«. Das Paket locker in Folie einschlagen und für etwa 30-45 Minuten in den Kühlschrank legen.
8. Für die zweite »Tour« das Teigpaket erneut auf einer leicht bemehlten Fläche ausrollen. Dieses Mal sollte eine der Seiten, auf der man die vier Teigschichten sehen kann, zu einem zeigen, und dann rollt man das Ganze wieder zu einem längeren Rechteck aus. Bei dieser Tour faltet man den Teig ebenfalls zusammen, nur dieses Mal sollen lediglich drei Schichten entstehen. Eine der kürzeren Seiten also wieder zur Mitte einschlagen. Dieses Mal etwas über die Mitte drüber und dann den Teig von der anderen Seite darüber schlagen – so entstehen die drei Schichten. Wieder in Folie einschlagen und noch einmal etwa 30-45 Minuten in den Kühlschrank legen.
9. Den gut gekühlten Teig jetzt auf der leicht bemehlten Fläche zu einem Rechteck mit etwa 45x35cm ausrollen, dann Quadrate mit etwa 11x11cm ausschneiden. Der Teig wird hier ein wenig größer ausgerollt, damit man, falls notwendig, unschöne Ränder noch ein wenig begradigen kann. Auf jedes Teigstück eine kleine Portion Marzipanfüllung geben und dann alle vier Ecken des Teigstücks zur Mitte falten und zusammendrücken – die Füllung sollte damit komplett eingeschlossen werden. Die Plunderteilchen auf zwei Backbleche mit Backpapier setzen (jeweils 6 Stück pro Blech) und mit Klarsichtfolie locker abdecken. Die Teilchen müssen ungestört aufgehen können. An einem warmen Ort etwa 1 1/2-2 Stunden aufgehen lassen – das Volumen des Teiges sollte sich sichtbar vergrößert haben. Die Gehzeiten hängen hier stark von der Raumtemperatur ab.
10. Den Ofen auf 190°C (375°F) Ober-/Unterhitze vorheizen. Den Pudding noch einmal durchrühren, damit er keine Klumpen hat (z.B. mit einem Pürierstab). Eigelb und etwas Sahne verrühren und die aufgegangenen Teilchen vorsichtig damit bestreichen. Mit einem Löffel (oder den Fingern) vorsichtig eine Mulde in die Mitte der Plunderteilchen drücken und dann erst etwa 1 EL Pudding und etwas Marmelade einfüllen. Das erste Blech mit Plunder in die Mitte des Ofens schieben und für etwa 20-23 Minuten backen. Die Teilchen sollten noch einmal etwas aufgegangen sein und schön Farbe bekommen haben. Mit dem zweiten Blech wiederholen. Die Spandauer auf einem Kuchengitter komplett abkühlen lassen und dann nach Belieben noch mit etwas Zuckerguss dekorieren.
Craving more? Keep in touch on Facebook, Instagram and Pinterest for new post updates and more. You can also contact me with any questions or inquiries!
Here is a version of the recipe you can print easily.
Print
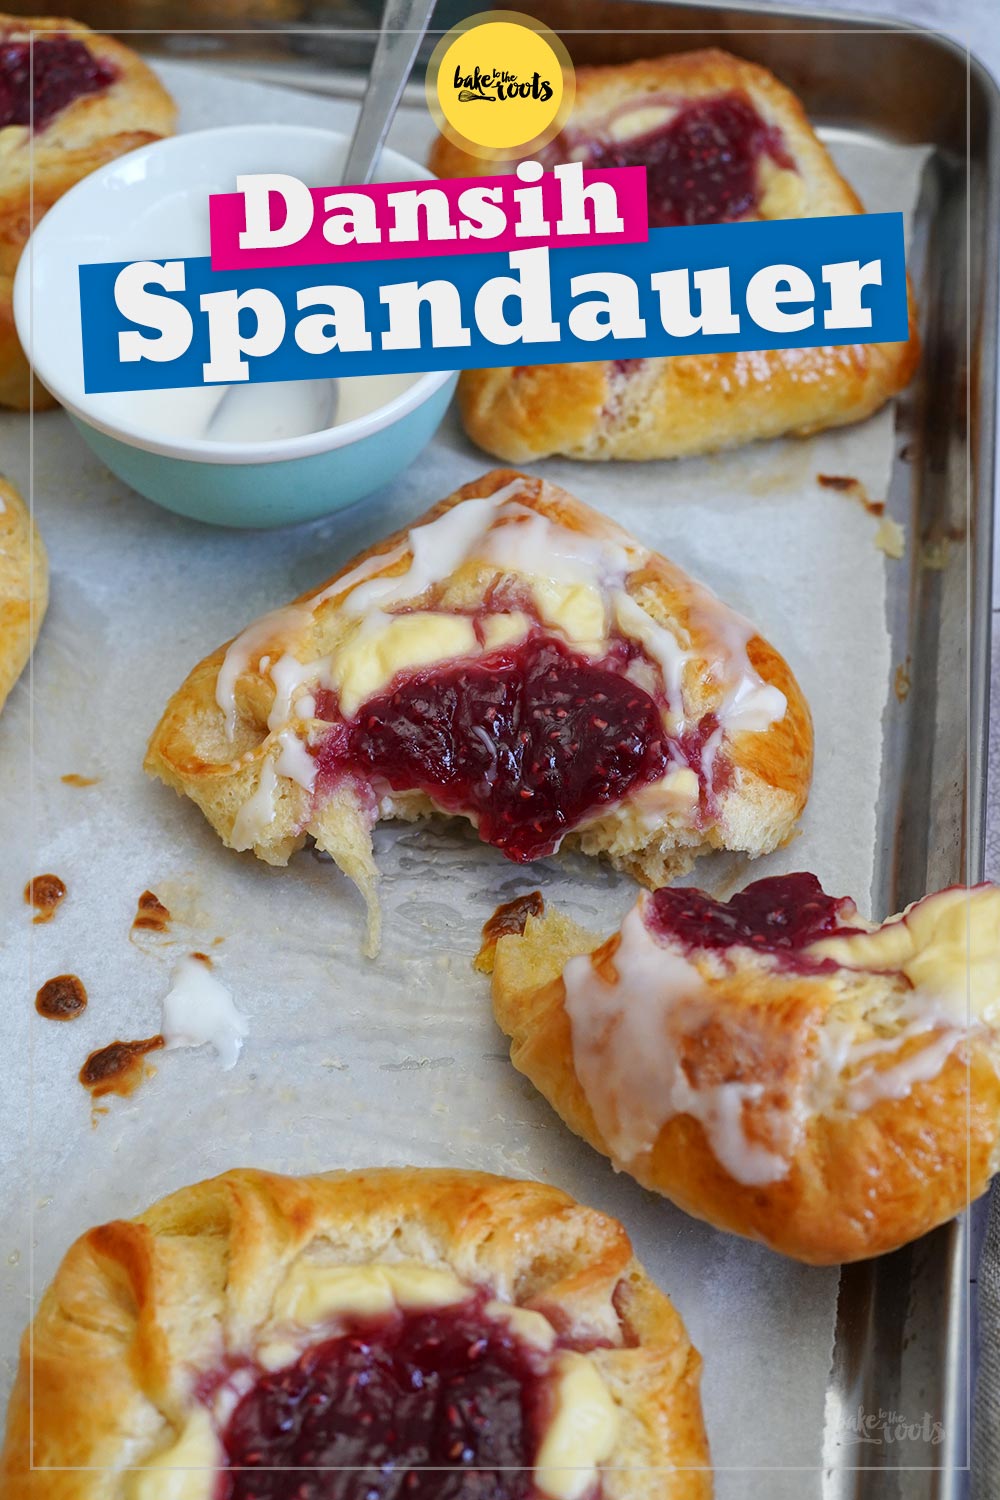
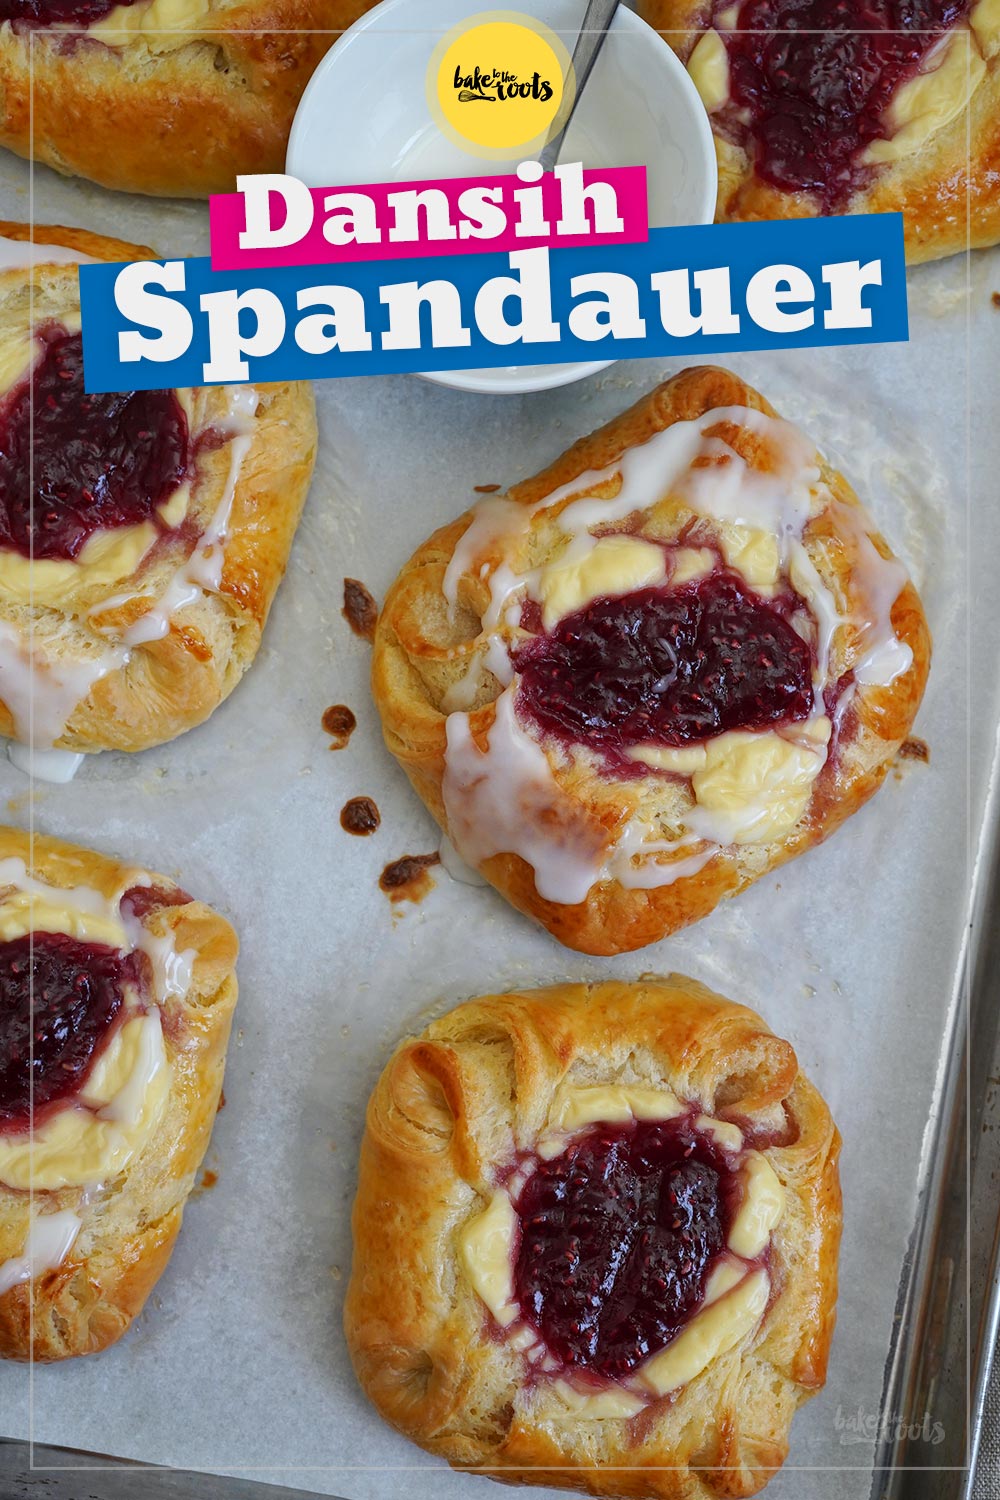
Spandauer – Danish Pastries with Marzipan, Custard & Raspberry Jam
- Prep Time: 01:00
- Cook Time: 00:23
- Total Time: 15:00
- Yield: 12 1x
- Category: Pastry
- Method: -
- Cuisine: Denmark
- Diet: Vegetarian
Description
These Danish Pastries are called »Spandauer« and filled with marzipan, vanilla custard and raspberry jam. So good you want to eat all of them at once!
Ingredients
For the dough:
9 oz. (250g) cold butter
17.6 oz. (500g) spelt flour*, plus some more
1/4 cup (50g) sugar (fine)*
1 1/2 tsp. salt
6 oz. (170g) cold milk (3.8% fat)
1 oz. (30g) butter, at room temperature
1 medium egg
2 medium egg yolks
1.4 oz. (40g) fresh bakers‘ yeast
For the custard cream (Kagecreme):
7 oz. (200g) milk (3.8% fat)
0.5 oz. (15g) cornstarch*
1 tbsp. sugar (fine)*
1 pinch of salt
1 tsp. vanilla extract*
1 tbsp. butter
1 medium egg yolk
For the marzipan filling (Remonce):
3.5 oz. (100g) marzipan paste
1.8 oz. (50g) butter, at room temperature
2 tbsp. sugar (fine)*
1 tbsp. vanilla sugar*
1 medium egg yolk & some heavy cream
4-5 tbsp. raspberry jam (or any other jam)
some sugar icing for the decoration (optional)
Instructions
1. You have to start in the evening with the preparations, so you can bake the next day. The dough needs time to rest and rise overnight. I recommend reading the whole recipe first.
2. Start with the butter package you need to laminate the dough. Cut the butter into 1cm thick strips and place them next to each other on a large piece of baking parchment. Fold the paper over the butter and create a square package with a size of 18x18cm. If you have sharp edges you can now simply roll/press the butter into shape with a rolling pin. You need a butter package/layer to have that exact dimensions. Place in the fridge overnight.
3. For the dough add spelt flour, sugar, and salt to the bowl of a food processor (with dough hook) and mix to combine. Add milk, butter, the egg, and egg yolks. Crumble the fresh yeast and add it to the bowl as well. Knead for about 8-9 minutes until you get a nice and smooth dough. Take the dough out of the bowl and knead it again briefly with your hands on a lightly floured surface, then shape it into a ball. Use a sharp knife and cut a cross into the dough (about 5cm deep). Place in a large bowl and cover (e.g. with cling film). Place in the fridge overnight (about 10 hours).
4. For the custard filling mix cornstarch, sugar, salt, and vanilla extract with a few tablespoons of the milk until well combined. Heat the remaining milk together with the butter in a small saucepan. As soon as the milk starts to boil, stir in the cornstarch mixture and allow the custard to thicken. Let it bubble for a moment while stirring constantly, then remove it from the heat and leave it to cool for a minute or so. Stir in the egg yolk, then immediately place a piece of plastic wrap directly on top of the custard (to prevent skin from forming) and let it cool down completely.
5. For the marzipan filling, mix the marzipan paste with butter, sugar and vanilla sugar until smooth. Cover and leave it on the counter at room temperature until needed. The butter, dough, pudding, and marzipan filling can all be prepared in advance.
6. The next morning, take the dough out of the fridge and roll it out into a rectangle (36x18cm) on a lightly floured surface. Place the butter (without the paper) in the center of the rectangle. The butter should be flush with the long edges of the dough on the left and right. Fold the dough over the butter to enclose it completely. Press the edges together. Turn the package at a 90° angle. Use the rolling pin to carefully press the butter and dough together and then roll out to create another long rectangle. If the shorter sides are a bit wonky due to the shaping of the dough, trim them a little to get straight edges.
7. Fold the short sides of this long rectangle towards the center so they meet exactly in the middle. Fold once more together as if you were closing a book – you should now have a total of four layers of dough stacked on top of each other. This is the first »tour« to get a nice lamination. Wrap the dough loosely in plastic wrap and place in the fridge for about 30-45 minutes.
8. For the second »tour«, roll out the dough once again on a lightly floured surface. Make sure the side of the package that shows all four layers is facing you, then roll it out, working away from you. You want a long rectangle again, a bit shorter than the first time. This time you have to fold the dough only once towards the center and the other side on top of that – this will create three layers. Wrap in plastic wrap once again and place in the fridge for another 30-45 minutes.
9. Roll out the chilled dough on a lightly floured surface into a rectangle with a size of about 45x35cm. Cut out squares with a size of about 11x11cm. The rectangle is slightly larger than you need so you can smooth out any unsightly edges, if necessary. Add a small portion of marzipan onto each dough square and fold all four corners towards the center to enclose the filling completely. Place the Danish pastries on two baking sheets lined with baking paper (6 pieces per baking sheet) and cover loosely with plastic wrap. The dough has to be able to rise undisturbed. Let the pieces rise in a warm place for about 1 1/2-2 hours – the volume of the dough should have visibly increased. The rising times depend greatly on the room temperature.
10. Preheat the oven to 190°C (375°F). Mix the pudding once again to get rid of any lumps (e.g. with an immersion blender). Whisk egg yolk and some heavy cream to create an egg wash and brush the risen Danishes with it – be gentle. Use a spoon (or your fingers) and carefully press an indention into the centers of the Danish pastries. Add about 1 tablespoon of custard and a small amount of jam into each indention. Place the first tray of Danishes in the center of the oven and bake for about 20-23 minutes. The pastries should have risen nicely with a nice golden brown color. Bake the second baking sheet the same way. Transfer the Danishes to a wire rack and let them cool down completely. Decorate with some sugar glaze, if desired.
Notes
Get your bake on!
Links marked with an asterisk (*) are affiliate links (advertising/Werbung) to Amazon Germany. If you click on one of those links and buy something via this link, I will get a commission for that sale. The price of whatever you buy is not affected in any way by this.


Can you freeze them?
Haven’t done it yet, but the internet says yes, you can freeze danishes.
Cheers,
Marc