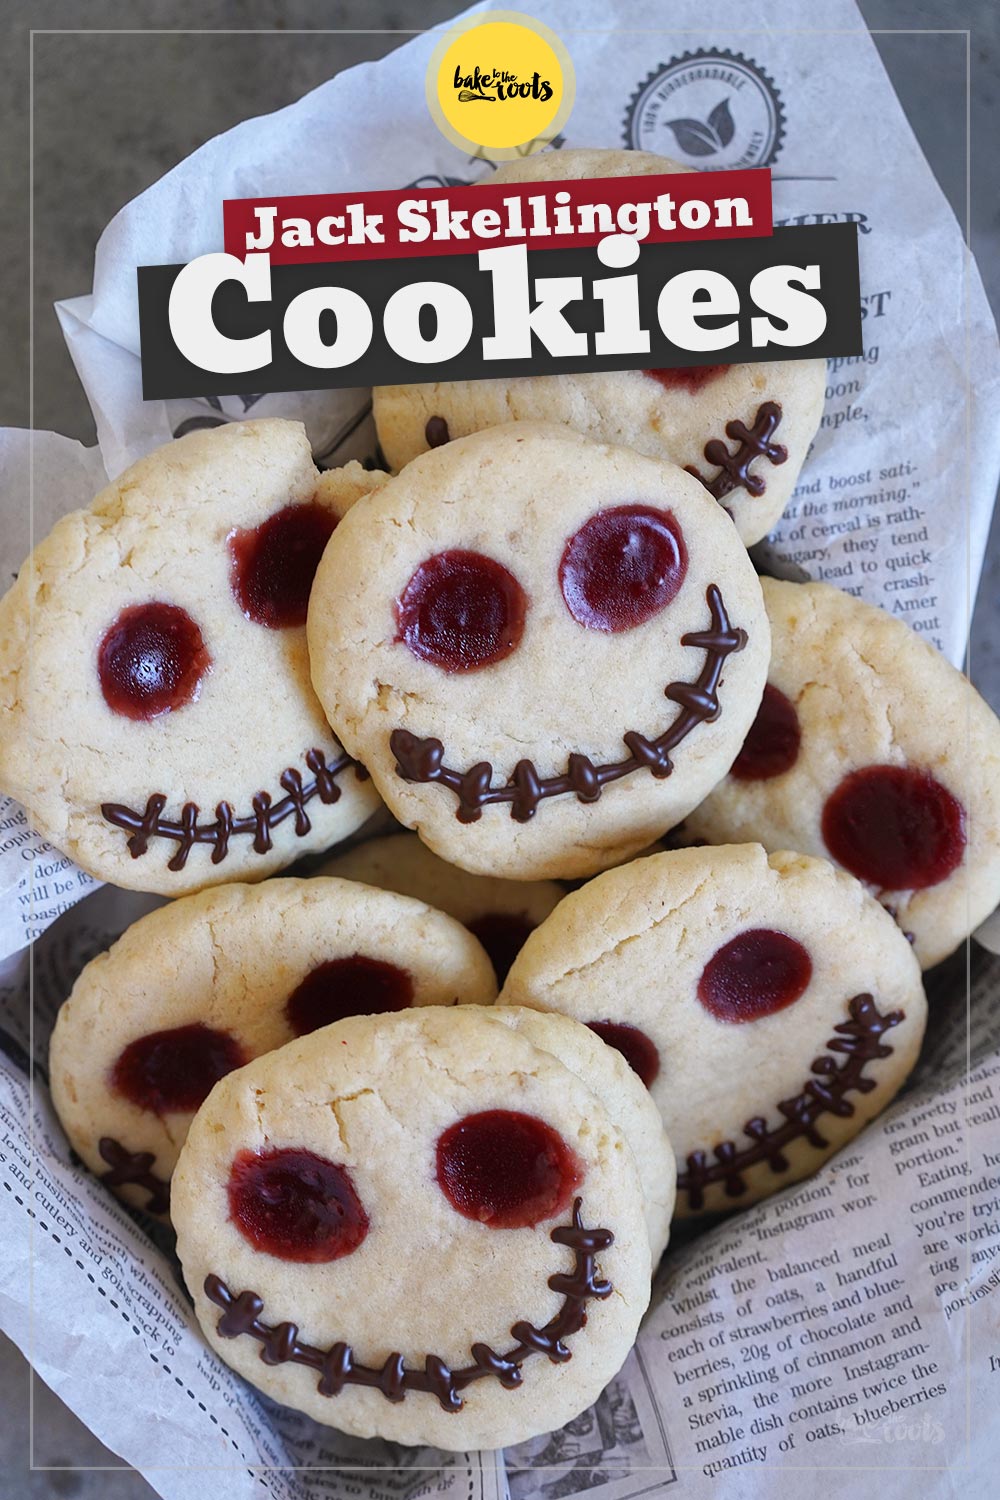
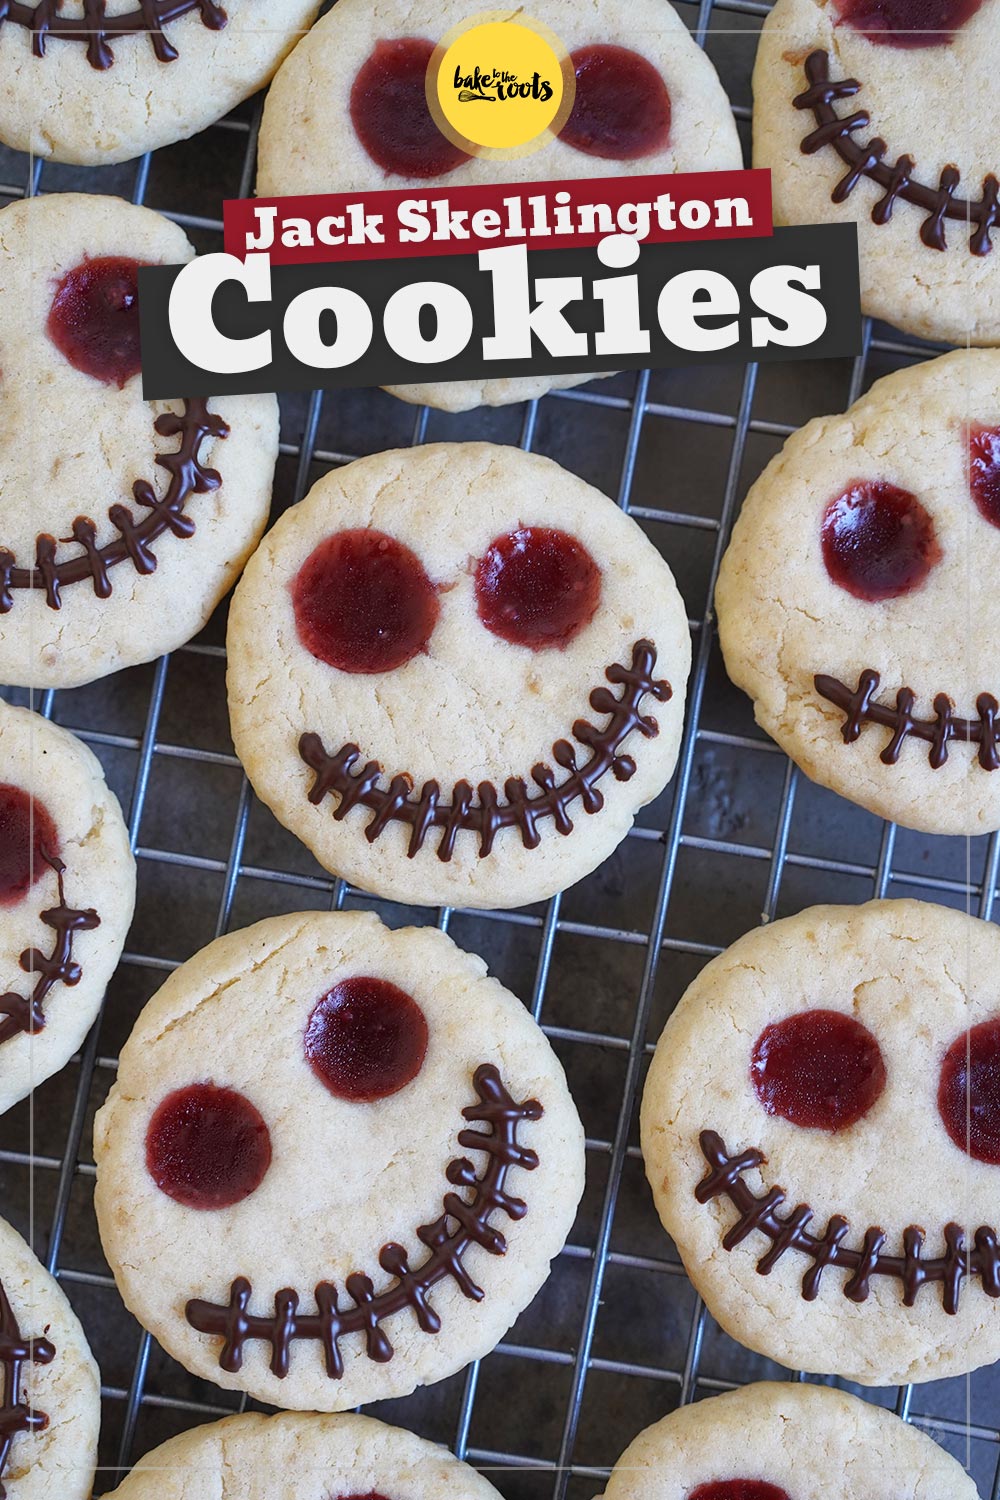
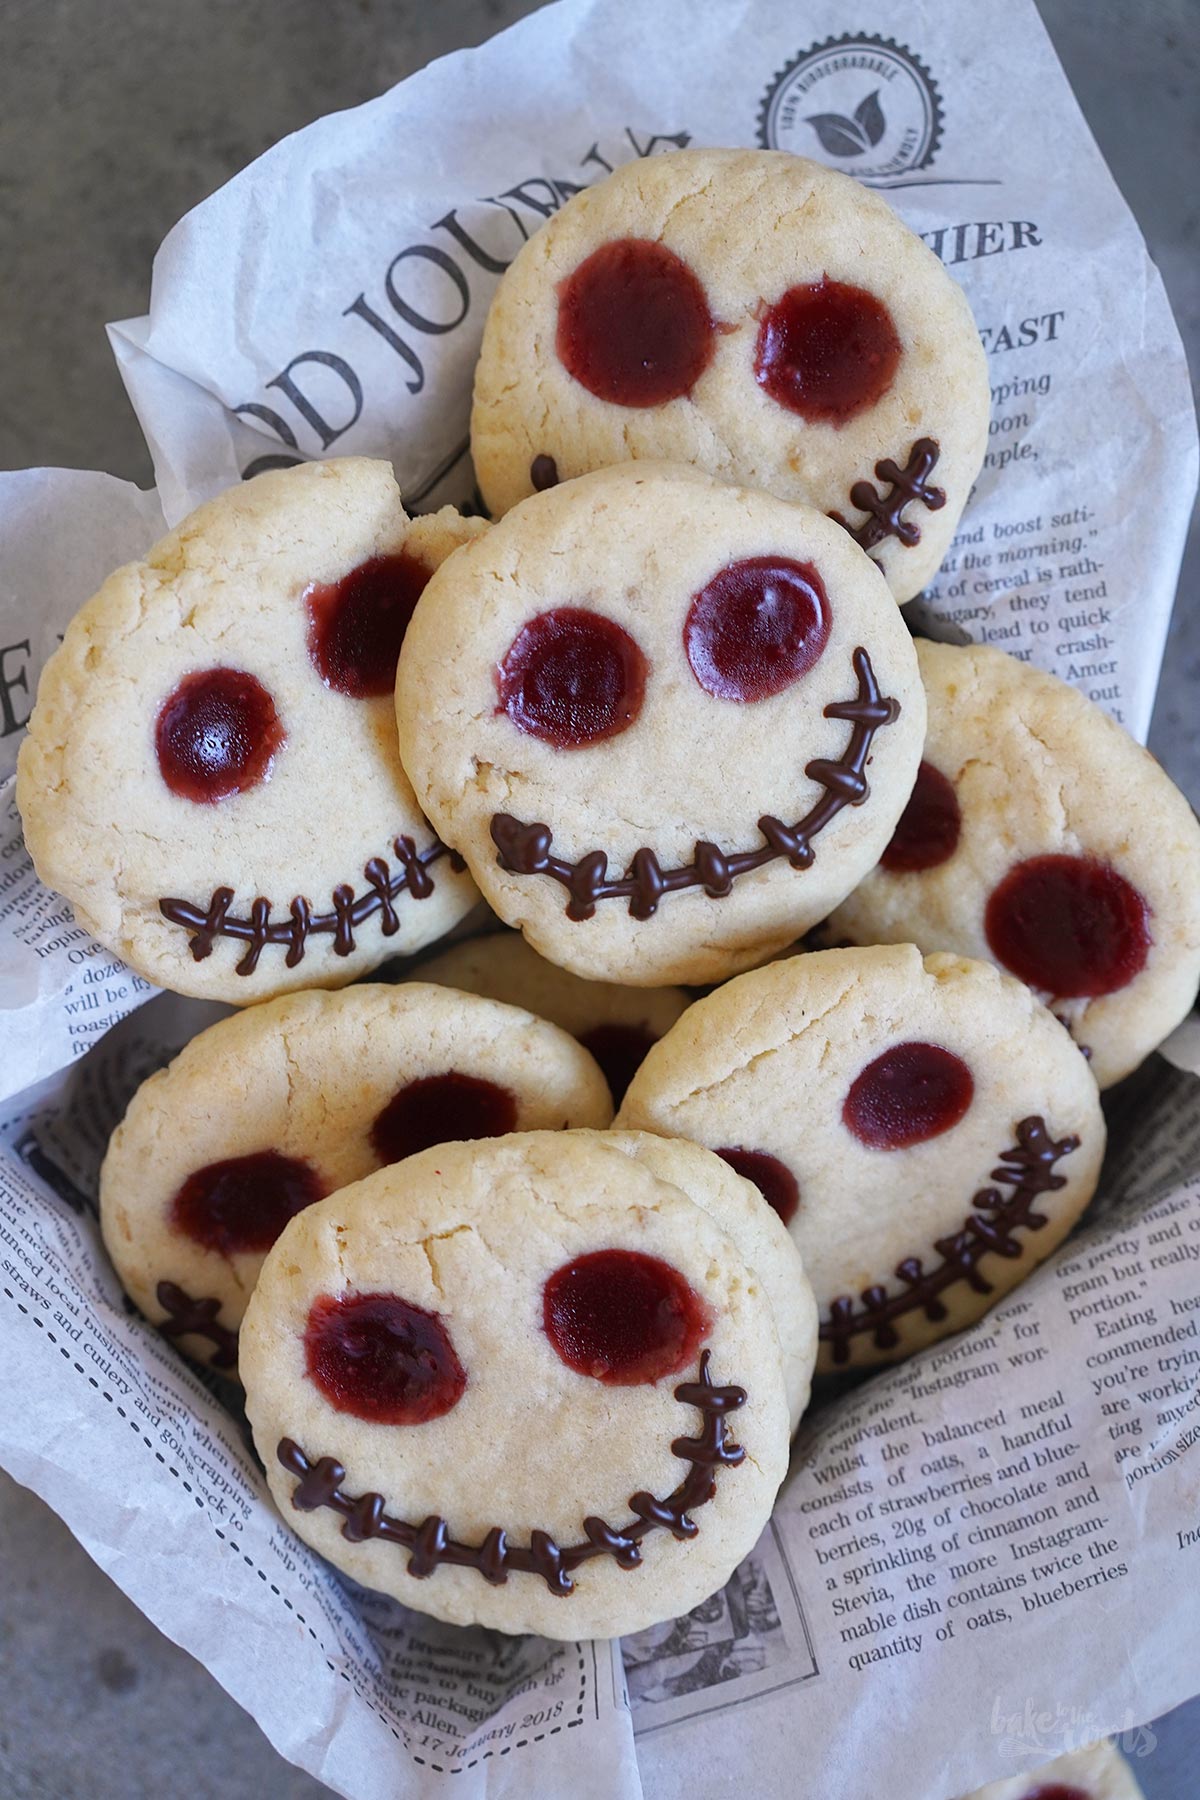
We never really celebrate Halloween here at home, with dressing up and all, but when it comes to spooky-funny snacks, we’re happy to join in! These Jack Skellington Thumbprint Cookies are super easy to make and perfect for Halloween – with or without a Halloween party. Since the cookies are only slightly spooky, they’re also great for kids. These cookies won’t give anyone nightmares…
Halloween as a holiday eventually made its way over to Germany from the US… but I’d say it never really took root. Yet. You can find Halloween parties here and there, where adults dress up, but there’s rarely anything for kids here. At least, if you look here in Berlin. But that might also be because we hardly have single-family homes where in the area you could go out for the popular »trick-or-treating«. Maybe it’s different in smaller towns?! IDK…
Halloween or not, funny-looking cookies can actually be served all year round, right? These Jack Skellington cookies can be baked 365 days a year and then nibbled whenever you are in the mood. Want to watch the movie »Nightmare Before Christmas« again? Well, these cookies are perfect for that! Even if you want to watch it right before Christmas. No problem!
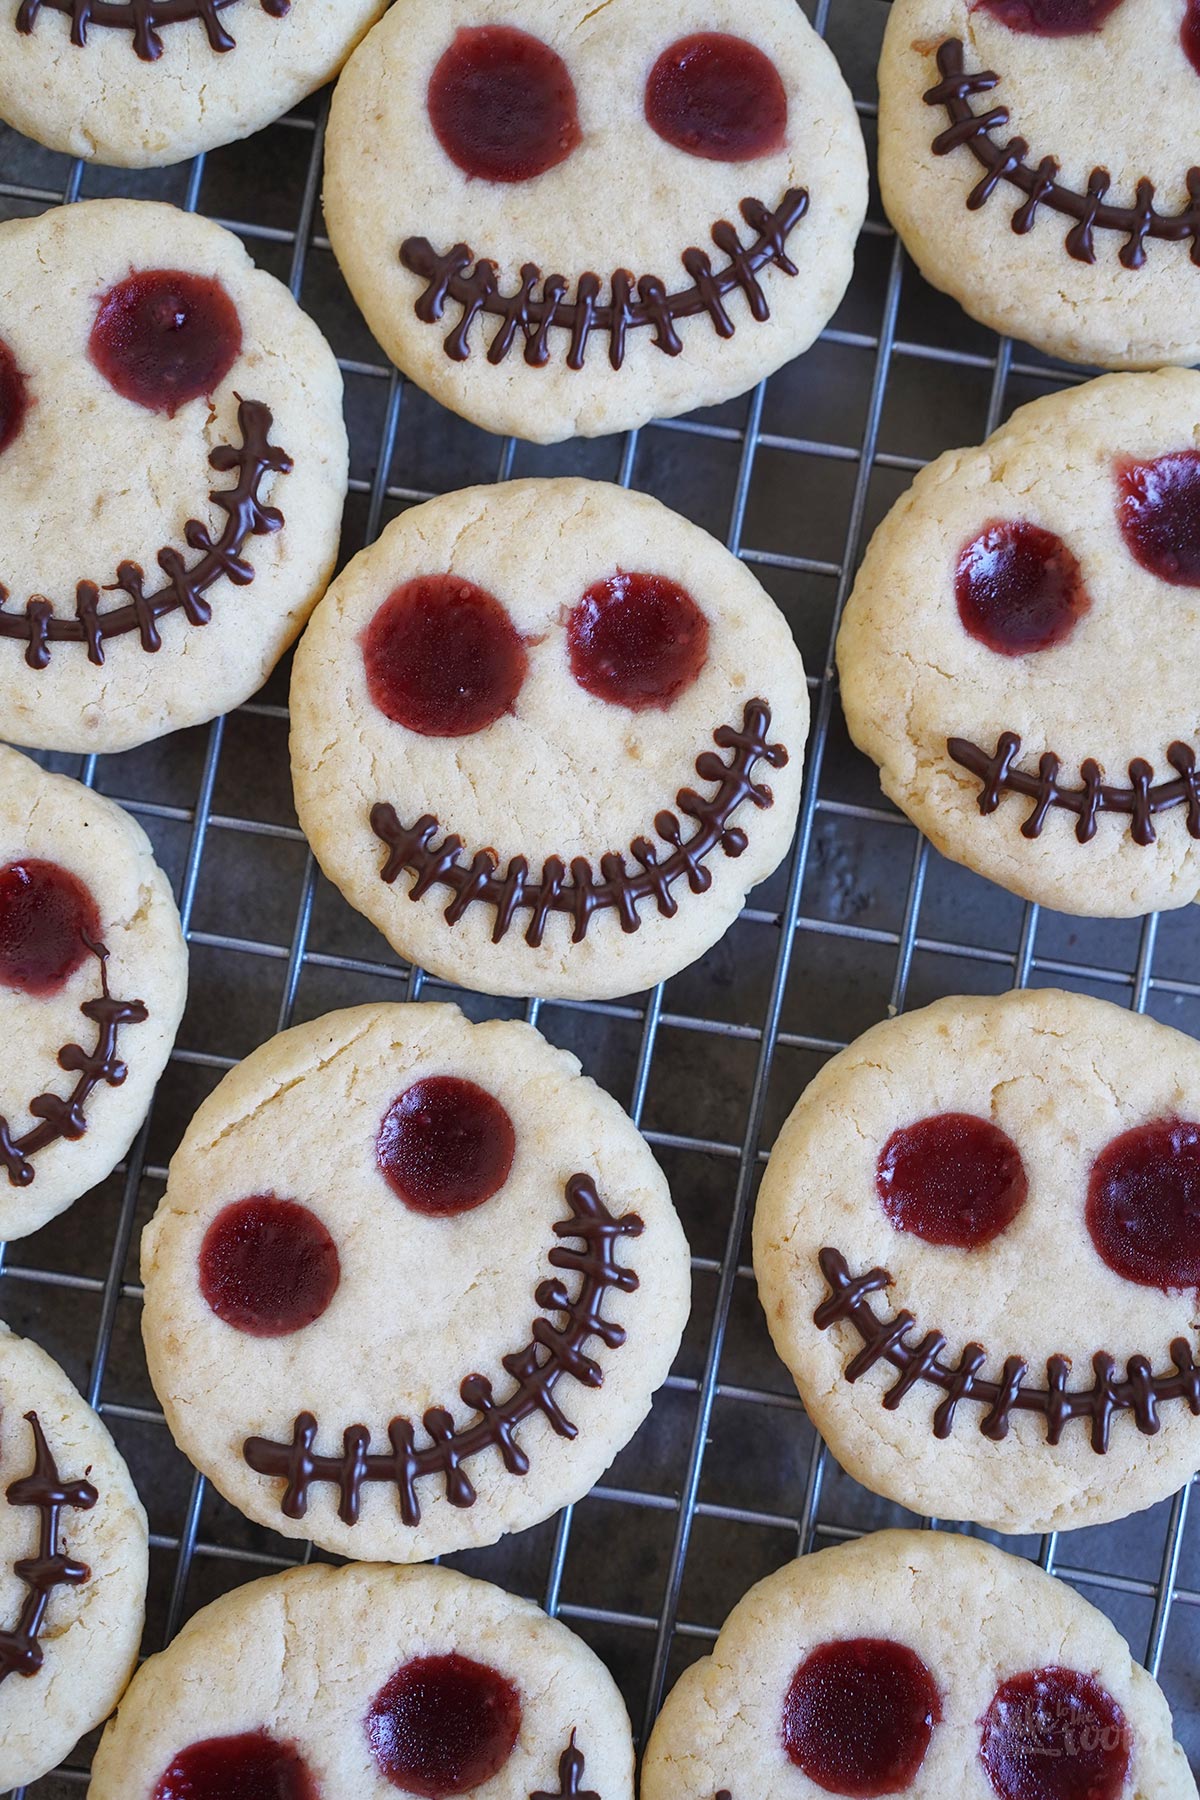
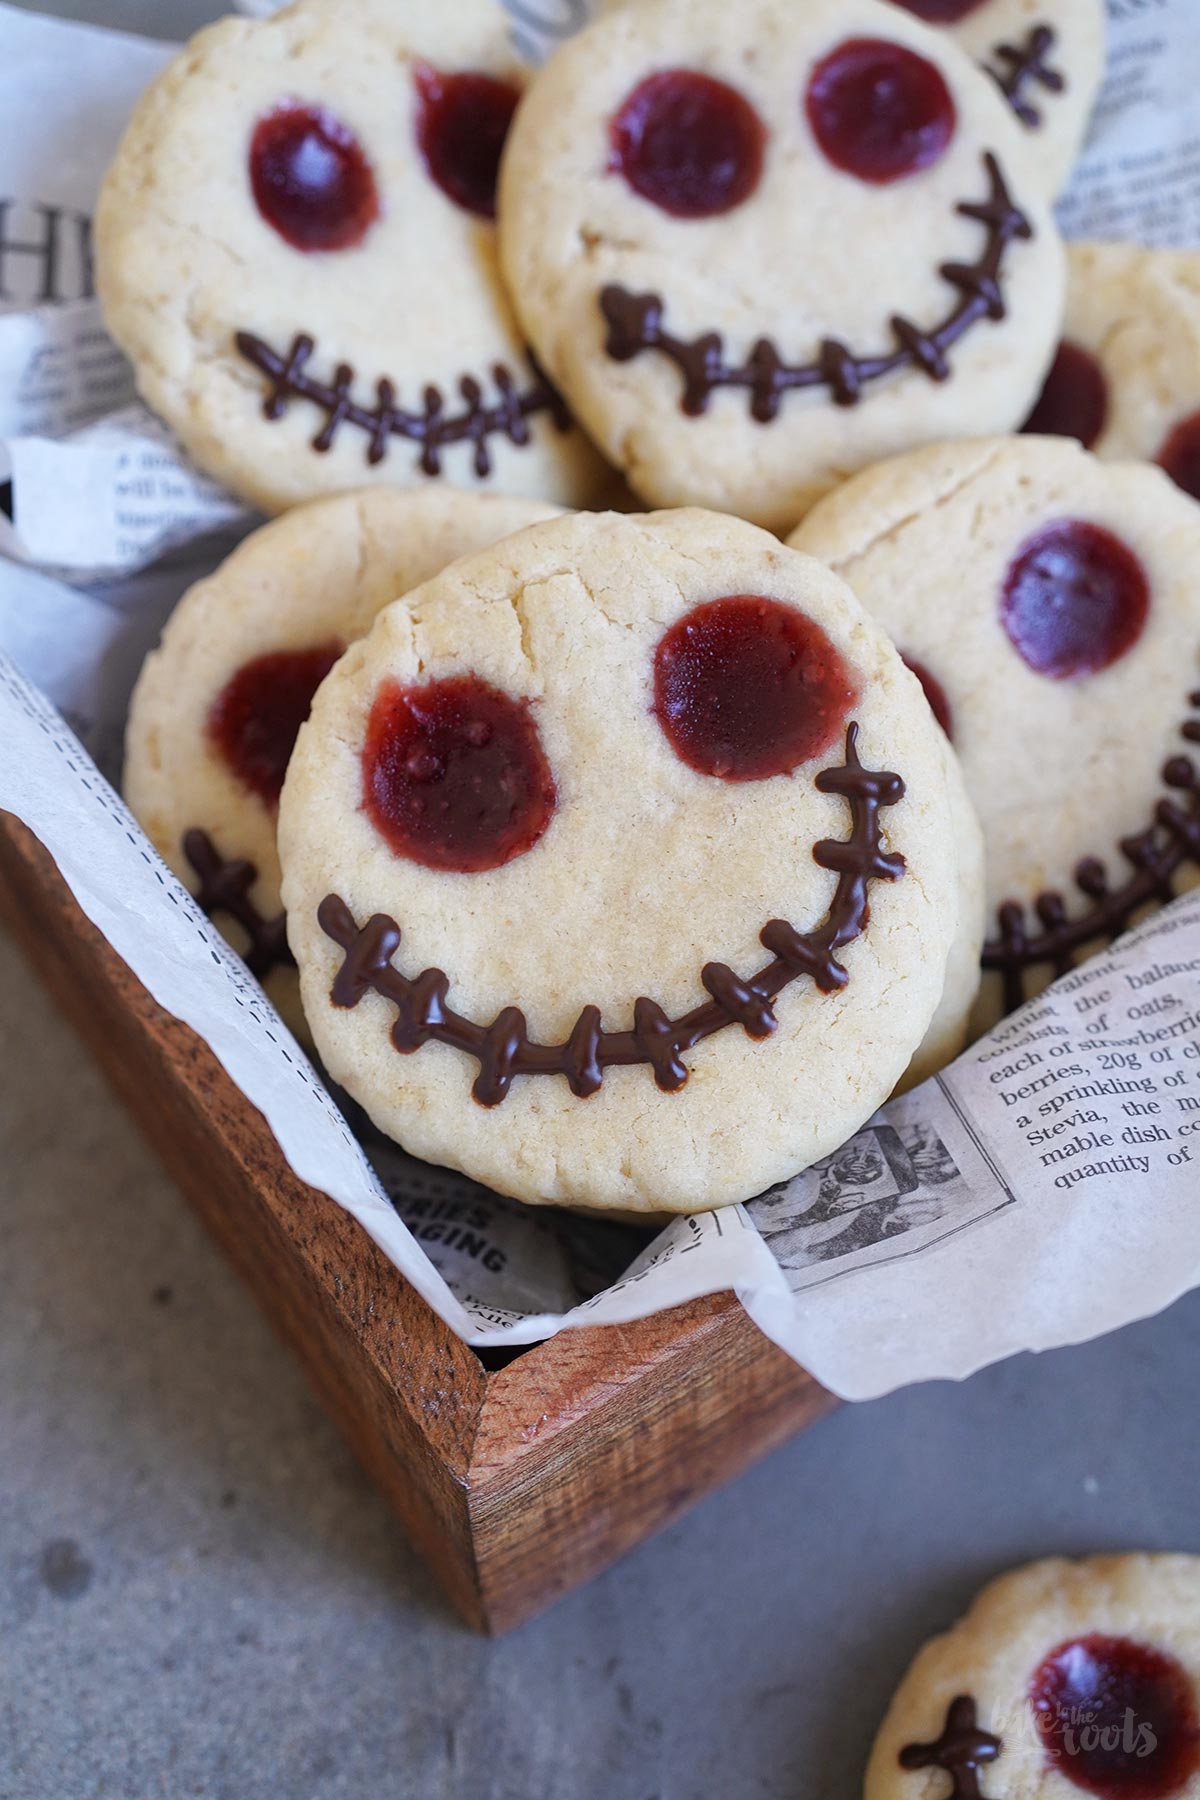
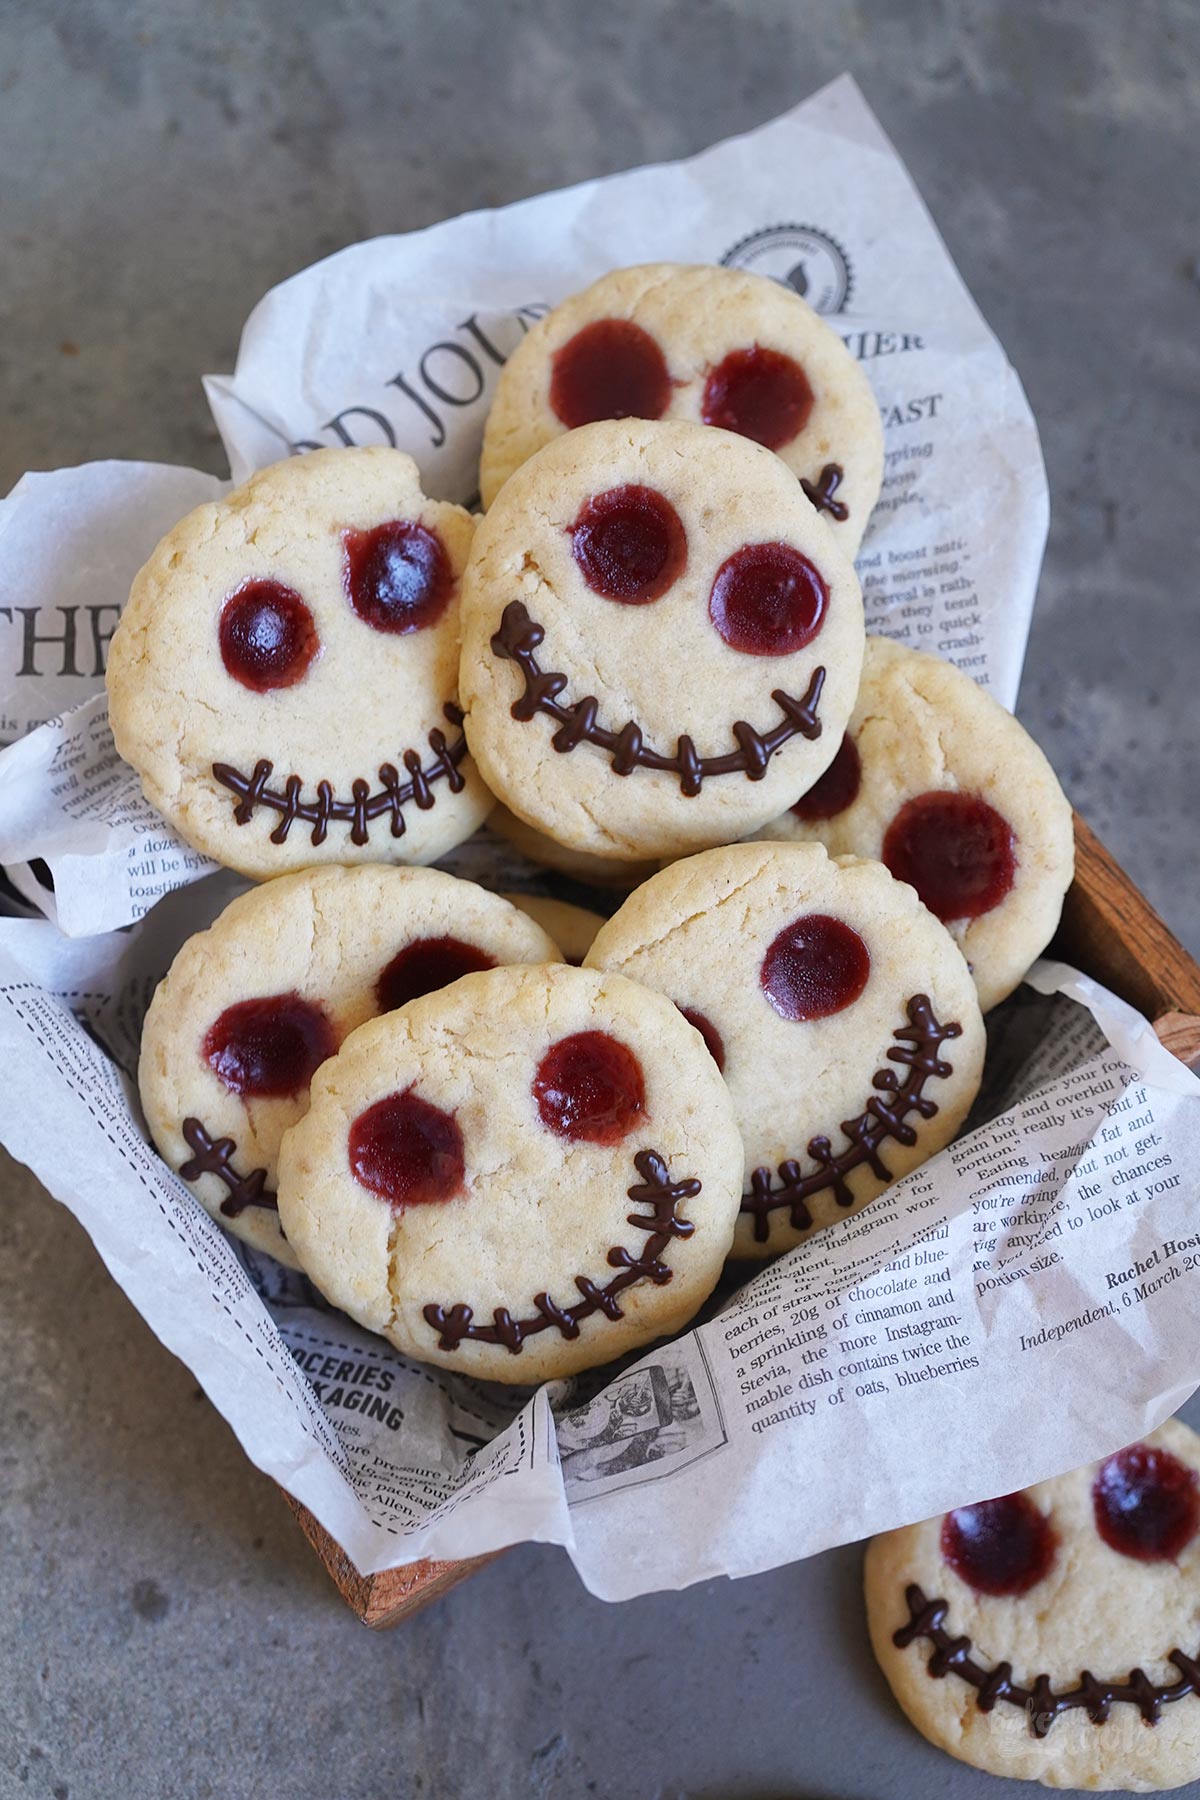
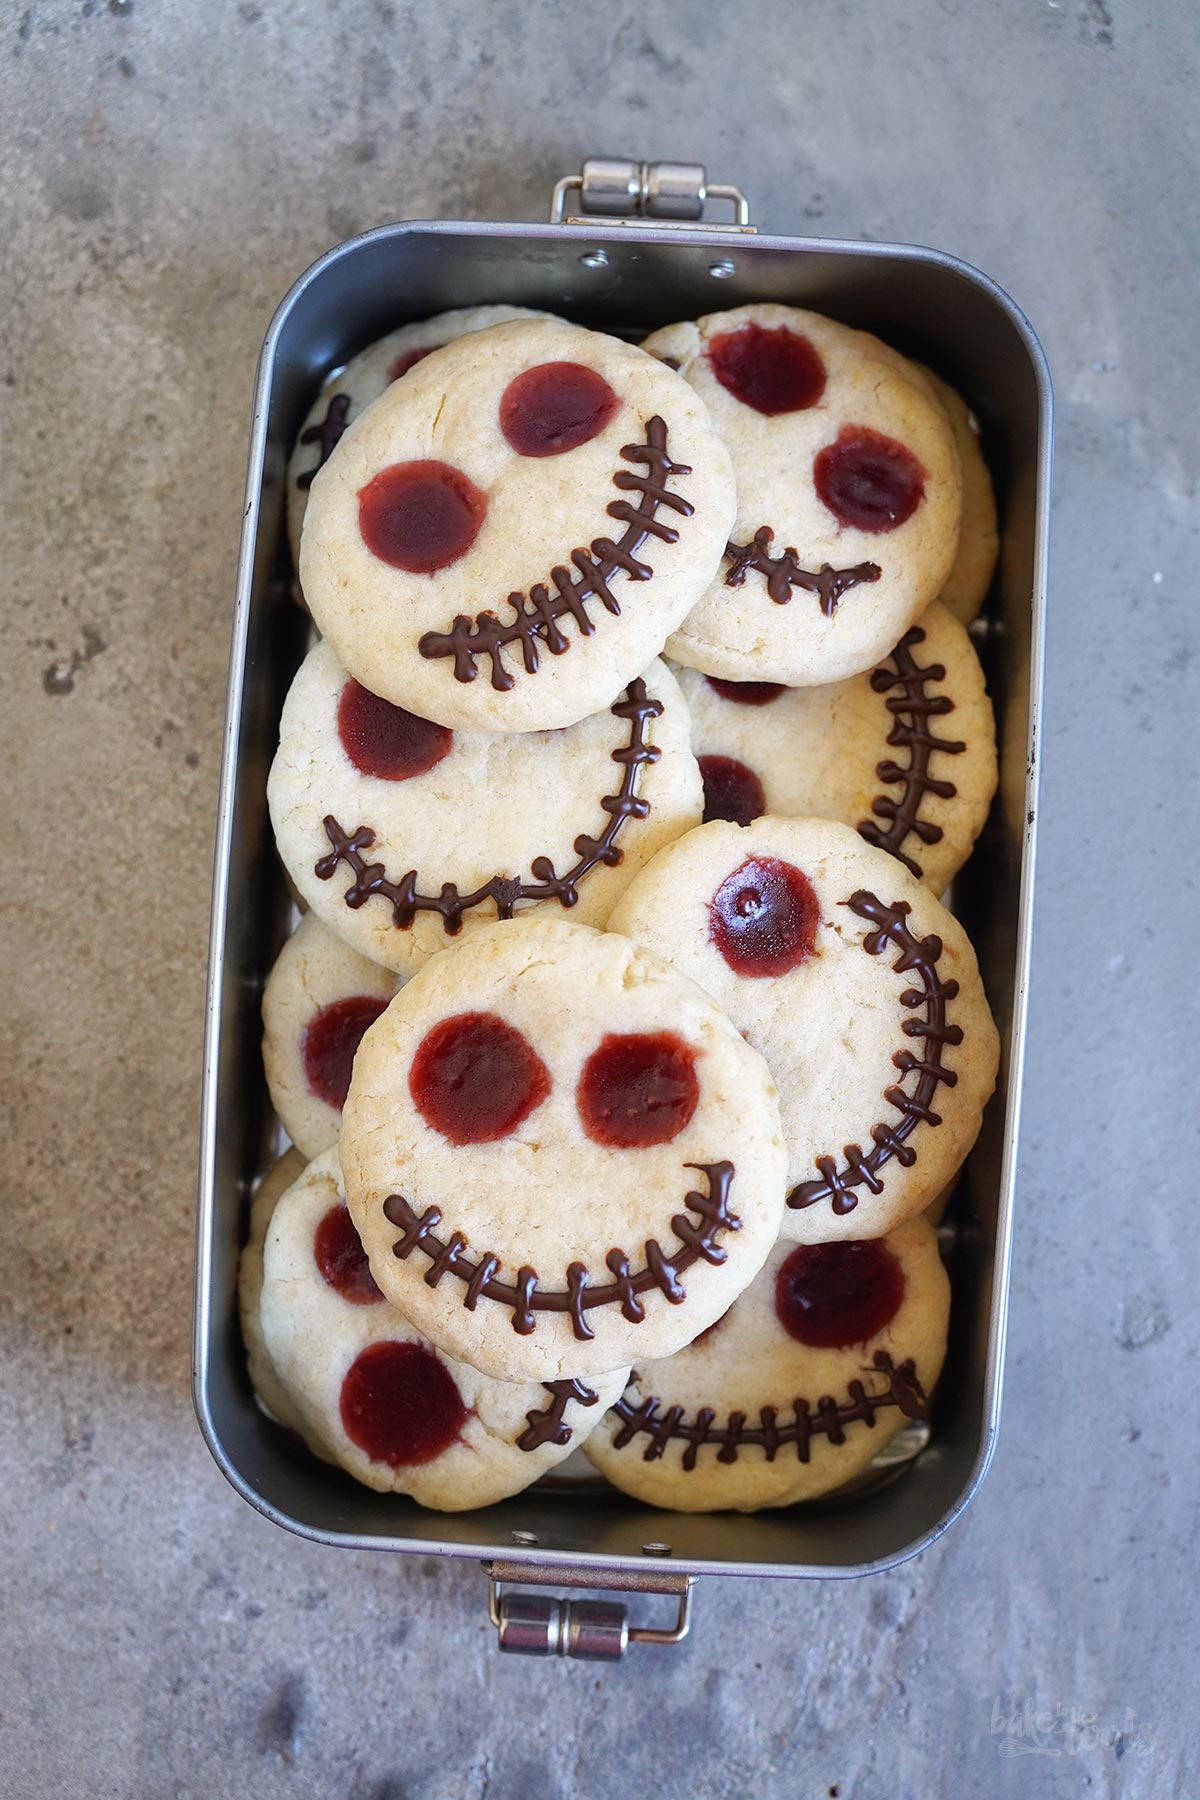
To be honest, the cookies don’t really look scary, right? The face on the cookies is smiling really nicely, and the red eyes… it’s probably just conjunctivitis. That can happen to anyone, summer or winter. It’s not something you can only encounter at Halloween. One of our friends gets it every few months and then walks around with eye drops in his eyes the whole time…
Anyway. The cookies are super easy to prepare. You just need a fairly steady hand when decorating them with the melted chocolate. Although a wobbly smile probably contributes to a better and more original »look & feel«.

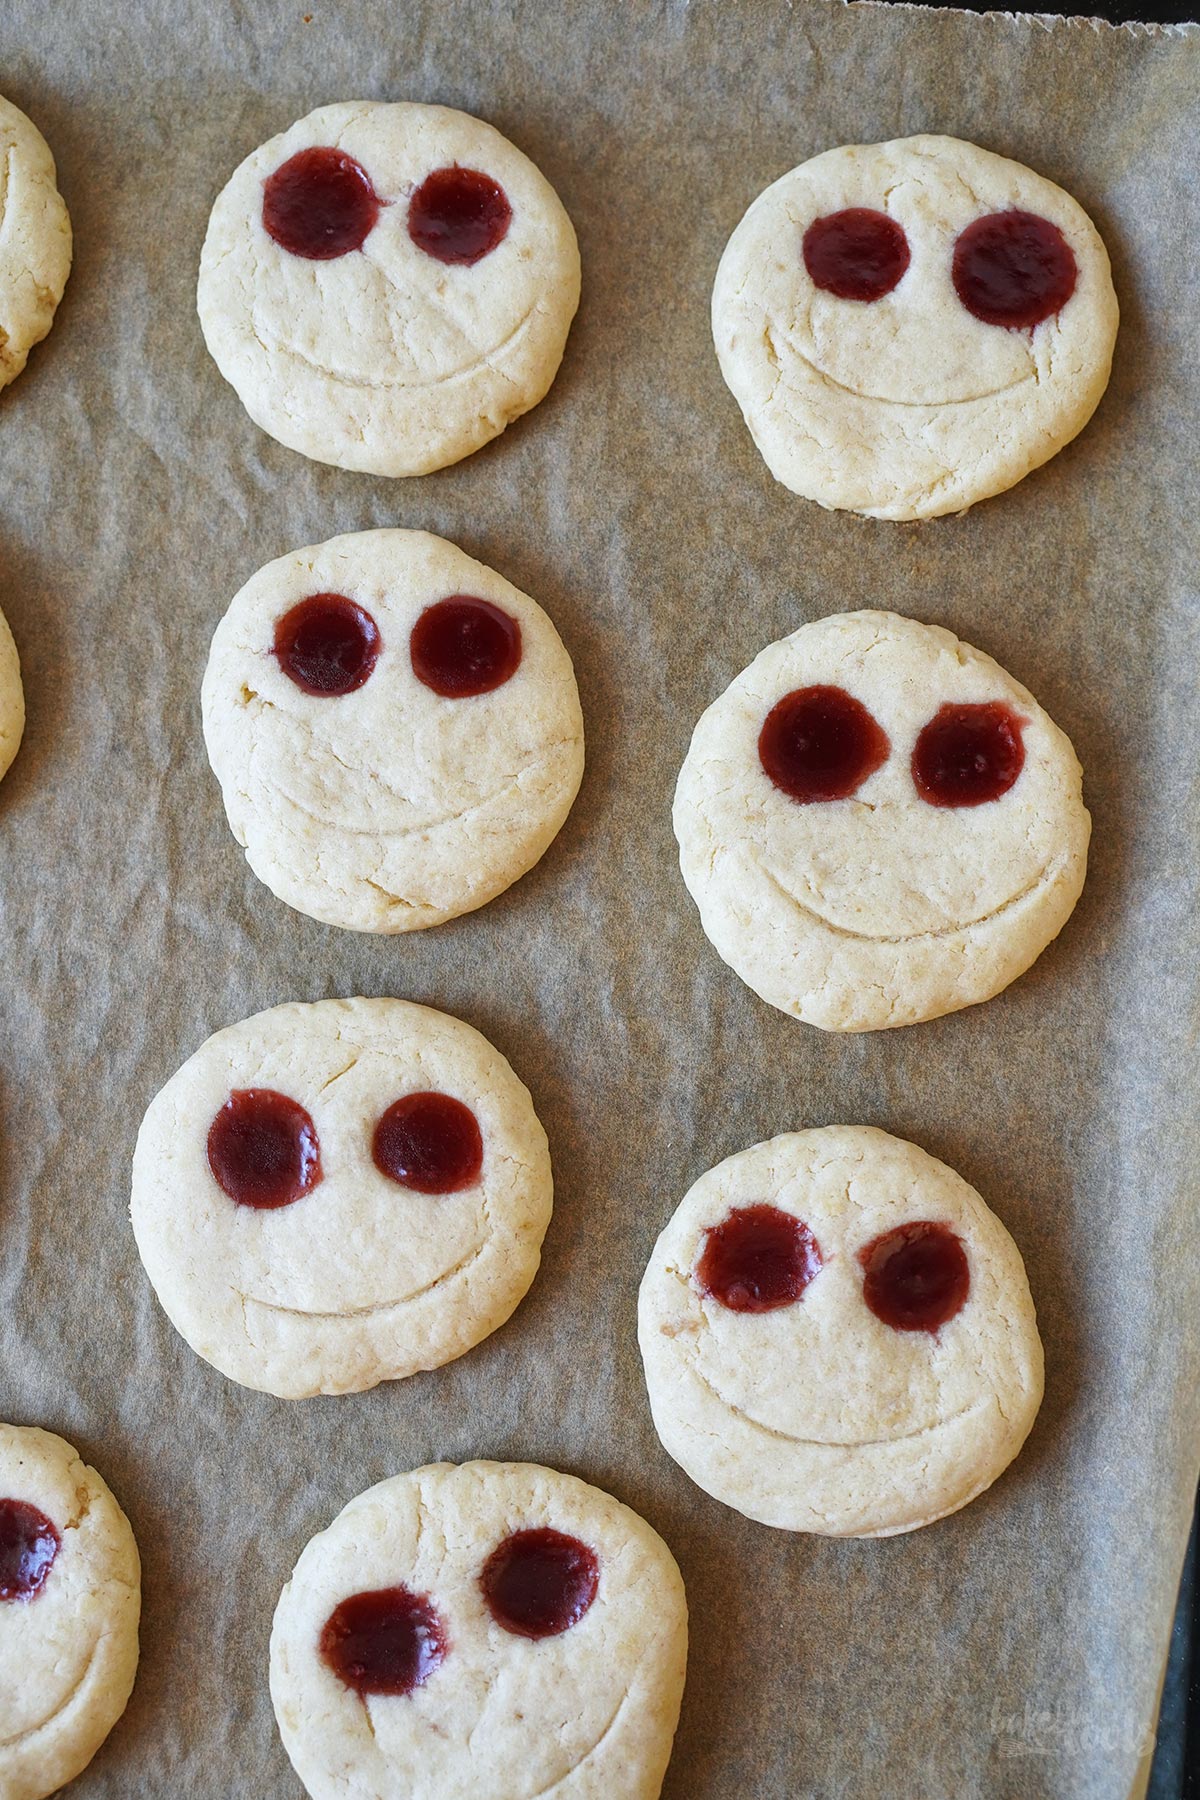
We tried to make the smiles as neatly (curved) as possible. That’s why you can see a line imprinted in the cookies in one of the pictures where they are not fully decorated yet. If you like, you can use a round cookie cutter and press it into the cookies as a template. Makes it easier to decorate the cookies with a perfect smile.
The Skellington cookies are a variation of our simple Heart Thumbprint Cookies, which we often bake for Valentine’s Day or Mother’s Day. So if you’re not quite so comfortable with the little skeleton heads, you can switch to making hearts instead in a snap. You just have to spread the jam a little differently and forget about the chocolate decorations.
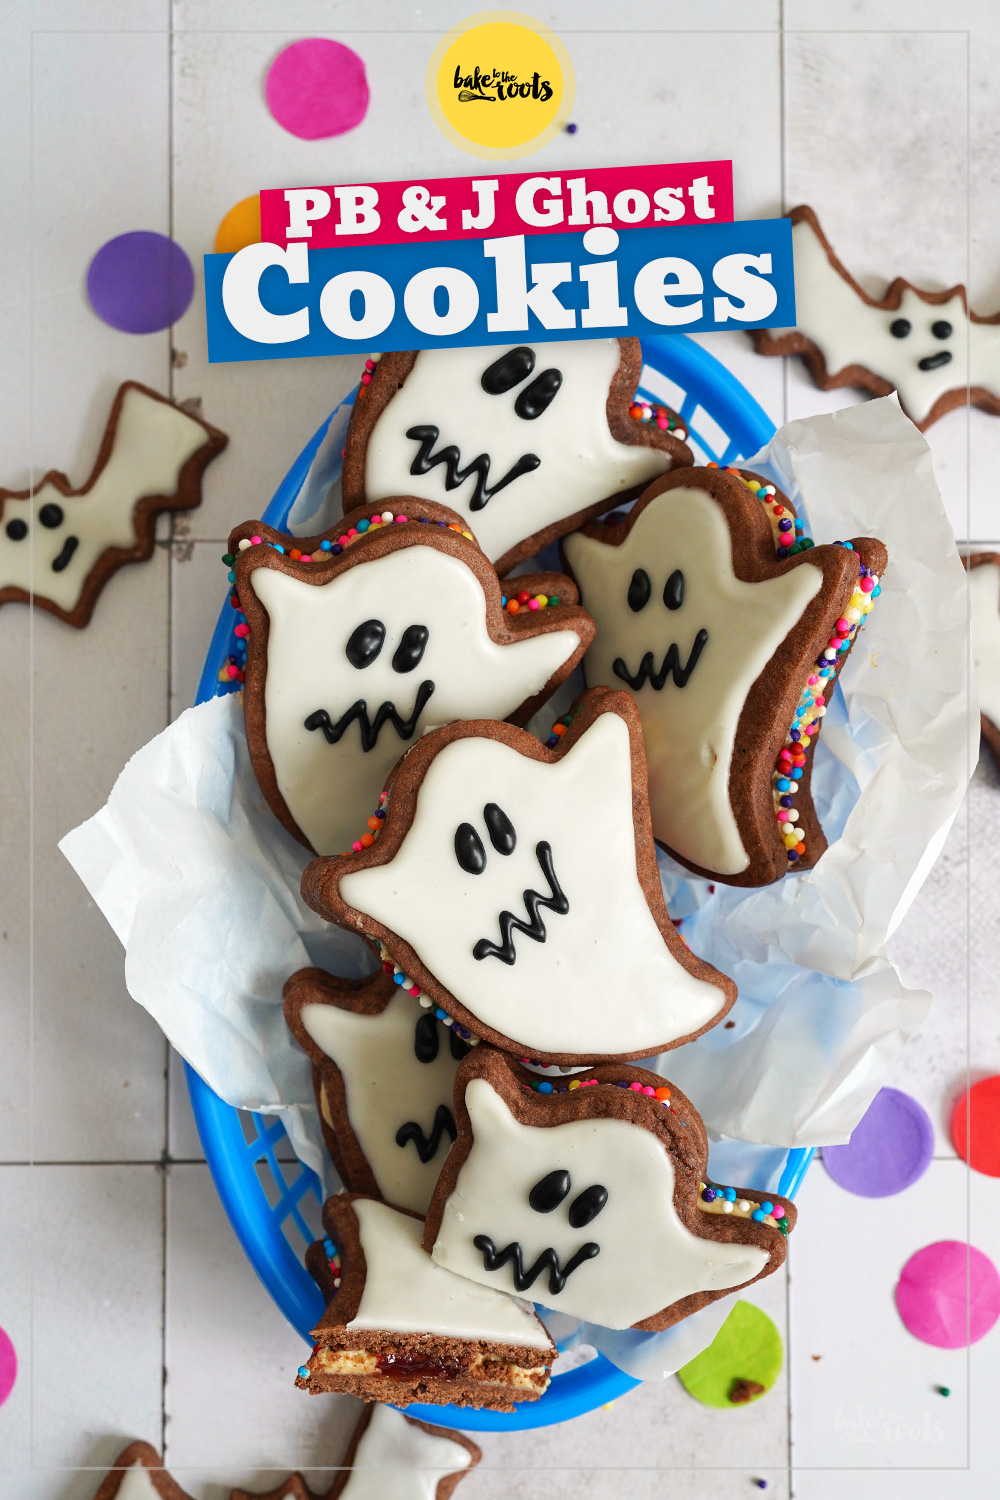
If you need even more (not quite as scary) Halloween snacks, you might also want to check out our Ghost Peanut Butter & Jelly Sandwich Cookies. Those are definitely not scary. Rather sweet and adorable. However, they’re also a bit more complicated to make compared to the cookies here. Two different fillings, sugar decorations… you’ll have to put in at least 6-8 minutes more work.
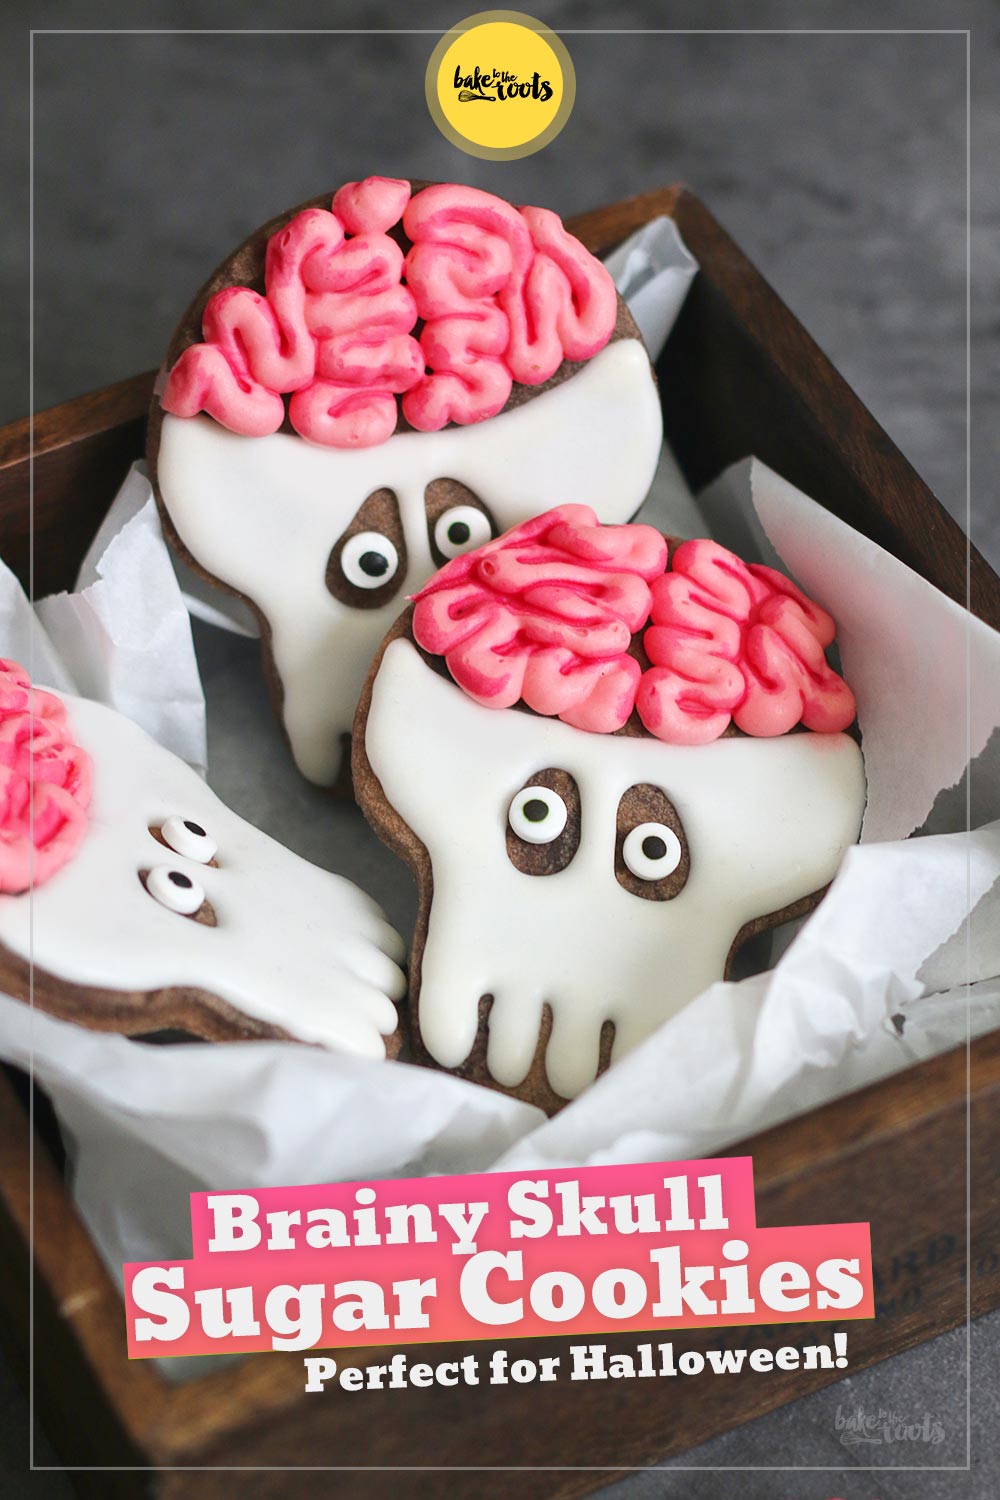
If you want something a little scarier… how about our Halloween Brainy Skull Sugar Cookies? Small children probably won’t get nightmares because of them, but adults might find the cookies a little creepy with the bloody brains. Why don’t small children find these cookies scary? Because they probably don’t know what the pink sausages are supposed to represent. In the best case scenario, a little kid will want to become a brain surgeon if you explain what this is all about…?! It’s worth a try. Muharrarr!
By the way, we also have a small collection of Halloween treats and decorations on the blog. Everything from simple cookies to a giant spooky Halloween Haunted Gingerbread House – you’ll have to start a few days in advance for that one, though. That one really takes a while to finish.
INGREDIENTS / ZUTATEN
(about 15 cookies)
For the dough:
1 1/2 cups (200g) all-purpose flour
1/2 cup (60g) confectioners’ sugar
0.9 oz. (25g) cornstarch
1/2 cup (120g) butter
1 medium egg
1 tsp. vanilla extract
For the decoration:
some raspberry jam
some melted chocolate
(etwa 15 Kekse)
Für den Teig:
200g Mehl (Type 550)
60g Puderzucker
25g Speisestärke
120g Butter
1 Ei (M)
1 TL Vanille Extrakt
Für die Dekoration:
etwas Himbeermarmelade
etwas geschmolzene Schokolade

DIRECTIONS / ZUBEREITUNG
1. Combine flour, confectioners’ sugar, and cornstarch in a bowl. Add the butter and break it into pea-sized pieces using a pastry blender*. Next, add the egg and vanilla extract, mix well, and knead until you get a smooth dough. Do not overwork the dough, though. Wrap it in plastic wrap and place in the fridge for at least 1 hour (or overnight).
2. Preheat the oven to 180°C (350°F). Line a baking sheet with baking parchment. Stir in the raspberry jam, or warm it slightly to make it easier to handle. Set aside.
3. Take the dough out of the fridge and divide it into about 15 equal pieces. Shape each piece into a small ball, flatten them slightly, and place them with some space in between on the baking sheet. Use your fingers or the end of a wooden spoon and press two small indentations for the eyes into the dough. Fill those indentations with a little jam and bake for about 10-12 minutes. Take the cookies out of the oven and let them cool down on a wire rack.
4. Melt a little chocolate for the decoration and fill it into a small piping bag. Then decorate each cookie with a mouth with seams (see pictures). Let them dry completely.
1. Mehl, Puderzucker und Stärke in einer Schüssel vermischen. Die Butter dazugeben und mit einem Teigmischer* in etwa erbsengroße Stücke zerteilen. Das Ei und den Vanille Extrakt dazugeben, alles gut vermengen und zügig zu einem glatten Teig verkneten – den Teig nicht zu stark bearbeiten. Den Teig in Klarsichtfolie einschlagen und mind. 1 Stunde (oder über Nacht) in den Kühlschrank legen.
2. Den Ofen auf 180°C (350°F) Ober-/Unterhitze vorheizen. Ein Backblech mit Backpapier auslegen. Die Himbeermarmelade durchrühren oder etwas erwärmen, damit sie leichter zu verarbeiten ist. Zur Seite stellen.
3. Den Teig aus dem Kühlschrank nehmen und in etwa 15 gleich große Stücke zerteilen. Jedes Teigstück zu einer kleinen Kugel formen, leicht flachdrücken und dann mit genügend Abstand zueinander auf das Backblech setzen. Mit Fingern oder mit dem Ende eins Kochlöffels zwei kleine Vertiefungen für die Augen in die Teigportionen drücken. Die Vertiefungen mit ein wenig Marmelade befüllen und dann für etwa 10-12 Minuten backen. Die Kekse aus dem Ofen nehmen und auf einem Kuchengitter abkühlen lassen.
4. Ein wenig Schokolade für die Dekoration schmelzen und in einen kleinen Spritzbeutel füllen, dann jeden Keks mit einem Mund mit Nähten dekorieren (s. Fotos). Komplett trocknen lassen.
Craving more? Keep in touch on Facebook, Instagram and Pinterest for new post updates and more. You can also contact me with any questions or inquiries!
Here is a version of the recipe you can print easily.
Print
Jack Skellington Thumbprint Cookies
- Prep Time: 00:20
- Cook Time: 00:12
- Total Time: 02:00
- Yield: 15 1x
- Category: Cookies
- Method: -
- Cuisine: International
- Diet: Vegetarian
Description
These Jack Skellington Thumbprint Cookies are cute and mildly spooky. Great for parties – even when kids are around. ;P
Ingredients
For the dough:
1 1/2 cups (200g) all-purpose flour
1/2 cup (60g) confectioners’ sugar
0.9 oz. (25g) cornstarch
1/2 cup (120g) butter
1 medium egg
1 tsp. vanilla extract
For the decoration:
some raspberry jam
some melted chocolate
Instructions
1. Combine flour, confectioners’ sugar, and cornstarch in a bowl. Add the butter and break it into pea-sized pieces using a pastry blender*. Next, add the egg and vanilla extract, mix well, and knead until you get a smooth dough. Do not overwork the dough, though. Wrap it in plastic wrap and place in the fridge for at least 1 hour (or overnight).
2. Preheat the oven to 180°C (350°F). Line a baking sheet with baking parchment. Stir in the raspberry jam, or warm it slightly to make it easier to handle. Set aside.
3. Take the dough out of the fridge and divide it into about 15 equal pieces. Shape each piece into a small ball, flatten them slightly, and place them with some space in between on the baking sheet. Use your fingers or the end of a wooden spoon and press two small indentations for the eyes into the dough. Fill those indentations with a little jam and bake for about 10-12 minutes. Take the cookies out of the oven and let them cool down on a wire rack.
4. Melt a little chocolate for the decoration and fill it into a small piping bag. Then decorate each cookie with a mouth with seams (see pictures). Let them dry completely.
Notes
Happy Baking!
Links marked with an asterisk (*) are affiliate links (advertising/Werbung) to Amazon Germany. If you click on one of those links and buy something via this link, I will get a commission for that sale. The price of whatever you buy is not affected in any way by this.