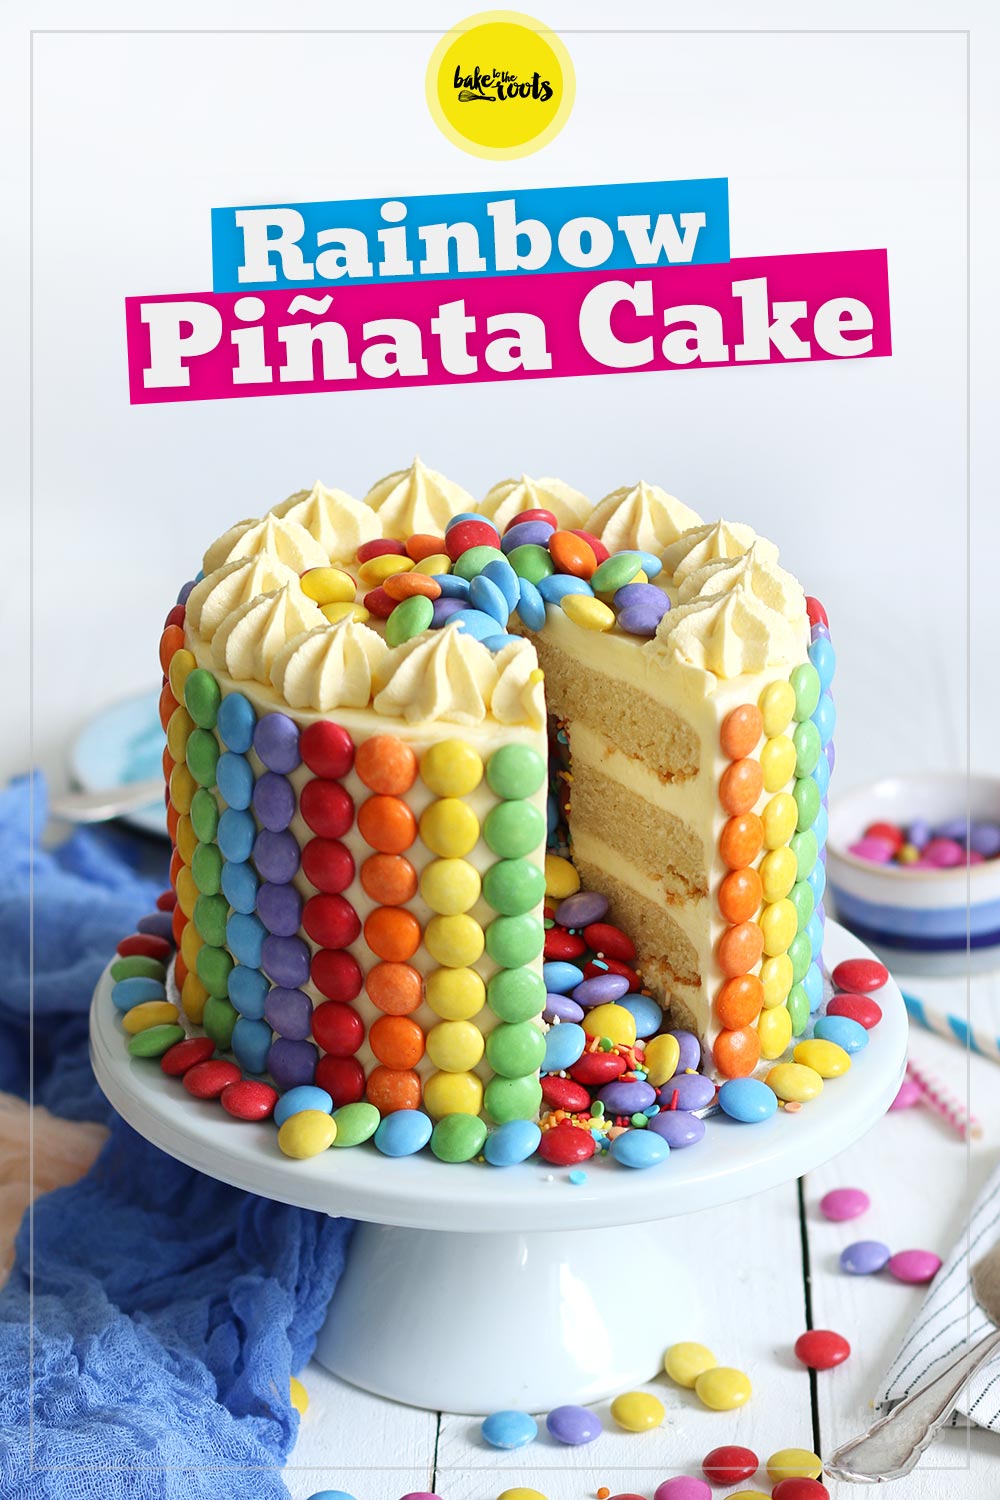
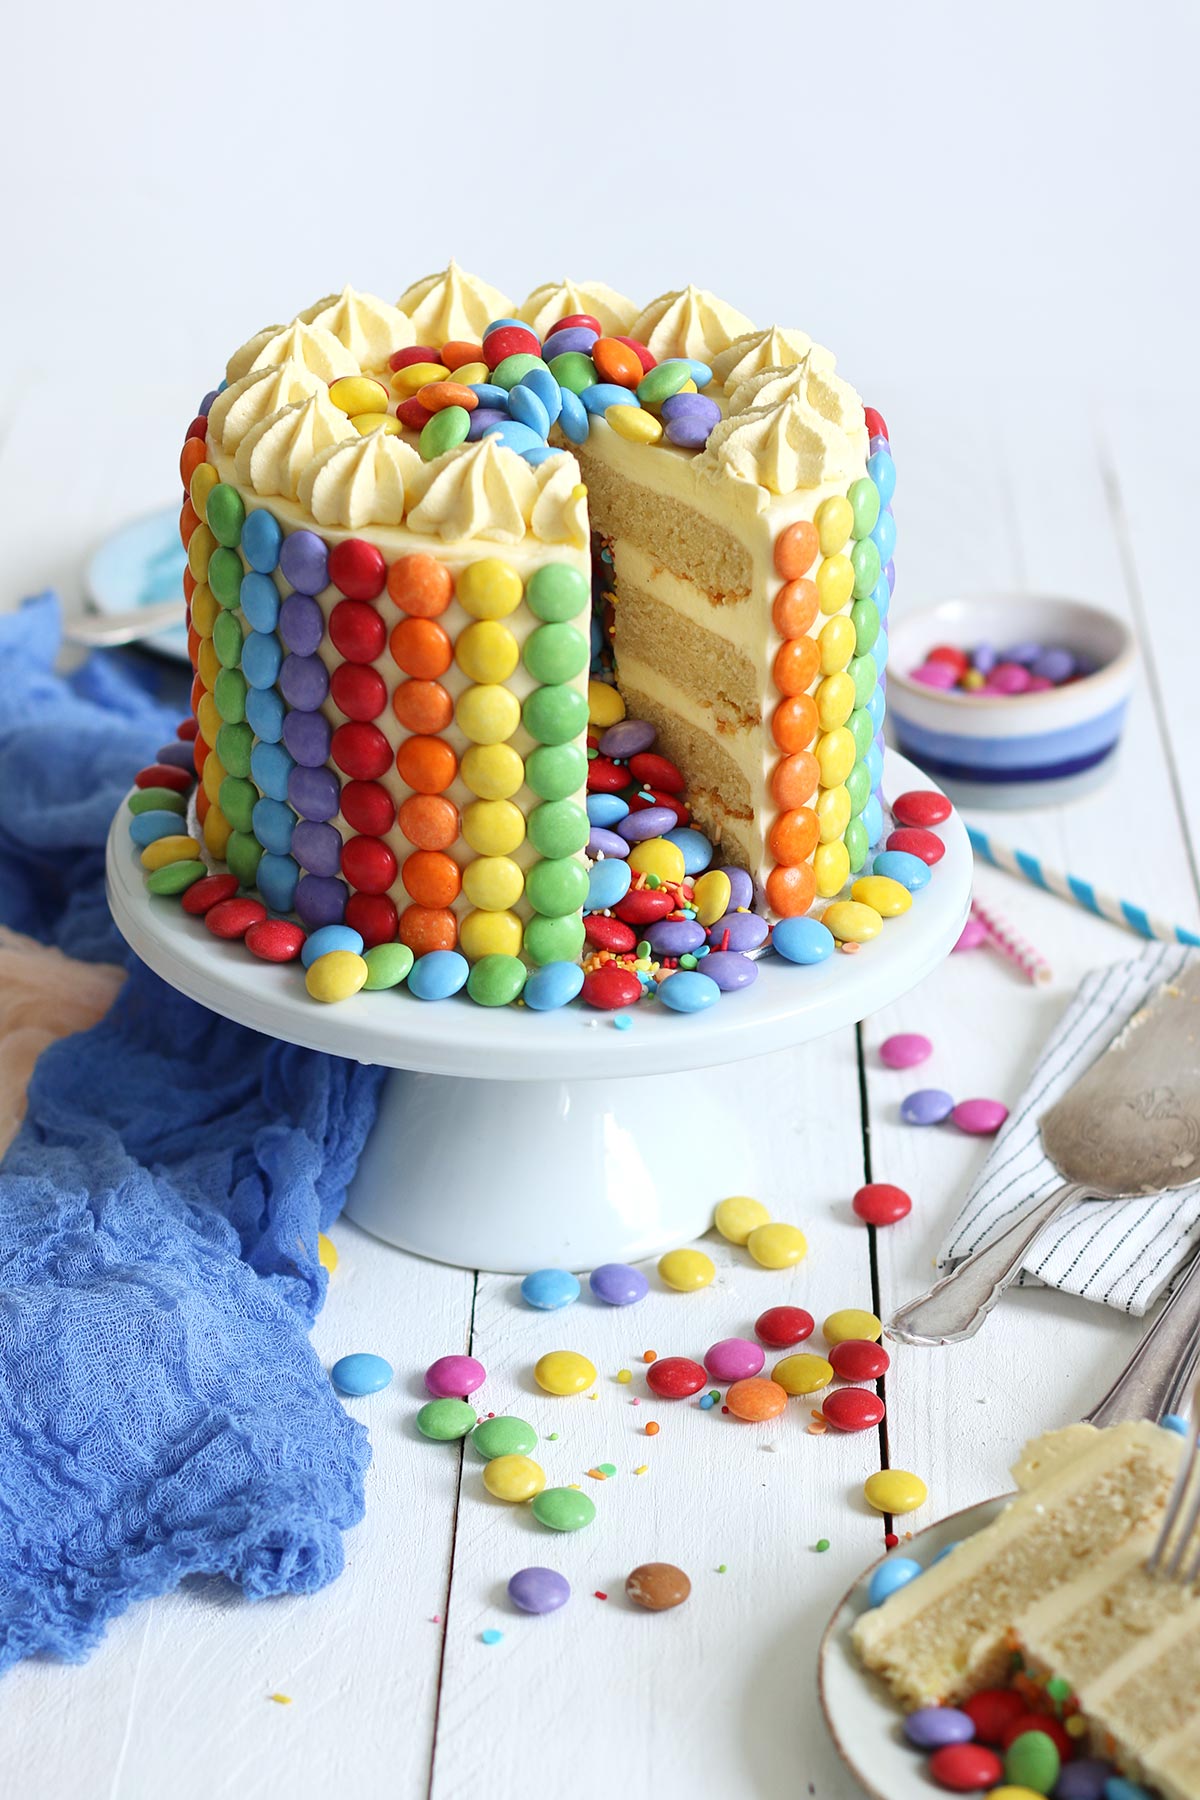
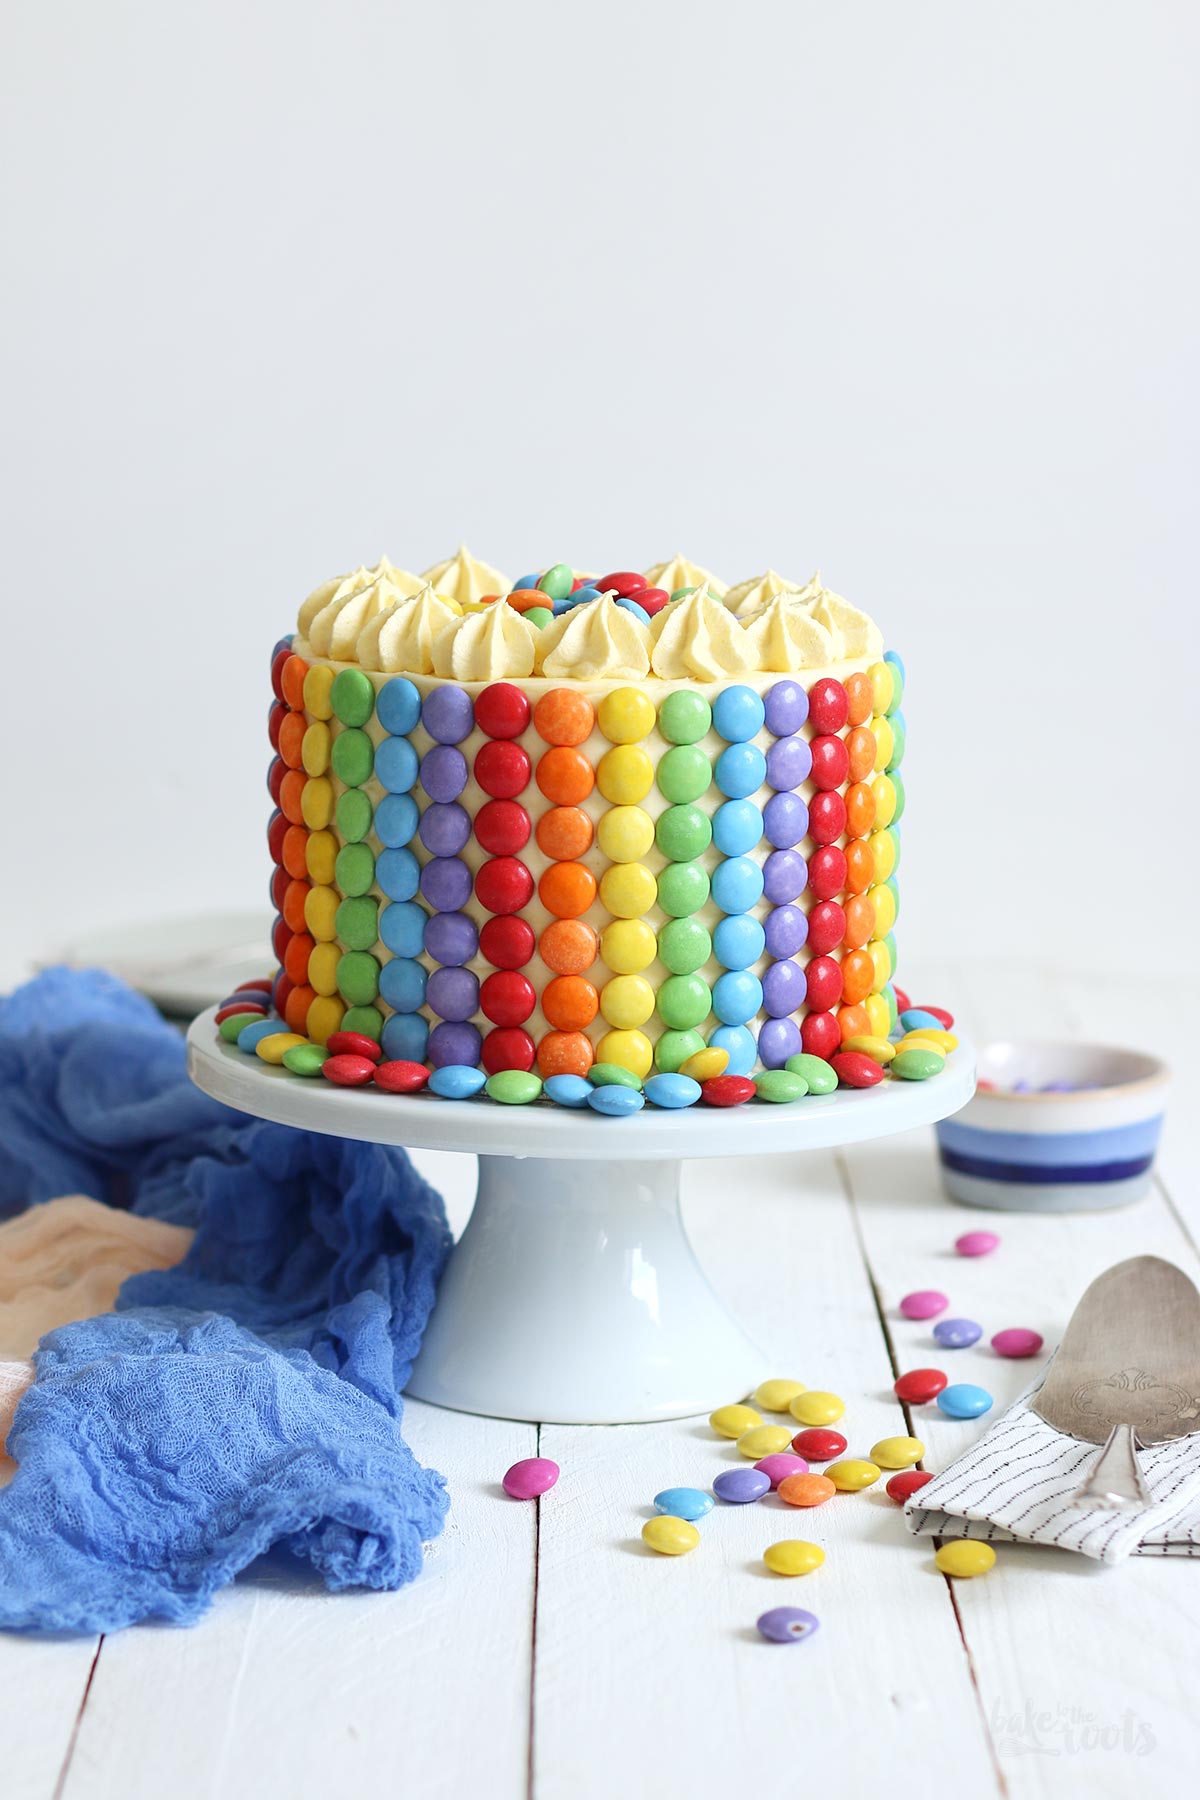
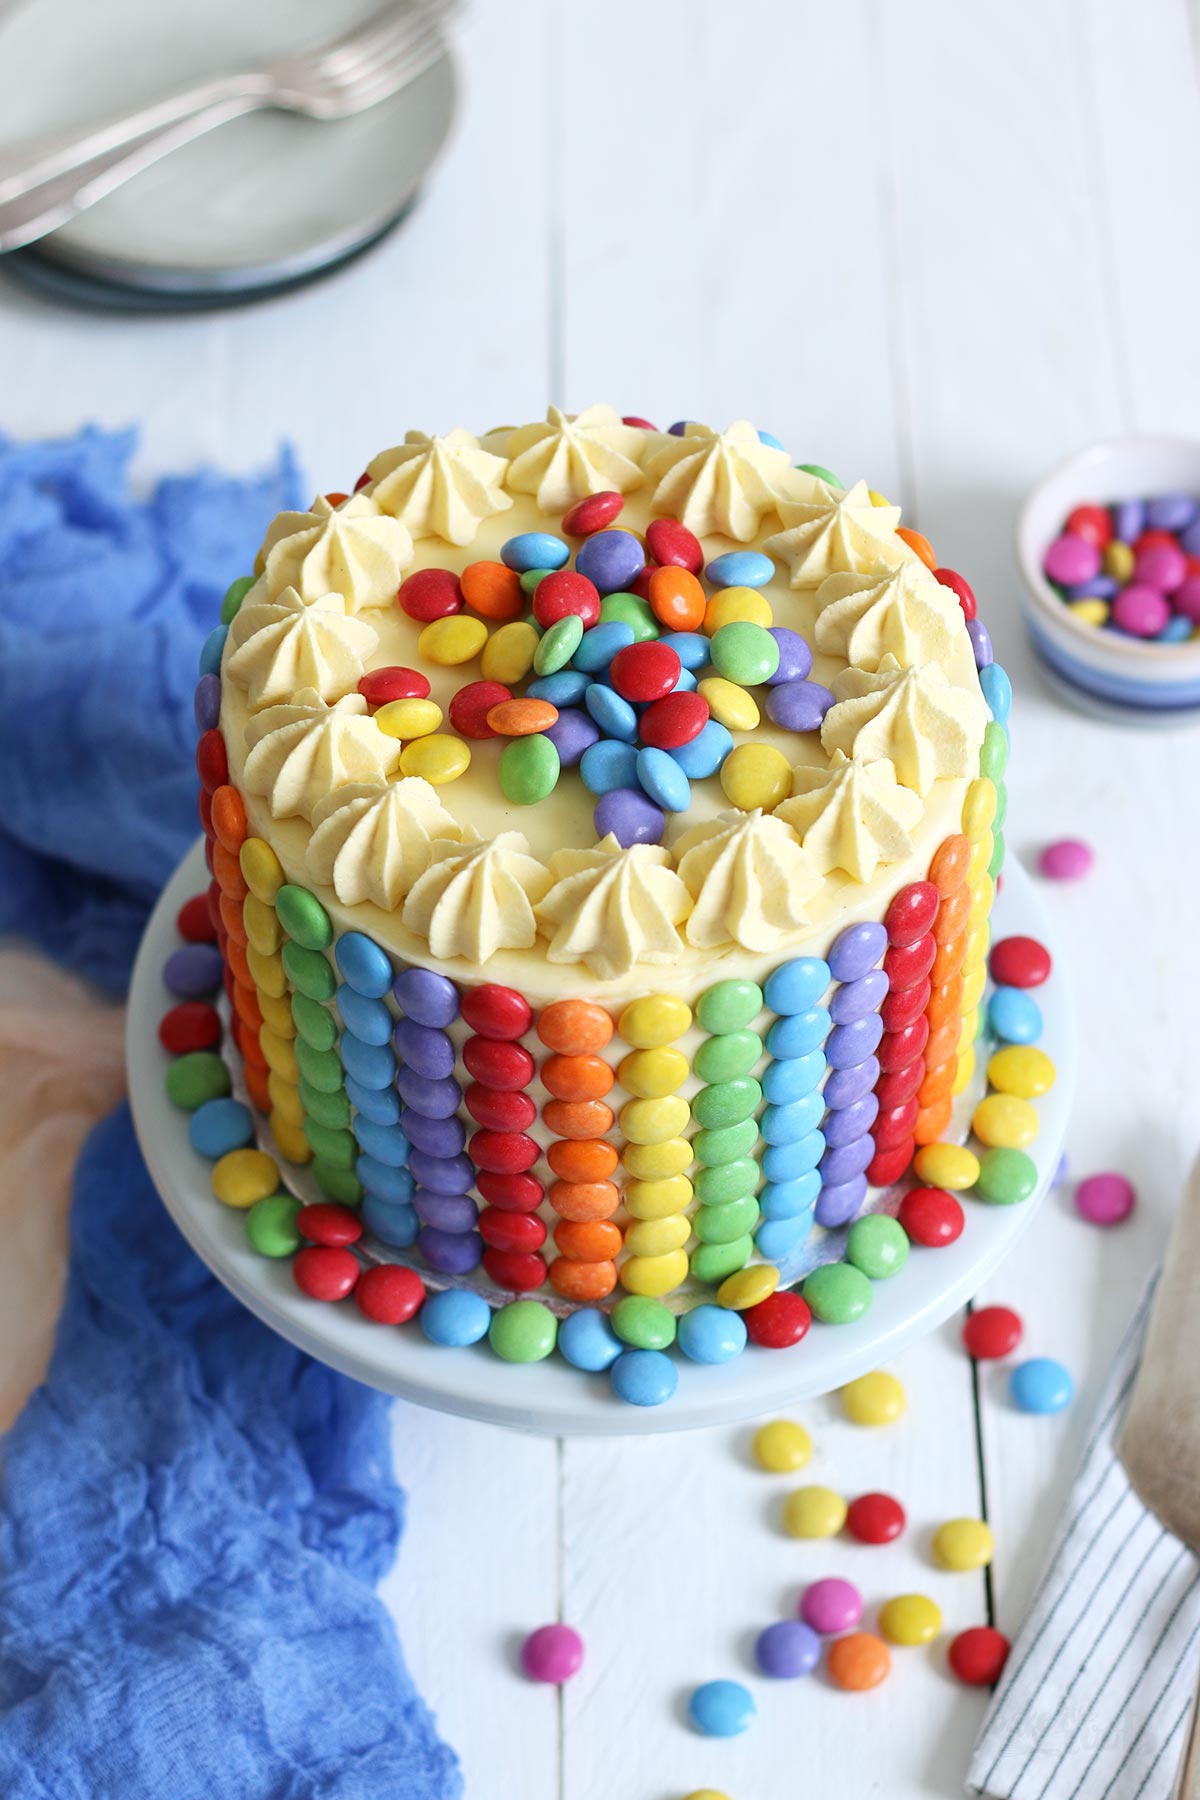
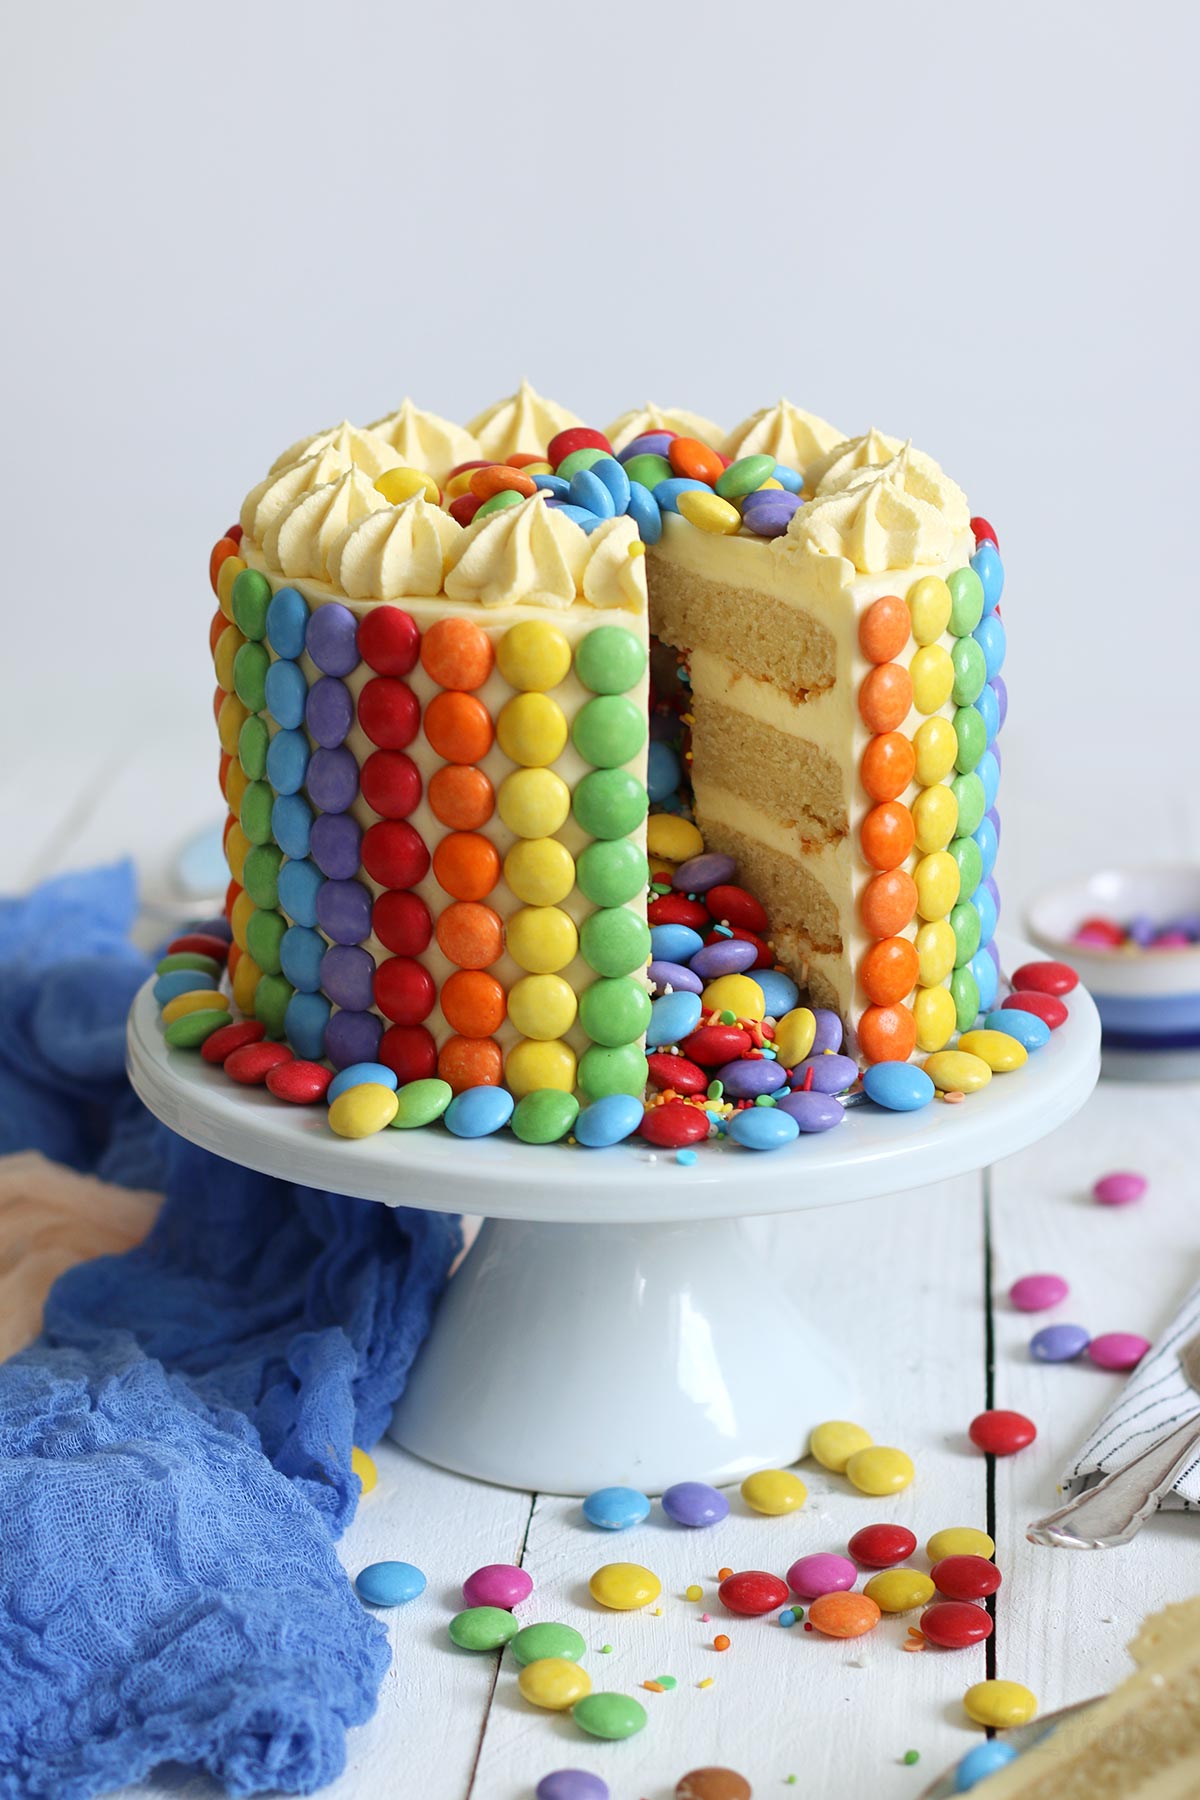
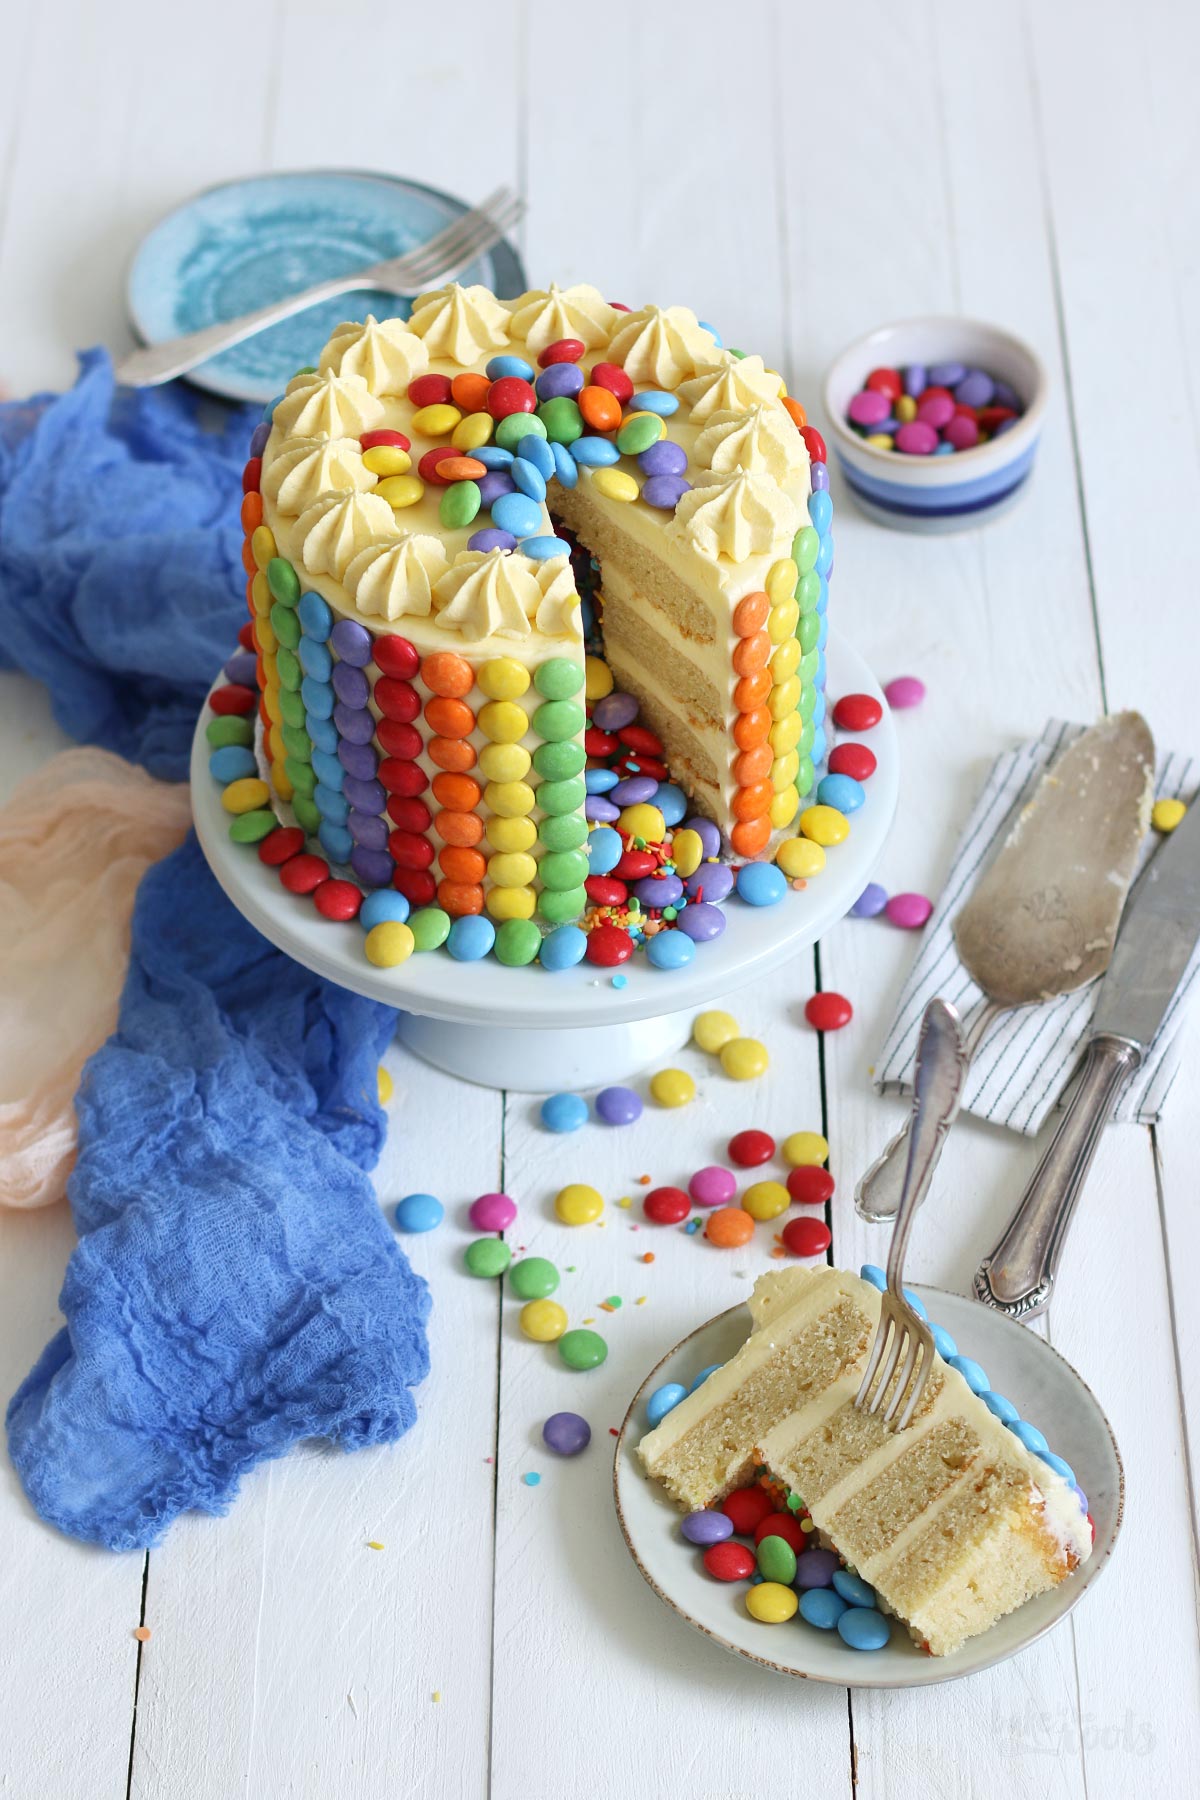
For special days and celebrations, people like to have a cake on the table. Today is one of these special days, that deserves a cake. This small Rainbow Piñata Cake. Colorful, delicious, and also coming with a message. Today is May 17th and some may know or can guess what today is all about…
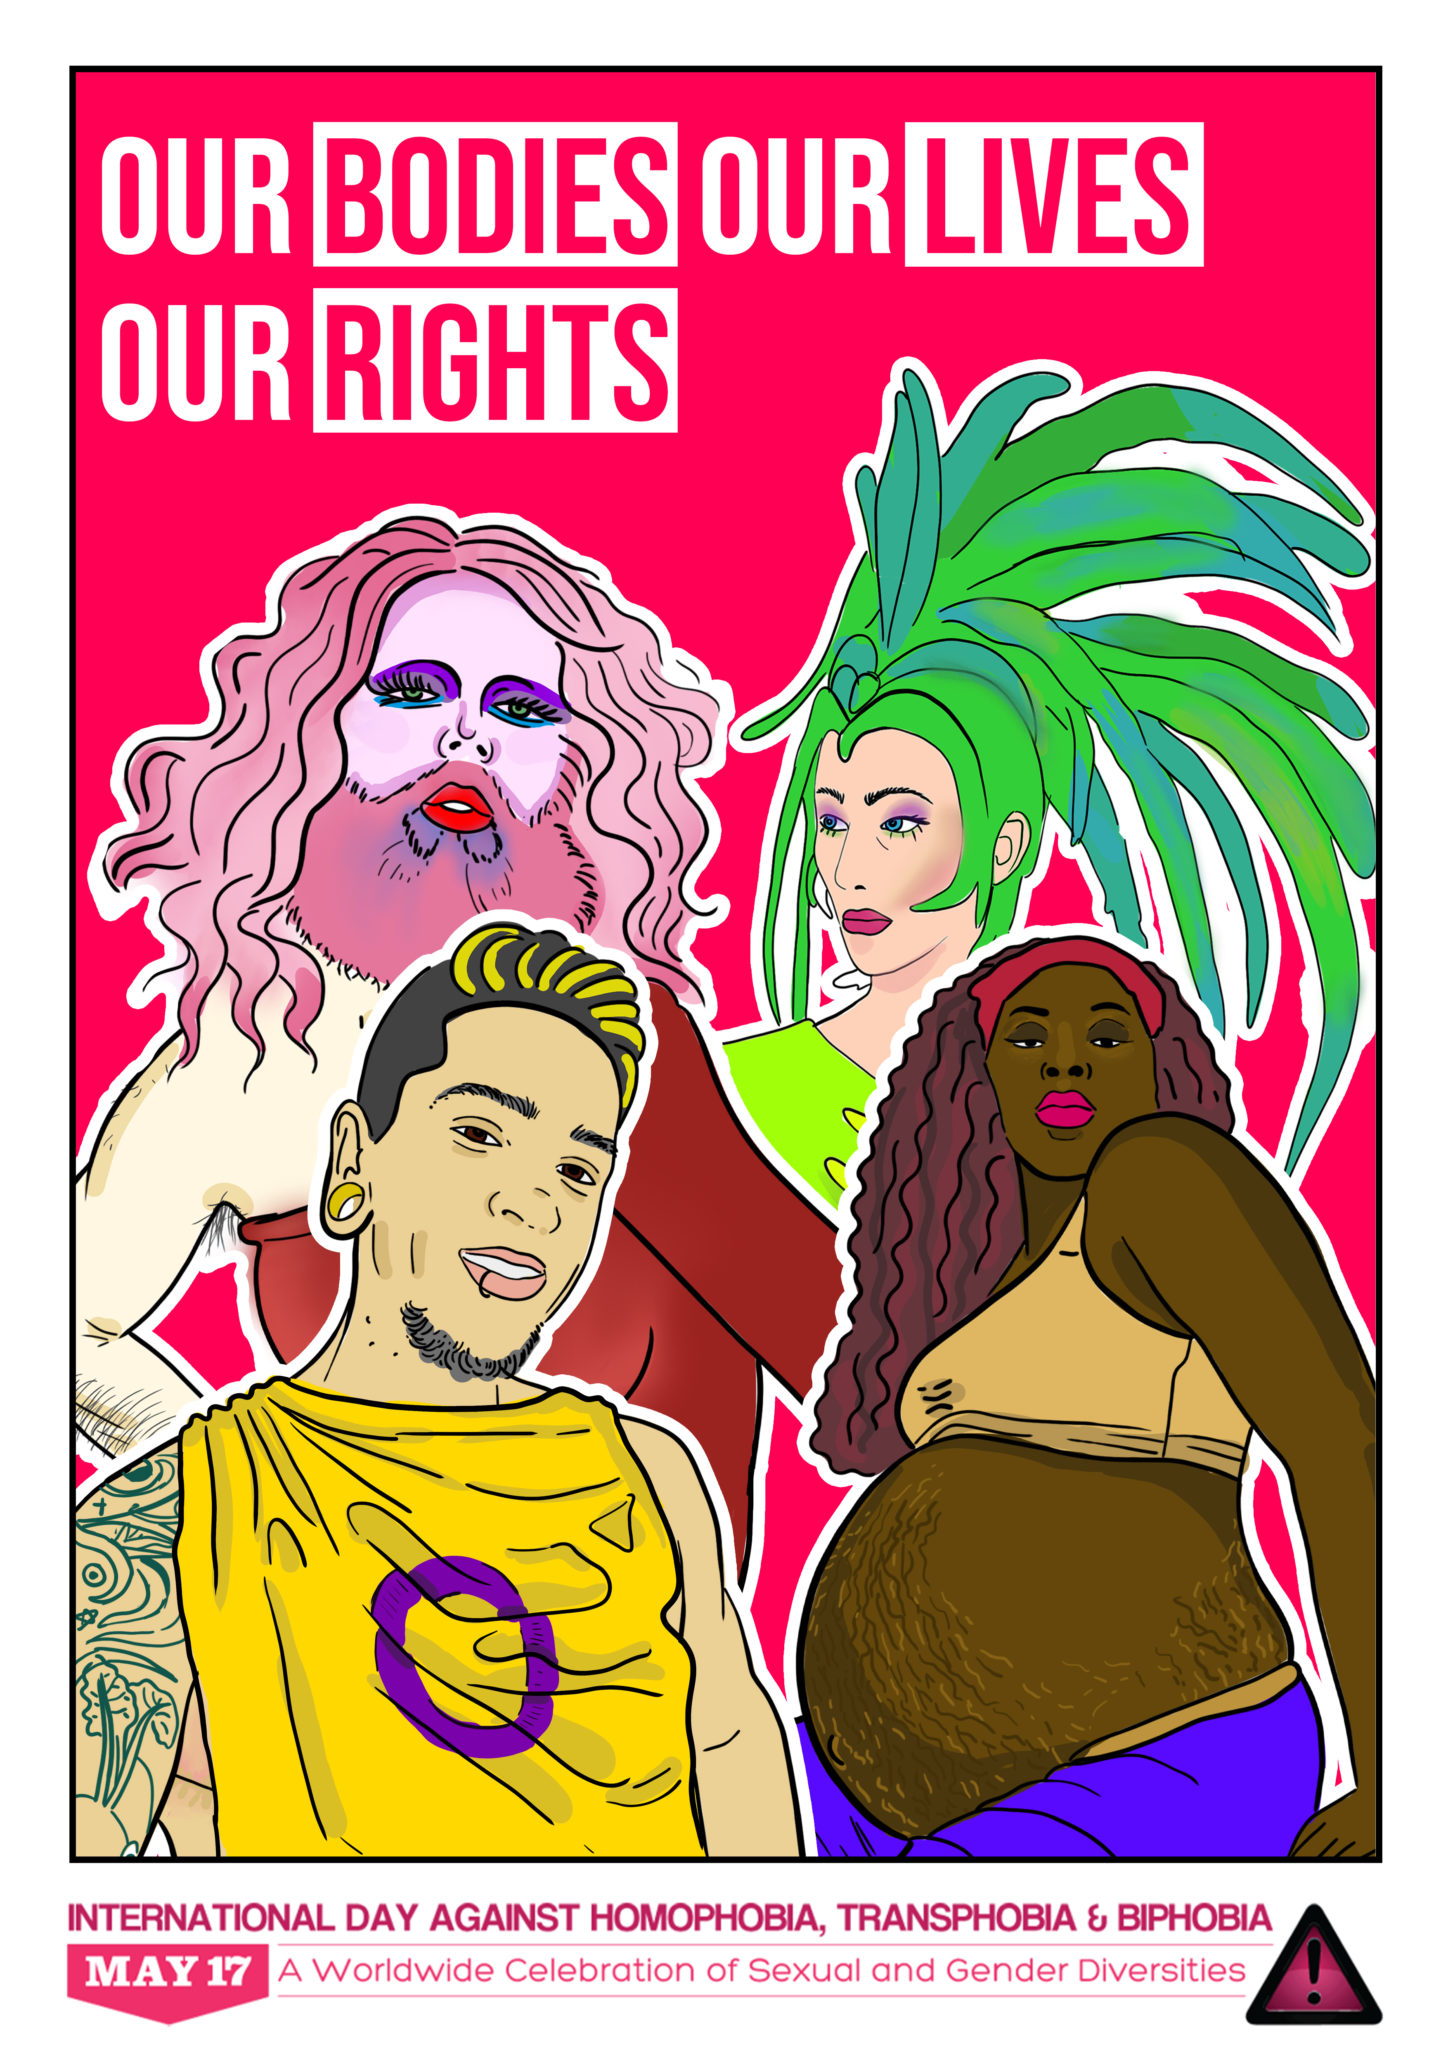
Since 2005, the International Day Against Homophobia, Biphobia, Interphobia, and Transphobia is celebrated all over the world on May 17th – a day to remember the date the World Health Organization (WHO) finally decided to remove homosexuality from its list of diseases. Also, a day to raise awareness and to draw attention to the fact that people who have a different sexual orientation or gender identity derivating from heteronormativity (more or less the complete LGBTQIA+ spectrum) are still discriminated against in many ways. I know – this all sounds a bit stiff ;) Let’s say it this way – everyone should be treated equally, everyone deserves the same opportunities, and should not be excluded socially, or economically from our society.
I myself had to deal with people who had a problem with me being different when I was a child/teenager. In case you don’t know – I am gay… just in case that wasn’t clear by now ;P
I was not the “typical” kid who liked soccer and stuff like that. I was interested in arts and graphic design and preferred to learn cooking and baking at school. None of that should make anyone feel threatened, but insults, discrimination, and even physical violence were not foreign to me when I was a teenager. When growing up you already have a lot to deal with (family, school, etc.) and having stuff like that added on top was actually quite frustrating (could not think of a better word here). A lot has changed, of course, since I was a teenager but there are still situations today that can be uncomfortable… That’s why I think it’s important to have a day like today where we draw attention to the problem. All over the world people are discriminated against because they are different and because they don’t fit the “norm”.
A lot has happened over the years already – there is public discussion about the issue and the media and many organizations are working hard to keep the discussion going. I am very happy that my collab partner PENNY (I did quite a few things with them already here on the blog) is also involved here. The cake today was actually created through an impulse from PENNY. They were asking if I could create a colorful sweet treat to support the International Day Against Homophobia, Biphobia, Interphobia, and Transphobia.
If you’re not familiar with the whole topic but want to know more, you’ll find plenty of material on the Internet to get you started. Just google “IDAHOBIT” or “IDAHOTB.” There are many national and international organizations you can support – maybe that is an option for you too. Feel free to take one of my cake pictures here and post it online to show your support. Any kind of support would be great ;)
About that cake… well, you should definitely make it. No matter if you want to send a message with it or not. Cakes are always something positive ;)
The rainbow colors I used here for the decoration have been associated with Christopher Street Day (Pride) for many years. I guess everyone has seen a pride flag by now ;) More recently flags with some additional colors are being used to show support for the LGBTQIA+ community. Today the rainbow has some additional pink, light blue, white, brown, and black to represent the whole community. Just in case you wanted to know ;P
INGREDIENTS / ZUTATEN
3 cups (390g) all-purpose flour
1 cup (200g) sugar
1 1/4 tsp. baking powder
1/2 tsp. salt
2 large eggs, at room temperature
1 cup (240ml) buttermilk, at room temperature
3/4 cup (170g) butter, melted & cooled
1/2 cup (120ml) vegetable oil
1 tsp. vanilla bean paste
For the buttercream:
4 large egg whites
1 cup (200g) sugar
1/8 tsp. salt
1 1/4 cups (300g) butter, at room temperature
1 tsp. vanilla bean paste
1 1/2 cups (200g) confectioners’ sugar
rainbow smarties
rainbow sprinkles (optional)
390g Mehl (Type 405)
200g Zucker
1 1/4 TL Backpulver
1/2 TL Salz
2 Eier (L), Zimmertemperatur
240ml Buttermilch, Zimmertemperatur
170g Butter, geschmolzen & abgekühlt
120ml Pflanzenöl
1 TL Vanillepaste
Für die Buttercreme:
4 Eiweiß (L)
200g Zucker
1/8 TL Salz
300g weiche Butter
1 TL Vanillepaste
200g Puderzucker
Bunte Smarties
Bunte Zuckerstreusel (optional)
DIRECTIONS / ZUBEREITUNG
2. Add the flour, sugar, baking soda, and salt to a large bowl and mix until well combined. In a second bowl mix the eggs with buttermilk, melted butter, oil, and vanilla bean paste until well combined. Add the wet ingredients to the bowl with dry ingredients and mix until well combined. Divide the batter between the prepared baking tins, smooth out the top, and bake for about 27-30 minutes or until a toothpick inserted into the center of the cakes comes out clean. Take out of the oven and remove the cakes immediately from the tins and let cool down on a wire rack.
Note: You can bake the cakes a day in advance, wrap them with some plastic wrap when cooled and leave them on the counter until you continue with the cake.
3. For the buttercream add the egg whites, sugar, and salt to the bowl of your kitchen machine (with heating function) or place it on a pot with simmering water – the water should not touch the bowl in this case! Mix until the sugar has dissolved completely and the mixture has reached a temperature of 160°F (71°C). It’s best to use a kitchen thermometer here to check the temperature. Once the temperature is reached, turn off the heating function or remove the bowl from the stove and transfer the mixture to the bowl of a stand mixer. Whisk on high for about 5-8 minutes until stiff peaks form and the mixture has cooled down to room temperature, more or less.
4. Gradually add the soft butter (about a tablespoon at a time) and mix well – only add more butter when the butter you just added has disappeared. Add the vanilla bean paste and confectioners’ sugar and mix in slowly, then mix on high for another 5-6 minutes until you got a very soft and silky buttercream.
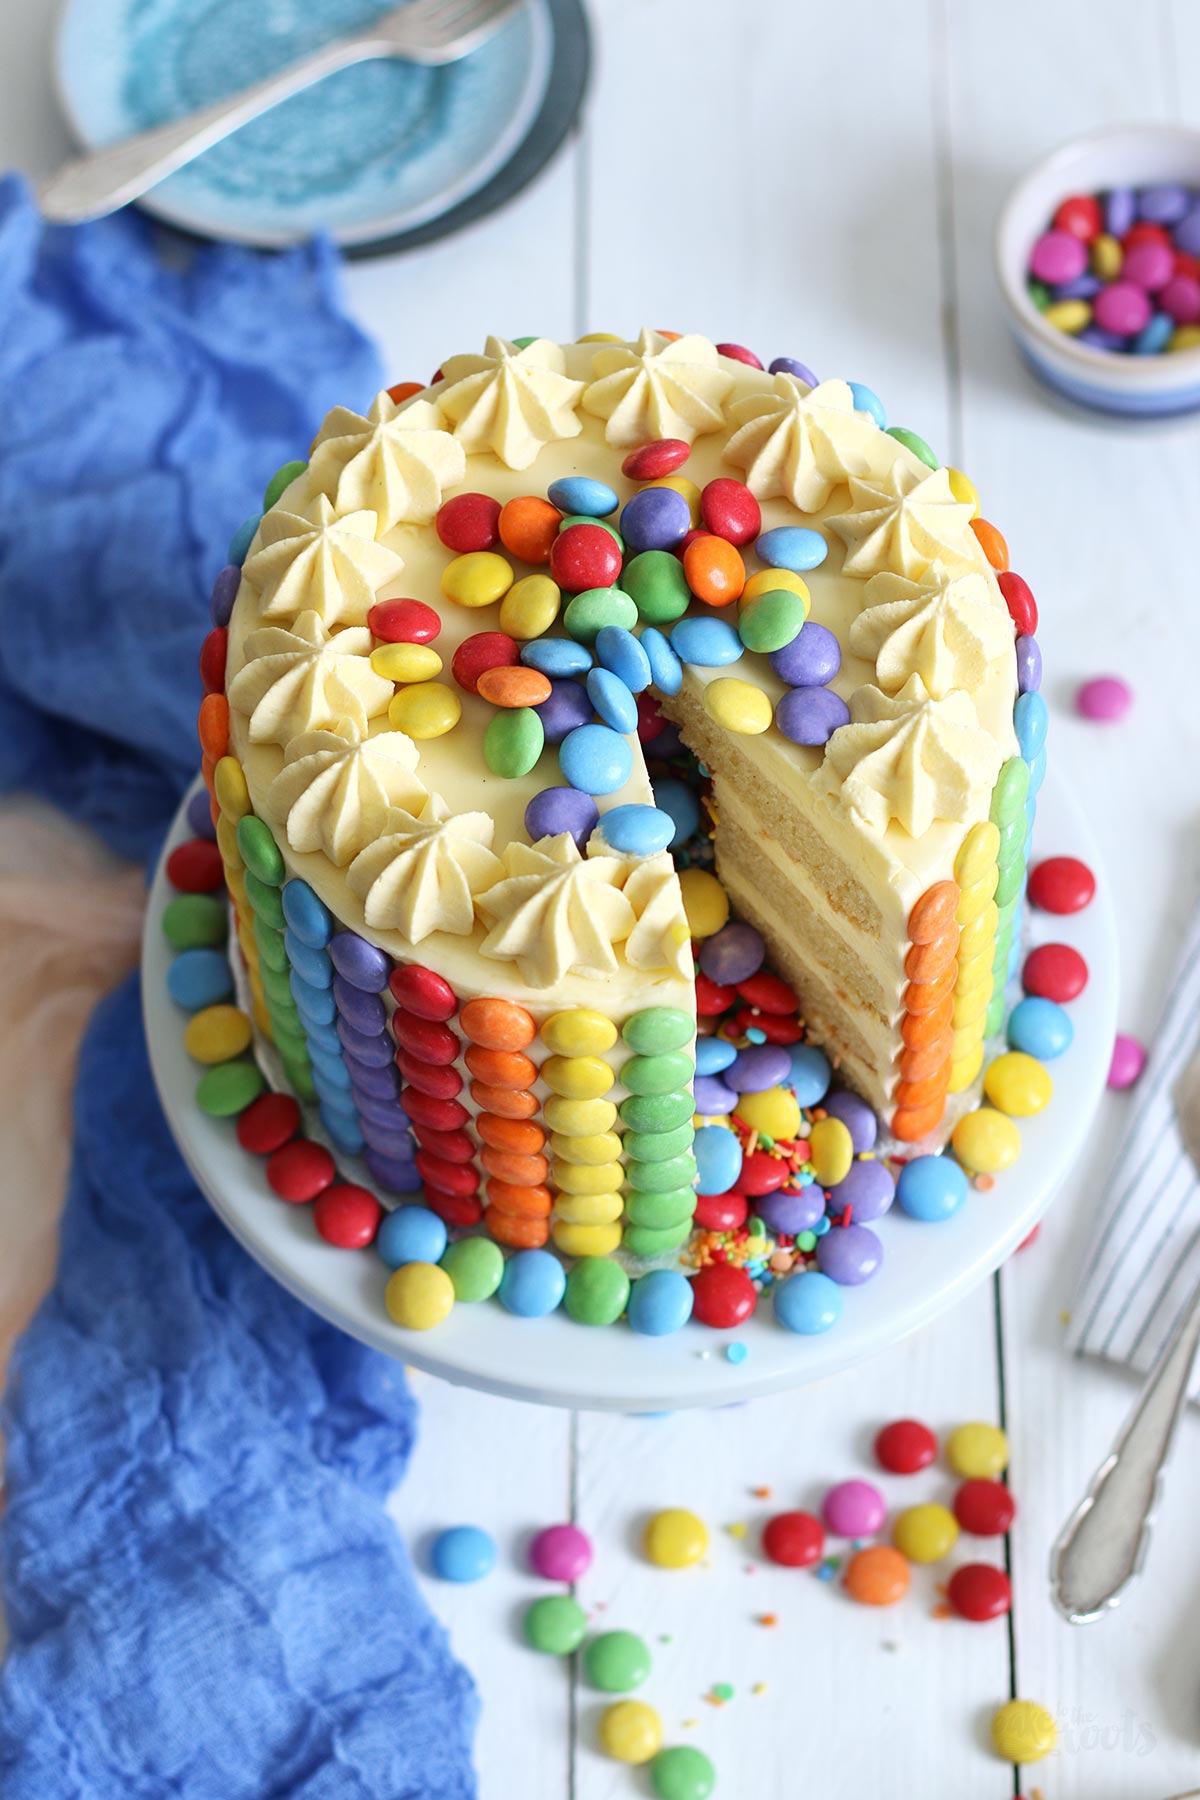
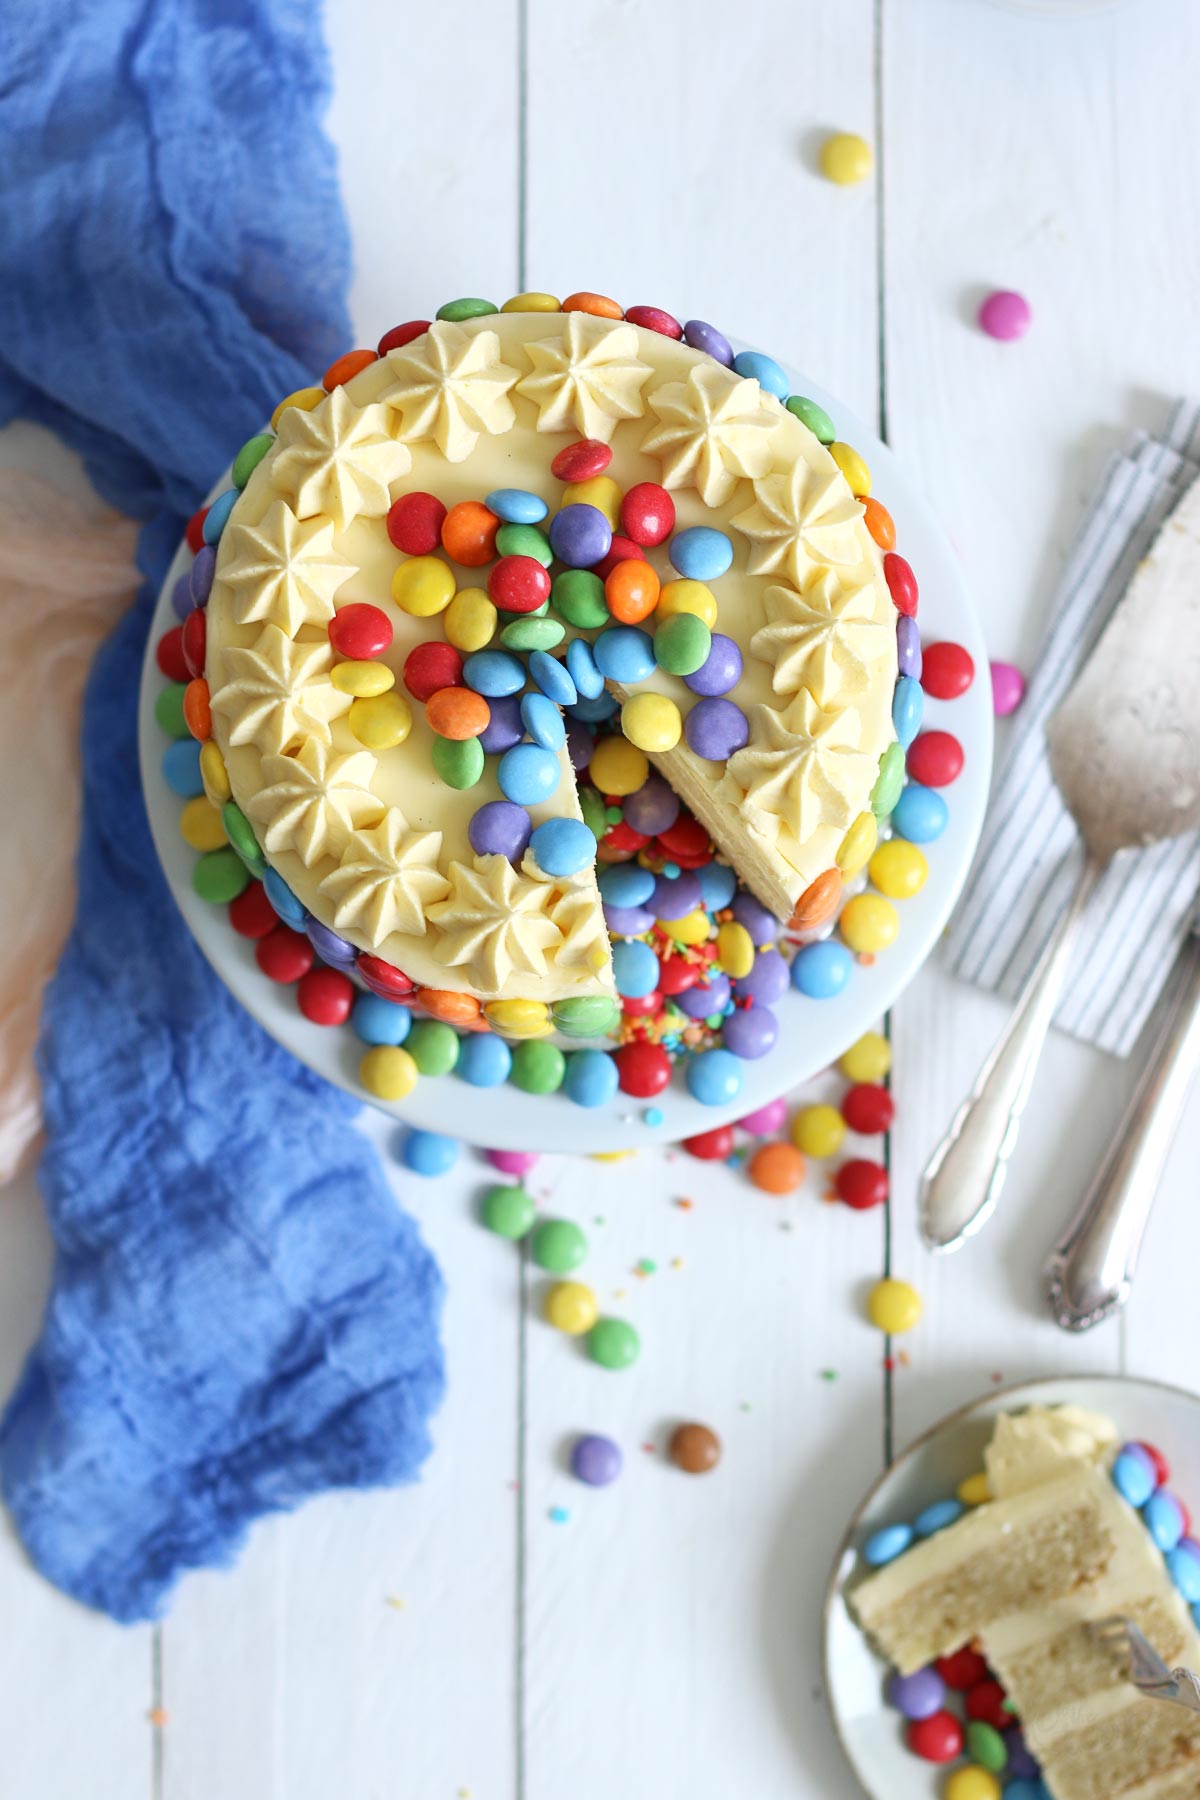
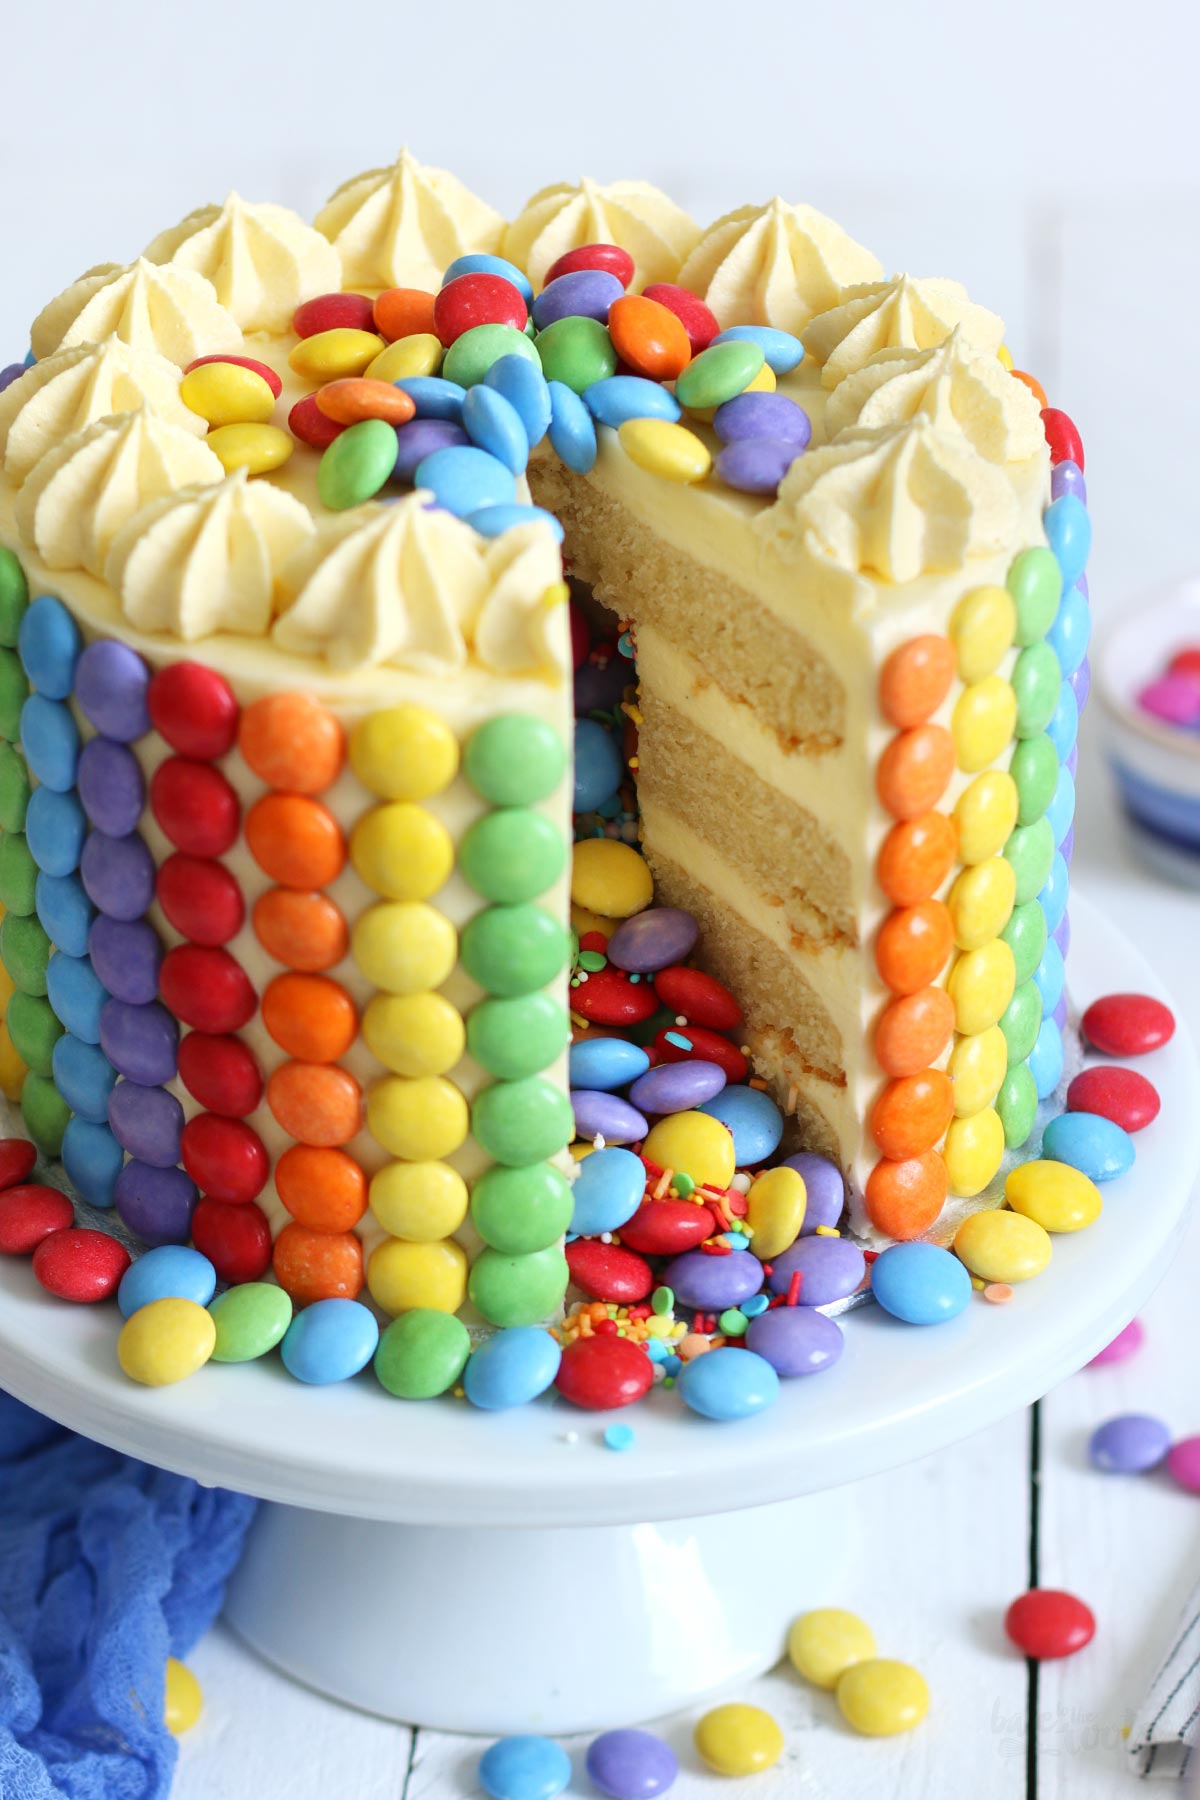
5. To assemble the cake, first straighten the cake layers, if they are domed, then cut out a hole in the center of three of the cake layers with a round cookie cutter (about 1.5-2 inches in diameter) – this is where the filling will go in later. Place the first cake layer (with hole) on a serving plate and spread some buttercream on top. Place the next cake layer (with hole) and repeat the process, same with the third cake layer. Fill the cavity in the center with smarties and rainbow sprinkles (optional), then place the last cake layer (without a hole) on top to close the filled space. Spread a thin layer of buttercream over the entire cake (doesn’t have to look super clean) and place it in the fridge for about 20-30 minutes.
6. Apply another layer of buttercream – try to make it look smooth – and decorate with the rainbow smarties to create a rainbow pattern. If you have some buttercream left, you can also pipe little swirls on top of the cake as decoration. Store in the refrigerator until ready to serve.
2. Mehl, Zucker, Backpulver und Salz in eine große Schüssel geben und vermischen. In einer zweiten Schüssel die Eier mit Buttermilch, geschmolzener Butter, Öl und Vanillepaste verrühren, bis alles gut vermischt ist. Diese Mischung in die Schüssel mit den trockenen Zutaten geben und gut verrühren. Den Teig auf die vorbereiteten Backformen verteilen und glatt streichen. Für etwa 27-30 Minuten backen – mit einem Zahnstocher testen, ob noch Teig kleben bleibt und die Kuchen erst herausholen, wenn dieser sauber herauskommt. Aus dem Ofen nehmen, sofort aus den Formen lösen und auf einem Kuchengitter abkühlen lassen.
Tipp: Man kann die Kuchen einen Tag vorab backen und dann in Klarsichtfolie einschlagen, damit sie nicht austrocknen.
3. Für die Buttercreme das Eiweiß, Zucker und Salz in eine große Schüssel geben und in der Küchenmaschine mit Heizelement oder über einem Topf mit köchelndem Wasser verrühren – die Schüssel sollte in dem Fall das Wasser nicht berühren! Die Masse so lange rühren, bis sie eine Temperatur von 71°C (160°F) erreicht hat und sich der Zucker komplett aufgelöst hat. Sobald die Temperatur erreicht wurde das Heizelement ausschalten bzw. die Schüssel vom Herd nehmen und die Mischung in die Schüssel einer Küchenmaschine umfüllen. Die Mischung für etwa 5-8 Minuten aufschlagen, bis das Eiweiß steif ist und in etwa Raumtemperatur erreicht hat.
4. Die weiche Butter nach und nach hinzufügen (jeweils etwa einen Esslöffel) und gut unterrühren. Vanillepaste und Puderzucker dazugeben und erst langsam, dann auf höchster Stufe weitere 5-6 Minuten aufschlagen, bis eine helle und cremige Masse entstanden ist.
5. Für den Zusammenbau der Torte die Kuchenschichten erst einmal begradigen, falls sie zu sehr gewölbt sind, dann in drei der Böden mit einem runden Ausstecher (etwa 4-5cm Durchmesser) in der Mitte ein Loch ausstechen – hier kommt später die Füllung rein. Den ersten Tortenboden (mit Loch) auf eine Servierplatte legen und etwas Buttercreme darauf verstreichen. Den nächsten Tortenboden (mit Loch) auflegen und noch einmal mit Buttercreme bestreichen, mit der dritten Kuchenschicht wiederholen. Den Hohlraum in der Mitte mit Smarties und bunten Zuckerstreuseln (optional) befüllen, dann den letzten Tortenboden (ohne Loch) auflegen und damit die Öffnung verschließen. Die komplette Torte mit einer dünnen Schicht Buttercreme einstreichen (muss nicht super sauber aussehen). Für etwa 20-30 Minuten in den Kühlschrank stellen.
6. Eine weitere Schicht Buttercreme auftragen, diesmal etwas sauberer Arbeiten und dann mit bunten Smarties abwechselnd in Regenbogenfarben dekorieren. Wer noch etwas Buttercreme übrig hat, kann auch noch Tupfen auf die Torte oben aufspritzen als Dekoration. Bis zum Servieren im Kühlschrank aufbewahren.
Craving more? Keep in touch on Facebook, Twitter, Instagram and Pinterest for new post updates and more. You can also contact me with any questions or inquiries!
Here is a version of the recipe you can print easily.
Print
Rainbow Piñata Cake
- Prep Time: 00:45
- Cook Time: 00:30
- Total Time: 04:00
- Yield: 1 1x
- Category: Cakes
- Cuisine: America
- Diet: Vegetarian
Description
If you want to celebrate something, you need cake. A colorful and fun cake. A Rainbow Piñata Cake like this one here. With a little surprise ;)
Ingredients
For the cake layers:
3 cups (390g) all-purpose flour
1 cup (200g) sugar
1 1/4 tsp. baking powder
1/2 tsp. salt
2 large eggs, at room temperature
1 cup (240ml) buttermilk, at room temperature
3/4 cup (170g) butter, melted & cooled
1/2 cup (120ml) vegetable oil
1 tsp. vanilla bean paste
For the buttercream:
4 large egg whites
1 cup (200g) sugar
1/8 tsp. salt
1 1/4 cups (300g) butter, at room temperature
1 tsp. vanilla bean paste
1 1/2 cups (200g) confectioners’ sugar
rainbow smarties
rainbow sprinkles (optional)
Instructions
1. Preheat the oven to 350°F (180°C). Lightly grease four 6 inches (15cm) baking tins (I used silicone molds) and set aside. Make sure your ingredients are all at room temperature. Melt the butter and let cool down a bit.
2. Add the flour, sugar, baking soda, and salt to a large bowl and mix until well combined. In a second bowl mix the eggs with buttermilk, melted butter, oil, and vanilla bean paste until well combined. Add the wet ingredients to the bowl with dry ingredients and mix until well combined. Divide the batter between the prepared baking tins, smooth out the top, and bake for about 27-30 minutes or until a toothpick inserted into the center of the cakes comes out clean. Take out of the oven and remove the cakes immediately from the tins and let cool down on a wire rack.
Note: You can bake the cakes a day in advance, wrap them with some plastic wrap when cooled and leave them on the counter until you continue with the cake.
3. For the buttercream add the egg whites, sugar, and salt to the bowl of your kitchen machine (with heating function) or place it on a pot with simmering water – the water should not touch the bowl in this case! Mix until the sugar has dissolved completely and the mixture has reached a temperature of 160°F (71°C). It’s best to use a kitchen thermometer here to check the temperature. Once the temperature is reached, turn off the heating function or remove the bowl from the stove and transfer the mixture to the bowl of a stand mixer. Whisk on high for about 5-8 minutes until stiff peaks form and the mixture has cooled down to room temperature, more or less.
4. Gradually add the soft butter (about a tablespoon at a time) and mix well – only add more butter when the butter you just added has disappeared. Add the vanilla bean paste and confectioners’ sugar and mix in slowly, then mix on high for another 5-6 minutes until you got a very soft and silky buttercream.
5. To assemble the cake, first straighten the cake layers, if they are domed, then cut out a hole in the center of three of the cake layers with a round cookie cutter (about 1.5-2 inches in diameter) – this is where the filling will go in later. Place the first cake layer (with hole) on a serving plate and spread some buttercream on top. Place the next cake layer (with hole) and repeat the process, same with the third cake layer. Fill the cavity in the center with smarties and rainbow sprinkles (optional), then place the last cake layer (without a hole) on top to close the filled space. Spread a thin layer of buttercream over the entire cake (doesn’t have to look super clean) and place it in the fridge for about 20-30 minutes.
6. Apply another layer of buttercream – try to make it look smooth – and decorate with the rainbow smarties to create a rainbow pattern. If you have some buttercream left, you can also pipe little swirls on top of the cake as decoration. Store in the refrigerator until ready to serve.
Notes
Enjoy baking!
*I have partnered with PENNY Markt GmbH (Domstraße 20, 50668 Köln) to bring you this delicious recipe. That’s why I have to declare this here in Germany as Advertising. All I wrote in this article is still based on my own opinion and has not been affected by anybody.