I can’t believe it… it’s been five years already since Andrea from Zimtkeks & Apfeltarte and I started our »Bake Together – The Baking Surprise«. Five whole years! Quite a long time, isn’t it? Every month a new recipe, sometimes even an entire week of recipes where we surprise each other. We’ve done quite a lot already… and there is more coming soon! Well… let’s celebrate today with this »tiny little« Rainbow Cake. I needed something colorful to put that candle on top.
Five years. Five years of what exactly some might ask. Well… my favorite food blogger colleague Andrea and I know each other for quite some time already and at some point, we noticed that we published similar recipes at the same time – several times. Could have been a coincidence or a special connection in the universe… who knows?! Some day we decided we could turn these »coincidences« into a little event for our readers. Well – that was the moment »Bake Together – The Baking Surprise« was born.
If you are keen to know more about the first post we did, take a look at the recipe for this Strawberry Ombre Cheesecake. That was our first topic – strawberry & cheesecake – and with that all started. Andrea made this delicious cake that day (article only in German). We were not really close that day, which means the recipes were quite different – even though the topic could have led to more similar recipes… well.
If you want to check out what we’ve already done, you can also check my »Bake Together« category with all the recipes that have been published so far. Well… the ones from my blog at least. Double that and you have all the recipes we did… but for Andrea’s recipes, you have to check her blog.
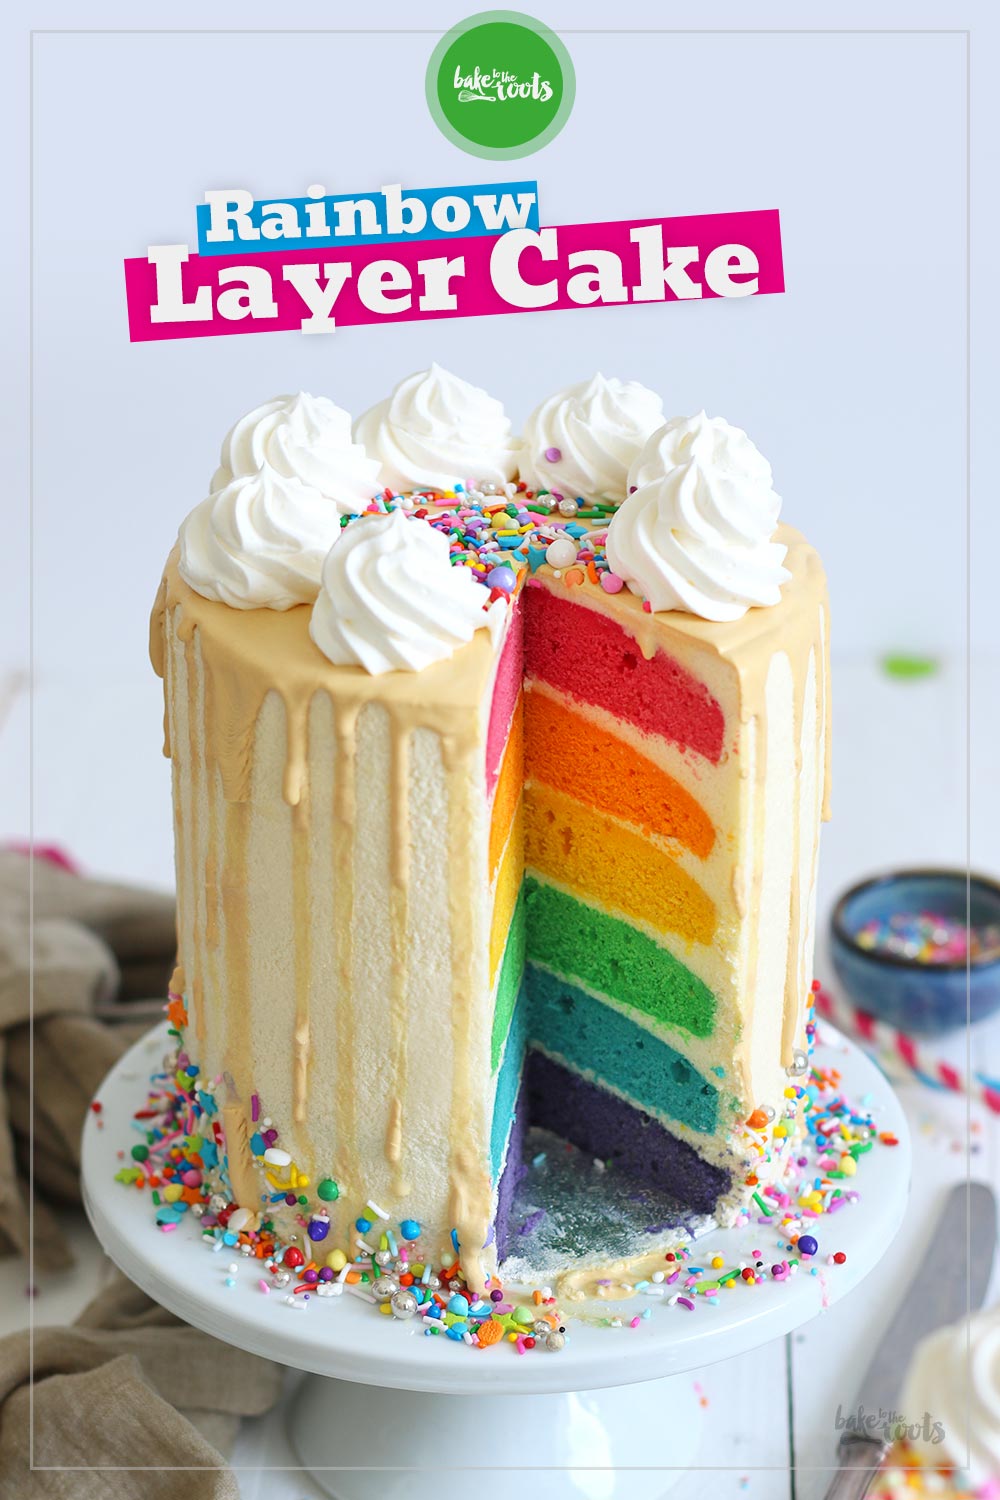
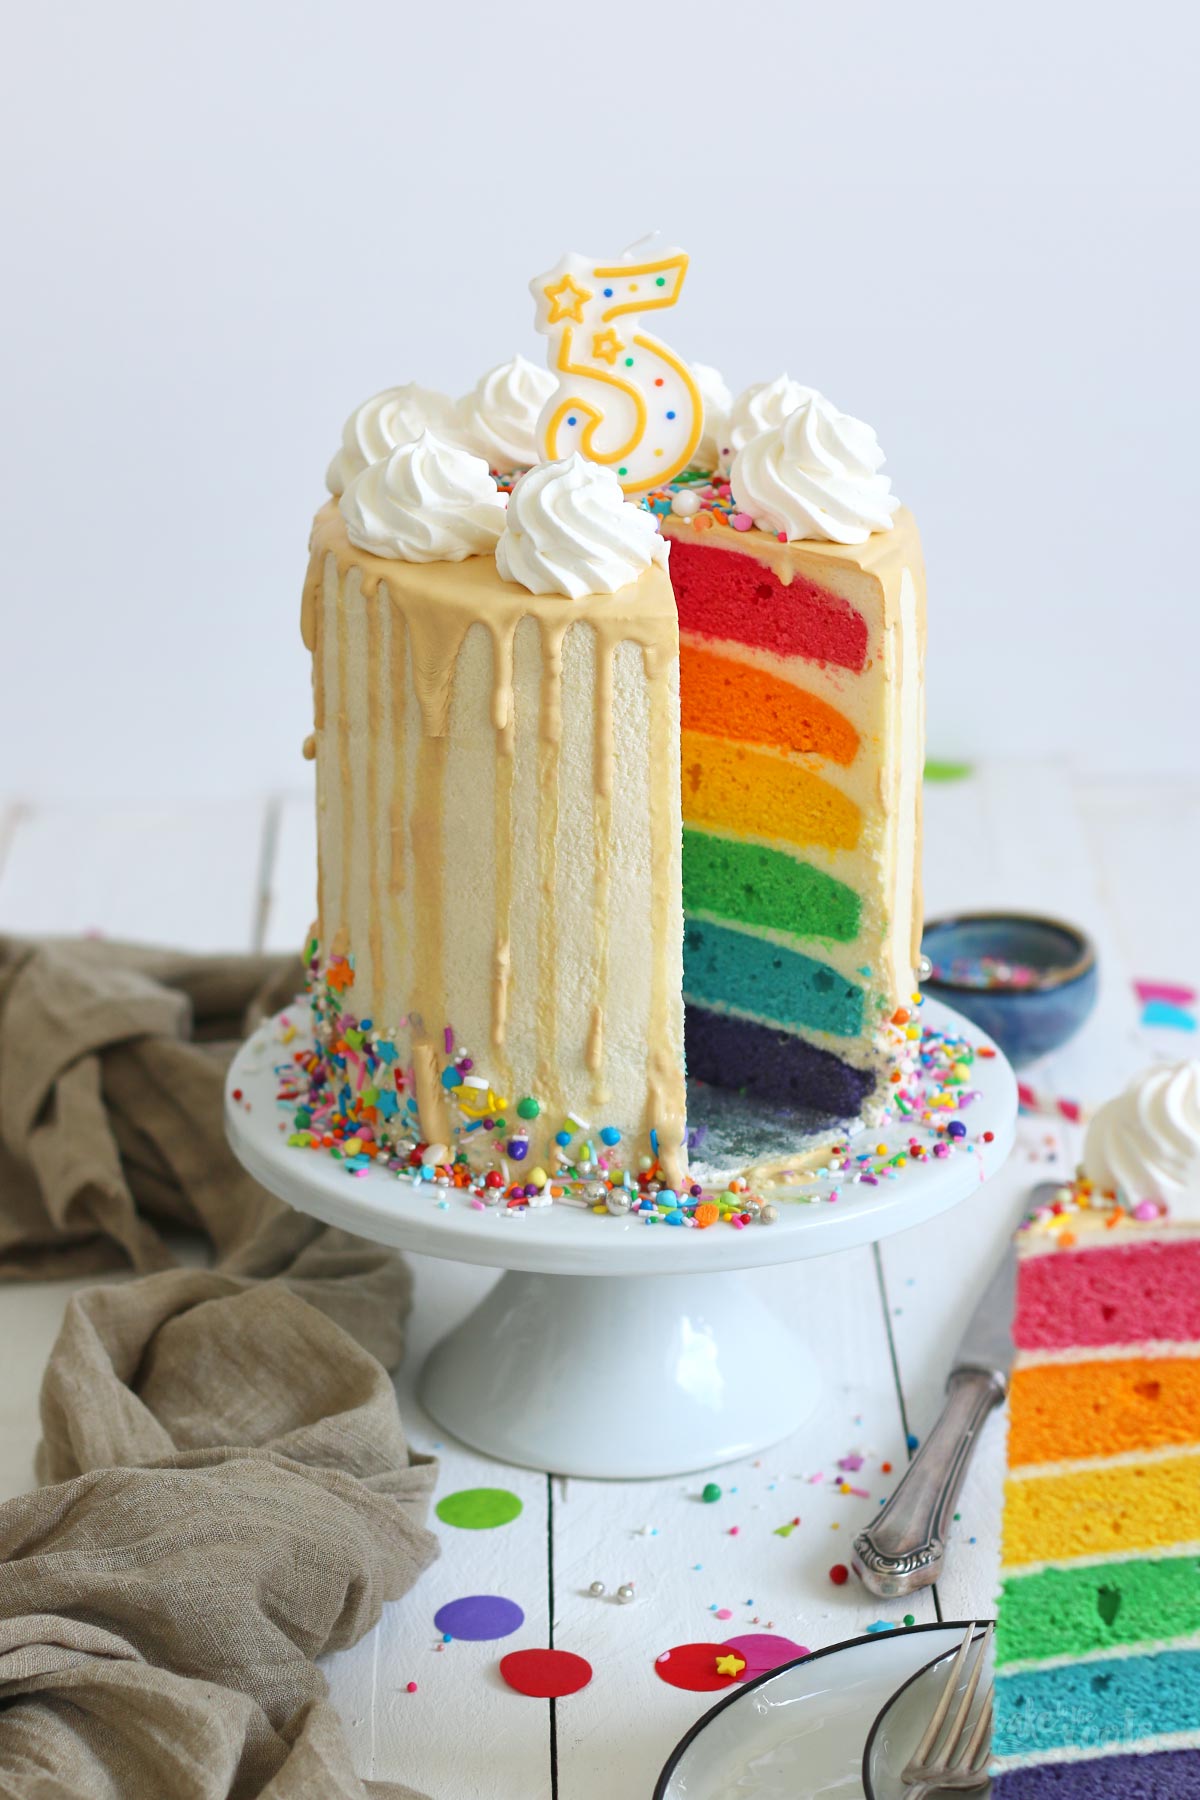
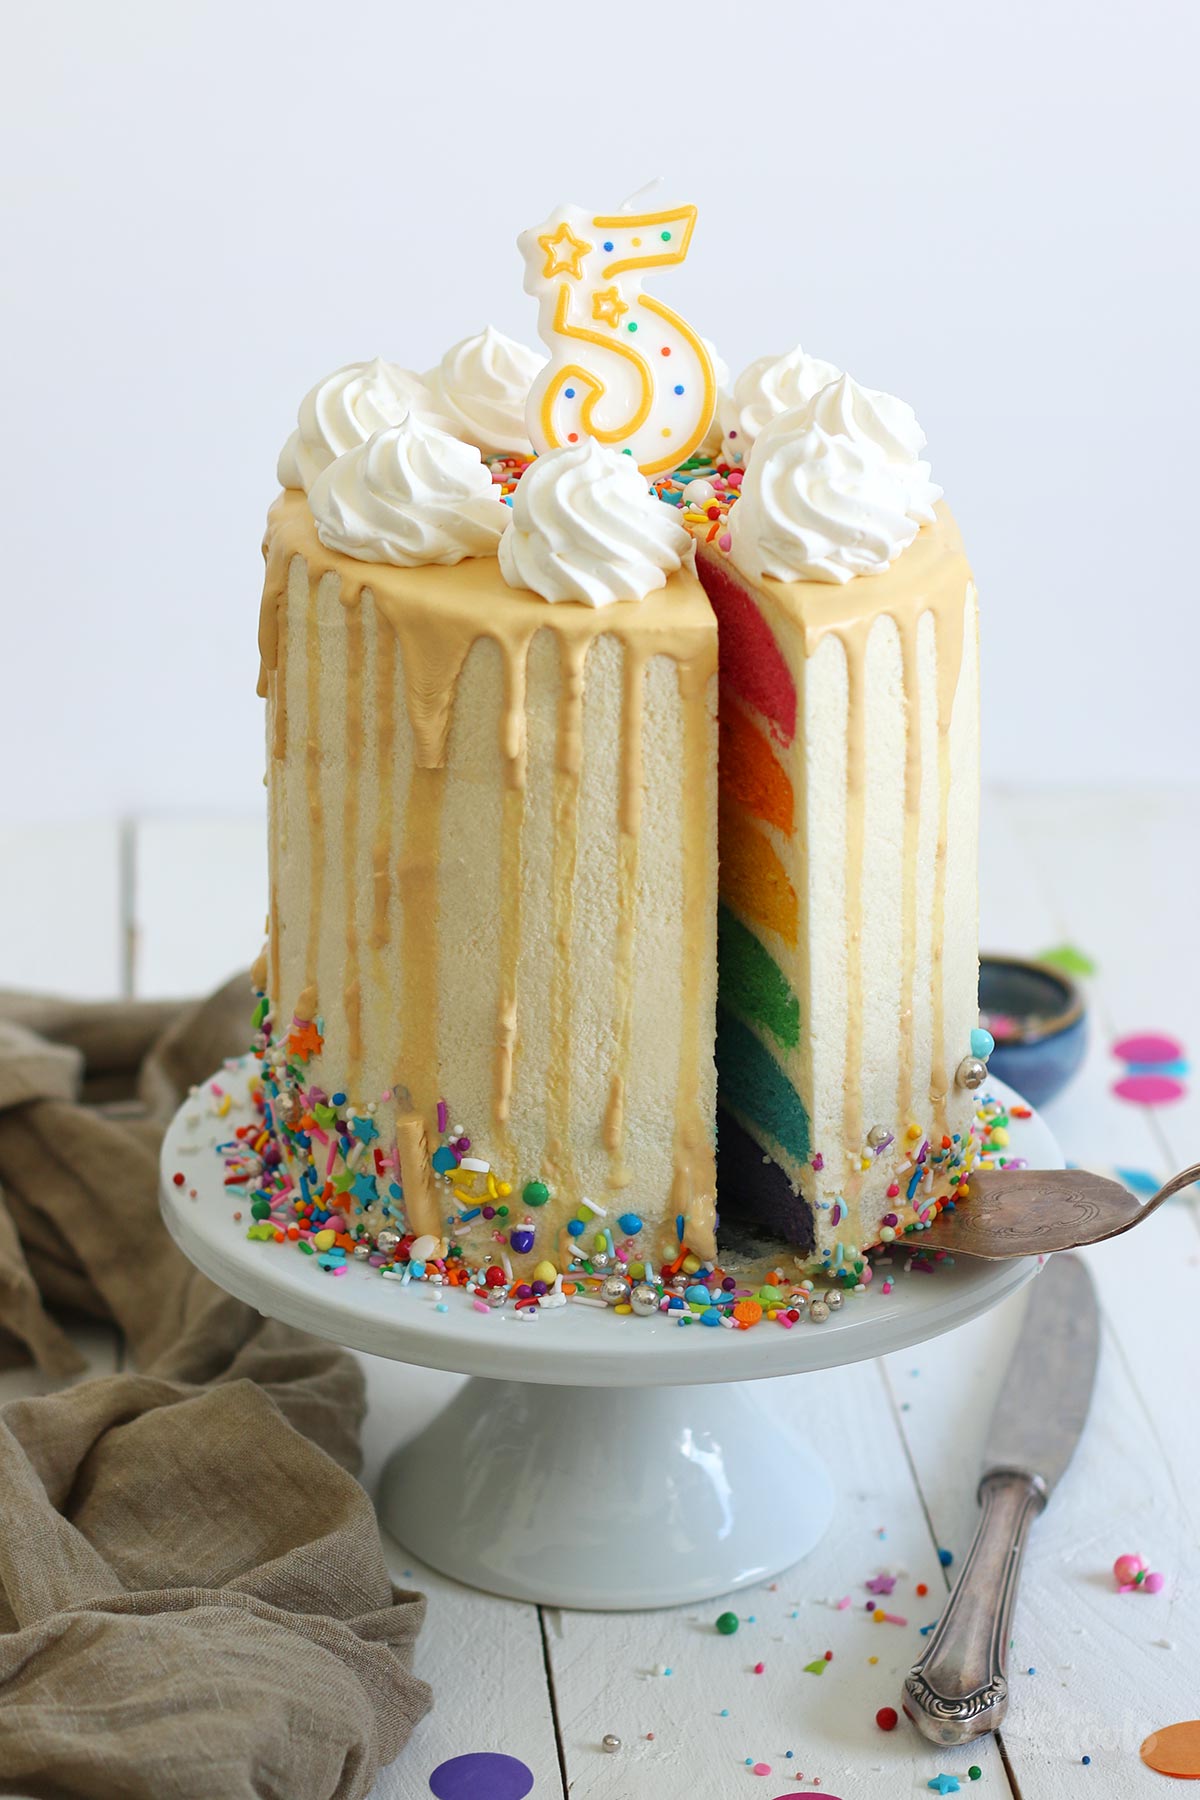
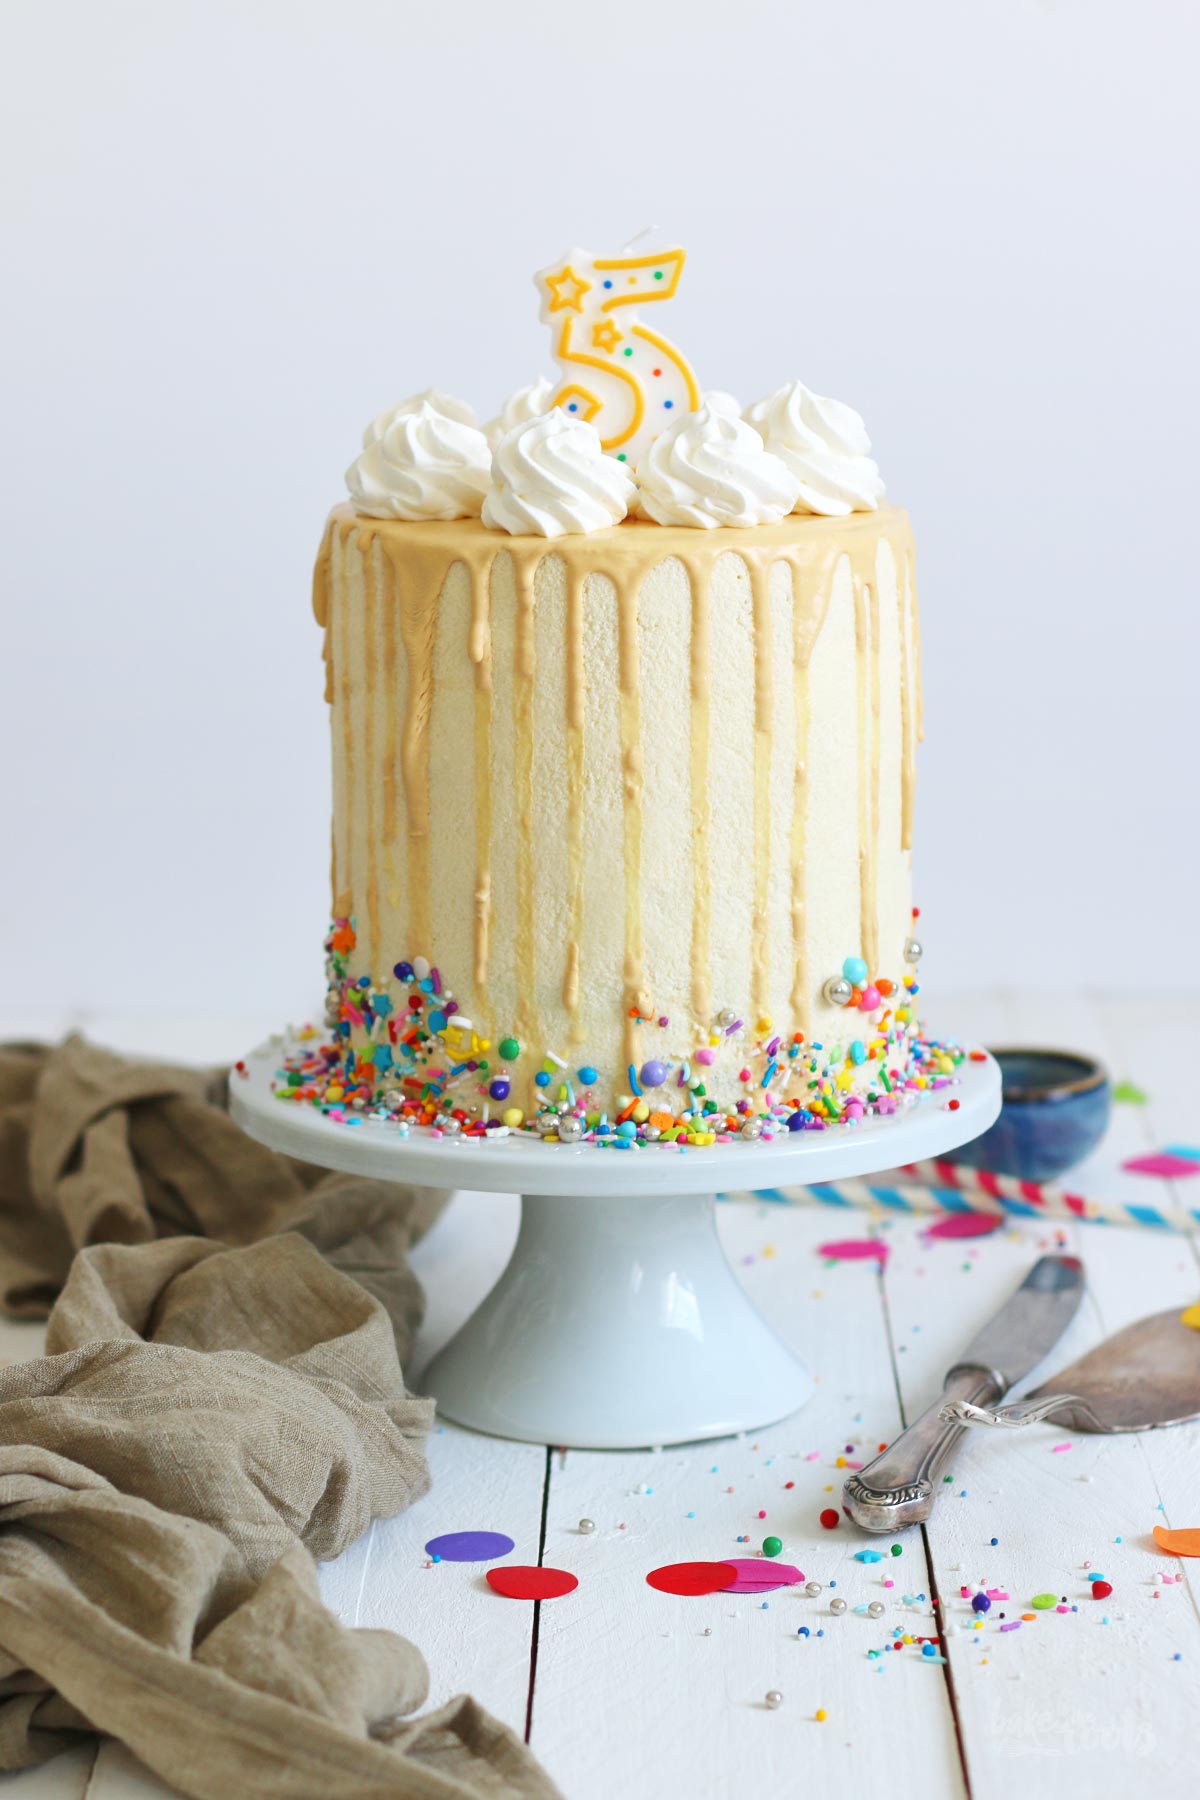
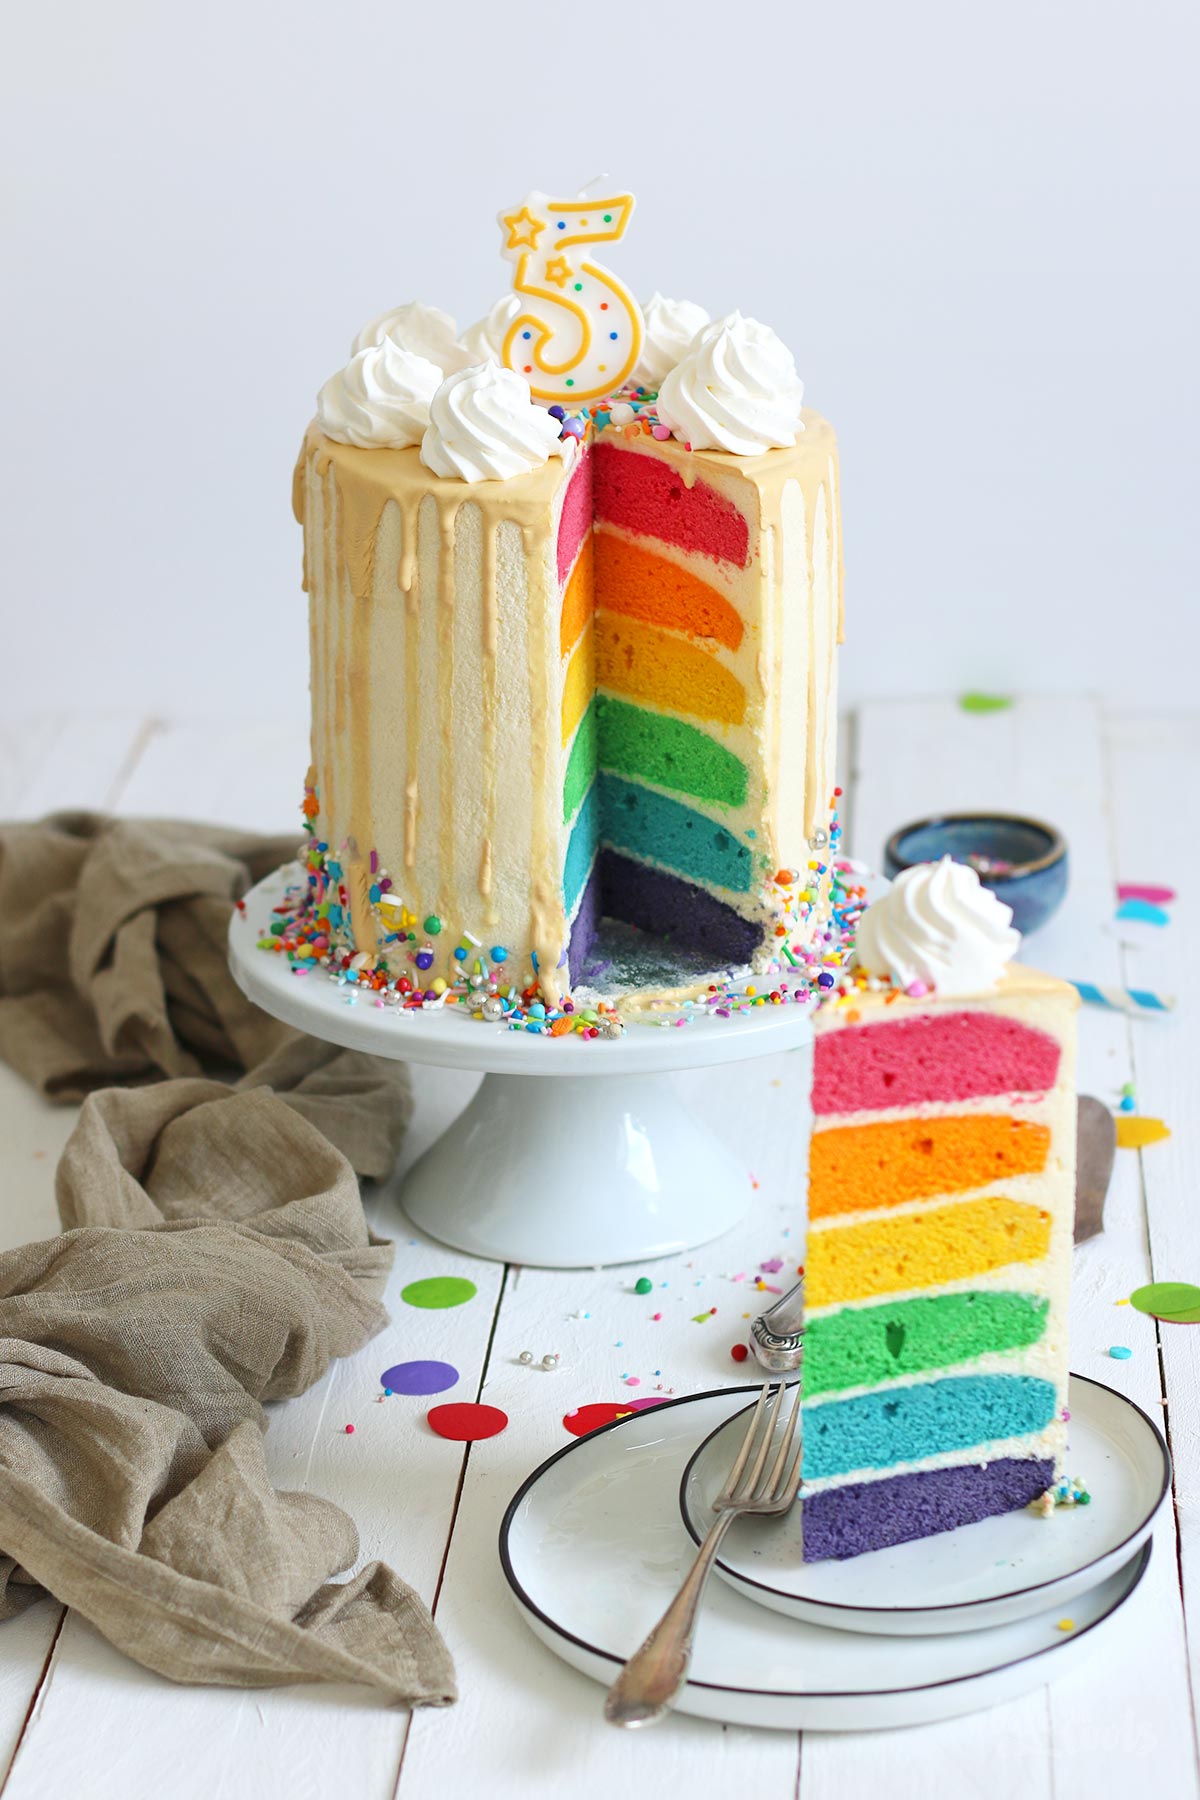
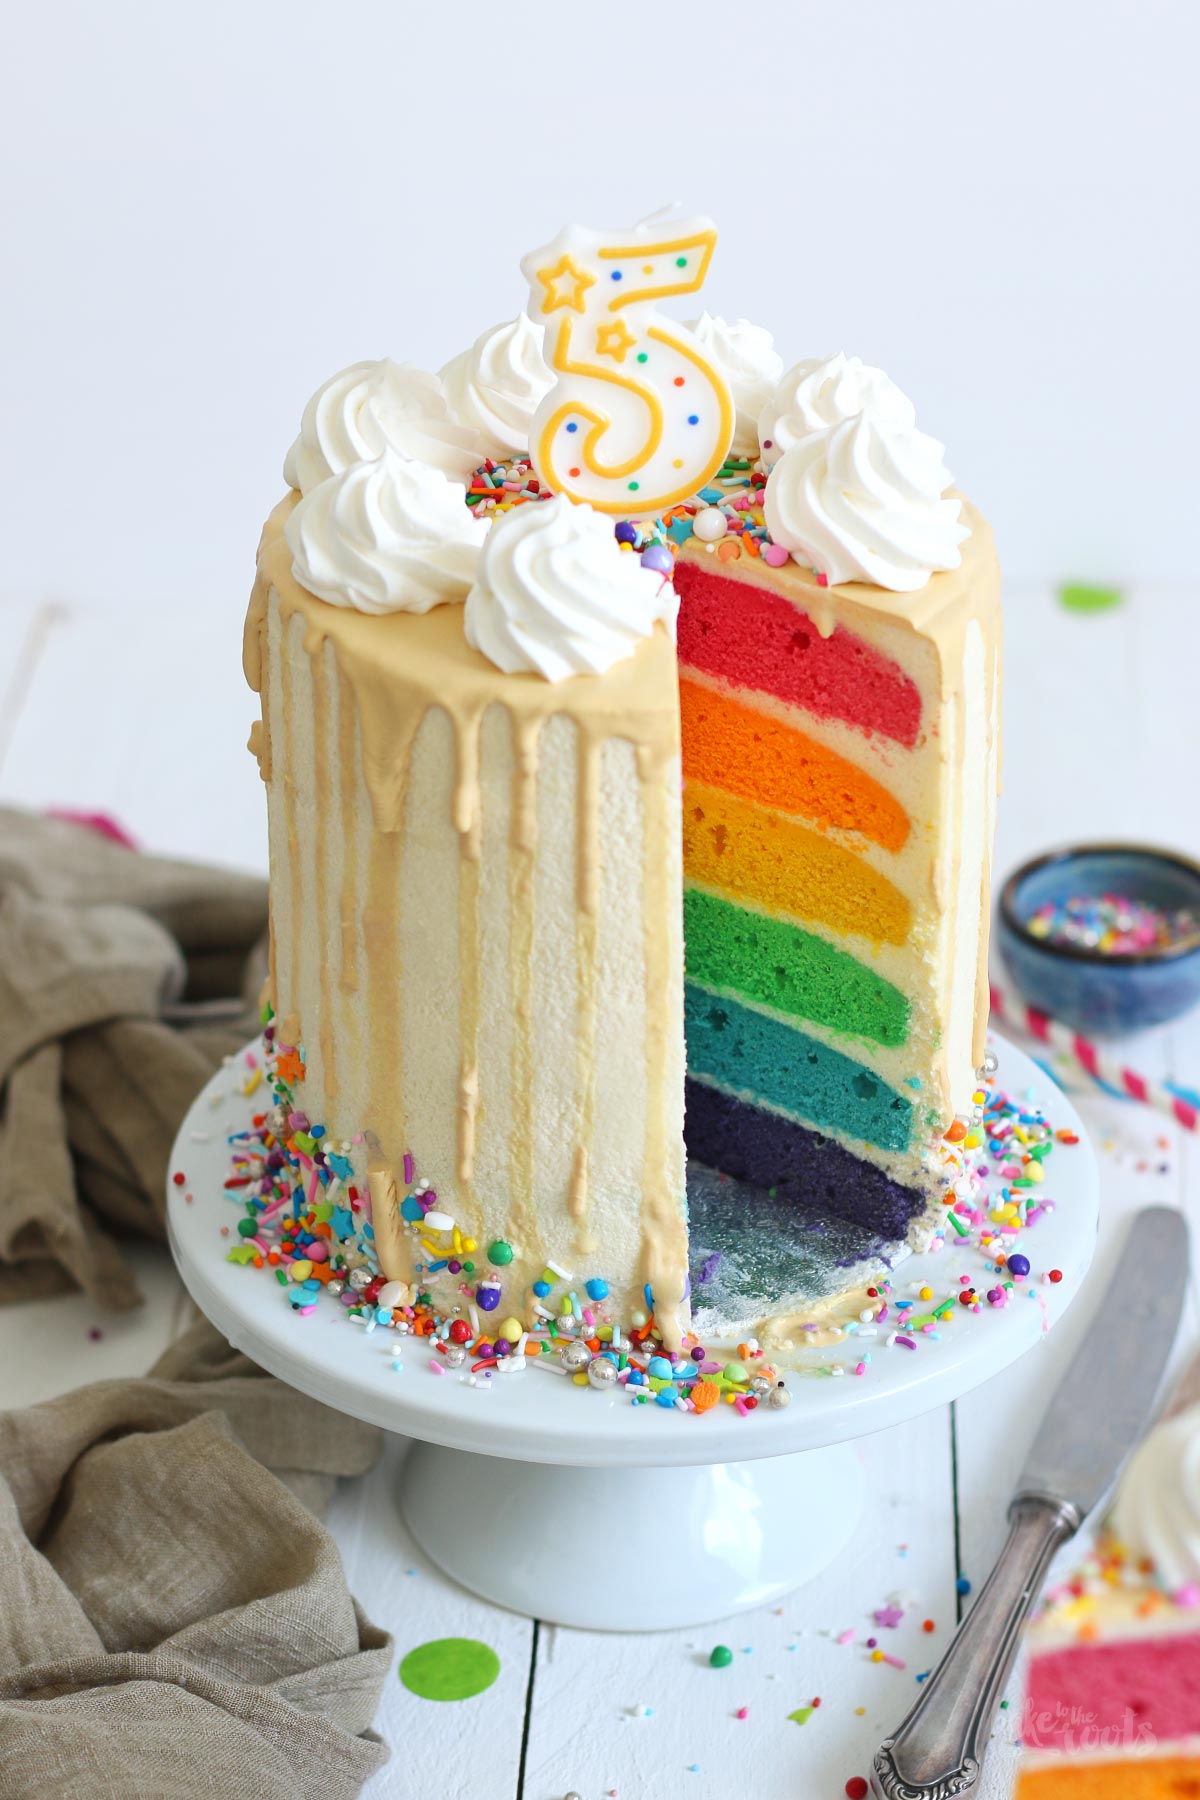
Well… to celebrate today’s event, I made a tiny little cake. I might have gone overboard once again… I wanted loads of colors and a lot of cake to celebrate. Somehow all the colors of the rainbow (and my cabinets) ended up in this cake I think. But hey… you only celebrate a 5th birthday/anniversary once! I wonder what Andrea made – the only thing I know is she made the cake on Friday. That’s all the information I got. I guess it’s going to be a cake since we decided to do cakes.
Anyway. About that cake… some of you probably noticed that the drip (ganache) looks slightly messy. More like a candle where the wax has been dripping down the sides. Less like a skillfully decorated cake. I tried my best, but the »hot water ganache« did not turn out as planned. Guess I should have used the ganache I normally use for drip cakes and not tried something entirely new. I thought »let’s use those candy melts to make the drip effect and then color it gold« – well, as you can see that did not turn out that good. I corrected the measurements in the recipe already, so that should work if you make the cake with the recipe, but mine was just a bit too runny. First, it looked great and the drips ended where I wanted them to end… but after an hour in the fridge, the ganache was slipping down the sides. Not very cute.
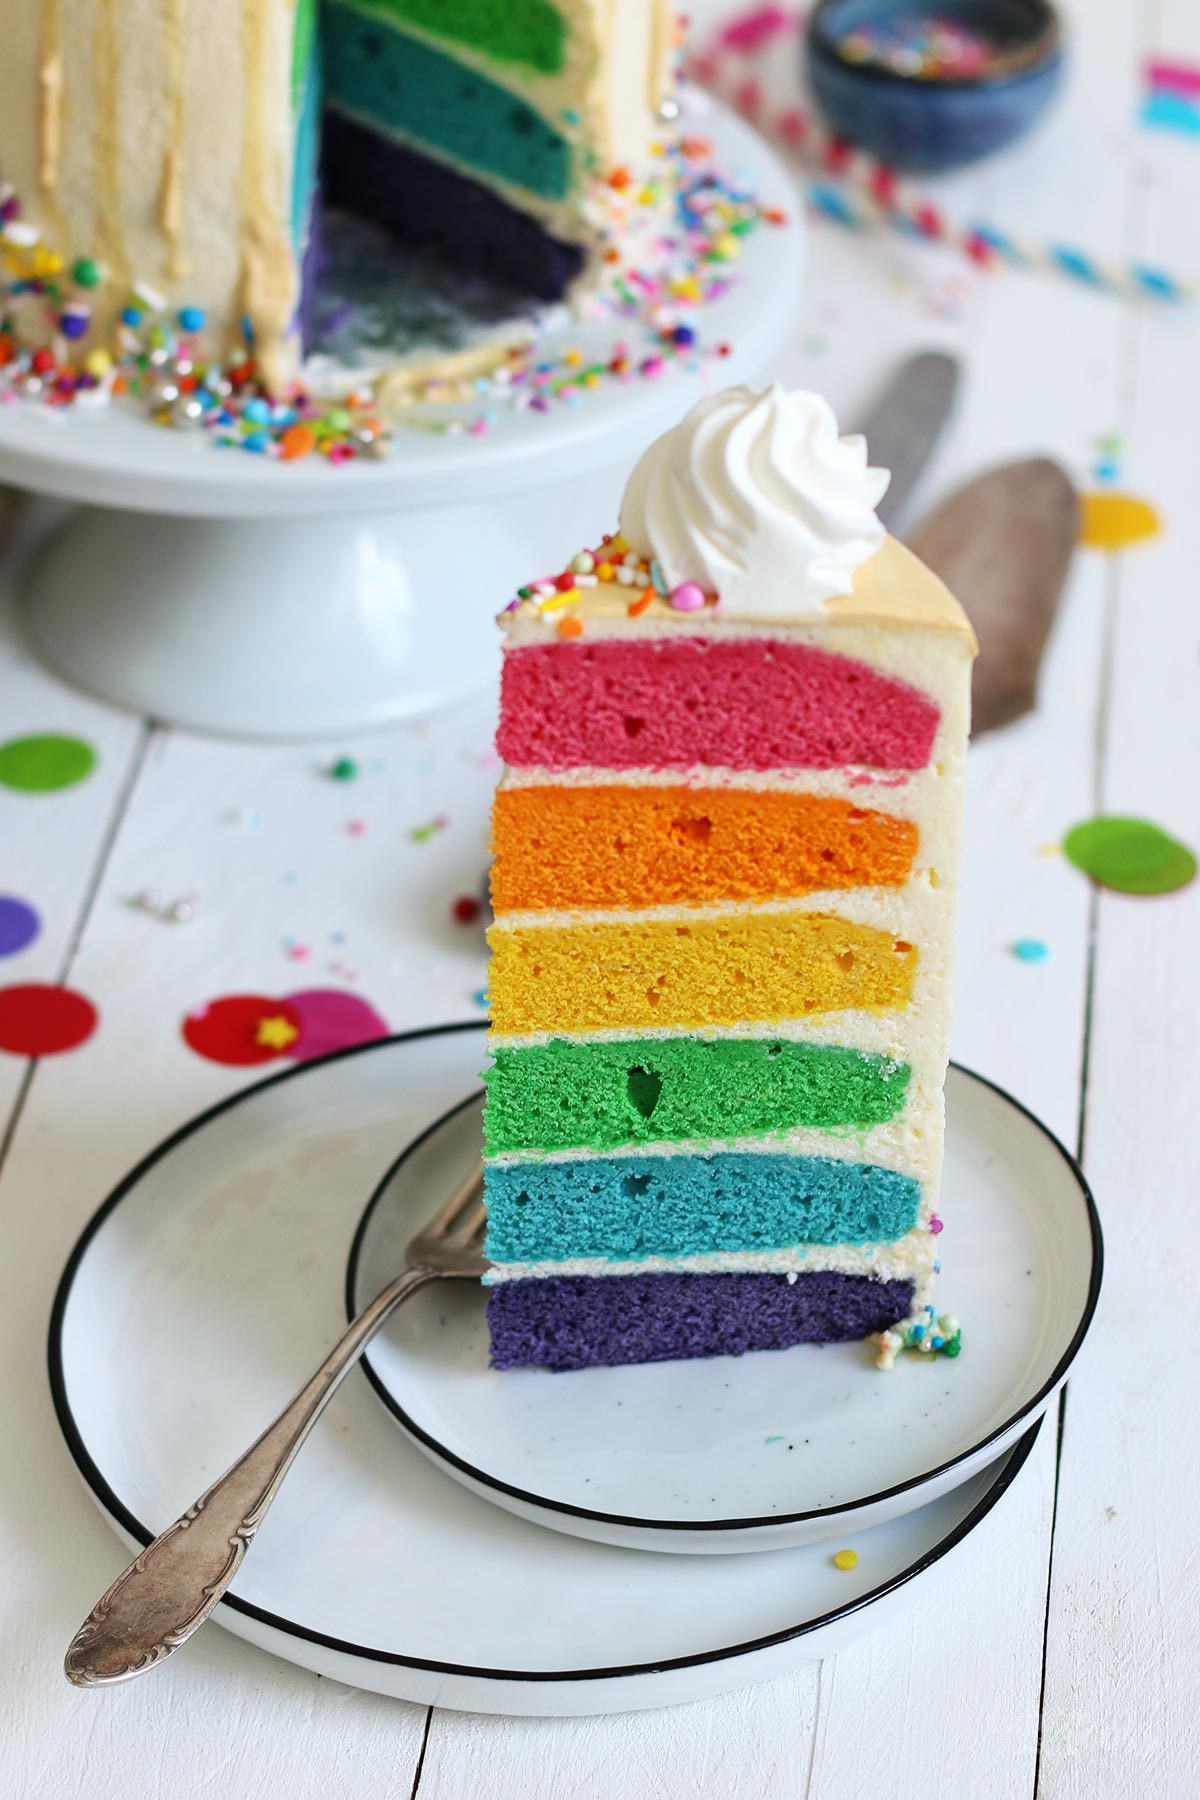
Oh well… and about those cake layers. I’d probably prepare a little more of the batter next time too so the cakes are slightly taller and I can cut off more of the domed tops in order to get straighter edges… But many people don’t care about that because you only see that rounded corners when you cut the cake. Well… throw more rainbow sprinkles on everything and nobody will notice.
This goes out to Andrea:
Dear Andrea – Happy 5 years of »Bake Together«! I couldn’t imagine doing something like this here with anybody else (for this long)! I really love our little »Bake Together Baby«. How about some additional 5 years?
INGREDIENTS / ZUTATEN
For the buttercream:
1/2 cup (60g) cornstarch*
3 tbsp. sugar (fine)*
2 tsp. vanilla extract*
25.4 fl. oz. (750ml) milk
11.6 oz. (330g) butter, at room temperature
4 tbsp. confectioners’ sugar*
For the batter:
1 cup (230g) butter, at room temperature
1 1/4 cups (250g) sugar (fine)*
5 medium eggs
2 tsp. vanilla extract*
3 cups (400g) stronger all-purpose flour*
2 tsp. baking powder
1 pinch of salt
4 tbsp. milk
some food color* (purple, blue, green, yellow, orange, pink or red)
For the drip glaze:
4.2 oz. (120g) candy melts* (white or any color you like)
0.7 oz. (20g) hot water
edible gold color* (optional)
For the decoration:
3.5 oz. (100g) heavy cream
1 tsp. confectioners’ sugar*
some rainbow sprinkles
Für die Buttercreme:
60g Speisestärke*
3 EL Zucker (fein)*
2 TL Vanille Extrakt*
750ml Milch
330g Butter, Zimmertemperatur
4 EL Puderzucker*
Für den Teig:
230g Butter, Zimmertemperatur
250g Zucker (fein)*
5 Eier (M)
2 TL Vanille Extrakt*
400g Mehl (Type 550)*
2 TL Backpulver
1 Prise Salz
4 EL Milch
Lebensmittelfarben* (lila, blau, grün, gelb, orange, rosa oder rot)
Für die Glasur:
120g Candy Melts* (weiß oder eine andere Farbe nach Belieben)
20g heißes Wasser
goldene Lebensmittelfarbe* (optional)
Für die Dekoration:
100g Schlagsahne
1 TL Puderzucker*
einige bunte Streusel
DIRECTIONS / ZUBEREITUNG
1. Start with the buttercream by cooking the custard. Add the cornstarch, sugar, and vanilla extract to a bowl and mix with a small amount of the milk until well combined. Add the rest of the milk to a small pot and bring to a boil. Add the cornstarch mixture and stir it in. Let it cook while stirring constantly until the custard has thickened nicely. Remove from the heat and immediately place a piece of plastic wrap on the surface of the custard to avoid the forming of skin. Let it cool down completely. Continue with the cake layers while the custard is cooling down.
2. Preheat the oven to 180°C (350°F). Grease six round baking tins (15cm)* and line with baking parchment. I only have four tins and had to do two rounds of baking with four and two tins in the oven.
3. Add the butter and sugar to a large bowl and mix for 4-5 minutes until very light and fluffy. Add the eggs one at a time and mix well after each addition. Add the vanilla extract and mix it in. Mix the flour with baking powder and salt and add together with the milk to the bowl, and mix at the lowest speed of your kitchen machine until just combined.
4. Divide the batter between six bowls and color with food color – don’t hold yourself back and use a good amount of food color to get a nice and bright result. Transfer the different colored batters to the baking tins, smooth out the top and bake them for about 12-16 minutes or until a wooden skewer inserted into the center of the cakes comes out clean. Take the cakes out of the oven and let them cool down inside the tins for some time, then remove them and let them cool down completely on a wire rack. If you did not bake all the tins at the same time, continue until all cake layers are done.
5. Continue with the buttercream by adding the butter and confectioners’ sugar to a large bowl and mix on high speed for about 4-5 minutes until very light and fluffy. Gradually add the completely cooled custard in small batches and mix well after each addition. When all the custard is added continue mixing for another 5-6 minutes until you get a smooth and creamy buttercream. Make sure the butter and custard have the same temperature or the two might not mix well.
6. Assemble the cake. Level the cake layers first if they domed too much during baking. Start with the purple cake layer by placing it on a cake plate. Add some buttercream on top and spread evenly until the edges of the cake. Place the blue cake layer on top and repeat the whole process with the buttercream. The next color would be green, then yellow, orange, and finally pink (or red). Cover the whole cake with a thin layer of buttercream (crumb coat) and place it in the fridge for at least 20-30 minutes. Add more buttercream to the top and sides and smooth it out to get a clean surface. Place in the fridge again for another 15-20 minutes.
7. For the drip glaze add the candy melts to a microwave-safe bowl and heat up in 15-second increments until almost completely melted. Add the hot water and heat it up another 15 seconds in the microwave. Stir the mixture until smooth. Depending on the color of candy melts you used you can leave it as it is or add food color now and mix it in. Use a teaspoon and let small amounts of the glaze drip down the sides of the cake. If the first drip runs down the sides too quickly you might want to wait a bit longer for the glaze to thicken up a bit and be less runny. Do the drip thing around the edges of the cake, then pour the rest of the glaze on top and push with a spatula to the edges to »connect« the glaze with the one that is already along the edges to get one smooth layer. Place in the fridge to let the glaze set.
8. To decorate the cake whisk the heavy cream until stiff peaks form. Fill into a piping bag with a star tip and decorate the top of the cake to your liking. You can also press some rainbow sprinkles into the buttercream around the bottom of the cake and/or add it on top of the cake. Keep the cake in the fridge until serving.
1. Mit der Buttercreme anfangen und dafür als Erstes einen Pudding kochen. Speisestärke mit Zucker und Vanille Extrakt in eine kleine Schüssel geben und mit etwas Milch glattrühren. Den Rest der Milch in einem kleinen Topf zum Kochen bringen. Die Stärkemischung unter ständigem Rühren dazugeben und einmal aufkochen lassen, bis der Pudding schön andickt. Vom Herd ziehen und ein Stück Klarsichtfolie direkt auf den Pudding legen, damit sich keine Haut bildet. Komplett abkühlen lassen. In der Zwischenzeit mit den Kuchenschichten weitermachen.
2. Den Ofen auf 180°C (350°F) Ober-/Unterhitze vorheizen. Sechs runde Backformen (15cm)* leicht einfetten und mit Backpapier auslegen. Ich hatte nur 4 Formen und musste entsprechend zweimal backen, mit 4 Kuchen in der ersten Runde und 2 Kuchen in der zweiten Runde – funktioniert ohne Probleme.
3. Butter und Zucker für den Teig in eine große Schüssel geben und für etwa 4-5 Minuten hell und luftig aufschlagen. Die Eier einzeln dazugeben und jeweils gut unterrühren. Vanille Extrakt dazugeben und unterrühren. Mehl mit Backpulver und Salz vermischen und dann zusammen mit der Milch in die Schüssel geben – auf niedrigster Stufe verrühren, bis der Teig zusammenkommt. Nicht zu viel rühren!
4. Den Teig auf sechs kleine Schüsseln aufteilen und dann mit den Lebensmittelfarben einfärben. Hier solltet ihr euch nicht zurückhalten, wenn ihr knallige Farben haben wollt. Die Teige in die Backformen füllen, glatt streichen und dann für etwa 12-16 Minuten backen. Mit einem Holzspieß testen, ob noch Teig kleben bleibt. Die fertigen Kuchen aus dem Ofen holen und in der Form kurz abkühlen lassen, dann herauslösen und auf einem Kuchengitter komplett auskühlen lassen. Wer noch mehr Kuchen zu backen hat, legt eine zweite Runde ein, bis alle Kuchenschichten fertig sind.
5. Mit der Buttercreme weitermachen und dafür die Butter mit dem Puderzucker in eine große Schüssel geben und auf höchster Stufe für etwa 4-5 Minuten aufschlagen, bis sie hell und luftig ist. Den komplett abgekühlten Pudding nach und nach in kleinen Portionen dazugeben und jeweils gut unterrühren. Wenn der gesamte Pudding dazugegeben wurde, weitere 5-6 Minuten aufschlagen, bis eine homogene und luftige Buttercreme entstanden ist. Die Butter und der Pudding sollten dieselbe Temperatur haben, da sie sich sonst nicht so gut verbinden.
6. Für den Zusammenbau des Kuchens die Kuchenschichten als Erstes zuschneiden, sollten sie beim Backen in der Mitte stark aufgegangen sein und einen »Buckel« bekommen haben – alle Schichten sollten die gleiche Dicke haben. Als Erstes die lila Kuchenschicht auf eine Servierplatte setzen, dann etwas Buttercreme darauf verstreichen (bis zu den Rändern) und die blaue Kuchenschicht daraufsetzen. Den Vorgang mit Buttercreme und den Kuchenschichten wiederholen, bis alle Kuchenschichten verwendet wurden – die nächste Farbe wäre dann Grün, dann Gelb, Orange und zum Schluss Pink bzw. Rot. Die komplette Torte mit einer dünnen Schicht Buttercreme (Crumb Coat) einstreichen und für mindestens 20-30 Minuten in den Kühlschrank stellen. Mit mehr Buttercreme eine weitere Schicht auf die Torte aufbringen und alles sauber »verspachteln«, damit eine glatte Oberfläche entsteht. Noch einmal etwa 15-20 Minuten in den Kühlschrank stellen.
7. Für die Glasur die Candy Melts in eine mikrowellengeeignete Schüssel geben und in 15-Sekunden-Schritten erwärmen, bis sie fast vollständig geschmolzen sind. Das heiße Wasser dazugeben und alles noch einmal für etwa 15 Sekunden in der Mikrowelle erwärmen (High), dann glatt rühren. Je nachdem, welche Farbe die Candy Melts haben, kann man sie jetzt einfach verwenden, oder man rührt noch etwas Lebensmittelfarbe ein. Mit einem Teelöffel kleine Mengen an Glasur an den Rändern des Kuchens heruntertropfen (drip) lassen. Sollte die erste Portion Glasur zu schnell an den Seiten des Kuchens heruntertropfen, die Glasur eventuell einfach noch einmal einen Moment abkühlen lassen, damit sie etwas mehr andickt, und dann fortfahren. Wenn die Ränder mit den Glasurtropfen versehen sind, den Rest auf die Torte gießen und mit einer Kuchenpalette bis an die Ränder verteilen und mit der Glasur dort »verbinden«, damit eine gleichmäßige, glatte Oberfläche entsteht. Torte in den Kühlschrank stellen, damit die Glasur anziehen und fest werden kann.
8. Zum Dekorieren der Torte die Sahne mit dem Puderzucker steif schlagen, in einen Spritzbeutel mit Sterntülle füllen und dann die Torte damit verzieren. Nach Belieben dann noch bunte Streusel im unteren Bereich der Torte in die Buttercreme drücken und/oder oben auf der Torte verteilen. Bis zum Servieren in den Kühlschrank stellen.
Craving more? Keep in touch on Facebook, Instagram and Pinterest for new post updates and more. You can also contact me with any questions or inquiries!
Here is a version of the recipe you can print easily.
Print
Colorful Rainbow Layer Cake
- Prep Time: 01:00
- Cook Time: 00:16
- Total Time: 04:00
- Yield: 1 1x
- Category: Layer Cakes
- Method: -
- Cuisine: United States
- Diet: Vegetarian
Description
If you want lots of colors, this cake might be the perfect cake for you: a delicious Rainbow Layer Cake! The perfect celebration treat!
Ingredients
For the buttercream:
1/2 cup (60g) cornstarch*
3 tbsp. sugar (fine)*
2 tsp. vanilla extract*
25.4 fl. oz. (750ml) milk
11.6 oz. (330g) butter, at room temperature
4 tbsp. confectioners‘ sugar*
For the batter:
1 cup (230g) butter, at room temperature
1 1/4 cups (250g) sugar (fine)*
5 medium eggs
2 tsp. vanilla extract*
3 cups (400g) stronger all-purpose flour*
2 tsp. baking powder
1 pinch of salt
4 tbsp. milk
some food color* (purple, blue, green, yellow, orange, pink or red)
For the drip glaze:
4.2 oz. (120g) candy melts* (white or any color you like)
0.7 oz. (20g) hot water
edible gold color* (optional)
For the decoration:
3.5 oz. (100g) heavy cream
1 tsp. confectioners‘ sugar*
some rainbow sprinkles
Instructions
1. Start with the buttercream by cooking the custard. Add the cornstarch, sugar, and vanilla extract to a bowl and mix with a small amount of the milk until well combined. Add the rest of the milk to a small pot and bring to a boil. Add the cornstarch mixture and stir it in. Let it cook while stirring constantly until the custard has thickened nicely. Remove from the heat and immediately place a piece of plastic wrap on the surface of the custard to avoid the forming of skin. Let it cool down completely. Continue with the cake layers while the custard is cooling down.
2. Preheat the oven to 180°C (350°F). Grease six round baking tins (15cm)* and line with baking parchment. I only have four tins and had to do two rounds of baking with four and two tins in the oven.
3. Add the butter and sugar to a large bowl and mix for 4-5 minutes until very light and fluffy. Add the eggs one at a time and mix well after each addition. Add the vanilla extract and mix it in. Mix the flour with baking powder and salt and add together with the milk to the bowl, and mix at the lowest speed of your kitchen machine until just combined.
4. Divide the batter between six bowls and color with food color – don’t hold yourself back and use a good amount of food color to get a nice and bright result. Transfer the different colored batters to the baking tins, smooth out the top and bake them for about 12-16 minutes or until a wooden skewer inserted into the center of the cakes comes out clean. Take the cakes out of the oven and let them cool down inside the tins for some time, then remove them and let them cool down completely on a wire rack. If you did not bake all the tins at the same time, continue until all cake layers are done.
5. Continue with the buttercream by adding the butter and confectioners‘ sugar to a large bowl and mix on high speed for about 4-5 minutes until very light and fluffy. Gradually add the completely cooled custard in small batches and mix well after each addition. When all the custard is added continue mixing for another 5-6 minutes until you get a smooth and creamy buttercream. Make sure the butter and custard have the same temperature or the two might not mix well.
6. Assemble the cake. Level the cake layers first if they domed too much during baking. Start with the purple cake layer by placing it on a cake plate. Add some buttercream on top and spread evenly until the edges of the cake. Place the blue cake layer on top and repeat the whole process with the buttercream. The next color would be green, then yellow, orange, and finally pink (or red). Cover the whole cake with a thin layer of buttercream (crumb coat) and place it in the fridge for at least 20-30 minutes. Add more buttercream to the top and sides and smooth it out to get a clean surface. Place in the fridge again for another 15-20 minutes.
7. For the drip glaze add the candy melts to a microwave-safe bowl and heat up in 15-second increments until almost completely melted. Add the hot water and heat it up another 15 seconds in the microwave. Stir the mixture until smooth. Depending on the color of candy melts you used you can leave it as it is or add food color now and mix it in. Use a teaspoon and let small amounts of the glaze drip down the sides of the cake. If the first drip runs down the sides too quickly you might want to wait a bit longer for the glaze to thicken up a bit and be less runny. Do the drip thing around the edges of the cake, then pour the rest of the glaze on top and push with a spatula to the edges to »connect« the glaze with the one that is already along the edges to get one smooth layer. Place in the fridge to let the glaze set.
8. To decorate the cake whisk the heavy cream until stiff peaks form. Fill into a piping bag with a star tip and decorate the top of the cake to your liking. You can also press some rainbow sprinkles into the buttercream around the bottom of the cake and/or add it on top of the cake. Keep the cake in the fridge until serving.
Notes
Enjoy baking!
Links marked with an asterisk (*) are affiliate links (advertising/Werbung) to Amazon Germany. If you click on one of those links and buy something via this link, I will get a commission for that sale. The price of whatever you buy is not affected in any way by this.