
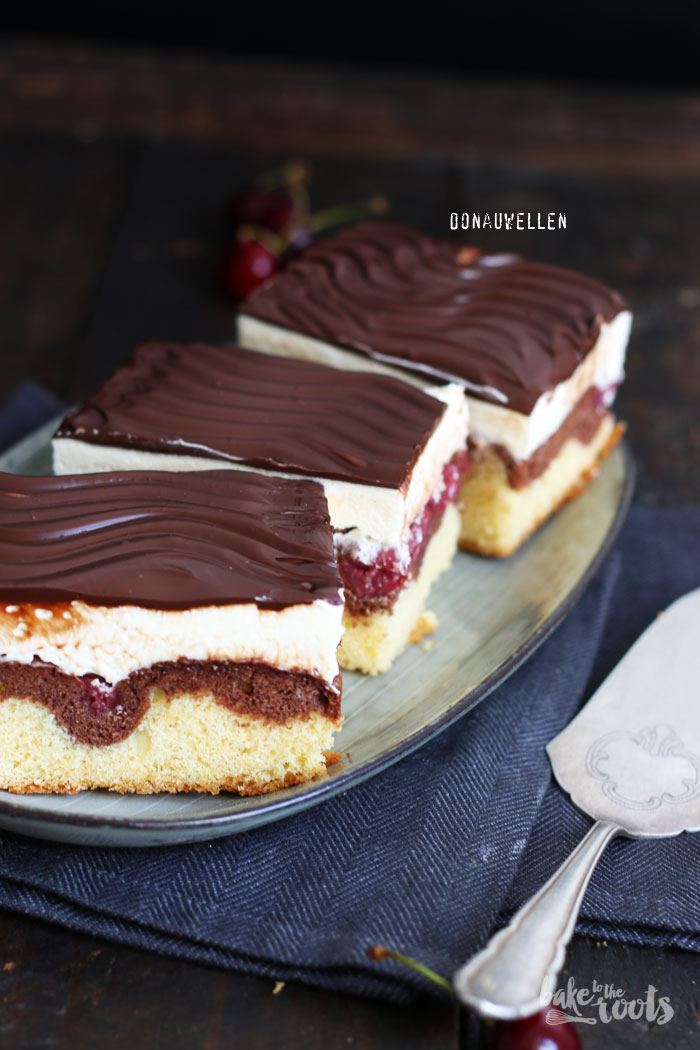
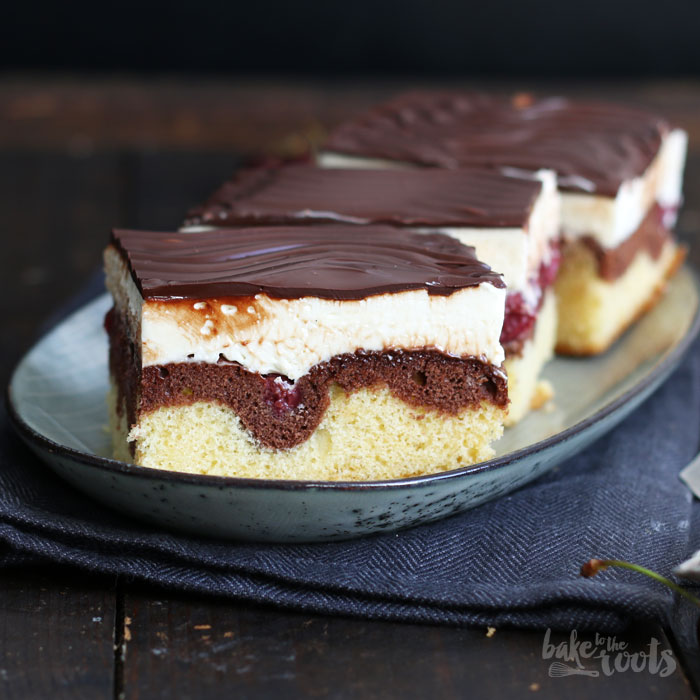
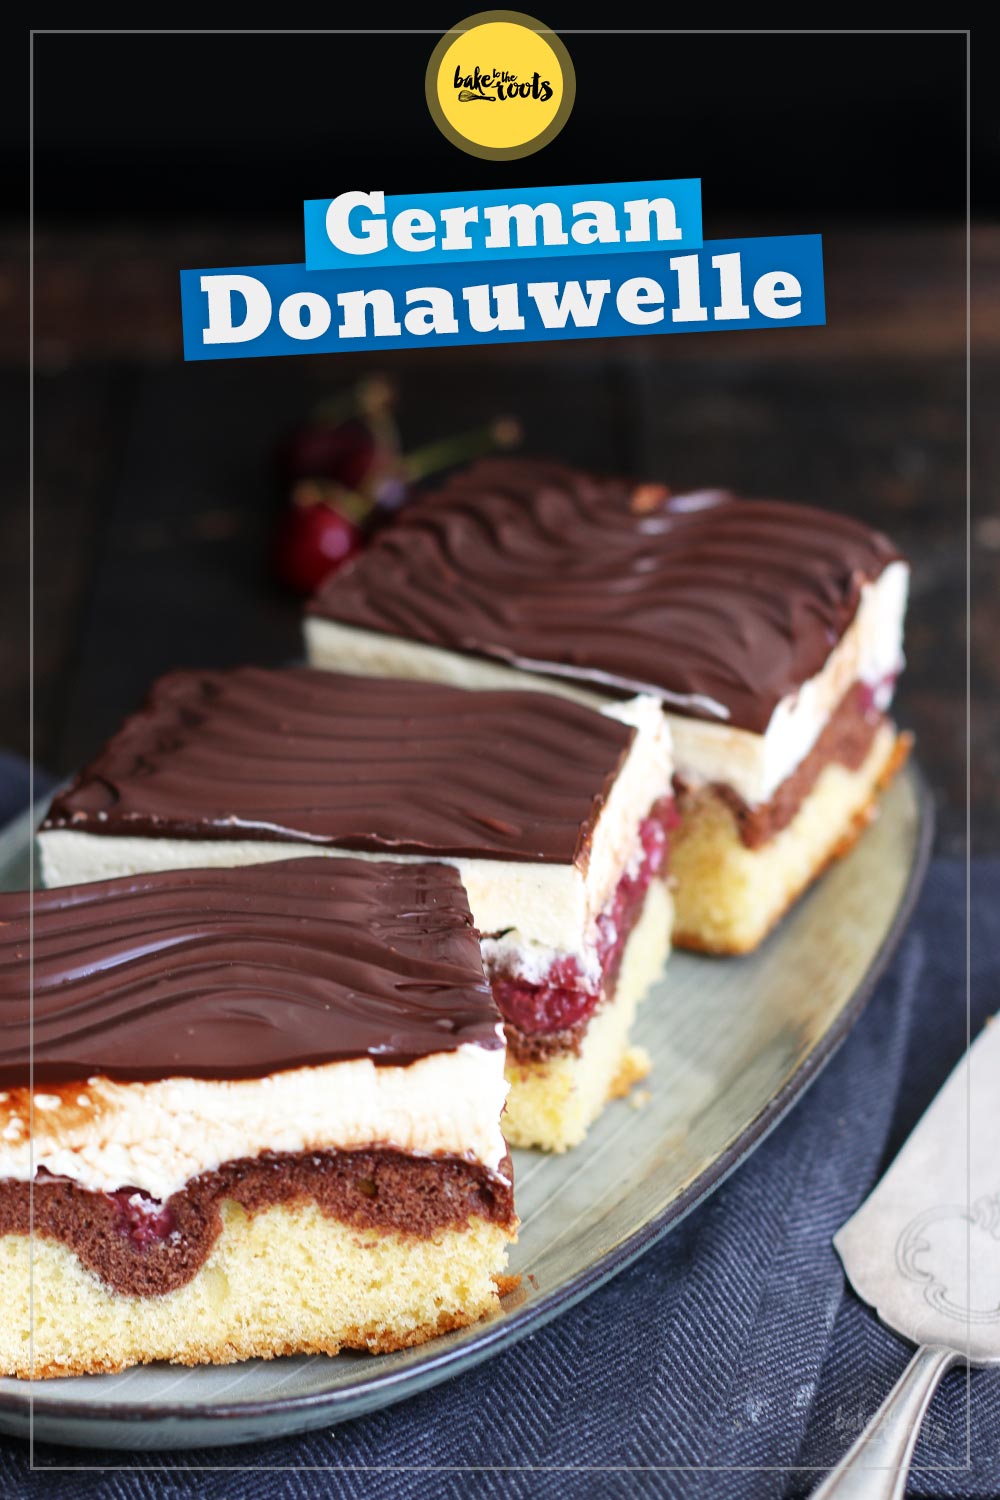
Today’s recipe is a German classic – German Donauwelle aka. Snow White Cake. Have you heard of it or maybe made it already? I like it a lot, but opinions about it are very different. Too old-school, lame… some of the critics. I don’t think it’s lame at all! Old-school perhaps, but that’s not necessarily a bad thing…
The cake is not one of the »healthy« snacks everyone is promoting when the new year starts. Not at all. The cream on top, the chocolate… you can count some calories here for sure, but they taste so good. Who cares?! Take a smaller piece and everything is fine. And in the evening maybe another small piece… and the next day.
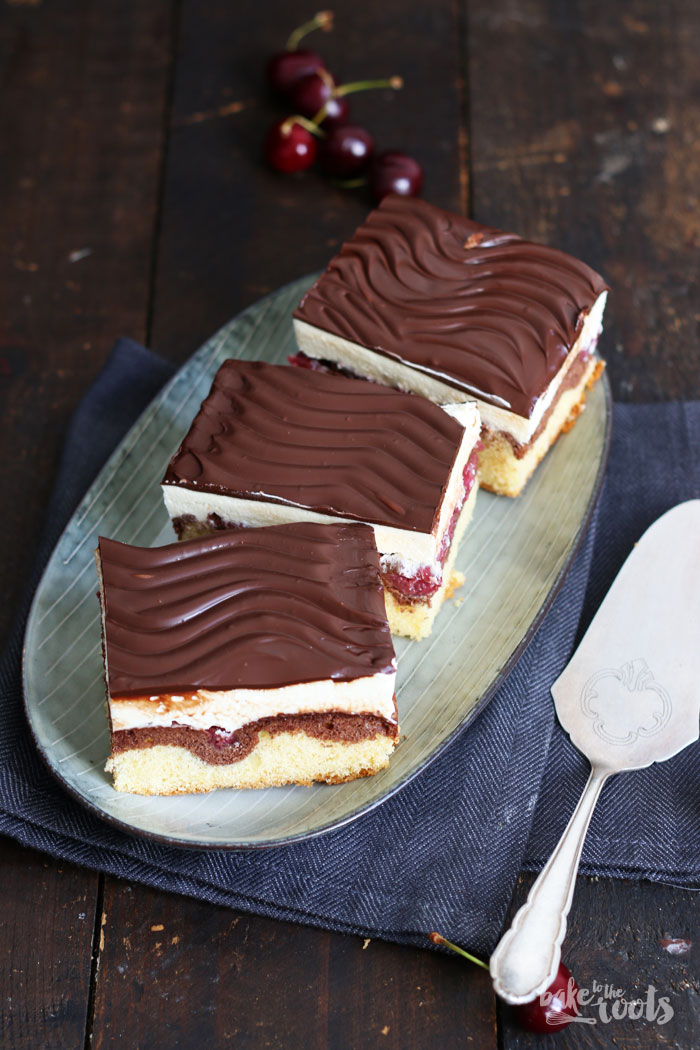
This kind of cake is a direct connection to my »baking roots«. I started pretty young baking »Donauwellen« (translated it means the waves of the Danube btw.). One of the big convenient food companies here in Germany offers many different cake mixes and the classic »Donauwelle« is one of them. When you buy the box, it comes with a paper form to bake the cake in. At least back in the day. This is how I started baking as a kid. With baking mixes. Yes, that is one of my deep dark secrets! I baked cakes from cake mixes.
Today I prefer to make my cakes and stuff all from scratch. I am fine with some pre-made doughs – for example, filo dough or puff pastry – those kinds of doughs just take a lot of time and sometimes you want to be a bit quicker. But a plain loaf cake is done in the same time as a cake box cake would need. So where is the need to use them? I have almost all the ingredients at home anyway all the time. I mean if you are used to the box mixes and love how they taste – stick with them. But let me tell you, you can do other things too! And you know exactly what’s in the cake at the end.
Anyway. This »Donauwelle« is not really complicated either, it just takes a bit of time because the cream on top needs time to cool down. Everything else is easy peasy.
INGREDIENTS / ZUTATEN
For the cake:
8.8 oz. (250g) butter, at room temperature
1 cup (200g) sugar (fine)*
1 tsp. vanilla bean paste* or vanilla extract*
5 medium eggs
3 cups (380g) all-purpose flour*
3 tsp. baking powder
1 pinch of salt
2 tbsp. cocoa powder*
1 tbsp. milk
12.3 oz. (350g) canned sour cherries*, drained
For the vanilla cream:
17 fl. oz. (500ml) milk
1/2 cup (100g) sugar (fine)*
1/3 cup (45g) cornstarch*
1 tsp. vanilla bean paste* or vanilla extract*
1 medium egg yolk
8.8 oz. (250g) butter, at room temperature
For the chocolate glaze:
7 oz. (200g) semi-sweet chocolate* (61%)
0.7 oz (20g) coconut fat*
Für den Kuchen:
250g weiche Butter
200g Zucker (fein)*
1 TL Vanillepaste* oder Vanille Extrakt*
5 Eier (M)
380g Mehl (Type 405)*
3 TL Backpulver
1 Prise Salz
2 EL Kakaopulver*
1 EL Milch
350g (1 Glas) Sauerkirschen/Schattenmorellen*, abgetropft
Für die Vanillecreme:
500ml Milch
100g Zucker (fein)*
45g Speisestärke*
1 TL Vanillepaste* oder Vanille Extrakt*
1 Eigelb (M)
250g weiche Butter
Für die Schokoladenglasur:
200g Zartbitterschokolade* (61%)
20g Kokosfett*
DIRECTIONS / ZUBEREITUNG
1. Preheat the oven to 180°C (350°F). Place a baking frame* on a baking sheet and adjust to a size of about 32x24cm – line with baking parchment or grease and dust with some flour. Set aside. Let the cherries drain in a sieve.
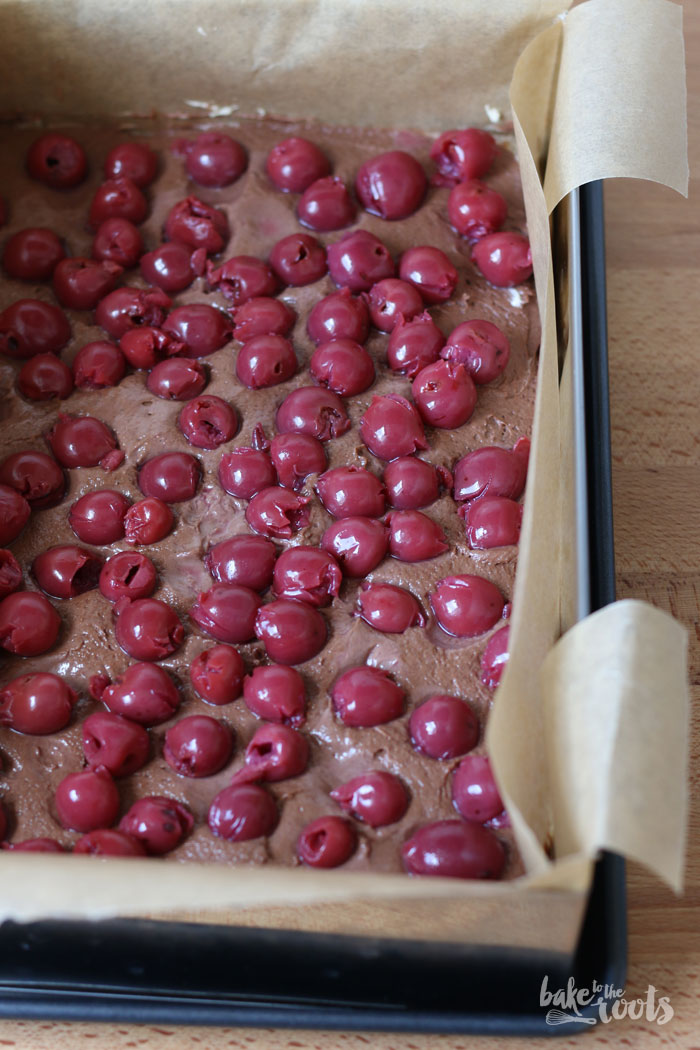
2. Add the butter and sugar to a large bowl and mix on high speed until light and fluffy. Add the vanilla paste/vanilla extract and mix in. Next, add the eggs one after another mixing well after each addition. Mix the flour with baking powder and salt and add in three batches to the bowl and mix until just combined. Transfer about 3/4 of the batter into the prepared baking frame, spread evenly and smooth out the top. Sift the cocoa over the remaining batter, add the milk and mix everything until well combined. Add this dark batter on top of the light batter and spread it evenly. Try not to mix those two layers. It works best if you add the chocolate batter with a smaller spoon all over the light batter and then distribute it evenly. Add the drained cherries evenly all over the chocolate batter and press them a bit into the batter.
3. Place the baking sheet with the baking frame in the middle of the oven and bake the cake for about 35-40 minutes until a toothpick inserted in the center comes out clean. Take it out of the oven and let it cool down a bit, then remove it from the baking sheet and transfer it to a wire rack to cool down completely.
4. While the cake is baking, prepare the vanilla custard for the vanilla cream filling. Mix the cornstarch with 2 tablespoons of the sugar and some of the milk until smooth. Add the remaining milk, sugar, and vanilla paste/vanilla extract to a saucepan, mix it and bring it to a boil. Add the cornstarch mixture and stir constantly until the custard starts to thicken. Next, add the egg yolk and mix it in. Take it off the heat and let it cool down a bit, then place a piece of plastic wrap right on top of the custard so it does not develop a skin. Let it cool down completely.
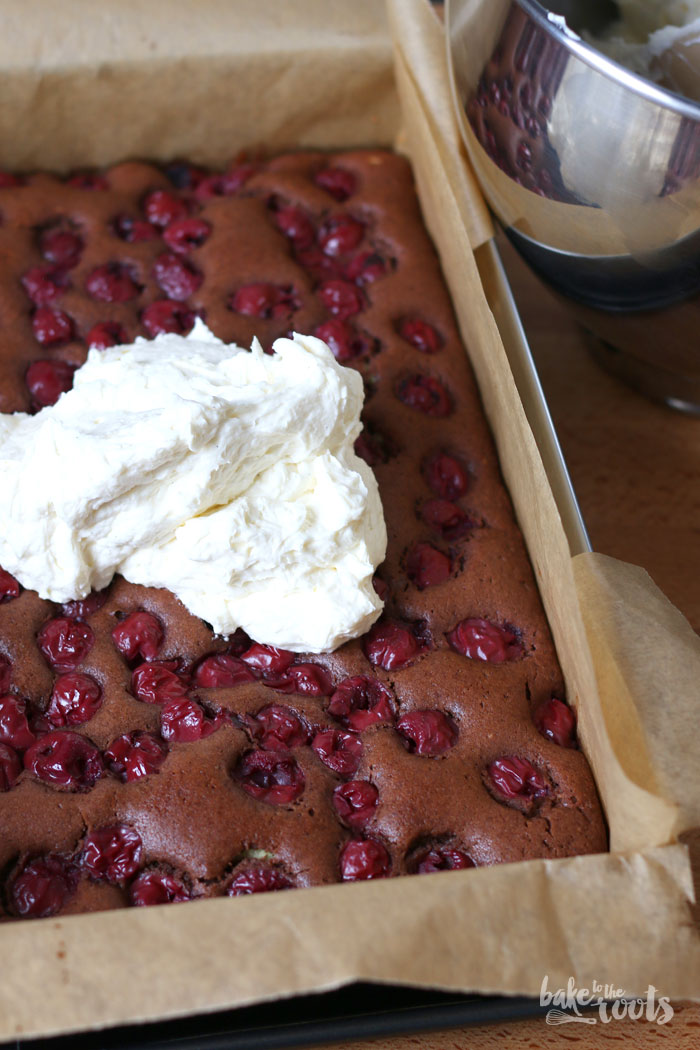
5. For the vanilla cream add the butter to a large bowl and mix on high speed until light and fluffy. Add the cooled custard one tablespoon at a time and mix it in. Make sure the custard and butter have the same (room) temperature. If one is too warm or cold, the cream might curdle, cause the two components won’t mix well. Place the cake inside the baking frame again, spread the vanilla cream on top and smooth it out. Place the cake in the fridge and let it cool down for at least 1 hour.
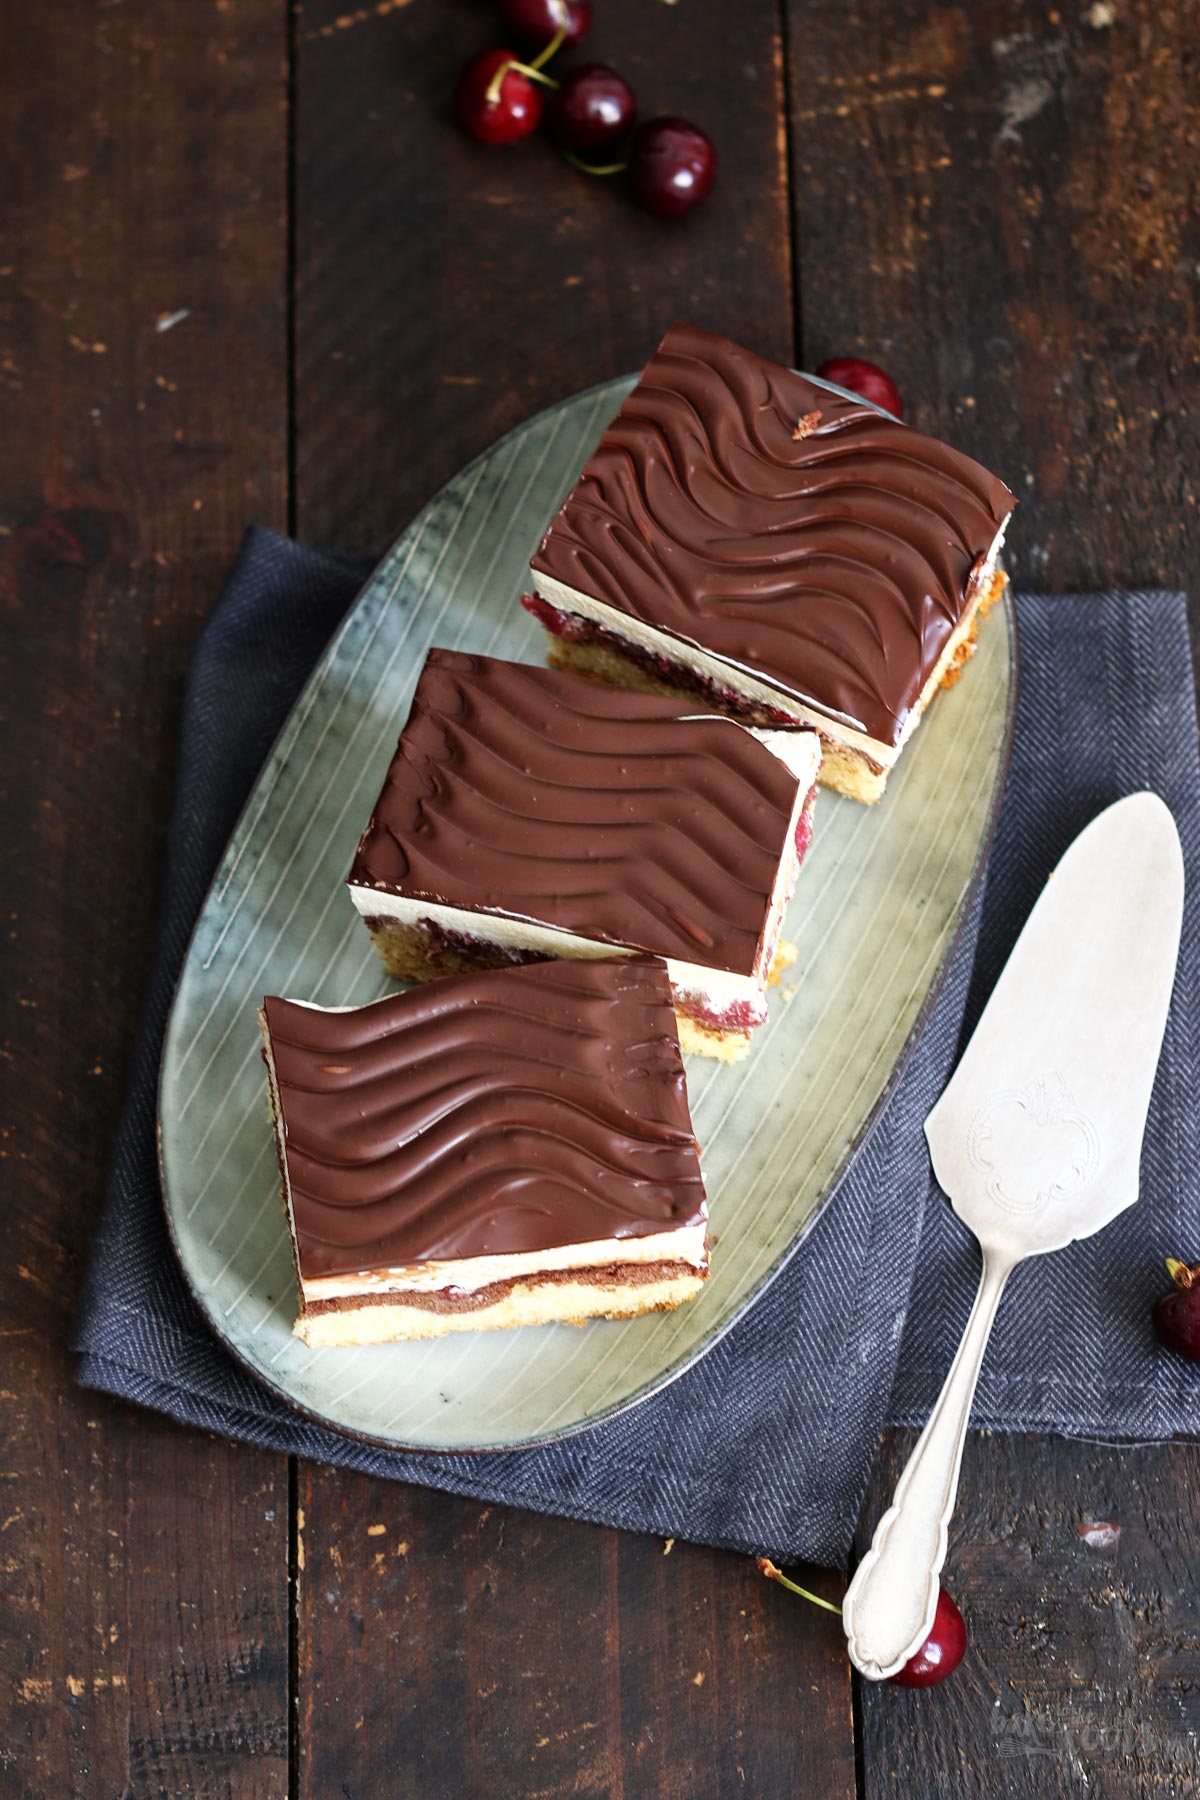
6. Chop the chocolate for the glaze and add it together with the coconut fat to a bowl. Place that bowl on top of a saucepan with simmering water and let the chocolate and coconut fat melt slowly. Mix until smooth, then take off the heat and let cool down for some time. The glaze should be spreadable but not too warm or it will melt the vanilla cream. Pour the glaze and make sure to cover everything. Wait a moment until you can see that the chocolate thickens a bit further, then use a fork and decorate the cake with a wavy pattern. Let it cool down completely, then cut it into slices and serve.
1. Den Ofen auf 180°C (350°F) Ober-/Unterhitze vorheizen. Einen Backrahmen auf ein Backblech setzen und auf eine Größe von etwa 32x24cm aufziehen, mit Backpapier auslegen oder einfetten und mit Mehl ausstäuben. Zur Seite stellen. Die Kirschen in ein Sieb schütten und gut abtropfen lassen.
2. Die Butter mit dem Zucker in einer großen Schüssel hell und luftig aufschlagen. Die Vanillepaste bzw. den Vanille Extrakt zugeben und unterrühren. Die Eier einzeln dazugeben und jeweils gut unterrühren. Das Mehl mit Backpulver und Salz vermischen und dann in drei Portionen zur Schüssel dazugeben und jeweils nur sehr kurz unterrühren. Etwa 3/4 des Teiges in die vorbereitete Form geben und glatt streichen. Den Kakao über den restlichen Teig sieben und dann zusammen mit der Milch unterrühren. Diesen dunklen Teig als zweite Schicht in die Form geben und ebenfalls glatt streichen. Die beiden Schichten dabei möglichst nicht vermischen – funktioniert am verlässlichsten, wenn man den dunklen Teig erst in kleinen Portionen auf dem hellen Teig platziert und dann verstreicht. Die abgetropften Kirschen auf der Oberfläche gleichmäßig verteilen und leicht in den Teig drücken.
3. Das Backblech mit dem Backrahmen in die Mitte des Ofens schieben und dann für etwa 35-40 Minuten backen – mit einem Zahnstocher testen, ob noch Teig kleben bleibt, und erst herausnehmen, wenn der Zahnstocher sauber herauskommt. Den Kuchen aus dem Ofen nehmen, nach ein paar Minuten aus der Form lösen und auf einem Kuchengitter komplett abkühlen lassen.
4. Während der Kuchen im Ofen ist, den Pudding für die Vanillecreme vorbereiten und dafür die Stärke mit etwa 2 EL des Zuckers und etwas Milch glatt rühren. Die restliche Milch, Zucker und Vanillepaste bzw. Vanille Extrakt in einem Topf zum Kochen bringen. Die Stärkemischung unter Rühren dazugeben und so lange unter ständigem Rühren köcheln lassen, bis der Pudding schön andickt. Das Eigelb gut unterrühren, vom Herd nehmen, etwas abkühlen lassen und dann ein Stück Klarsichtfolie direkt auf den Pudding legen und festdrücken, damit keine Haut entsteht. Komplett auskühlen lassen.
5. Für die Vanillecreme die Butter in einer großen Schüssel hell und luftig aufschlagen. Den abgekühlten Pudding esslöffelweise zugeben und unterrühren – Butter und Pudding sollten hier unbedingt die gleiche (Raum-)Temperatur haben, sonst flockt die Creme eventuell aus. Den Kuchen erneut in den Backrahmen setzen, dann die Vanillecreme auf dem abgekühlten Kuchen verteilen und glatt streichen. Für mindestens 1 Stunde in den Kühlschrank stellen.
6. Die Schokolade grob hacken und mit dem Kokosfett über einem Topf mit köchelndem Wasser schmelzen und glatt rühren. Die Glasur ein wenig abkühlen lassen – ist sie zu warm, kann sie die Creme schmelzen. Die Glasur dann auf der Vanillecreme verteilen, noch einen Moment warten, bis sie etwas angezogen hat, und dann mit einem Garnierkamm oder einer Gabel das typische Donauwellenmuster einritzen. Komplett abkühlen lassen und dann in Stücke schneiden und servieren.
Craving more? Keep in touch on Facebook, Instagram and Pinterest for new post updates and more. You can also contact me with any questions or inquiries!
Here is a version of the recipe you can print easily.
Print
German Donauwelle aka. Snow White Cake
- Prep Time: 01:20
- Cook Time: 00:40
- Total Time: 03:30
- Yield: 12 1x
- Category: Cake
- Method: -
- Cuisine: Germany
- Diet: Vegetarian
Description
This German cake is known as Snow White Cake or Donauwelle, which means »Wave of the Danube«. A delicious chocolate cake with cherries and vanilla buttercream.
Ingredients
For the cake:
8.8 oz. (250g) butter, at room temperature
1 cup (200g) sugar (fine)*
1 tsp. vanilla bean paste* or vanilla extract*
5 medium eggs
3 cups (380g) all-purpose flour*
3 tsp. baking powder
1 pinch of salt
2 tbsp. cocoa powder*
1 tbsp. milk
12.3 oz. (350g) canned sour cherries*, drained
For the vanilla cream:
17 fl. oz. (500ml) milk
1/2 cup (100g) sugar (fine)*
1/3 cup (45g) cornstarch*
1 tsp. vanilla bean paste* or vanilla extract*
1 medium egg yolk
8.8 oz. (250g) butter, at room temperature
For the chocolate glaze:
7 oz. (200g) semi-sweet chocolate* (61%)
0.7 oz (20g) coconut fat*
Instructions
1. Preheat the oven to 180°C (350°F). Place a baking frame* on a baking sheet and adjust to a size of about 32x24cm – line with baking parchment or grease and dust with some flour. Set aside. Let the cherries drain in a sieve.
2. Add the butter and sugar to a large bowl and mix on high speed until light and fluffy. Add the vanilla paste/vanilla extract and mix in. Next, add the eggs one after another mixing well after each addition. Mix the flour with baking powder and salt and add in three batches to the bowl and mix until just combined. Transfer about 3/4 of the batter into the prepared baking frame, spread evenly and smooth out the top. Sift the cocoa over the remaining batter, add the milk and mix everything until well combined. Add this dark batter on top of the light batter and spread it evenly. Try not to mix those two layers. It works best if you add the chocolate batter with a smaller spoon all over the light batter and then distribute it evenly. Add the drained cherries evenly all over the chocolate batter and press them a bit into the batter.
3. Place the baking sheet with the baking frame in the middle of the oven and bake the cake for about 35-40 minutes until a toothpick inserted in the center comes out clean. Take it out of the oven and let it cool down a bit, then remove it from the baking sheet and transfer it to a wire rack to cool down completely.
4. While the cake is baking, prepare the vanilla custard for the vanilla cream filling. Mix the cornstarch with 2 tablespoons of the sugar and some of the milk until smooth. Add the remaining milk, sugar, and vanilla paste/vanilla extract to a saucepan, mix it and bring it to a boil. Add the cornstarch mixture and stir constantly until the custard starts to thicken. Next, add the egg yolk and mix it in. Take it off the heat and let it cool down a bit, then place a piece of plastic wrap right on top of the custard so it does not develop a skin. Let it cool down completely.
5. For the vanilla cream add the butter to a large bowl and mix on high speed until light and fluffy. Add the cooled custard one tablespoon at a time and mix it in. Make sure the custard and butter have the same (room) temperature. If one is too warm or cold, the cream might curdle, cause the two components won’t mix well. Place the cake inside the baking frame again, spread the vanilla cream on top and smooth it out. Place the cake in the fridge and let it cool down for at least 1 hour.
6. Chop the chocolate for the glaze and add it together with the coconut fat to a bowl. Place that bowl on top of a saucepan with simmering water and let the chocolate and coconut fat melt slowly. Mix until smooth, then take off the heat and let cool down for some time. The glaze should be spreadable but not too warm or it will melt the vanilla cream. Pour the glaze and make sure to cover everything. Wait a moment until you can see that the chocolate thickens a bit further, then use a fork and decorate the cake with a wavy pattern. Let it cool down completely, then cut it into slices and serve.
Notes
Enjoy baking!
Links marked with an asterisk (*) are affiliate links (advertising/Werbung) to Amazon Germany. If you click on one of those links and buy something via this link, I will get a commission for that sale. The price of whatever you buy is not affected in any way by this.


Me encanta este pastel, no tardare mucho en hacerlo, gracias.
Hey, I love this recipe but i have a question. In the vanilla cream ingredients, you list an egg yolk. But in the directions, there is no mention of where to add the egg yolk. Could you please fix this? Thank you.
Hi Janet,
thanks for pointing this out! It got lost in translation ;)
It has to be added at the end when the pudding has thickened.
Cheers,
Marc
Vanilla paste is not available where I live. How can I fix this problem?
Hi. You can use regular vanilla extract instead, artificial vanilla flavor or vanilla sugar instead. All fine.
Cheers, Marc
I use lemon zest instead of vanilla. Mainly because we have a lemon tree in the garden and I love everything lemon. But it works well in the recipe.
Do these turn out OK as cupcakes?
I am making big batches of small cupcakes for an event. Already decided that I wanted to try your mini-Bienenstich! But I wanted to do Donauwelle for people with nut allergies, so I was curious whether these could be done as cupcakes too.
Vielen Dank!
Hi Amanda,
the recipe for the dough should definitely work for cupcakes. I see a problem keeping the pudding cream on the cupcakes and the chocolate glaze ;)
But if you adapt the cream to a something that is good to pipe… why not :)
Cheers,
Marc
There is coconut oil used, so not good if a nut allergies
People with nut allergies probably know that already…
How long will the cake be fresh before I add the pudding and chocolate? Will it last 4 days?
Hi.
It will stay fine for a day but everything should actually be done on the same day for best results.
Cheers
Marc
For the coconut oil in the chocolate, are you using refined or unrefined? Not sure they would act differently, but would definitely taste differently. Thanks!
I recommend unrefined in general.
Cheers :)