
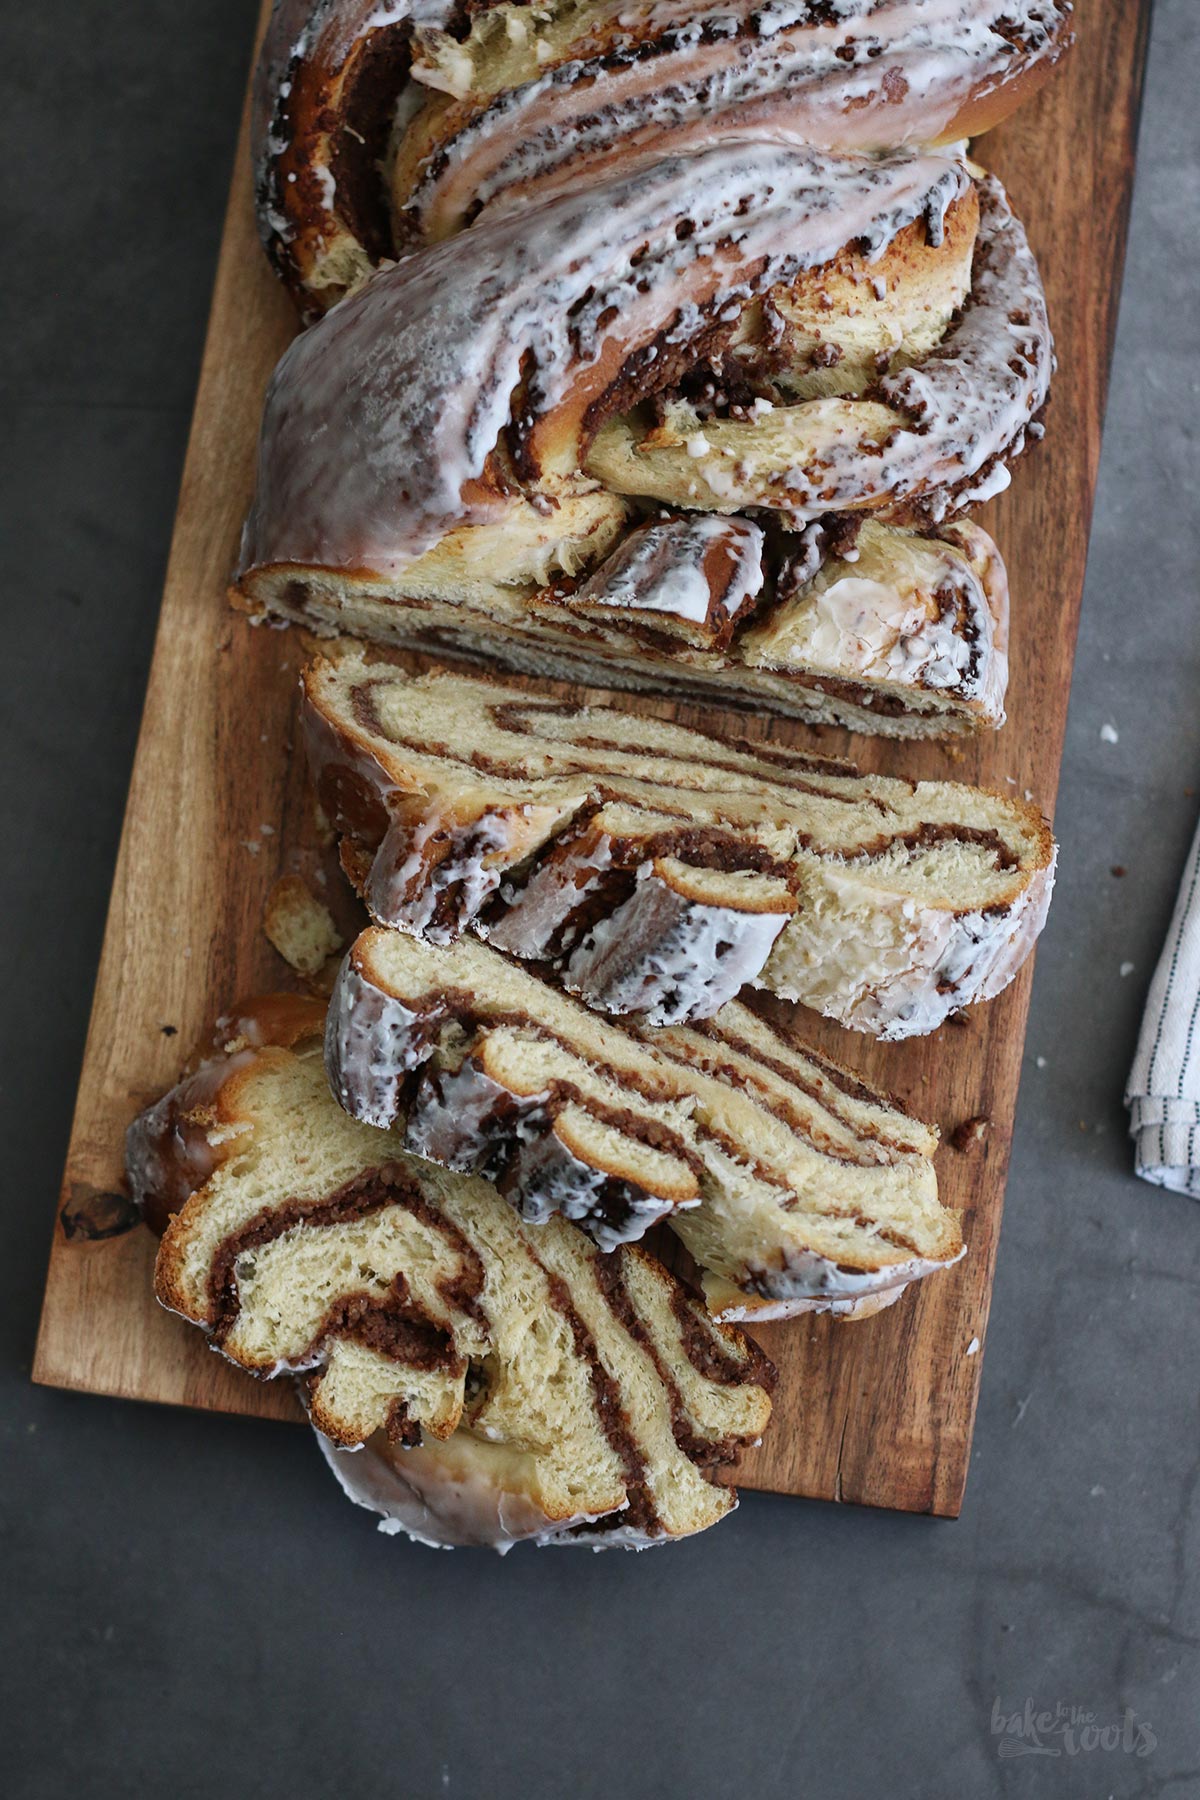
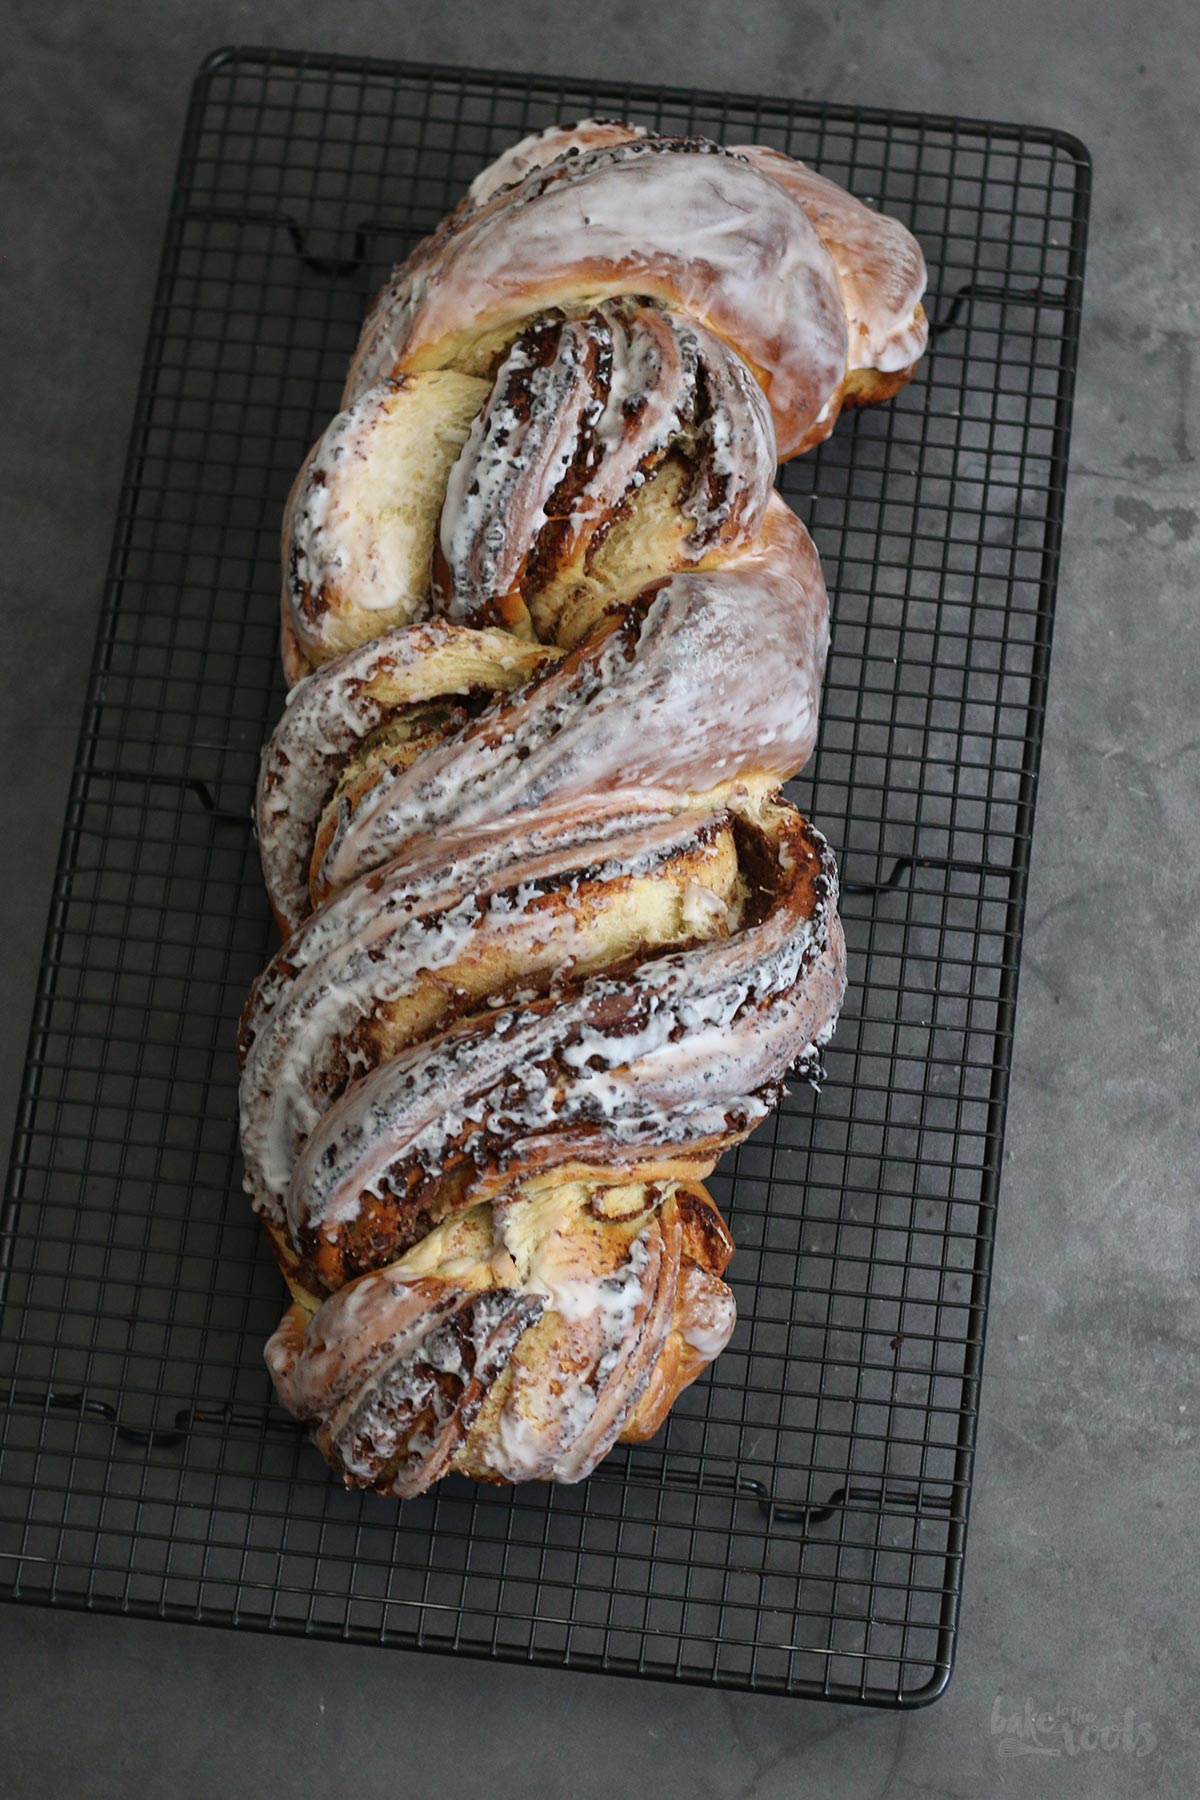
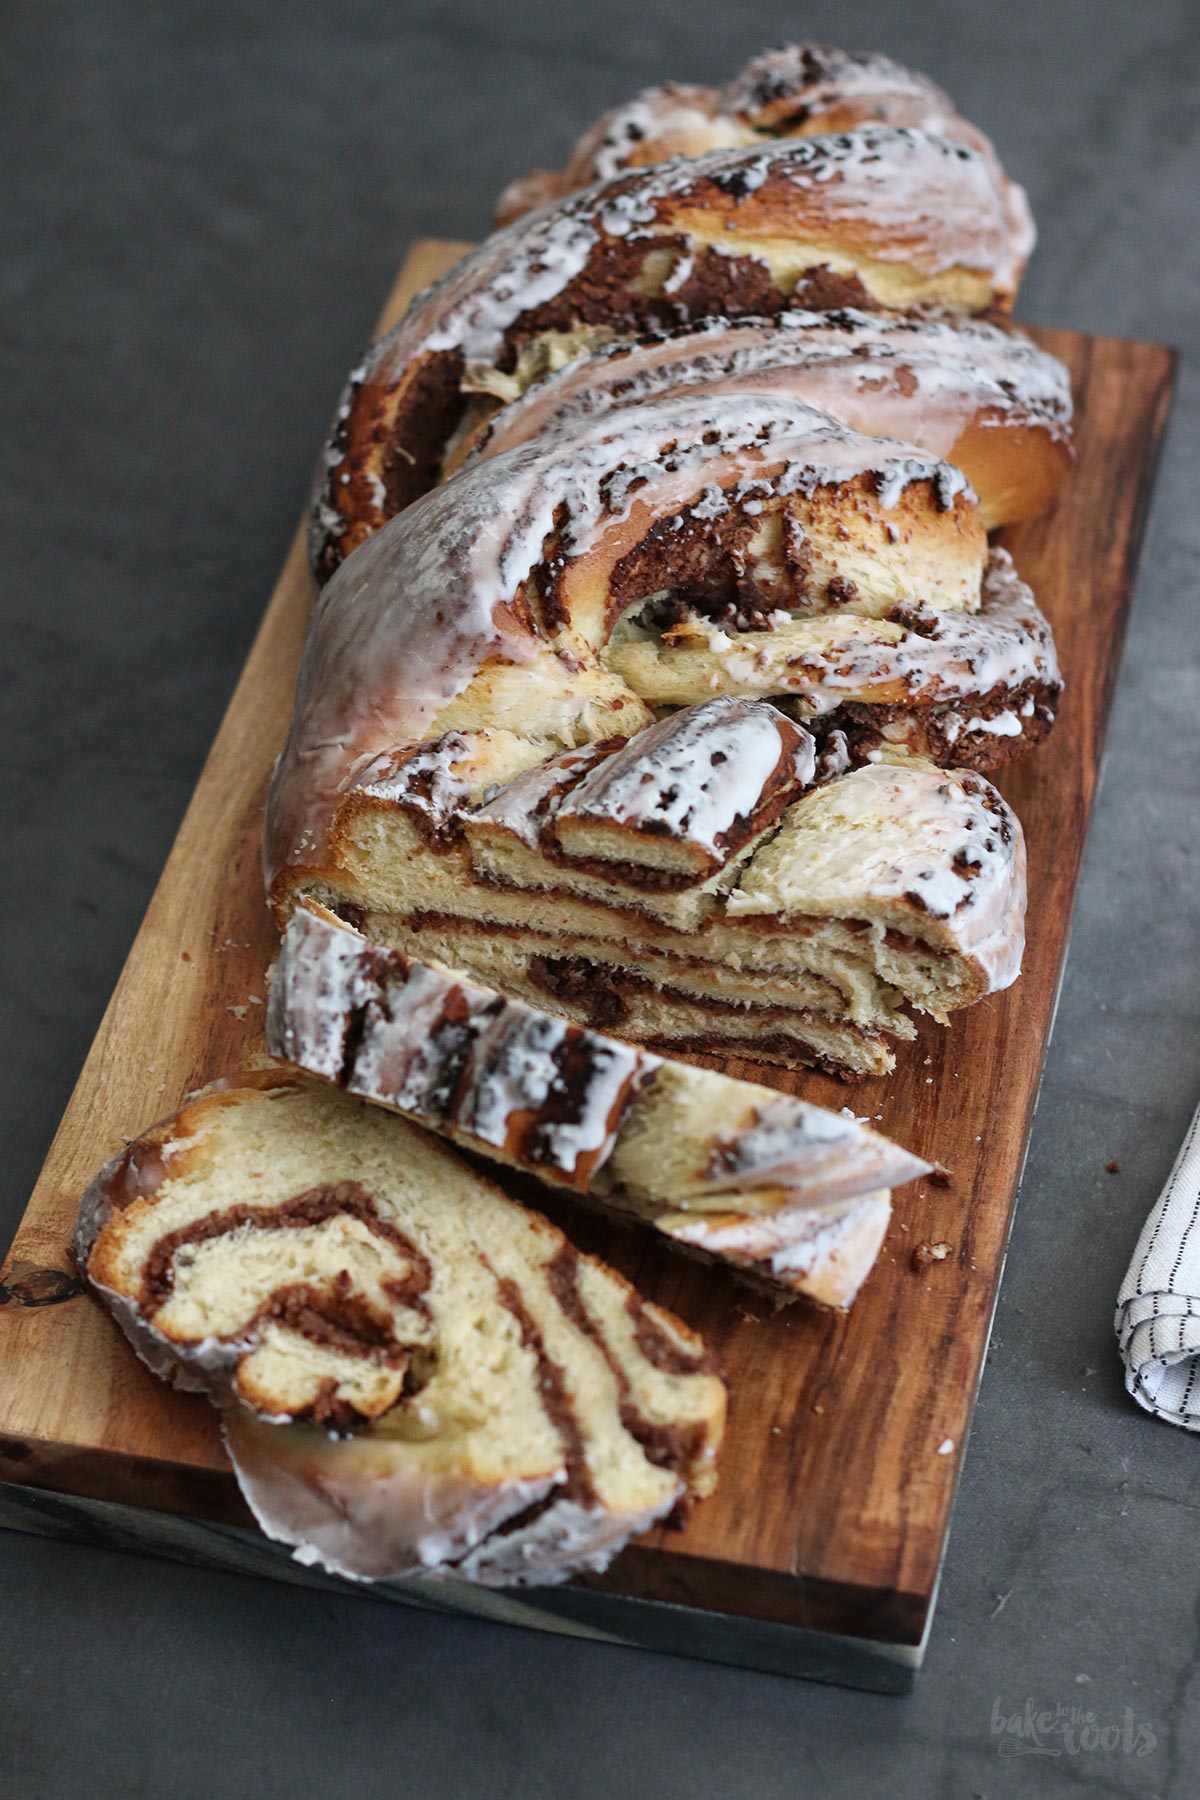
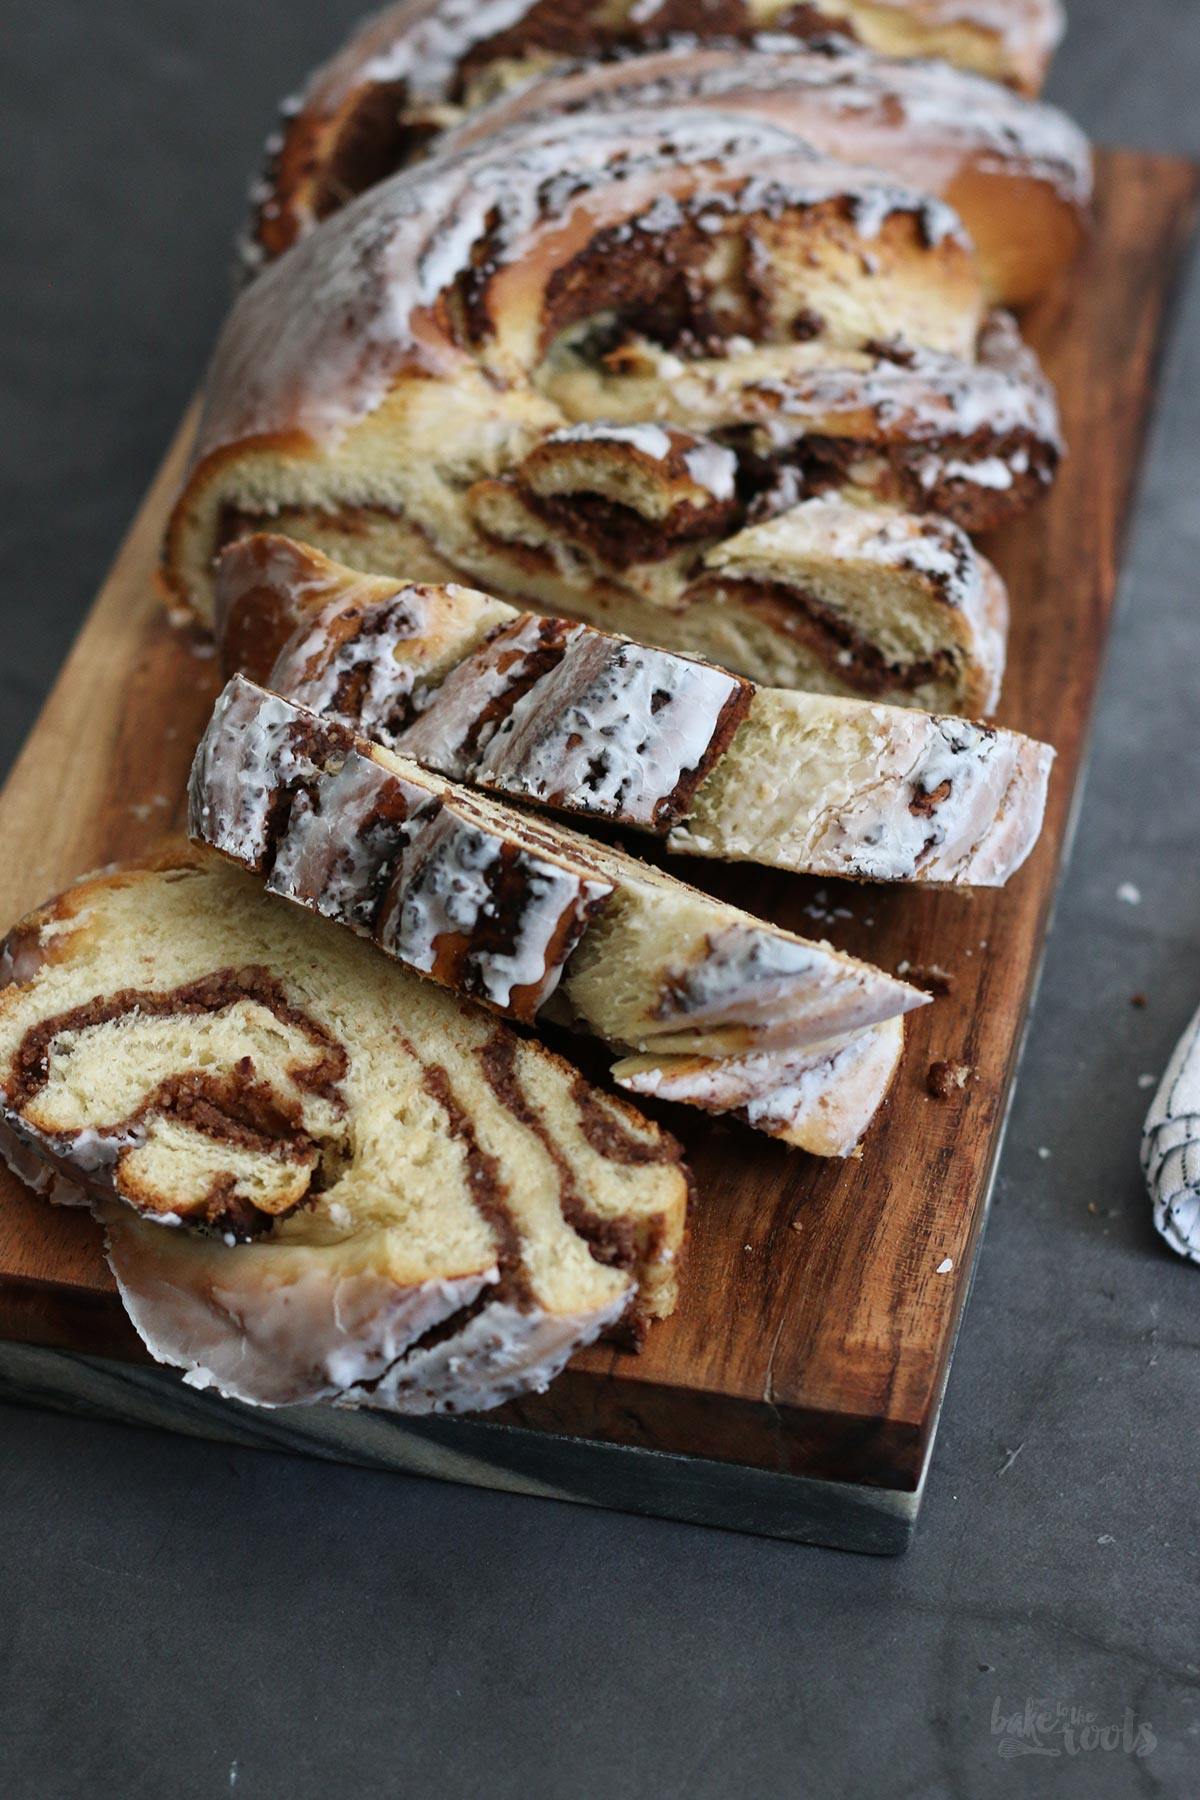
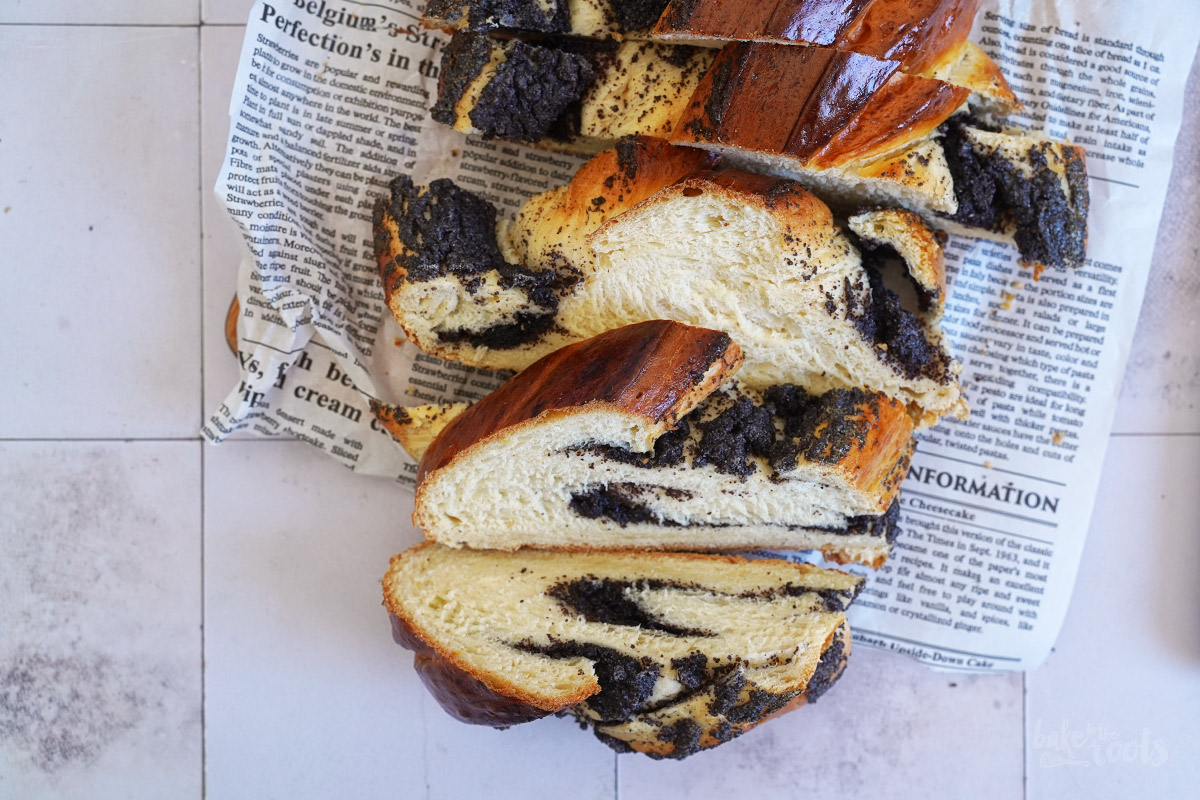
A homemade babka or braided loaf is not only for Easter a nice treat. I could actually eat a slice of this simple German Nusszopf (Braided Loaf with Nuts) every day. Unfortunately, my blood sugar wouldn’t be too thrilled if I did. I don’t use a lot of sugar in the dough here, but the sugar glaze on top is too much for me personally. That’s why I do not always brush the whole loaf with the glaze – the part I want to eat has no sugar on top. Clever, right?!
Yeast bakes are not everyone’s cup of tea, I’ve been told. Many probably think yeast can be a bitch. Well… it can certainly happen that a yeast dough is not behaving as he/she should but honestly, normally yeast dough is quite easy to handle (and not bitchy at all). I really like to use it for my bakes. The only thing that bothers me a bit is the waiting time. I mean you can do things while waiting for the dough to rise, but this also means your end product is not ready in 5 minutes. You have to wait. It’s inevitable.
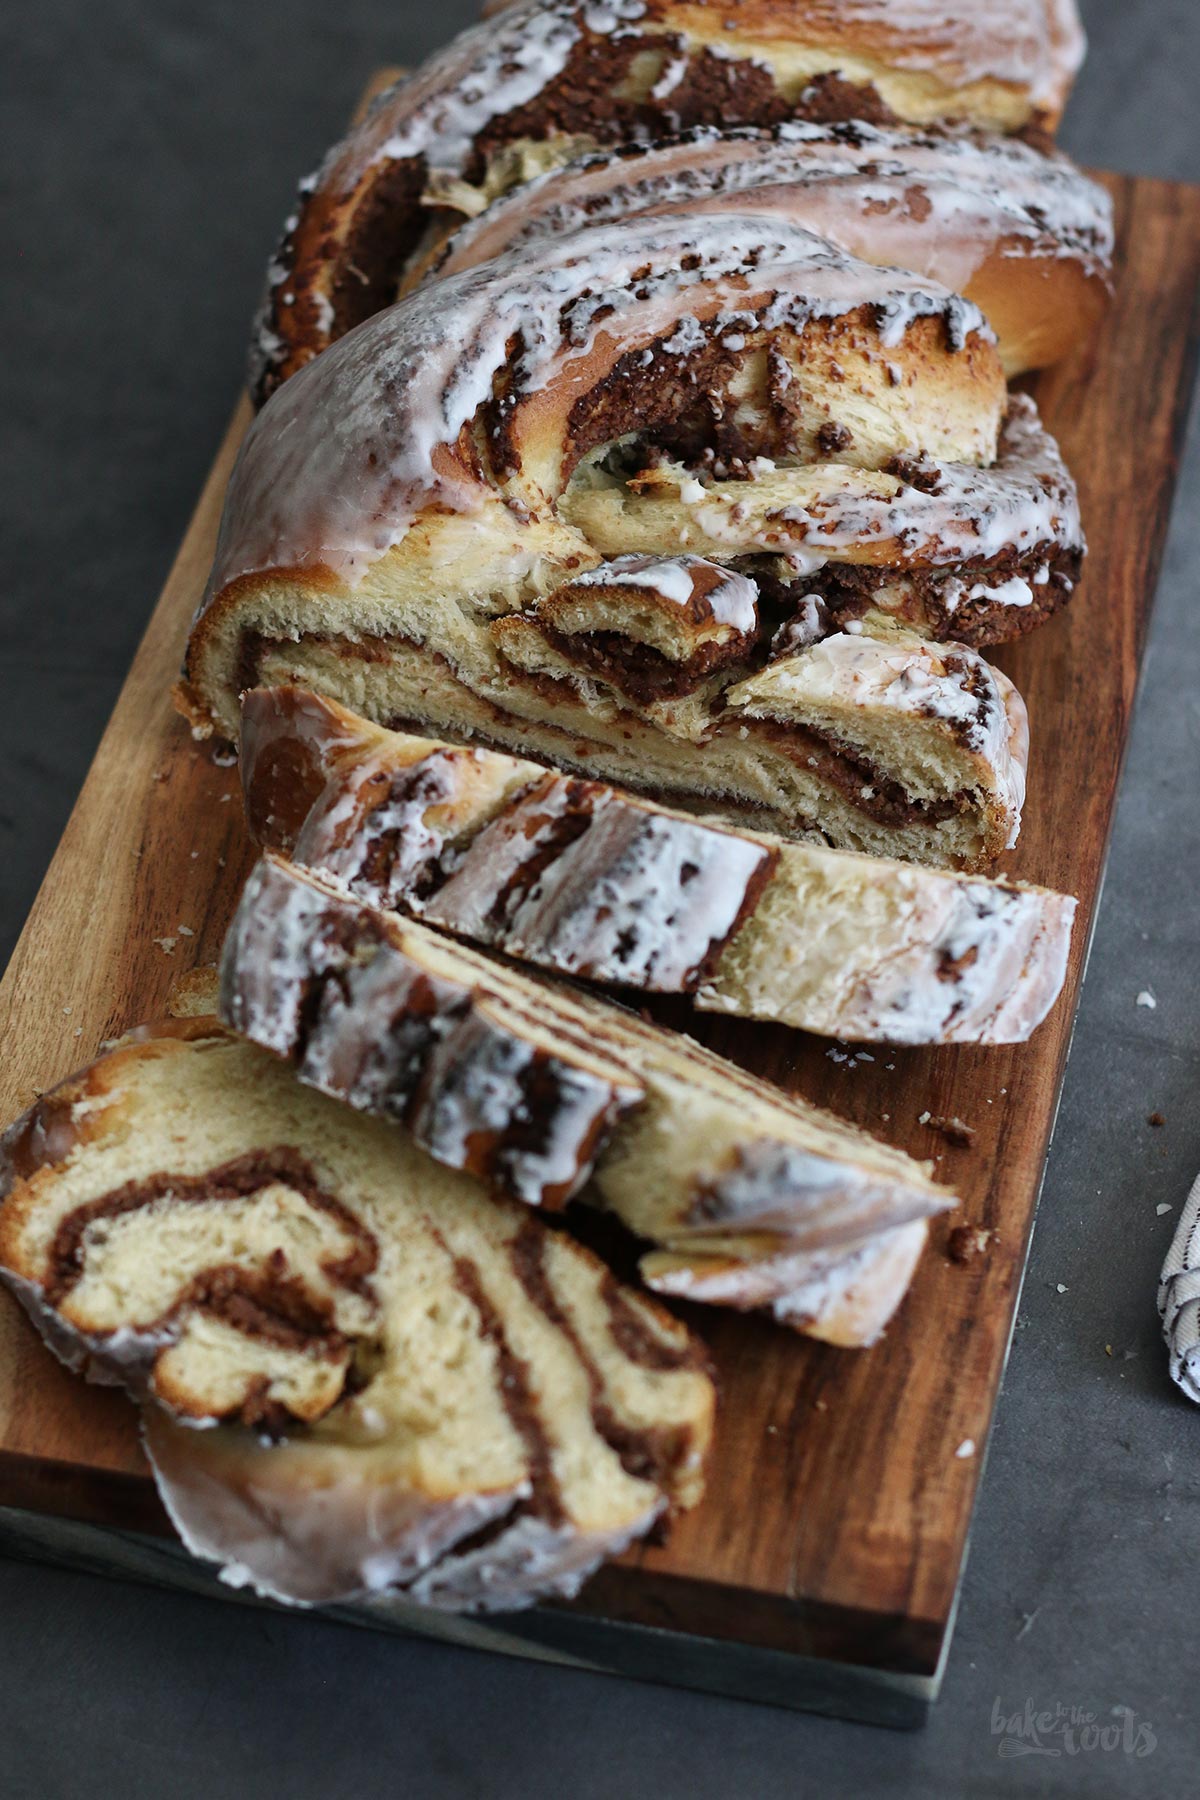
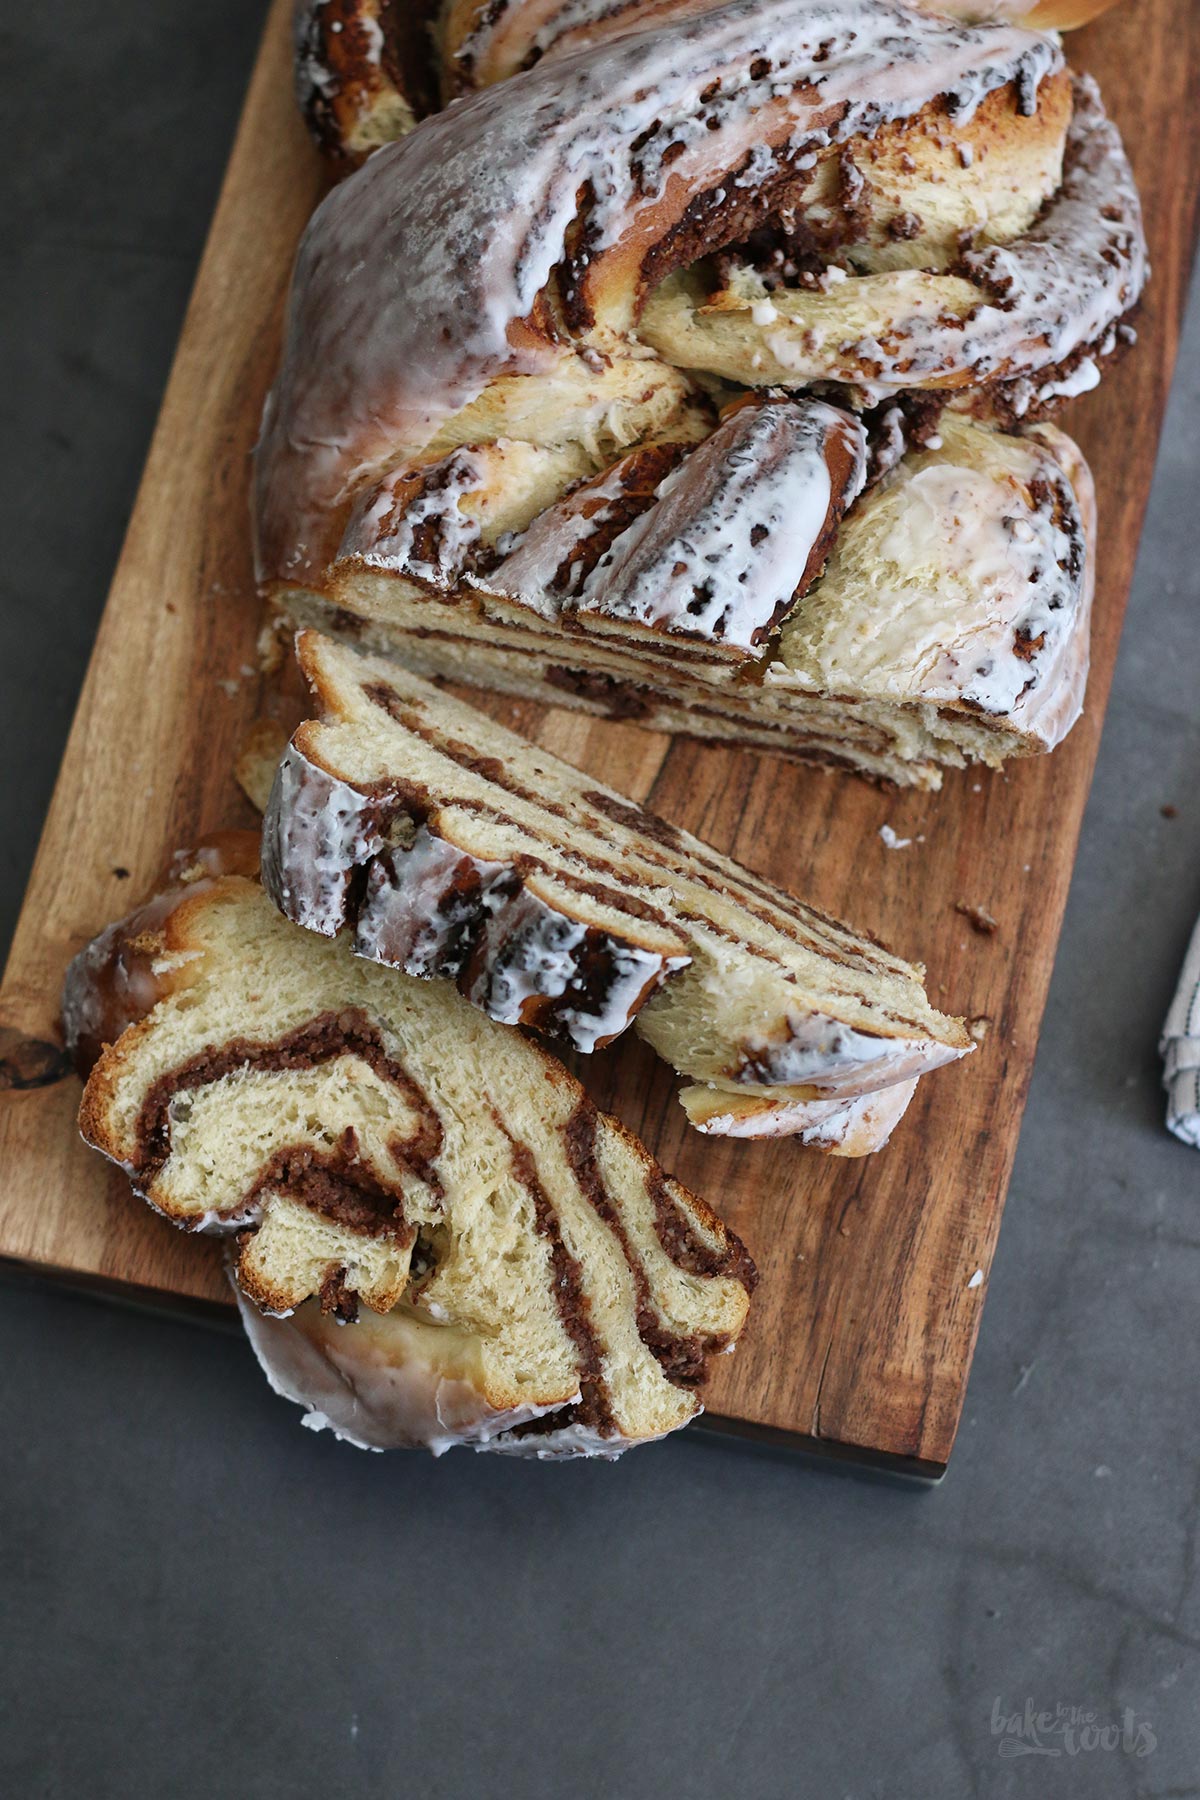
This braided loaf here with nut filling is a pretty easy bake. The dough needs not much attention to be honest, the filling is easy to prepare and the braiding is also quite easy to do. And that’s it. Not much more to do. This braided loaf here does not even need a second resting/rising time. Normally you give yeast bakes a second rise, but this one here gets delicious and fluffy without that. Thanks to the nut filling the bake also stays nice and fresh for days. A regular sweet braided loaf can dry out a bit, let’s say on the second day – not gonna happen here.
As mentioned before – this bake is coated with a simple sugar glaze. If you don’t like that (like me) or just want to save the extra calories, you can easily skip that step. I recommend in that case brushing the loaf with some whisked egg yolk before baking so the top gets nice and shiny. Just looks better.
Oh and about the nuts… feel free to use any kind of nuts you like. I normally mix ground almonds with hazelnuts but there are many other types of nuts that work here. Pecans or pistachios, for example. If you use nuts like that you might want to leave out the cocoa and add some maple syrup instead. That always goes well together. As long as the nut mixture is not too dry (or moist) it will be fine.
Working with yeast is not complicated at all…
Using yeast in a bake is not as difficult as some people may think. Yeast dough needs a little more attention compared to a regular pound cake batter but that’s all doable if you follow some simple rules.
Yeast likes it warm and cozy.
Fresh yeast we all use for baking is a fungus, or rather many single-celled fungi that reproduce by sprouting or dividing. For this process, yeast needs a certain temperature – just as we need a certain body temperature to function properly. At low temperatures, we also prefer to snuggle up in a blanket and are less productive. The ideal temperature for yeast is somewhere between 86°–104°F (30°–40°C). In this range yeast works, multiplies well, and releases gases that let the dough rise. If the temperatures are lower, yeast continues to work, but everything takes much longer. Above 113°F (45°C), the yeast says goodbye and goes to (yeast) heaven – you should be careful here and keep that in mind.
Bring ingredients to the right temperature.
As already mentioned, yeast needs a certain temperature to work properly. If the recipe says »lukewarm« milk, it should be lukewarm only. Stick your finger into the milk and test it – it should not be much warmer than your own body temperature. Butter, eggs and other ingredients you add to the dough should also be at room temperature, if possible. That gives everyone the chance to get to know each other better.
Yeast dough gives »Schmackes« – meaning you will get strong arms!
Yeast dough should be kneaded thoroughly – this can take up to 10 minutes or more until all ingredients are well combined and the yeast has the nutrients close by it needs to multiply properly. You can do the kneading by hand and show everyone how strong you are – or you let your kitchen robot do the work. Works both ways. Many bakers say they prefer to knead by hand because it allows them to »feel« the dough better, but honestly…. I prefer to do something else in those 10 minutes.

Letting yeast rise is a walk in the park!
A yeast dough needs a little rest after kneading. You don’t have to turn off the music or leave the room for the yeast dough to rise properly, but covering the bowl and placing the bowl in a warm place is actually a good idea. This could be inside the oven, on the kitchen floor if you have floor heating, near a stove or heater (not on top!), or classically in the bedroom under the covers. Yes, many do that. The point is that you give the dough time and a cozy place to rest – without any drafts of cold air. If your yeast dough does not rise as quickly as expected, just give it a little more time. That will do the trick in most cases.
Off to a second round!
Many recipes for a bake with a yeast dough call for a second resting time. After the first round, you knock out the air bubbles that have developed inside the dough, you knead a bit more if necessary and then you shape the bread, bread rolls, braid the loaf, or whatever. After that you let the dough rise again. The second rising time makes the crumb of the pastry finer and the baked good usually has fewer large air bubbles in it. If your yeast dough gets a bit bitchy after the second round of kneading and resists when you try to roll it out – just cover it again and give it another five minutes or so. The dough just needs to relax again briefly and is much easier to handle after that.
Fresh yeast or dry yeast – that’s the question here!
There are many opinions about the usage of fresh or dried yeast. Some swear by fresh yeast, others think dry yeast is great and ideal to work with. Theoretically, you can use both. Fresh yeast usually has to be mixed with a lukewarm liquid and some sugar – this gets the yeast going. Dry yeast can be mixed with the flour and the other ingredients and that’s it basically. Many insist on testing dry yeast to check if it is still active by dissolving it in lukewarm milk before using it, but that is not really necessary. If the expiration date on the package is still far away, everything should be fine. No matter if you use fresh or dried yeast – if you give the yeast time and treat it well, both versions will give you a nice result.
INGREDIENTS / ZUTATEN
For the dough:
17.6 oz. (500g) all-purpose flour*
1/4 cup (50g) sugar (fine)*
1/2 tsp. salt
1 cup (250ml) lukewarm milk (or plant-based alternative)
1.5 oz. (42g) fresh yeast
1/3 cup (80g) butter, at room temperature
1 large egg
For the filling:
7 oz. (200g) ground nuts (e.g. almonds, hazelnuts or mixed).
2 tbsp. sugar (fine)* (or xylitol*)
1 tbsp. cocoa powder*
1 large egg
1 tsp. vanilla extract*
about 1/4 cup (60ml) milk (or plant-based alternative)
For the glaze (optional):
3.5 oz. (100g) confectioners’ sugar
some milk (or plant-based alternative)
Für den Teig:
500g Mehl (Type 405)*
50g Zucker (fein)*
1/2 TL Salz
250ml lauwarme Milch (oder pflanzliche Alternative)
1 Würfel (42g) frische Hefe
80g weiche Butter
1 Ei (L)
Für die Füllung:
200g gemahlene Nüsse (z.B. Mandeln, Haselnüsse oder gemischt)
2 EL Zucker (fein)* (oder Xylit*)
1 EL Kakaopulver*
1 Ei (L)
1 TL Vanille Extrakt*
etwa 60ml Milch (oder pflanzliche Alternative)
Für die Glasur (optional):
100g Puderzucker
etwas Milch (oder pflanzliche Alternative)
DIRECTIONS / ZUBEREITUNG
1. Mix the flour, sugar, and salt in a large bowl. Crumble the yeast into the lukewarm milk and stir to dissolve, then add it to the bowl together with the soft butter and the egg. Knead everything for 5-6 minutes until a nice and smooth dough forms. Cover the bowl and let the dough rise in a warm place for about 30-35 minutes until it has almost doubled in size.
2. For the filling, mix the ground nuts, sugar (or xylitol), cocoa, egg, and vanilla extract in a bowl. Gradually add milk and mix until well combined. The mixture should be nice and spreadable, but not too wet. Set aside.
3. Preheat the oven to 200°C (390°F). Line a baking sheet with baking parchment and set aside. On a floured surface roll out the dough into a large rectangle and spread the nut filling evenly on top. Roll up tightly from one of the long sides and place on the prepared baking sheet.
4. Cut the dough roll you created from one side in half with a sharp knife to create two strands where you can see the individual layers. Then fold/braid the two strands over each other several times – the cut edges with the nut filling should face outward. Tuck the end underneath the loaf and repeat the process on the other side. Bake the braided loaf for about 28-30 minutes – the surface should have a nice golden brown color. Check in between, and if the loaf is getting too dark and cover with a piece of baking parchment and continue baking. Remove the finished loaf from the oven and cool on a wire rack.
5. For the glaze, mix the confectioners’ sugar with some milk to create a thick paste, brush the still-warm loaf with it and let dry/cool down completely.
1. Mehl, Zucker und Salz in einer großen Schüssel vermischen. Die Hefe in die lauwarme Milch bröckeln und darin auflösen lassen, dann zusammen mit der weichen Butter und dem Ei zur Schüssel dazugeben und alles für 5-6 Minuten zu einem glatten Teig verkneten. Die Schüssel abdecken und den Teig für etwa 30-35 Minuten an einem warmen Ort gehen lassen, bis sich das Volumen in etwa verdoppelt hat.
2. Für die Füllung die gemahlenen Nüsse, Zucker (oder Xylit), Kakao, Ei und Vanille Extrakt in einer Schüssel vermischen. Nach und nach Milch dazugeben und alles gut verrühren. Die Masse sollte schön streichfähig sein, aber nicht zu feucht. Zur Seite stellen.
3. Den Ofen auf 200°C (390°F) Ober-/Unterhitze vorheizen. Ein Backblech mit Backpapier auslegen und zur Seite stellen. Den Teig zu einem großen Rechteck ausrollen und die Nussfüllung gleichmäßig darauf verstreichen. Von einer langen Seite her aufrollen und auf das vorbereitete Backblech legen.
4. Die Teigrolle von einer Seite mit einem scharfen Messer so einschneiden, dass zwei Stränge entstehen, bei denen man die einzelnen Schichten gut erkennen kann. Die beiden Teigstränge dann mehrmals übereinanderschlagen/flechten – die Schnittkanten mit der Nussfüllung sollten dabei möglichst nach außen zeigen. Das Ende nach unten einschlagen und dann den Prozess auf der anderen Seite wiederholen. Den Zopf dann etwa 28-30 Minuten backen – die Oberfläche sollte eine schöne goldbraune Farbe bekommen haben. Zwischendurch mal checken, sollte der Zopf zu dunkel werden, einfach mit einem Stück Backpapier abdecken und weiterbacken. Den fertigen Zopf aus dem Ofen holen und auf einem Kuchengitter abkühlen lassen.
4. Für die Glasur den Puderzucker mit etwas Milch zu einer dickflüssigen Masse verrühren, den noch warmen Zopf damit bestreichen und dann trocknen bzw. komplett abkühlen lassen.
Craving more? Keep in touch on Facebook, Instagram and Pinterest for new post updates and more. You can also contact me with any questions or inquiries!
Here is a version of the recipe you can print easily.
Print
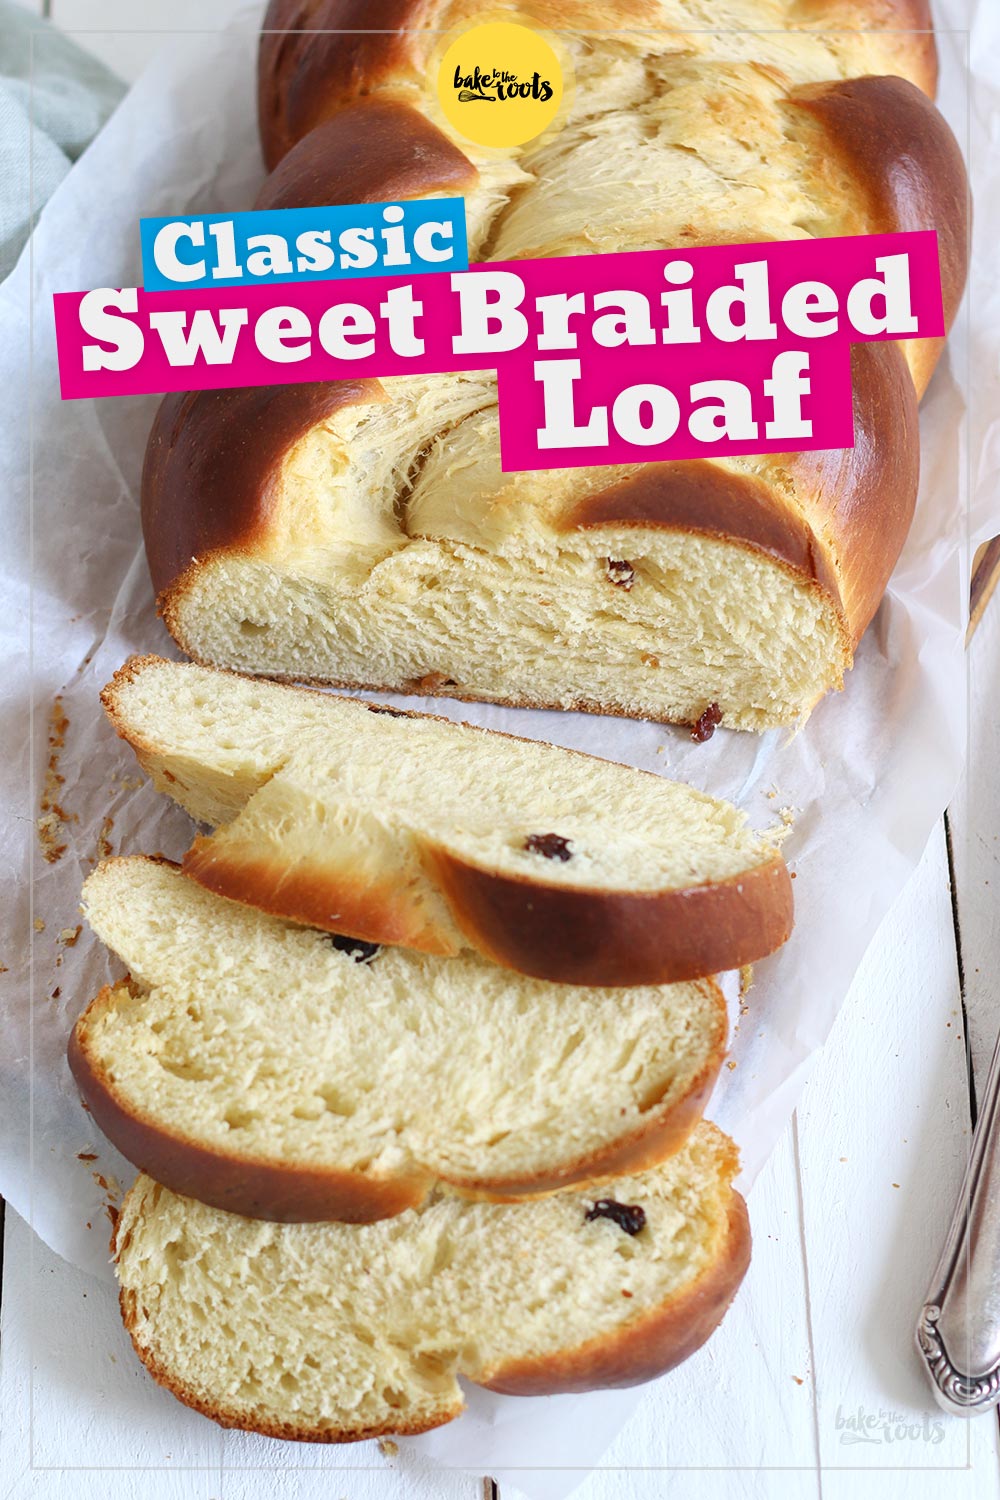
Simple Sweet Braided Loaf with Nut Filling aka. German Nusszopf
- Prep Time: 00:15
- Cook Time: 00:30
- Total Time: 01:00
- Yield: 1 1x
- Category: Yeast Bakes
- Method: -
- Cuisine: Germany
- Diet: Vegetarian
Description
This Sweet Braided Loaf with Nut Filling is easy to prepare and an extremely delicious treat! Not only for Easter – we bake it all year round!
Ingredients
For the dough:
17.6 oz. (500g) all-purpose flour*
1/4 cup (50g) sugar (fine)*
1/2 tsp. salt
1 cup (250ml) lukewarm milk (or plant-based alternative)
1.5 oz. (42g) fresh yeast
1/3 cup (80g) butter, at room temperature
1 large egg
For the filling:
7 oz. (200g) ground nuts (e.g. almonds, hazelnuts or mixed).
2 tbsp. sugar (fine)* (or xylitol*)
1 tbsp. cocoa powder*
1 large egg
1 tsp. vanilla extract*
about 1/4 cup (60ml) milk (or plant-based alternative)
For the glaze (optional):
3.5 oz. (100g) confectioners‘ sugar
some milk (or plant-based alternative)
Instructions
1. Mix the flour, sugar, and salt in a large bowl. Crumble the yeast into the lukewarm milk and stir to dissolve, then add it to the bowl together with the soft butter and the egg. Knead everything for 5-6 minutes until a nice and smooth dough forms. Cover the bowl and let the dough rise in a warm place for about 30-35 minutes until it has almost doubled in size.
2. For the filling, mix the ground nuts, sugar (or xylitol), cocoa, egg, and vanilla extract in a bowl. Gradually add milk and mix until well combined. The mixture should be nice and spreadable, but not too wet. Set aside.
3. Preheat the oven to 200°C (390°F). Line a baking sheet with baking parchment and set aside. On a floured surface roll out the dough into a large rectangle and spread the nut filling evenly on top. Roll up tightly from one of the long sides and place on the prepared baking sheet.
4. Cut the dough roll you created from one side in half with a sharp knife to create two strands where you can see the individual layers. Then fold/braid the two strands over each other several times – the cut edges with the nut filling should face outward. Tuck the end underneath the loaf and repeat the process on the other side. Bake the braided loaf for about 28-30 minutes – the surface should have a nice golden brown color. Check in between, and if the loaf is getting too dark and cover with a piece of baking parchment and continue baking. Remove the finished loaf from the oven and cool on a wire rack.
5. For the glaze, mix the confectioners‘ sugar with some milk to create a thick paste, brush the still-warm loaf with it and let dry/cool down completely.
Notes
Enjoy baking!
Links marked with an asterisk (*) are affiliate links (advertising/Werbung) to Amazon Germany. If you click on one of those links and buy something via this link, I will get a commission for that sale. The price of whatever you buy is not affected in any way by this.


Ich möchte Mohnszopf machen. Kennst du eine gute Mohnsfüllung ?
Versuch es doch mal mit dem hier :)
https://baketotheroots.de/mohnzopf
LG
Marc
Is lukewarm milk needed when using when using instant yeast before adding other ingredients?
Hi Michaela,
it is always good to give the yeast a warm start to activate it properly – no matter of fresh yeast or instant.
Cheers, Marc
Hello Marc,
I would like to say thank you for sharing your recipe. It is so so wonderful. We all absolutely loved it.
Stay safe :)
Kai
Happy to hear that! :D
Cheers
Marc
Just saw website, it looks like I will find great recipes. Thank you
How much dried yeast should you use?
Depends on where you live. In Germany, it would be one sachet. Enough for 500g of flour.
Cheers,
Marc