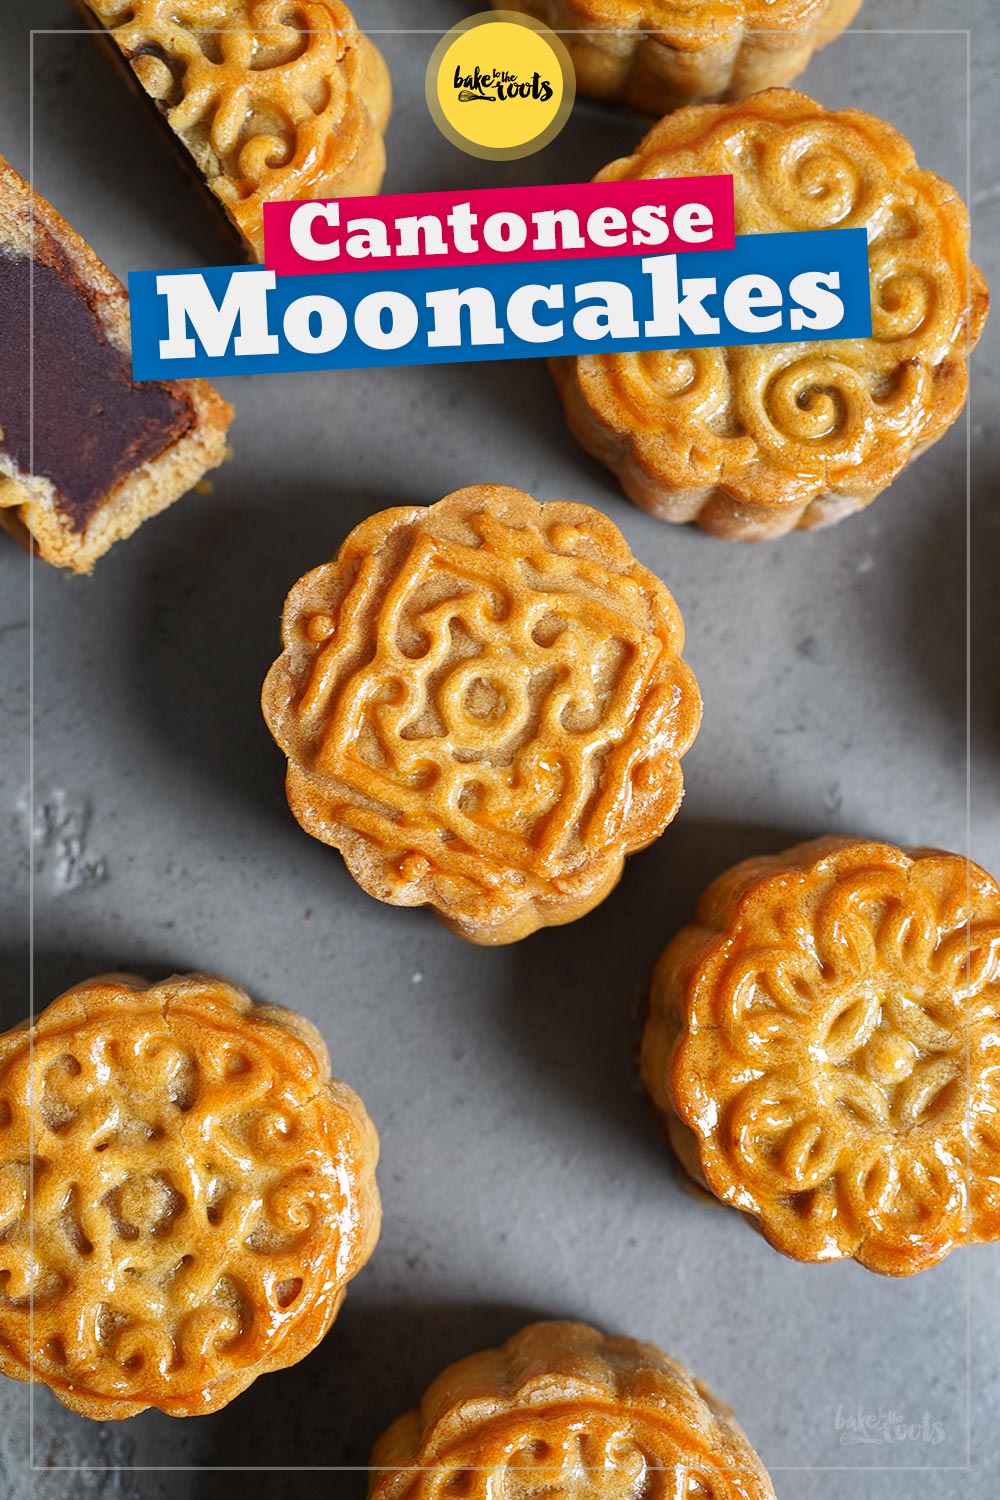
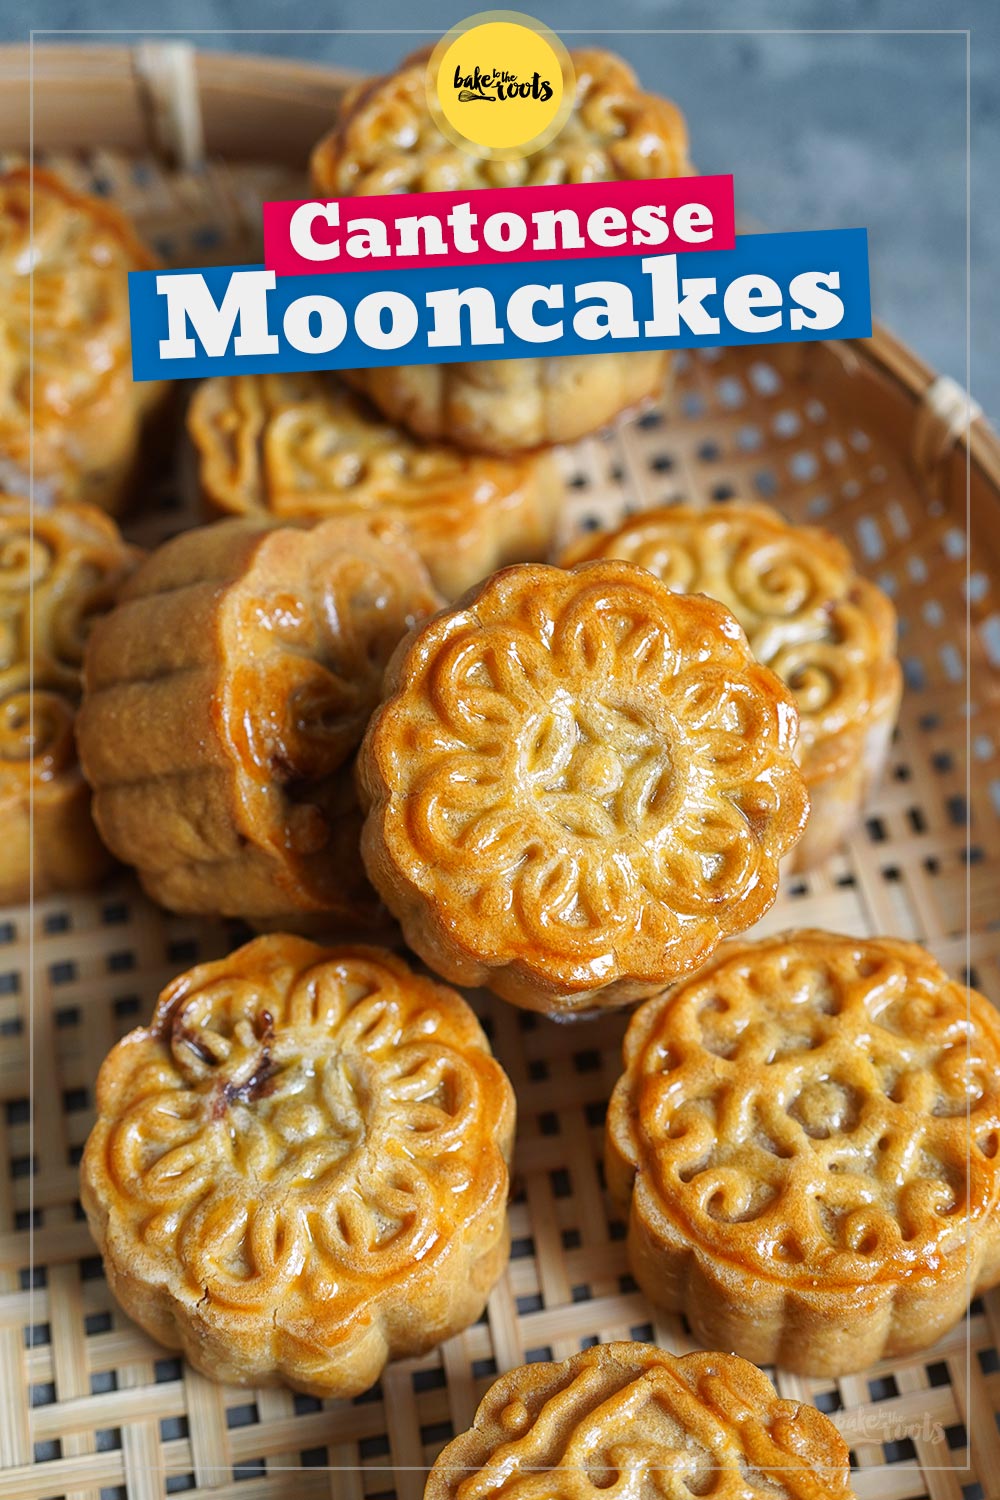
These little cakes are only baked for a short time every year in China and everywhere else where the Moon Festival is celebrated. These Mooncakes with Red Bean Paste are (among other versions) extremely popular and essential to celebrate the Moon Festival (Mid-Autumn Festival) properly. How else can you enjoy the full moon if you don’t share a few of these cakes with family and friends?! In Germany, mooncakes are difficult to find in bakeries – maybe in an Asian supermarket, if you’re lucky. Probably because we neither use the Chinese lunar calendar nor celebrate the Moon Festival.

Anyway. The first time we had mooncakes was in Singapore several years ago. We were on the way back home from Bali and had a stopover in Singapore. Since it was September and close to the Mid-Autumn Festival, those little cakes were on sale everywhere. Although you could get them pretty much anywhere, there were always huge lines to queue… a really popular sweet treat. And of course, we had to try them.
The mooncake we bought was given to us with a piece of advice – not to get it for ourselves, but to gift it to someone else. The lady that sold us the mooncake knew immediately we had no clue about the traditions surrounding the Moon Festival. Well, we simply gave each other the cake as a gift. We did not want to wait until someone else did that…
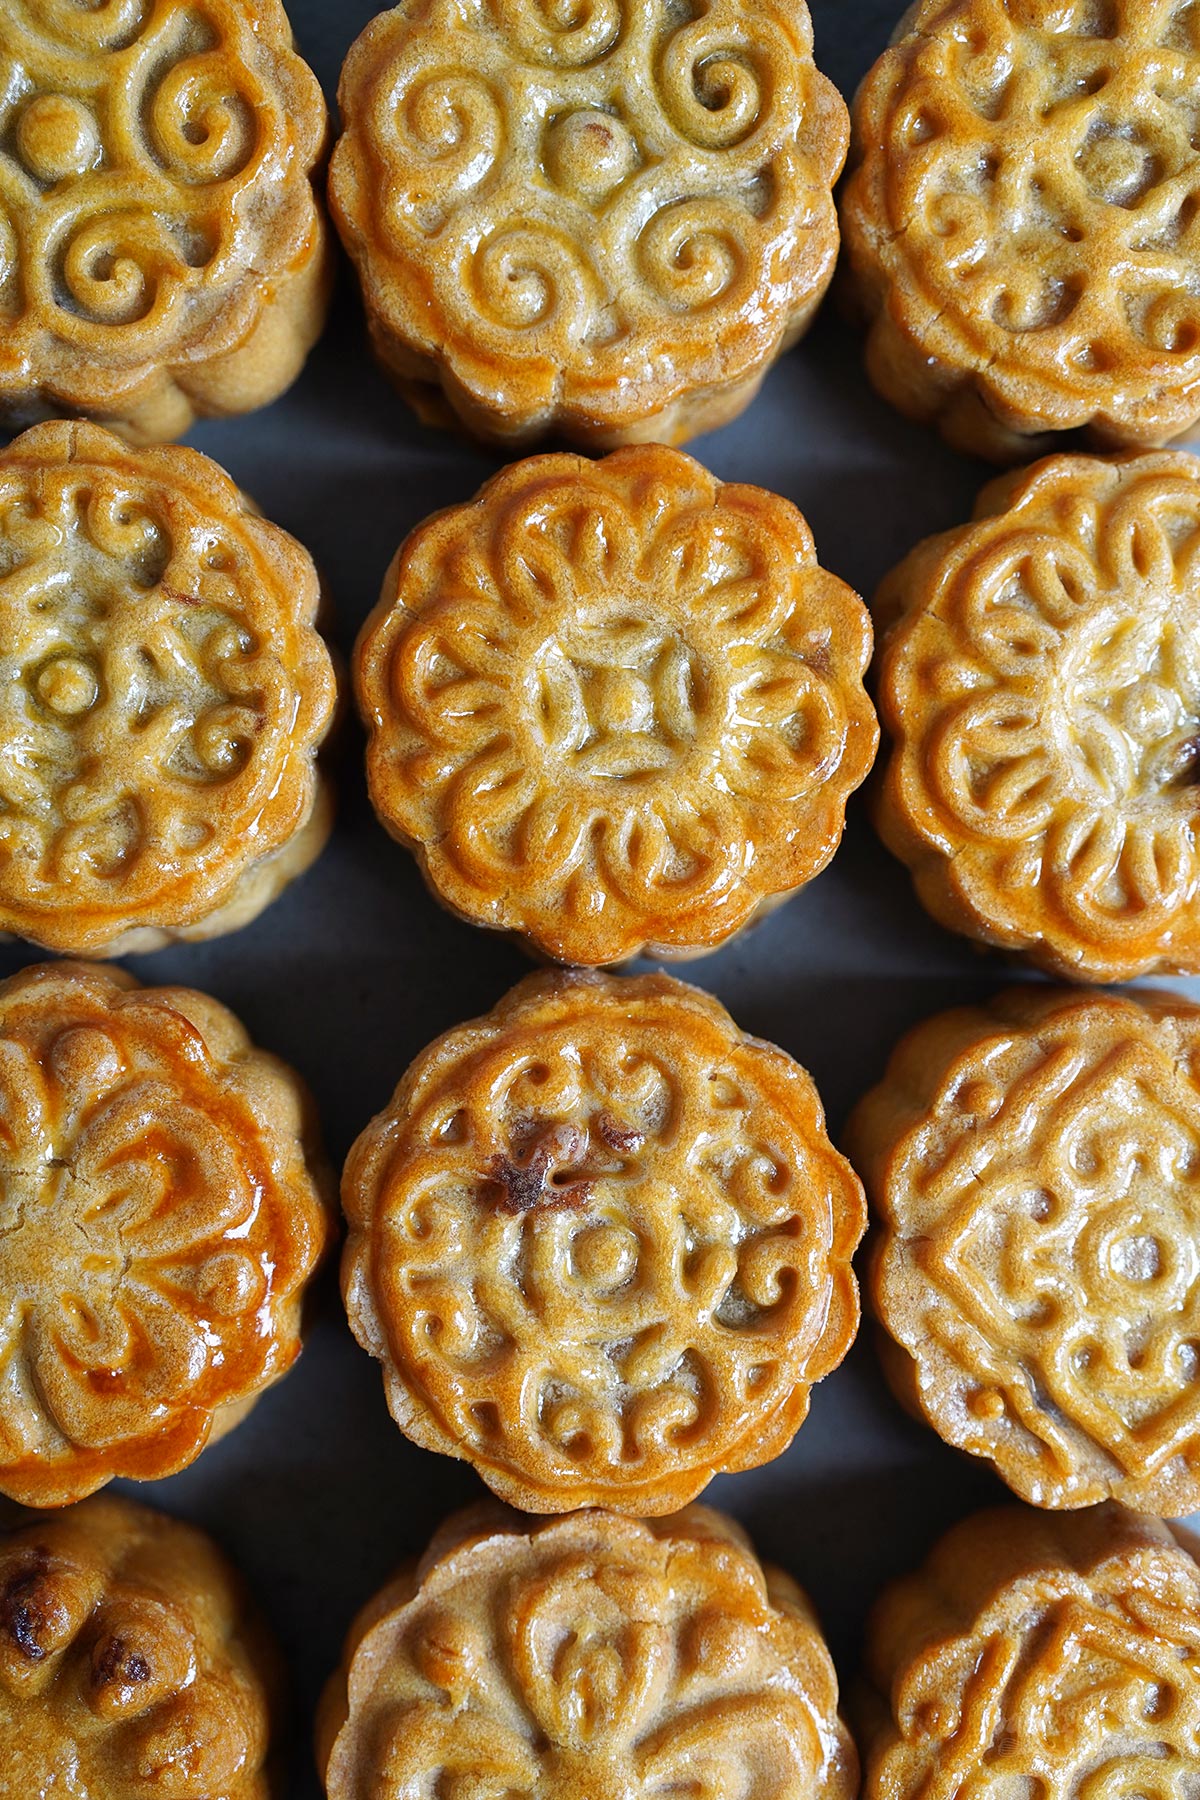
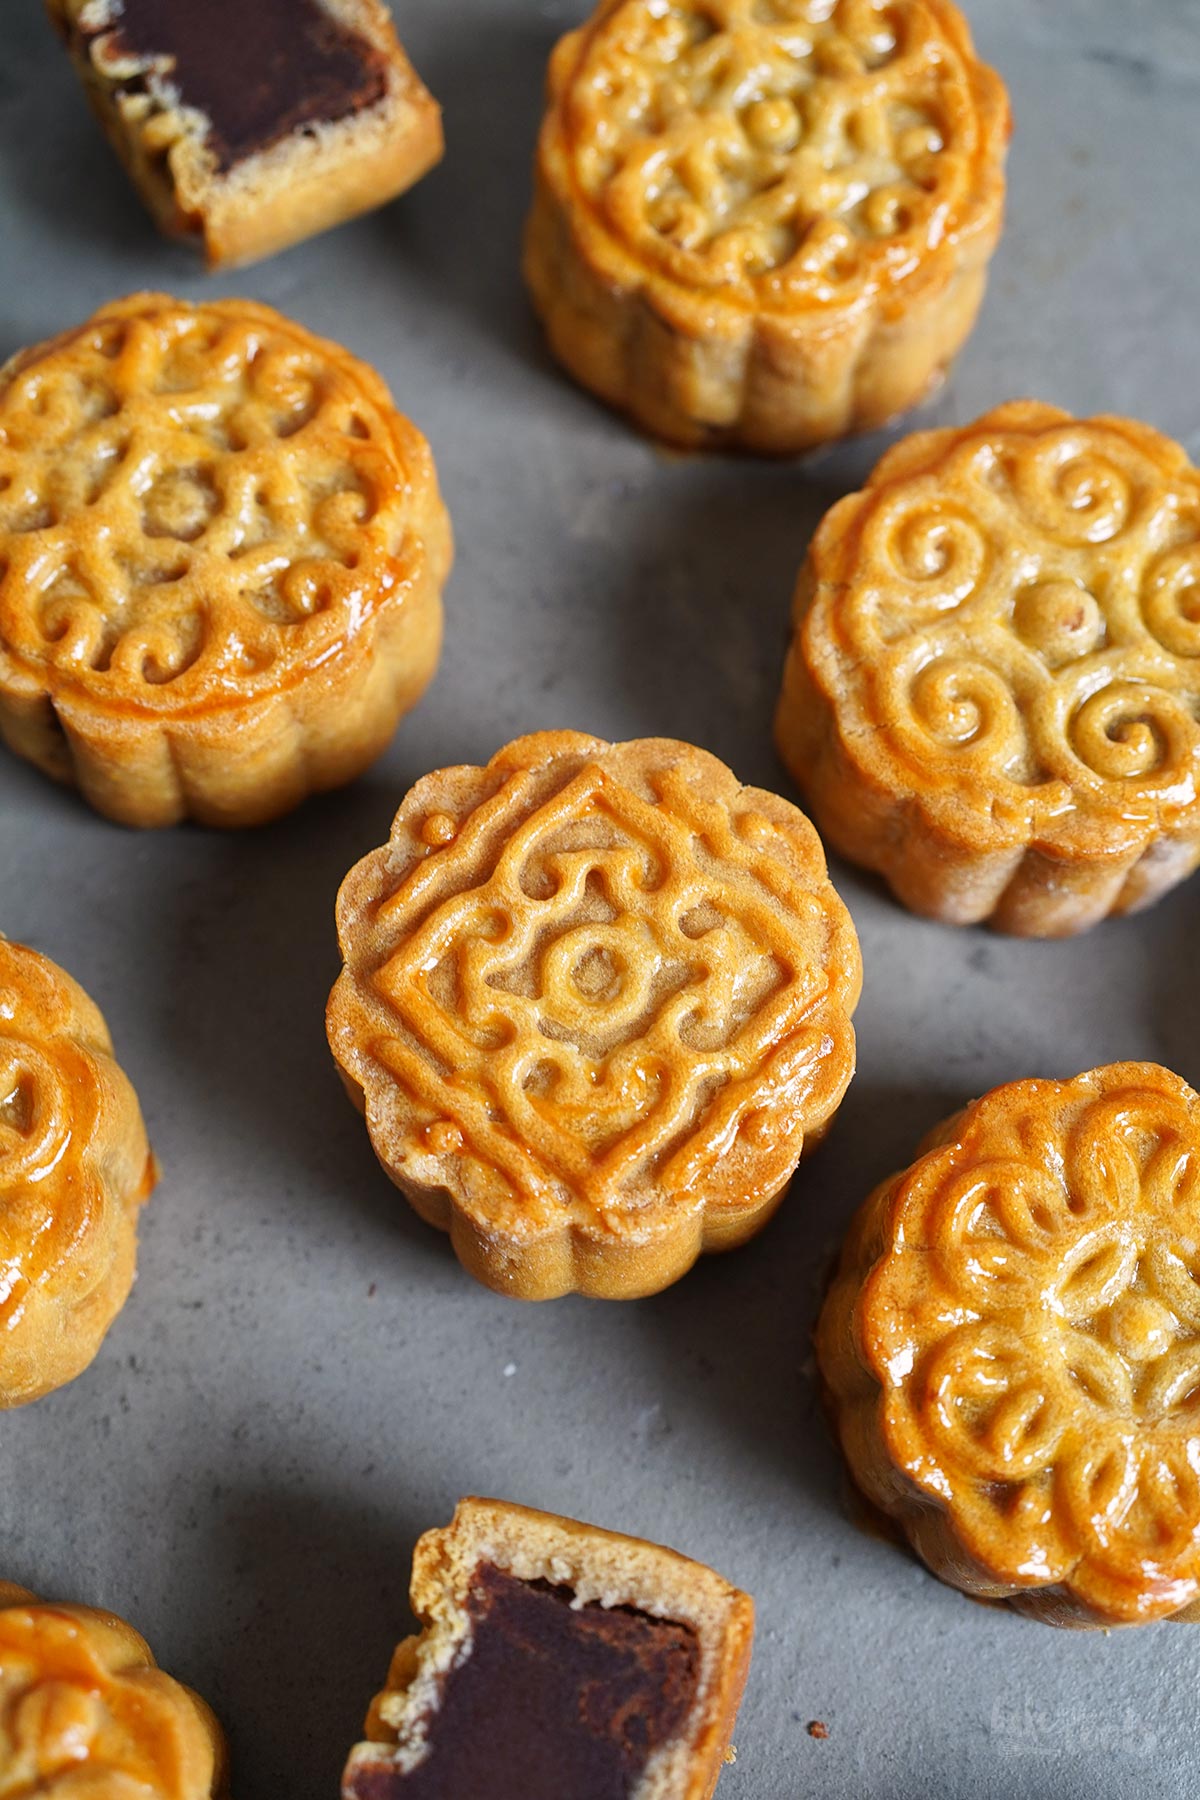
Mooncakes come with many fillings and in different sizes. The most popular are probably mooncakes with lotus paste or red bean paste, but there is much more to choose from… fruity fillings (e.g., pineapple), nutty fillings, fillings with Matcha, and so much more – there’s something for every taste. The sweet fillings often contain an additional salty egg yolk, which is supposed to symbolize the full moon. To be honest, that’s not really our thing. That’s why our mooncakes here don’t have egg yolks inside… it would have made everything more complicated anyway.
Well. There are no shops selling mooncakes in our corner of Berlin. But we do have several small Asian supermarkets that sell the ingredients you need to make them. Could be worse. Mooncakes have been on our to-do-list for quite some time, but somehow the timing has never been right in recent years. You don’t want to bake them in spring or summer – you can only do them for a short period of time in autumn. Organizing the ingredients was also a bit more complicated. It took some time to find a supermarket that sells lye water – something you need for the dough. At least that’s what we thought. We did some research and found out that you can actually bake the cakes without it, they just turn out a little paler. Well… something we learned after we had the bottle at home already.
Anyway. The dough and filling are actually super easy to prepare. Shaping the little cakes is a bit more complicated. First, you have to flatten or roll out a small piece of dough, then you place a ball of filling on top and wrap that with the dough. Since the dough layer has to be quite thin, it takes a little practice to get the filling wrapped properly. Admittedly, our first filled dough balls looked a little »wonky«, but you quickly figure out how big the dough circle needs to be and how to wrap the filling. Don’t worry. We’ve already tested how much dough and filling you need to get the ratio right, so that’s something you don’t have to figure out.
Once the dough balls with filling are ready, the rest is a breeze… simply push the balls into the mold, then press the plunger down and voilà, you get a little cake with a beautiful pattern on top. That’s it. You still have to bake the cakes, but that’s really easy to do. If you have any questions about the recipe, just leave a comment – I’m happy to help where I can…
If you find mooncakes too complicated, you could try making our Chinese Almond Cookies instead – they’re meant for New Year’s Eve and not Mid-Autumn Festival, but they actually taste delicious all year round. Don’t tell anyone! Alternatively, you also try our Pandan Lemon Crinkle Cookies. Forget chocolate chip cookies – Pandan cookies are the sweet treat you want to make!


INGREDIENTS / ZUTATEN
(12 mooncakes)
5.6 oz. (160g) all-purpose flour
2.8 oz. (80g) sugar beet syrup* (caramel)
1/2 tsp. lye water*
3 tbsp. rapeseed oil*
1 tbsp. water (plus more if needed)
1 can (min. 12.7 oz./360g) sweetened red been paste* or sweetened lotus nut paste*
1 egg yolk + 1 tsp. water, for brushing
(12 Mooncakes)
160g Mehl (Type 405)
80g Zuckerrübensirup* (Karamell)
1/2 TL Lye Water*
3 EL Rapsöl*
1 EL Wasser (ggf. mehr)
1 Dose (mind. 360g) Rote Bohnenpaste* oder Lotuspaste*
1 Eigelb + 1 TL Wasser zum Bestreichen


A piece of advice
As mentioned above, lye water (alkaline solution) is not that easy to find in stores (online is easier). You also have to be careful with lye water – if used incorrectly, the solution can cause skin irritation. If you mix it with the sugar beet syrup, oil, and water, everything is fine. However, you should not let the pure solution come into contact with your skin. If this happens, rinse immediately with water. To make sure nothing can happen, you can wear gloves. ALWAYS keep the bottle out of the reach of children! After baking, however, the alkaline solution is completely harmless (it transforms into sodium carbonate) – similar to pretzels, which are also bathed in lye before being baked.
DIRECTIONS / ZUBEREITUNG
1. Add the flour to a bowl. In a separate bowl mix sugar beet syrup, lye water, oil, and water until well combined. Add this mixture to the bowl with the flour and mix to combine. You want a soft and smooth dough that is not sticky. If it seems too dry, add a bit more water and knead in. Do not overwork the dough. Wrap the dough in plastic wrap and let it sit on the counter for about 60-70 minutes.
2. While the dough is resting, weigh out the red bean paste (or lotus paste) to get portions of about 30g (1.05 oz.) – shape into balls and set them on a plate. Refrigerate until needed again.
3. Preheat the oven to 180°C (350°F). Dust a mooncake mold press (50g/1.8 oz.)* with some flour – the flour will help to release the mooncakes from the mold. You don’t need much, though. Line a baking sheet with baking parchment and set aside.
4. Divide the dough into 12 equal pieces and shape each piece into a ball. Place one of the dough balls in the palm of your hand and press/shape it into a disc that has about the size of your palm. You can also do that with a rolling pin between two layers of plastic wrap instead – it’s easier that way (see notes in text above). Place one of the bean paste (lotus paste) balls in the center of that disc and fold the dough around the ball. It likely will not cover the whole ball immediately. Gently push, press, and squeeze the dough, holding the ball securely in your palm, until the dough covers the filling completely. If the dough tears somewhere, just pinch it together.
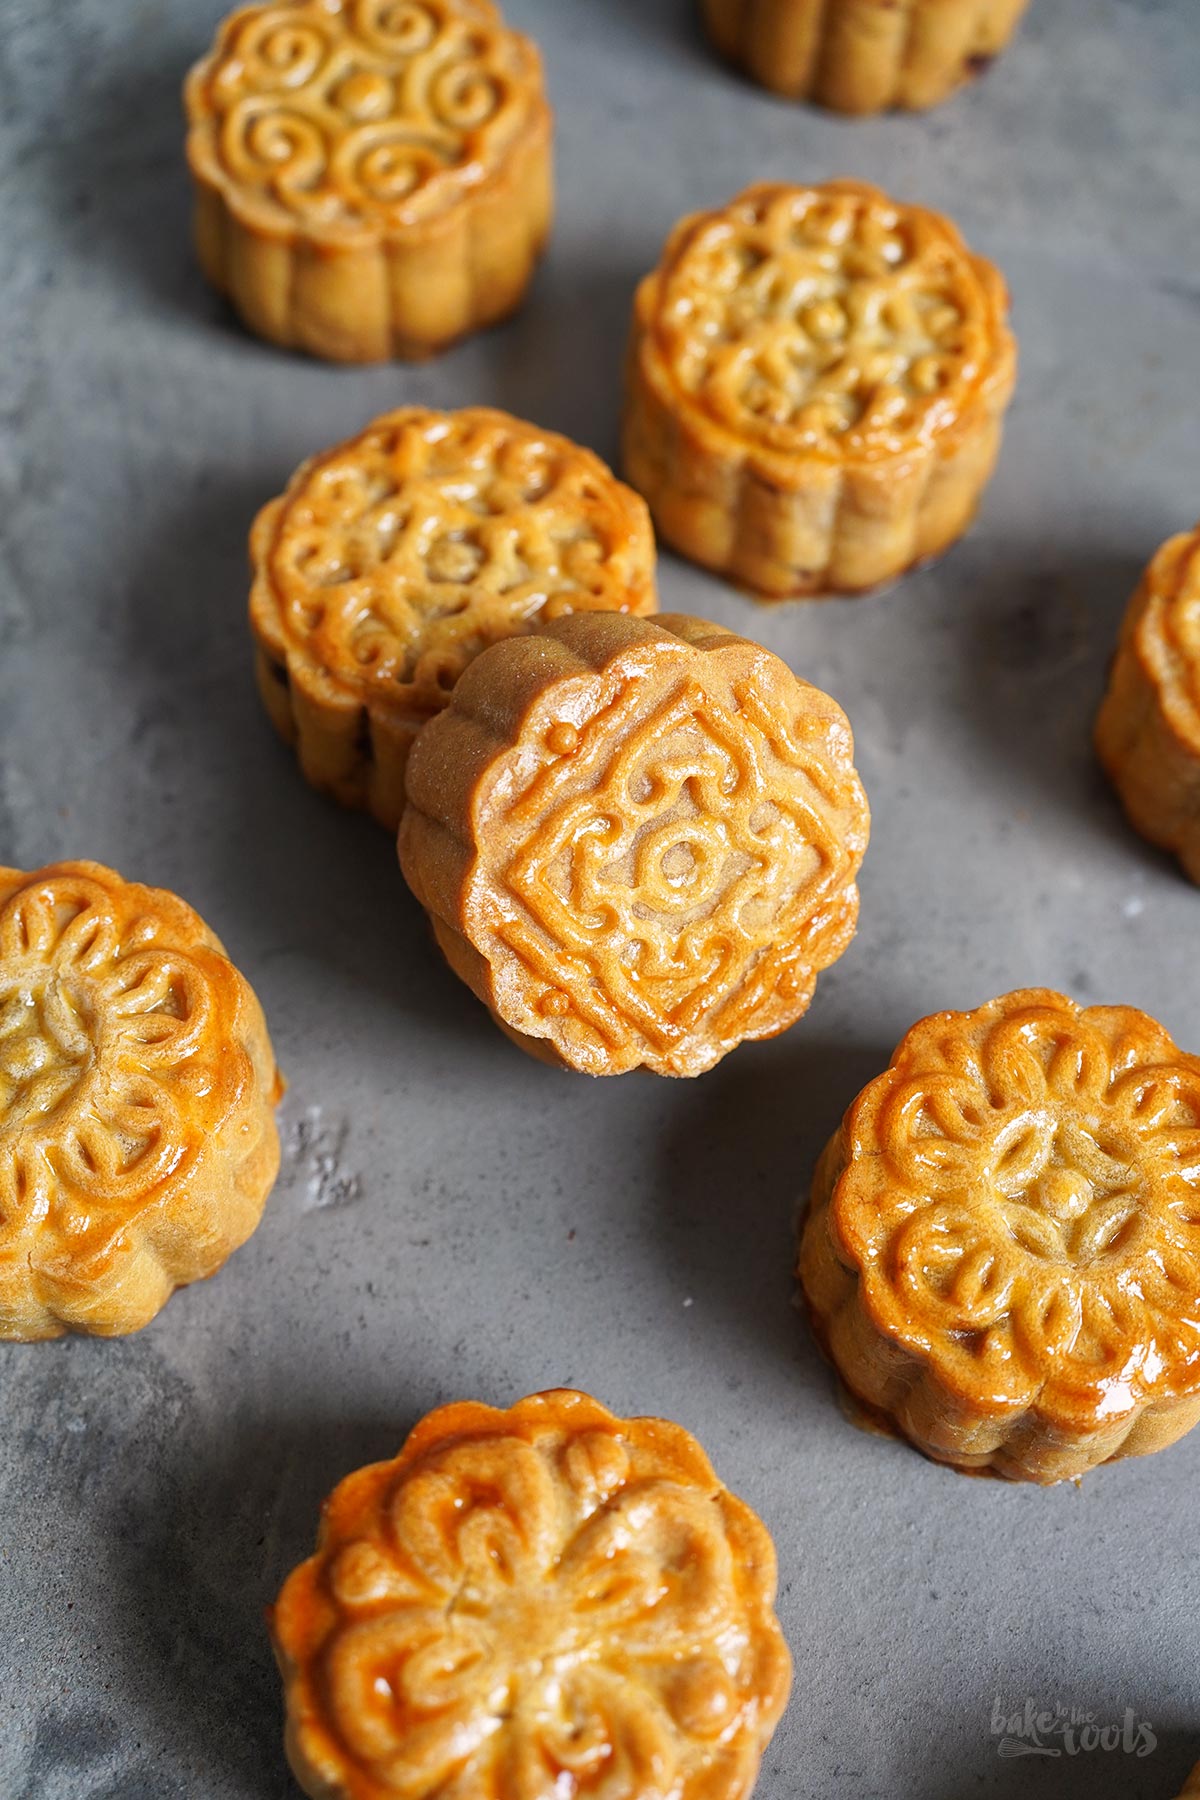
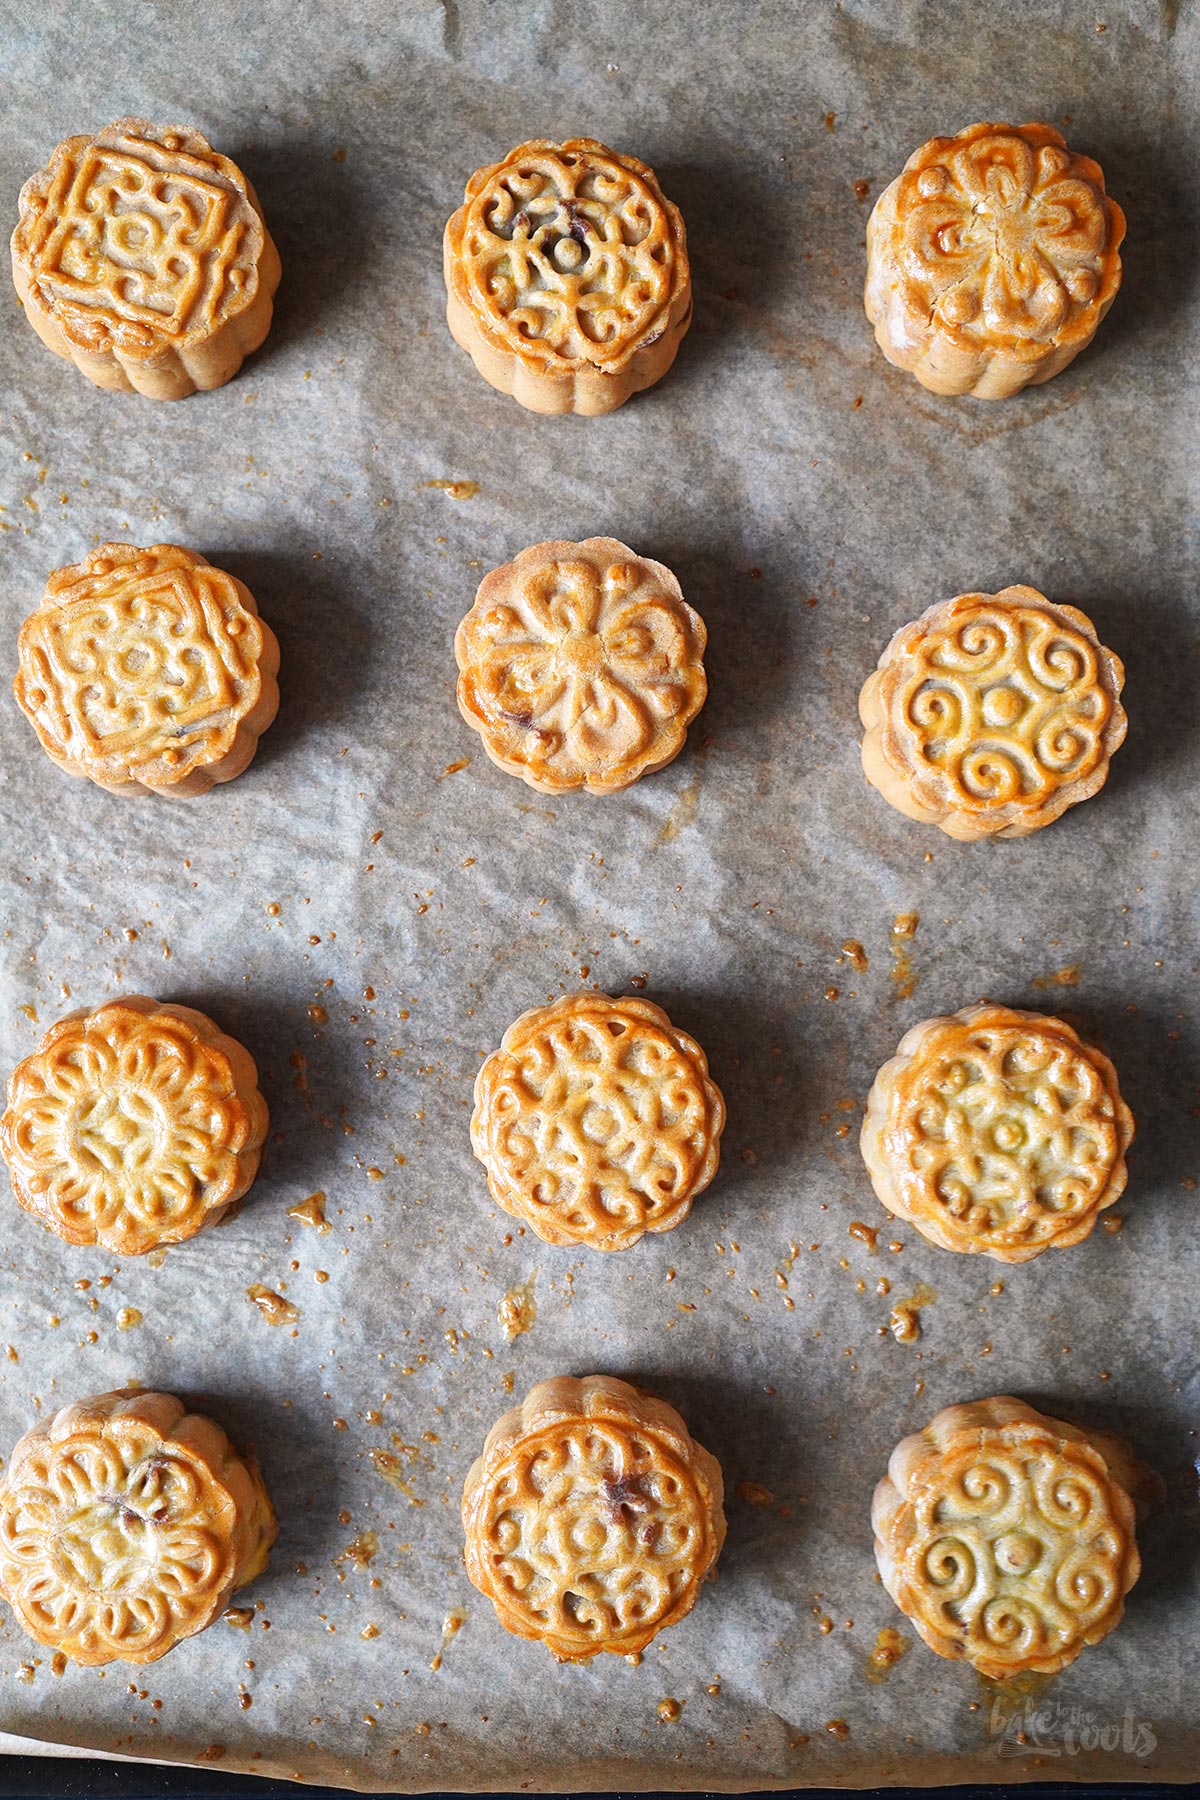
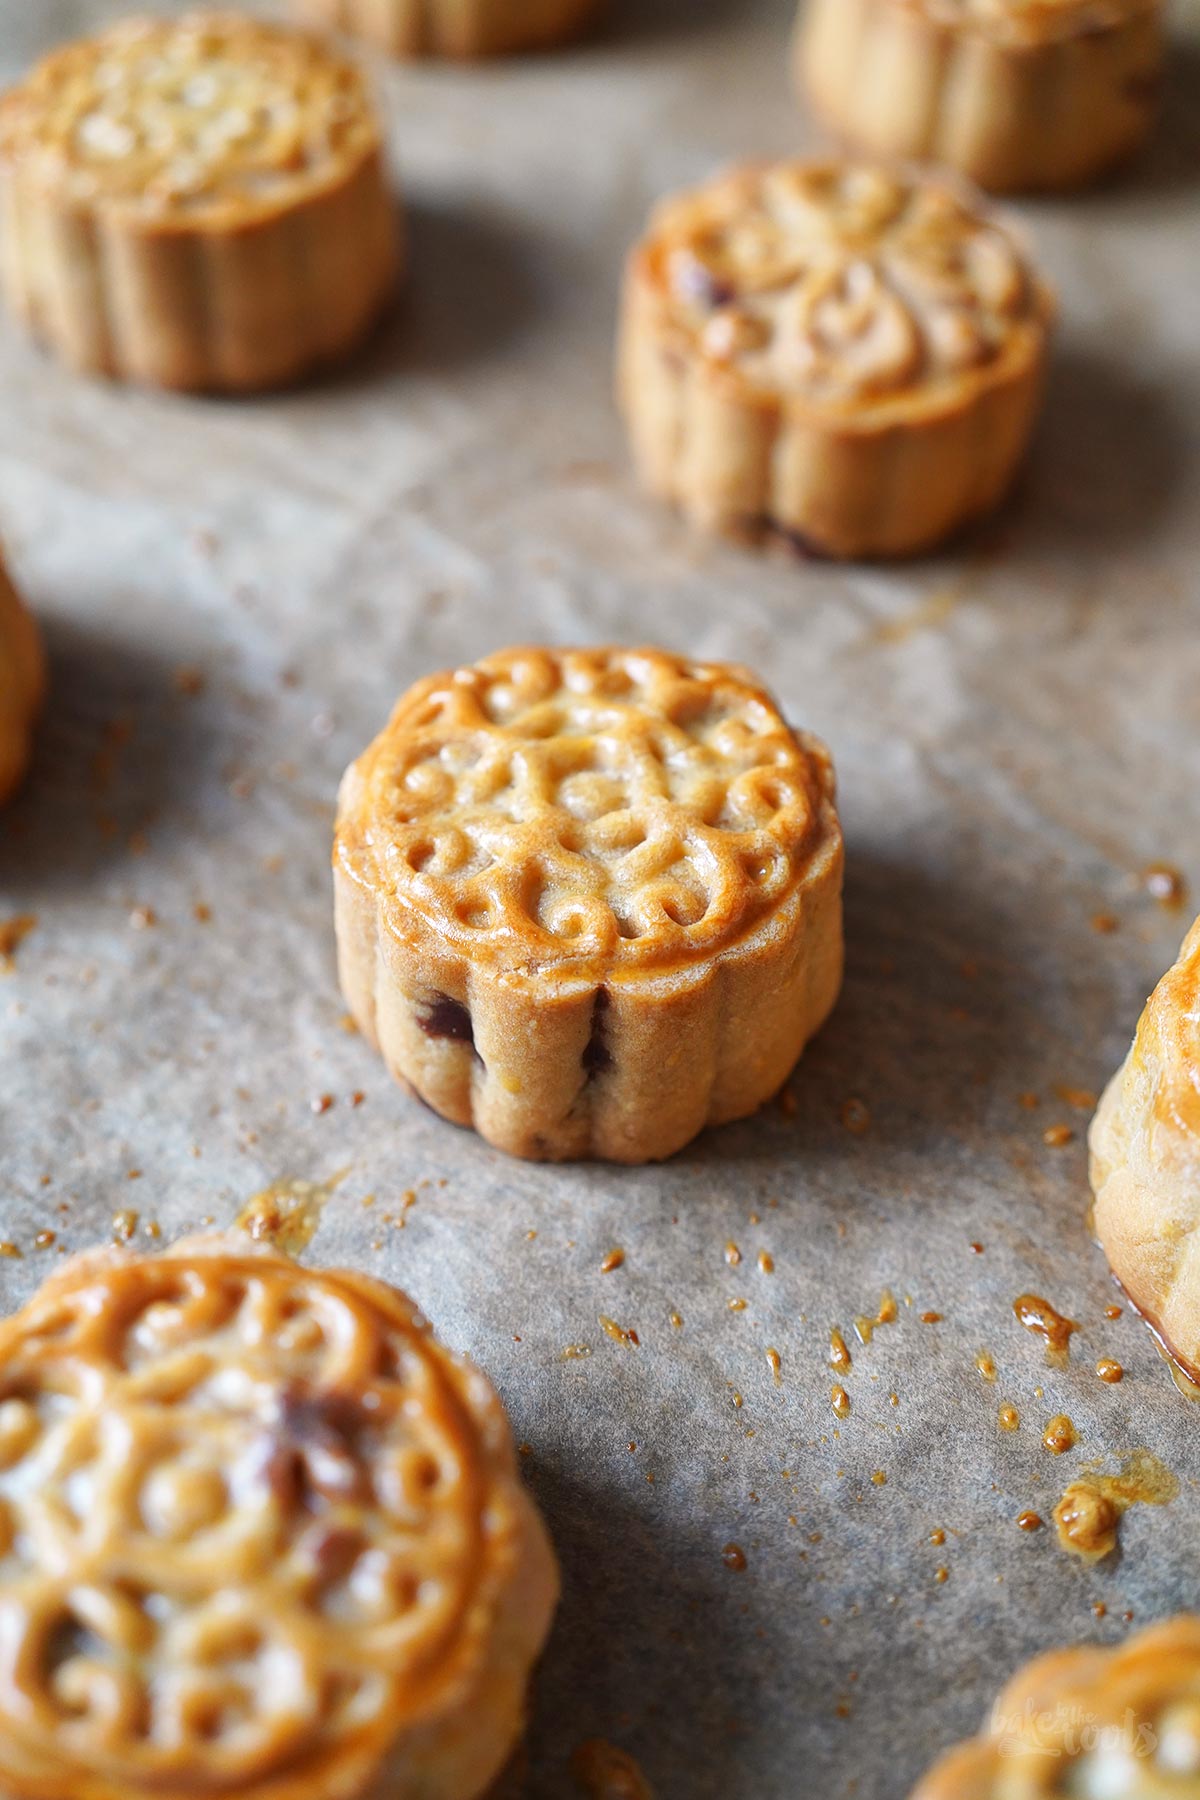
5. Press the balls you just made into the prepared mooncake mold – make sure they go all the way in and touch the bottom of the mold. Place the mold onto your work surface and push the dough ball down with the help of the plunger. You want to make sure the pattern is showing nicely when releasing the mooncake from the mold – but don’t push too hard, or you might squash the little cakes. Place them on the prepared baking sheet with some space in between..
6. Bake the mooncakes for about 8 minutes in the preheated oven. Take the mooncakes out of the oven and let them cool down for about 10 minutes (do not turn off the oven). Mix the egg yolk with the water and brush the small cakes very lightly with that egg wash (you don’t want to cover the pattern with the egg wash). Bake the mooncakes another 14-16 minutes, or until golden brown on top. Take the cakes out of the oven and let them cool down completely. Store in an airtight container for 1-2 days before serving.
1. Als Erstes das Mehl in eine Schüssel geben. Zuckerrübensirup, Lye Water, Öl und Wasser in einer separaten Schüssel verrühren, dann zum Mehl dazugeben und alles zu einem geschmeidigen Teig verkneten. Der Teig sollte weich, aber nicht klebrig sein. Sollte er zu trocken wirken, noch etwas Wasser dazugeben. Nicht zu viel Kneten. Den Teig in Klarsichtfolie einschlagen und dann für etwa 60-70 Minuten bei Zimmertemperatur ruhen lassen.
2. Während der Teig ruht, die Bohnenpaste (oder Lotuspaste) in Portionen von etwa 30g abwiegen, zu Kugeln formen und auf einen Teller legen. Bis zur weiteren Verwendung in den Kühlschrank stellen.
3. Den Ofen auf 180°C (350°F) Ober-/Unterhitze vorheizen. Eine Mooncake Mold Press (50g)* mit etwas Mehl ausstauben. Das Mehl hilft später, die Mooncakes leichter aus der Form zu lösen – man braucht hier allerdings nicht viel. Ein Backblech mit Backpapier auslegen und zur Seite stellen.
4. Den Teig in 12 Portionen aufteilen und jeweils zu einer Kugel formen. Eine Teigkugel in die Hand nehmen und dann in der Handfläche flach drücken, bis der entstehende Teigkreis in etwa die Größe der Handfläche hat. Wem das zu kompliziert erscheint, kann hier natürlich auch mit einem Nudelholz arbeiten und den Teig zwischen zwei Lagen Frischhaltefolie ausrollen (s. Hinweise im Text oben). Als Nächstes dann eine Kugel der Bohnenpaste auf den Teigkreis setzen und den Teig rundum ein- und darüber schlagen. Die Kugel wird wahrscheinlich nicht sofort vollständig bedeckt sein. Mit vorsichtigem Drücken und Quetschen sollte man es aber schaffen, die Bohnenpaste komplett mit Teig einzuschließen. Sollte der Teig irgendwo einreißen, einfach mit den Fingern etwas zusammendrücken.
5. Die gefüllten Kugeln in die vorbereitete Mooncake Presse schieben – die Kugel sollte hier bis zum Boden der Presse hineingeschoben werden. Die Presse dann auf die Arbeitsfläche setzen und den Kolben fest nach unten drücken. Man muss hier schon ordentlich drücken, damit das Muster hinterher klar im Teig sichtbar ist. Man darf es aber auch nicht übertreiben, sonst zerquetscht man die Kugel eventuell. Die Mooncakes mit Abstand zueinander auf das vorbereitete Blech setzen.
6. Die Mooncakes etwa 8 Minuten im vorgeheizten Backofen backen. Aus dem Ofen nehmen und etwa 10 Minuten abkühlen lassen (den Backofen nicht ausschalten). Das Eigelb mit etwas Wasser verrühren und die kleinen Kuchen ganz leicht damit bestreichen – das Muster sollte weiterhin gut sichtbar sein und nicht vom Eigelb verdeckt werden. Die Mooncakes dann noch einmal für etwa 14–16 Minuten in den Ofen schieben und so lange backen, bis sie schön gebräunt sind. Die Küchlein aus dem Ofen nehmen und vollständig abkühlen lassen. Bis zum Servieren noch 1–2 Tage in einem luftdichten Behälter aufbewahren.

Craving more? Keep in touch on Facebook, Instagram and Pinterest for new post updates and more. You can also contact me with any questions or inquiries!
Here is a version of the recipe you can print easily.
Print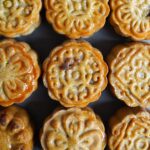
Cantonese Mooncakes with Red Bean Paste (月饼)
- Prep Time: 00:25
- Cook Time: 00:24
- Total Time: 02:30
- Yield: 12 1x
- Category: Cakes
- Cuisine: China
- Diet: Vegetarian
Description
Something you definitely need for the Chinese Mid-Autumn Festival aka. Moon Festival: delicious little mooncakes! We love them!
Ingredients
5.6 oz. (160g) all-purpose flour
2.8 oz. (80g) sugar beet syrup* (caramel)
1/2 tsp. lye water*
3 tbsp. rapeseed oil*
1 tbsp. water (plus more if needed)
1 can (min. 12.7 oz./360g) sweetened red been paste* or sweetened lotus nut paste*
1 egg yolk + 1 tsp. water, for brushing
Instructions
1. Add the flour to a bowl. In a separate bowl mix sugar beet syrup, lye water, oil, and water until well combined. Add this mixture to the bowl with the flour and mix to combine. You want a soft and smooth dough that is not sticky. If it seems too dry, add a bit more water and knead in. Do not overwork the dough. Wrap the dough in plastic wrap and let it sit on the counter for about 60-70 minutes.
2. While the dough is resting, weigh out the red bean paste (or lotus paste) to get portions of about 30g (1.05 oz.) – shape into balls and set them on a plate. Refrigerate until needed again.
3. Preheat the oven to 180°C (350°F). Dust a mooncake mold press (50g/1.8 oz.)* with some flour – the flour will help to release the mooncakes from the mold. You don’t need much, though. Line a baking sheet with baking parchment and set aside.
4. Divide the dough into 12 equal pieces and shape each piece into a ball. Place one of the dough balls in the palm of your hand and press/shape it into a disc that has about the size of your palm. You can also do that with a rolling pin between two layers of plastic wrap instead – it’s easier that way (see notes in text above). Place one of the bean paste (lotus paste) balls in the center of that disc and fold the dough around the ball. It likely will not cover the whole ball immediately. Gently push, press, and squeeze the dough, holding the ball securely in your palm, until the dough covers the filling completely. If the dough tears somewhere, just pinch it together.
5. Press the balls you just made into the prepared mooncake mold – make sure they go all the way in and touch the bottom of the mold. Place the mold onto your work surface and push the dough ball down with the help of the plunger. You want to make sure the pattern is showing nicely when releasing the mooncake from the mold – but don’t push too hard, or you might squash the little cakes. Place them on the prepared baking sheet with some space in between..
6. Bake the mooncakes for about 8 minutes in the preheated oven. Take the mooncakes out of the oven and let them cool down for about 10 minutes (do not turn off the oven). Mix the egg yolk with the water and brush the small cakes very lightly with that egg wash (you don’t want to cover the pattern with the egg wash). Bake the mooncakes another 14-16 minutes, or until golden brown on top. Take the cakes out of the oven and let them cool down completely. Store in an airtight container for 1-2 days before serving.
Notes
Happy Baking!
Links marked with an asterisk (*) are affiliate links (advertising/Werbung) to Amazon Germany. If you click on one of those links and buy something via this link, I will get a commission for that sale. The price of whatever you buy is not affected in any way by this.