Well… the plan was actually to NOT bake more for Valentine’s Day this year, but somehow the idea for these Valentine’s Day Craquelin Cream Puffs has been (stuck) in my head for quite a while. They may not be the prettiest cream puffs in the world, but they were definitely made with a lot of love… and maybe they were made because I had to prove something to myself ;P
Valentine’s Day is the day of roses and sweet chocolate candy – at least if you believe what magazines and social media is telling you ;) I was never a big fan of all that stuff. If I want to make someone happy with a small gift, I prefer making one myself (in the kitchen) and not buying something. I think you can show your love or appreciation for someone with homemade or baked gifts much better – no need to end the life of some innocent flowers prematurely ;P Even if your gift is not the most beautiful (like these not so beautiful cream puffs here), the effort and love you put into making something is all that counts. At least that’s what my grandma always said ;)
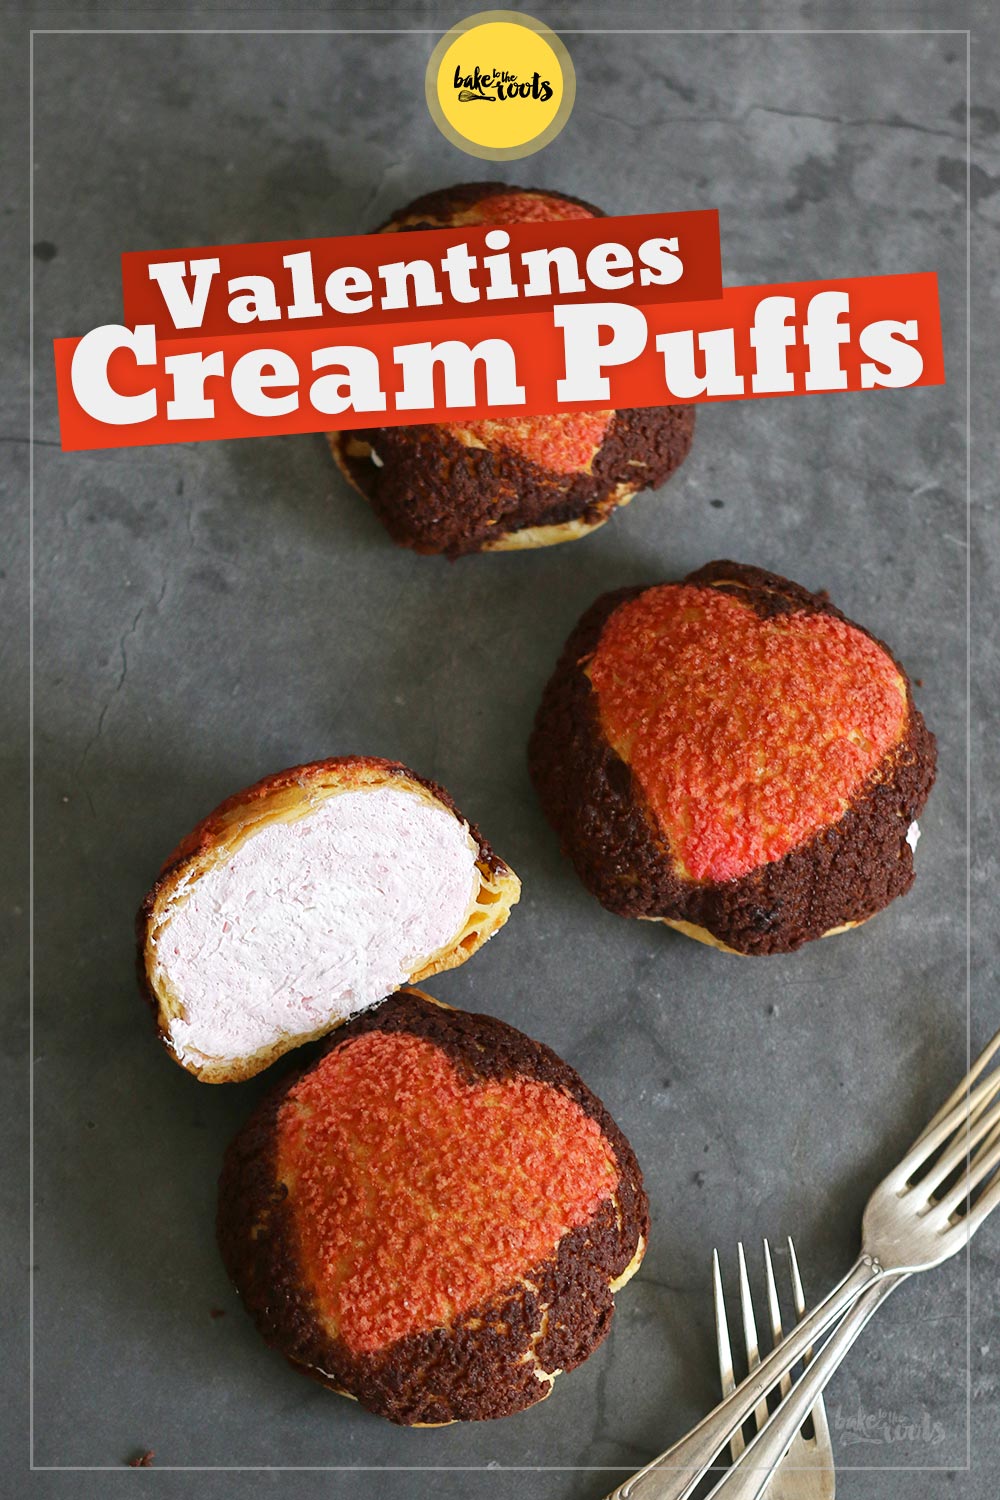
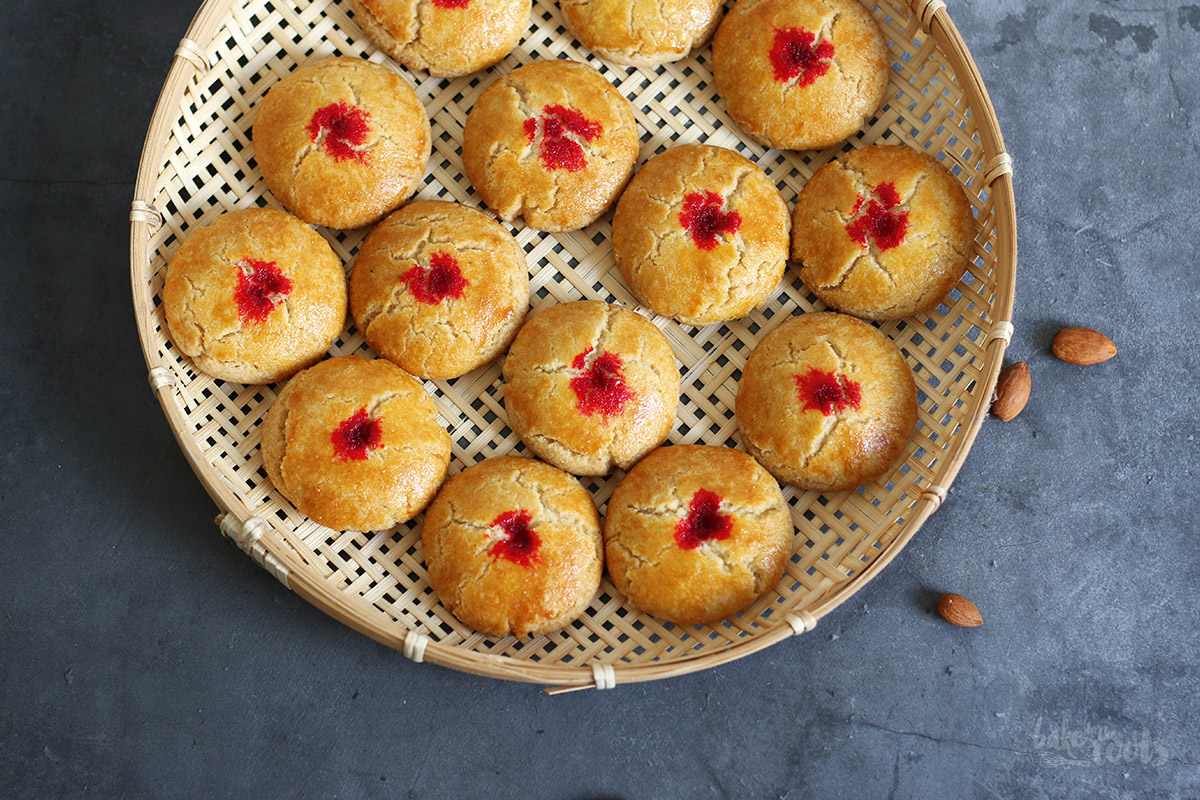
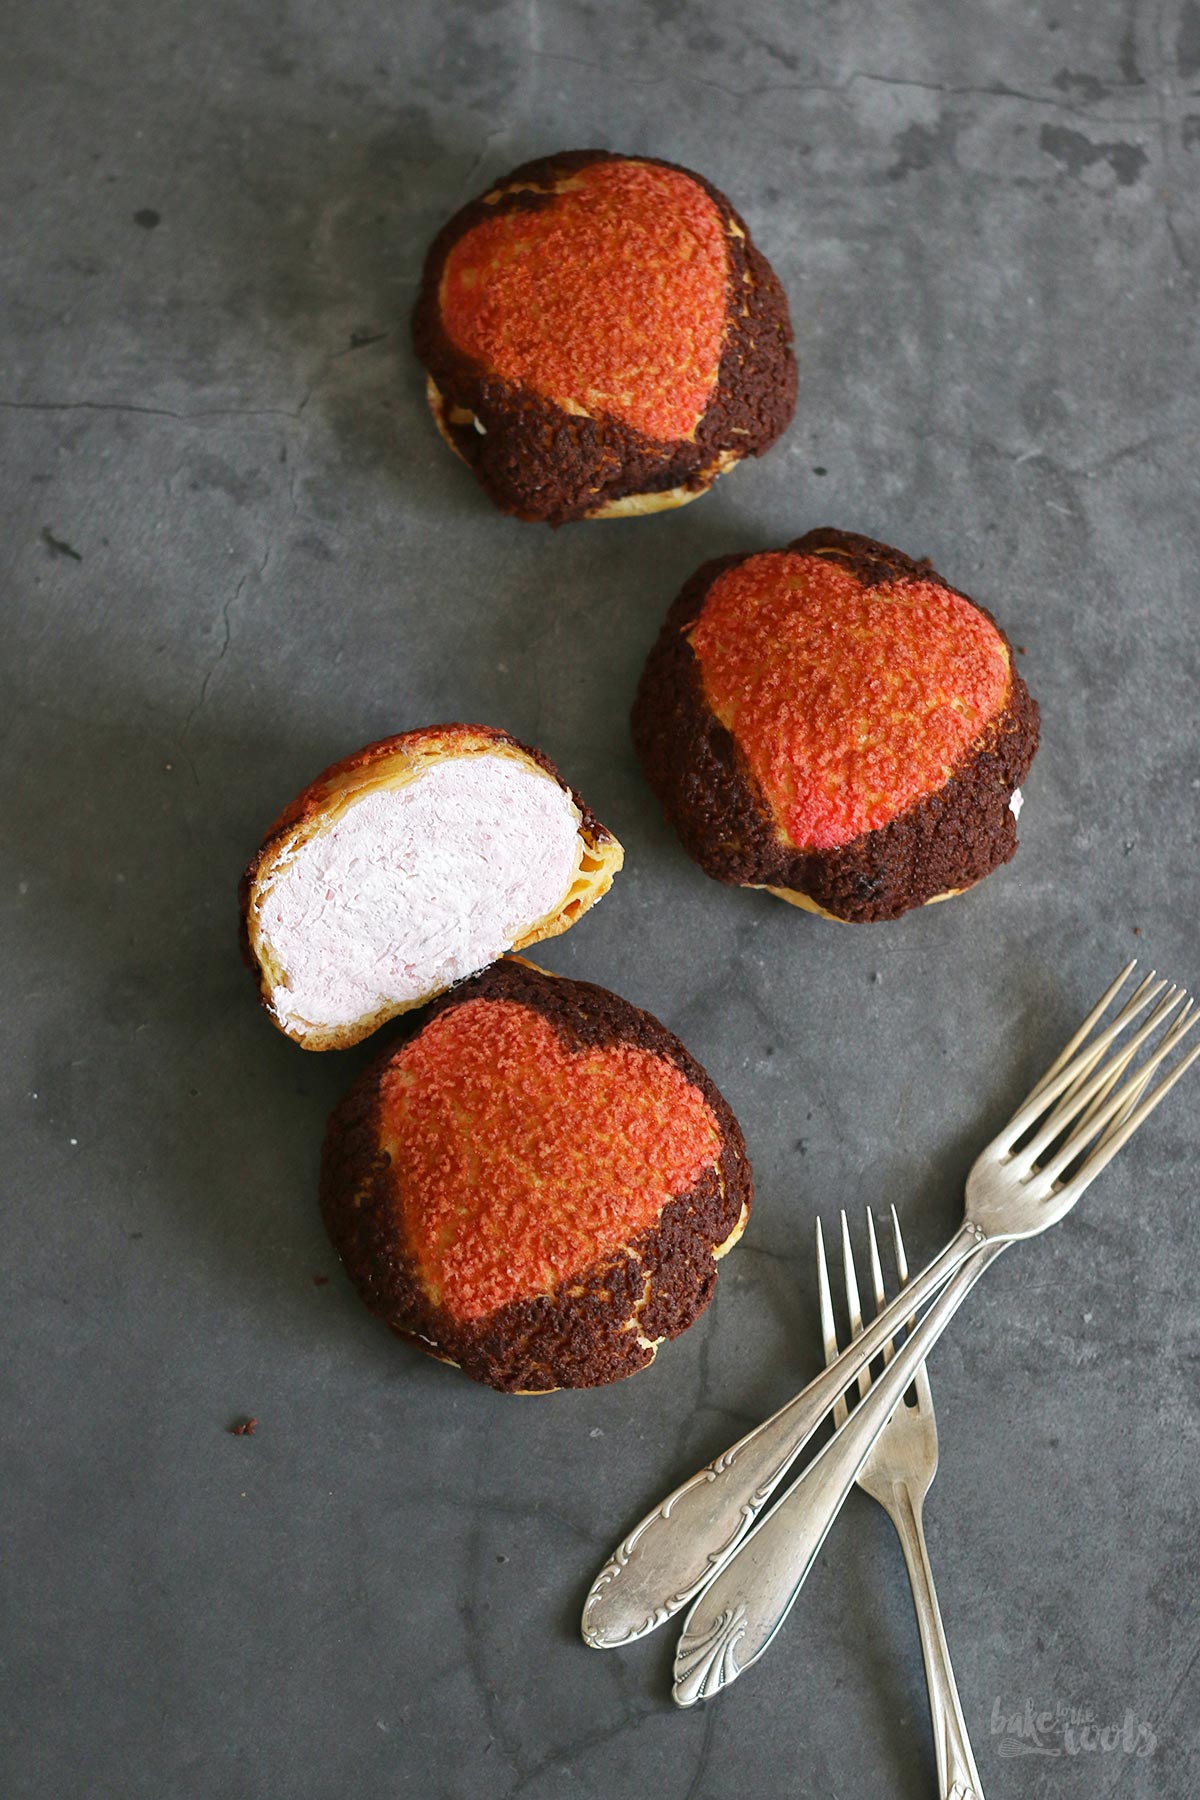
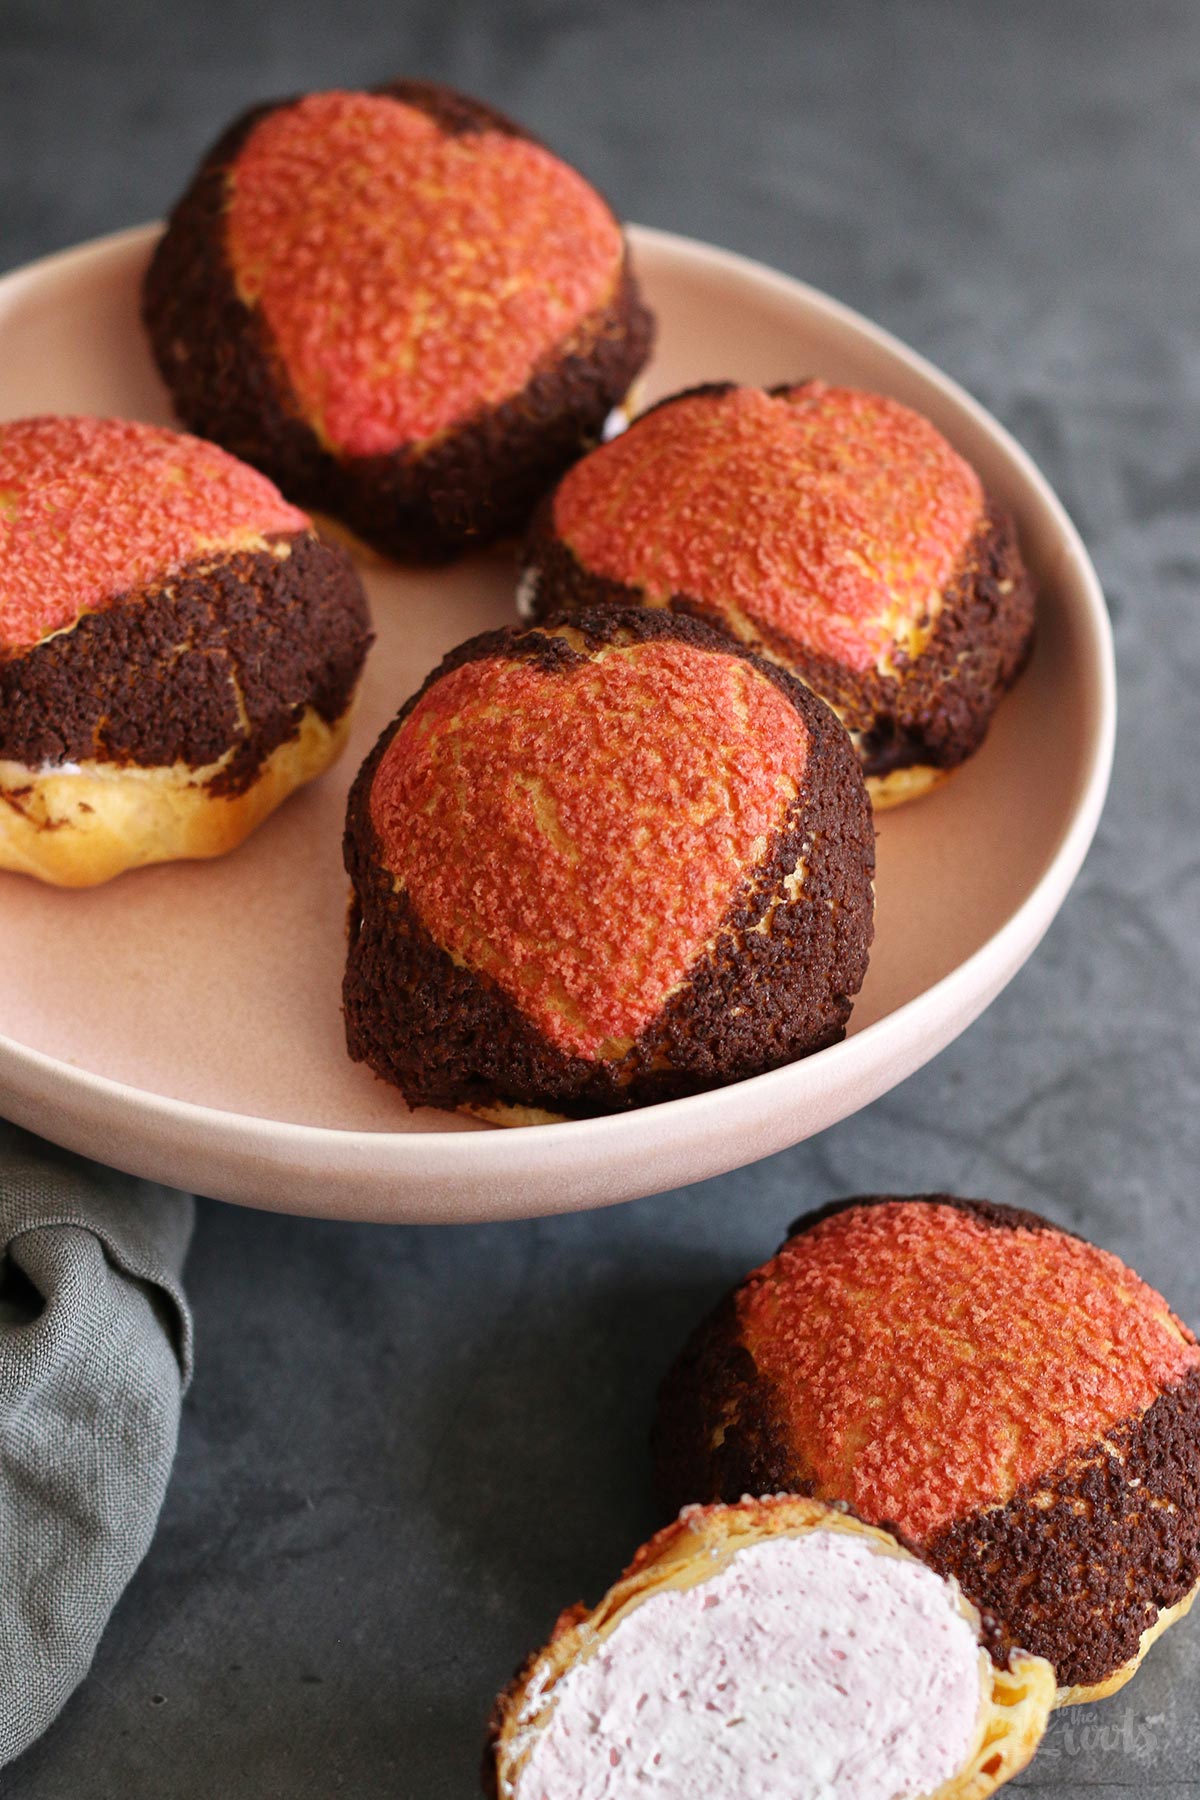
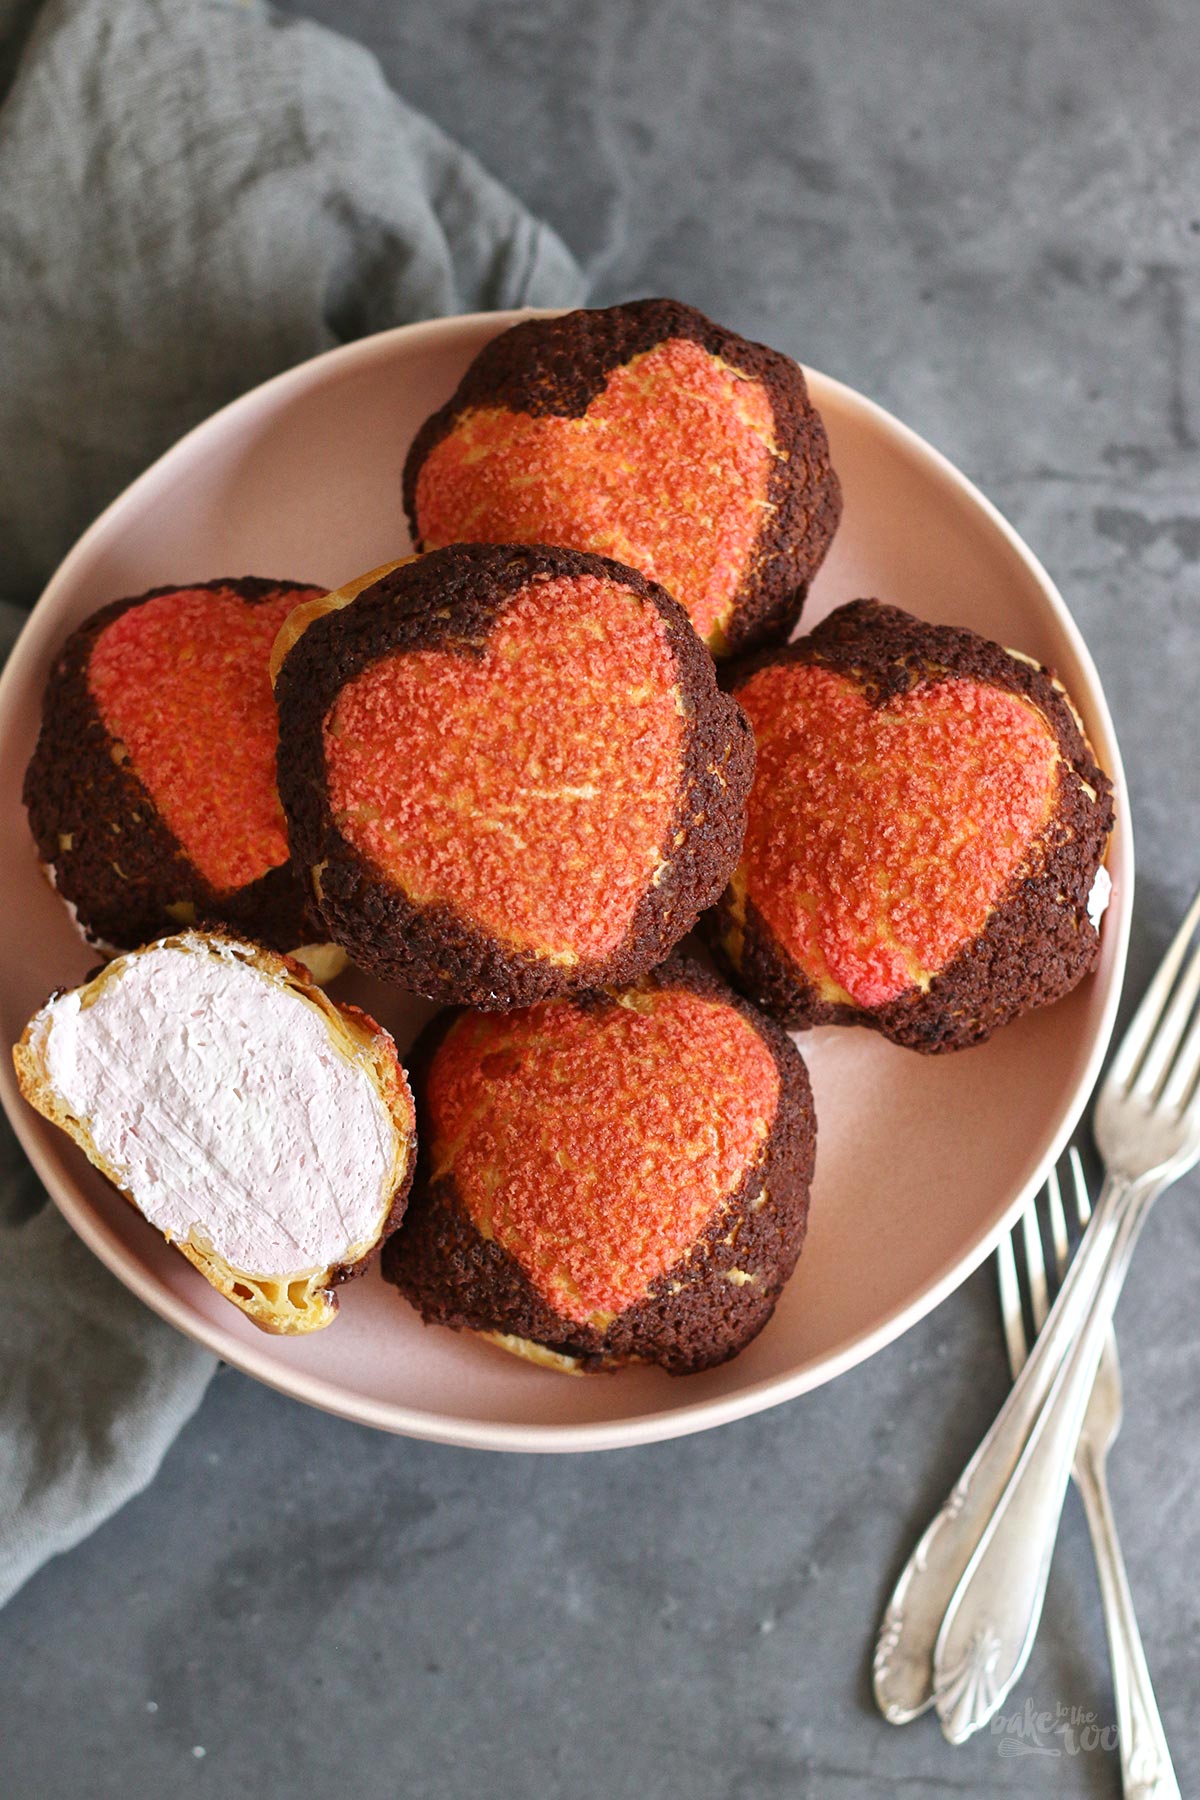
The Valentine’s Day Cookies https://baketotheroots.de/valentines-day-heart-cookies/ from last week definitely turned out better – I have to admit that quite frankly. I don’t like how the hearts on top of the cream puffs turned out here. The color is a bit off I think. I should have used more pink or maybe go for a completely different color – now they look a bit sunburned ;P In addition to that, I went a bit overboard with the size of the cream puffs. With the amount of dough from the recipe, you should be able to create 25-28 cream puffs actually, but because I did not pay attention, mine got quite large… more like little tennis balls instead of golf balls. Well… could be worse I guess ;P
About that cream puffs and choux pastry in particular… Sometimes I have the feeling that cream puffs are somehow my “archnemesis” – only slightly less “nemesissy” than macarons ;P Craquelin cream puffs are actually not that bad, but with classic cream puffs I always have problems. I guess I am not the only one here. The choux pastry is actually not the problem here – that one works actually well for me. I always have problems with the shape of the cream puffs and with that, problems with the piping of the dough. I often miscalculate the amount of dough I need for a certain size of cream puffs – the result is often oversized as you can see here. The cream puffs also often blow up too much and tip over to one side because I am not piping them correctly onto the baking sheet (I think). I tried many different ways to do it but never found the perfect solution. Maybe someone out there has some tips for me on how to do it right? ;)
Well… no matter what size these cream puffs might have here, you could definitely make them smaller if you like. No need to make the same mistakes I did ;P
Happy Halloween! I mean Happy Valentine’s Day! ;)
INGREDIENTS / ZUTATEN
For craquelin dough:
2.8 oz. (80g) butter, at room temperature
2.8 oz. (80g) sugar
2.3 oz. (65g) all-purpose flour, plus 1 tsp.
1 pinch of salt
some pink food color
2 tbsp. cocoa powder
For the choux pastry:
3.5 oz. (100g) water
3.5 oz. (100g) milk
2.8 oz. (80g) butter
1 tbsp. sugar
1/4 tsp. salt
1/2 tsp. vanilla extract
1 cup (130g) all-purpose flour
4 large eggs, at room temperature
For the cream filling:
21 oz. (500g) heavy cream, cold
some pink food color
1 tsp. vanilla extract
2 tbsp. confectioners’ sugar
some cream stiffener (optional)
0.4 oz. (10g) freeze-dried raspberries, finely ground
Für den Craquelin Teig:
80g weiche Butter
80g Zucker
65g Mehl (Type 550), plus 1 TL
1 Prise Salz
etwas pinke Lebensmittelfarbe
2 EL Kakaopulver
Für den Brandteig:
100g Wasser
100g Milch
80g Butter
1 EL Zucker
1/4 TL Salz
1/2 TL Vanille Extrakt
130g Mehl (Type 550)
4 Eier (L), Zimmertemperatur
Für die Cremefüllung:
500g Sahne, kalt
etwas pinke Lebensmittelfarbe
1 TL Vanilleextrakt
2 EL Puderzucker
etwas Sahnesteif (optional)
10g gefriergetrocknete Himbeeren, gemahlen
DIRECTIONS / ZUBEREITUNG
2. For the choux pastry add the water, milk, butter, sugar, salt, and vanilla extract to a large pot (stainless steel is best here). Bring the liquid to a boil over medium-high heat until the butter has melted completely. Add the flour (all at once) and mix with a wooden spoon until the dough starts coming together. Continue mixing for 1-2 minutes to “burn” the dough (but not actually burning it) and get some moisture out of the dough. A white layer will appear on the bottom of the pot which is something you want to happen. The dough should have no lumps or visible spots of flour. Remove from the heat and transfer the dough to a mixing bowl. Let cool down for about 5 minutes.
3. When the dough has cooled enough you can start adding the eggs one by one. If the dough is too warm, the eggs will curdle, so make sure it had enough time to cool down. Mix the dough with the first egg (handheld mixer with dough hooks works best in my opinion), when all of the egg is absorbed, add the next egg, continue doing that until all four eggs are used and the dough is (not too) thick and glossy. Use the wooden spoon to check if the dough is ready by pulling some of the dough up – if it drops back into the bowl and leaves a dough triangle hanging from the spoon, the dough is perfect. Fill into a piping bag with a larger round tip and set aside.
4. Preheat the oven to 390°F (200°C). Line two baking sheets with baking parchment and set aside. Take the pink craquelin dough out of the fridge and roll out to a thickness of about 0.07-0.12inches (2-3mm) – works best between two layers of plastic wrap. Use a small heart cookie cutter and cut out 15-18 hearts. Set aside. Roll out the dark dough to the same thickness and cut out 15-18 circles with a diameter of about 2 inches (5cm). Use the same small heart cookie cutter and cut out hearts from the centers of the circles, place the red hearts inside, and press both slightly together. Transfer onto a small board or baking tray and place in the freezer until needed.
5. Pipe small dough portions (Ø 2 inches/5cm) onto the first baking sheet – leave at least 2 inches (5cm) space in between, so the dough can expand. Top each dough portion with a frozen craquelin disc (keep the rest in the freezer) and then place in the lower third of the oven. Bake for 20-22 minutes until the dough has puffed up nicely, the bottoms look golden in color and the top has that nice crinkled crust. Do not open the oven in between or the puffs will deflate. Take out of the oven and let cool down on the baking sheet for some time, then transfer to a wire rack to cool down completely. Repeat with the remaining dough and craquelin discs from the freezer.
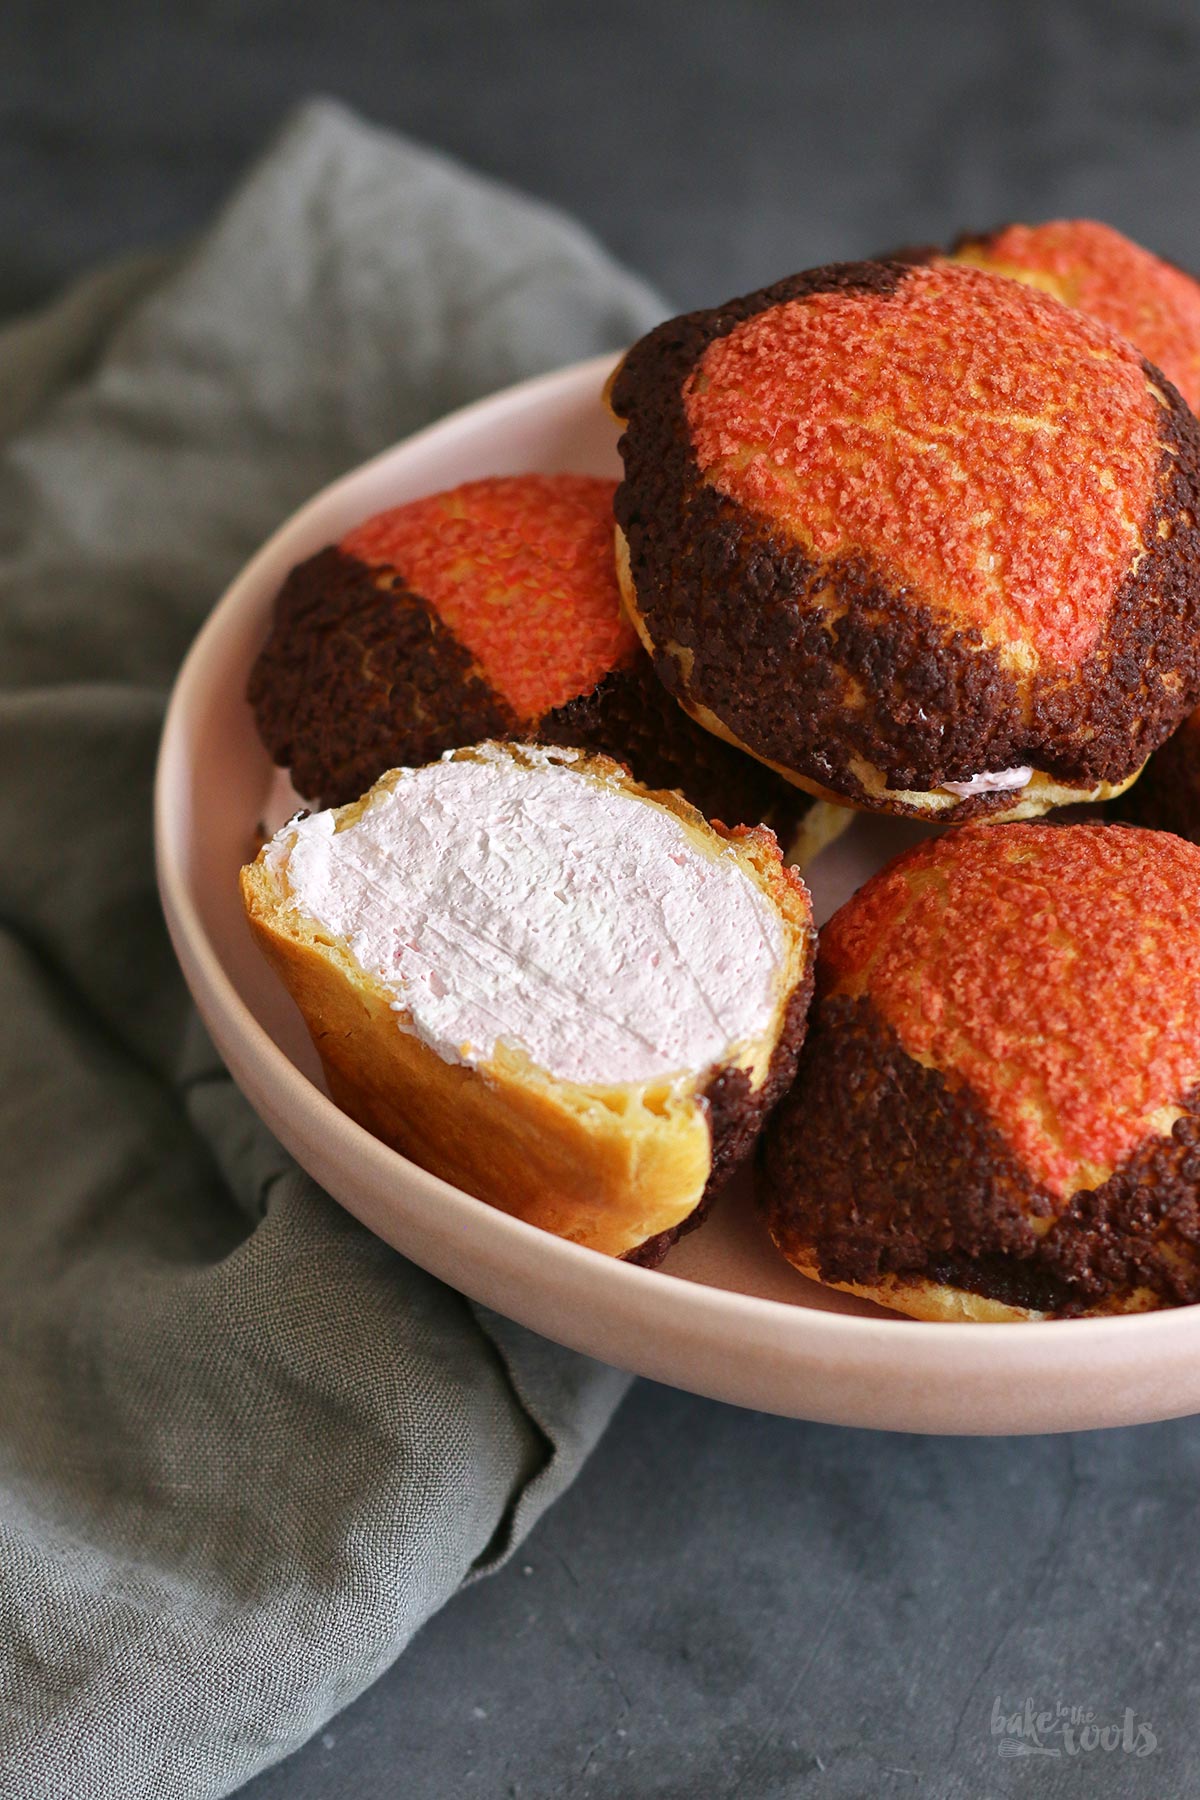
6. For the cream filling grind/pulverize the freeze-dried raspberries in a mixer or mortar. Add the heavy cream to a large bowl of a kitchen machine (or use a handheld mixer), add some drops of pink food color, vanilla extract, confectioners’ sugar, and cream stiffener (optional), and whisk until stiff peaks form. While whisking you can adjust the color with some more food color. Be careful not to overwhip the heavy cream or you will end up with butter ;) Add the pulverized raspberries to the whipped cream and fold in. Fill the cream into a piping bag with a round tip. Poke a hole into the bottom of the cooled puffs and fill them generously with the cream filling. The filled cream puffs need about 30 minutes in the fridge before you can serve them.
2. Für den Brandteig Wasser, Milch, Butter, Zucker, Salz und Vanille Extrakt in einen großen Topf geben (am besten aus Edelstahl) und bei mittlerer Hitzezufuhr erwärmen, bis die Butter geschmolzen ist und die Flüssigkeit anfängt zu köcheln. Das Mehl dann (auf einmal) in den Topf dazugeben und mit einem Kochlöffel verrühren, bis sich eine dicke Masse entwickelt. Für etwa 1-2 Minuten kontinuierlich rühren, um den Teig “abzubrennen” (nicht anbrennen) und etwas Feuchtigkeit aus dem Teig zu bekommen. Es sollte sich am Boden des Topfes eine weiße Schicht entwickeln. Der Teig sollte keine Klumpen oder Mehltaschen aufweisen, sondern eine homogene Masse sein. Den abgebrannten Teig in eine Rührschüssel geben und für etwa 5 Minuten abkühlen lassen.
3. Wenn der Teig ausreichend abgekühlt hat, können die Eier nach und nach dazugegeben und untergerührt werden. Achtet wirklich darauf, dass der Teig nicht mehr zu warm ist, damit die Eier nicht gerinnen. Den Teig mit dem ersten Ei verrühren (ein Handrührgerät mit Knethaken funktioniert bei mir am besten), bis das Ei vollkommen absorbiert wurde, dann erst das nächste Ei dazugeben. Mit den restlichen Eiern wiederholen. Der Teig sollte glänzend und schön dickflüssig sein, aber nicht zu fest, damit man ihn gut weiterverarbeiten kann. Wenn man etwas Teig mit einem Kochlöffel nach oben zieht, sollten Teigreste runtertropfen und ein Dreieck am Kochlöffel zurückbleiben. Den Teig in einen Spritzbeutel mit großer runder Spritztülle füllen und zur Seite legen.
4. Den Ofen auf 200°C (390°F) vorheizen. Zwei Backbleche mit Backpapier auslegen und zur Seite stellen. Den pinken Craquelin Teig aus dem Kühlschrank holen und auf eine Dicke von etwa 2-3mm ausrollen (z.B. zwischen zwei Lagen Klarsichtfolie). Mit einem kleinen Herz Ausstecher etwa 15-18 Herzen ausstechen. Den dunklen Craquelin Teig mit der gleichen Dicke ausrollen und etwa 5cm große Kreise ausstechen. Die Mitte der Kreise mit dem selben kleinen Herz Ausstecher ausstechen und dort dann die pinken Herzen einpassen und etwas festdrücken. Diese Scheiben dann auf ein kleines Brett oder Blech setzen und bis zur weiteren Verwendung in den Gefrierschrank legen.
5. Den Brandteig in kleinen Portionen mit einem Durchmesser von etwa 5cm auf das erste der vorbereiteten Backbleche aufspritzen – dazwischen mindestens 5cm Platz lassen, damit sich der Teig ungestört ausdehnen kann. Je Teigportion eine der gefrorenen Craquelin Scheiben aufsetzen (den Rest im Gefrierschrank lassen) und dann im unteren Drittel des Ofens für etwa 20-22 Minuten backen. Die Windbeutel sollten schön aufgegangen sein und an der Unterseite eine goldene Farbe haben – die Craquelin Schicht wird sich ausgedehnt haben und rissig sein. Den Ofen während der Backzeit nicht öffnen, da die Windbeutel sonst zusammenfallen können. Die fertigen Windbeutel aus dem Ofen holen und auf dem Blech ein Weilchen abkühlen lassen, dann auf ein Kuchengitter setzen und komplett auskühlen lassen. Den Vorgang mit dem restlichen Teig und den Craquelin Scheiben aus dem Gefrierschrank wiederholen.
6. Für die Füllung die gefriergetrockneten Himbeeren im Mixer oder mit einem Mörser mahlen/pulverisieren. Die Sahne in eine große Schüssel geben. Ein paar Tropfen pinke Lebensmittelfarbe, Vanille Extrakt, Puderzucker und Sahnesteif (optional) dazugeben und entweder mit der Küchenmaschine oder dem Handrührgerät steif schlagen. Während dem Aufschlagen kann man die Farbe noch etwas anpassen. Die Sahne sollte schön steif sein, aber übertreibt es nicht, sonst habt ihr schnell Butter ;) Die pulverisierten Himbeeren dazugeben und unterrühren. Die Himbeersahne in einen Spritzbeutel mit kleinerer runter Spritztülle einfüllen. In die Böden der Windbeutel ein Loch schneiden und dann großzügig mit der Sahne befüllen. Die fertigen Windbeutel sollten dann noch einmal mindestens 30 Minuten in den Kühlschrank, bevor man sie serviert.
Craving more? Keep in touch on Facebook, Twitter, Instagram and Pinterest for new post updates and more. You can also contact me with any questions or inquiries!
Here is a version of the recipe you can print easily.
Print
Valentine’s Day Craquelin Cream Puffs
- Prep Time: 00:45
- Cook Time: 00:22
- Total Time: 02:00
- Yield: 15 1x
- Category: Pastry
- Cuisine: France
Description
The perfect little sweet snack for Valentine’s Day: Craquelin Cream Puffs with Raspberry Whipped Cream Filling
Ingredients
For craquelin dough:
2.8 oz. (80g) butter, at room temperature
2.8 oz. (80g) sugar
2.3 oz. (65g) all-purpose flour, plus 1 tsp.
1 pinch of salt
some pink food color
2 tbsp. cocoa powder
For the choux pastry:
3.5 oz. (100g) water
3.5 oz. (100g) milk
2.8 oz. (80g) butter
1 tbsp. sugar
1/4 tsp. salt
1/2 tsp. vanilla extract
1 cup (130g) all-purpose flour
4 large eggs, at room temperature
For the cream filling:
21 oz. (500g) heavy cream, cold
some pink food color
1 tsp. vanilla extract
2 tbsp. confectioners’ sugar
some cream stiffener (optional)
0.4 oz. (10g) freeze-dried raspberries, finely ground
Instructions
1. Start with the craquelin dough by adding the butter and sugar to a large bowl. Mix until light and fluffy. Add the flour and salt and mix until just combined. Take about 1 oz. (30g) of the dough and add it to a small bowl, add the additional teaspoon of flour and some pink food color and mix to combine. Add the cocoa powder to the remaining dough and mix to combine. Wrap both doughs in plastic wrap and place in the fridge for about 30 minutes.
2. For the choux pastry add the water, milk, butter, sugar, salt, and vanilla extract to a large pot (stainless steel is best here). Bring the liquid to a boil over medium-high heat until the butter has melted completely. Add the flour (all at once) and mix with a wooden spoon until the dough starts coming together. Continue mixing for 1-2 minutes to “burn” the dough (but not actually burning it) and get some moisture out of the dough. A white layer will appear on the bottom of the pot which is something you want to happen. The dough should have no lumps or visible spots of flour. Remove from the heat and transfer the dough to a mixing bowl. Let cool down for about 5 minutes.
3. When the dough has cooled enough you can start adding the eggs one by one. If the dough is too warm, the eggs will curdle, so make sure it had enough time to cool down. Mix the dough with the first egg (handheld mixer with dough hooks works best in my opinion), when all of the egg is absorbed, add the next egg, continue doing that until all four eggs are used and the dough is (not too) thick and glossy. Use the wooden spoon to check if the dough is ready by pulling some of the dough up – if it drops back into the bowl and leaves a dough triangle hanging from the spoon, the dough is perfect. Fill into a piping bag with a larger round tip and set aside.
4. Preheat the oven to 390°F (200°C). Line two baking sheets with baking parchment and set aside. Take the pink craquelin dough out of the fridge and roll out to a thickness of about 0.07-0.12inches (2-3mm) – works best between two layers of plastic wrap. Use a small heart cookie cutter and cut out 15-18 hearts. Set aside. Roll out the dark dough to the same thickness and cut out 15-18 circles with a diameter of about 2 inches (5cm). Use the same small heart cookie cutter and cut out hearts from the centers of the circles, place the red hearts inside, and press both slightly together. Transfer onto a small board or baking tray and place in the freezer until needed.
5. Pipe small dough portions (Ø 2 inches/5cm) onto the first baking sheet – leave at least 2 inches (5cm) space in between, so the dough can expand. Top each dough portion with a frozen craquelin disc (keep the rest in the freezer) and then place in the lower third of the oven. Bake for 20-22 minutes until the dough has puffed up nicely, the bottoms look golden in color and the top has that nice crinkled crust. Do not open the oven in between or the puffs will deflate. Take out of the oven and let cool down on the baking sheet for some time, then transfer to a wire rack to cool down completely. Repeat with the remaining dough and craquelin discs from the freezer.
6. For the cream filling grind/pulverize the freeze-dried raspberries in a mixer or mortar. Add the heavy cream to a large bowl of a kitchen machine (or use a handheld mixer), add some drops of pink food color, vanilla extract, confectioners’ sugar, and cream stiffener (optional), and whisk until stiff peaks form. While whisking you can adjust the color with some more food color. Be careful not to overwhip the heavy cream or you will end up with butter ;) Add the pulverized raspberries to the whipped cream and fold in. Fill the cream into a piping bag with a round tip. Poke a hole into the bottom of the cooled puffs and fill them generously with the cream filling. The filled cream puffs need about 30 minutes in the fridge before you can serve them.
Notes
Enjoy baking!