
A long time ago in a galaxy far, far away…
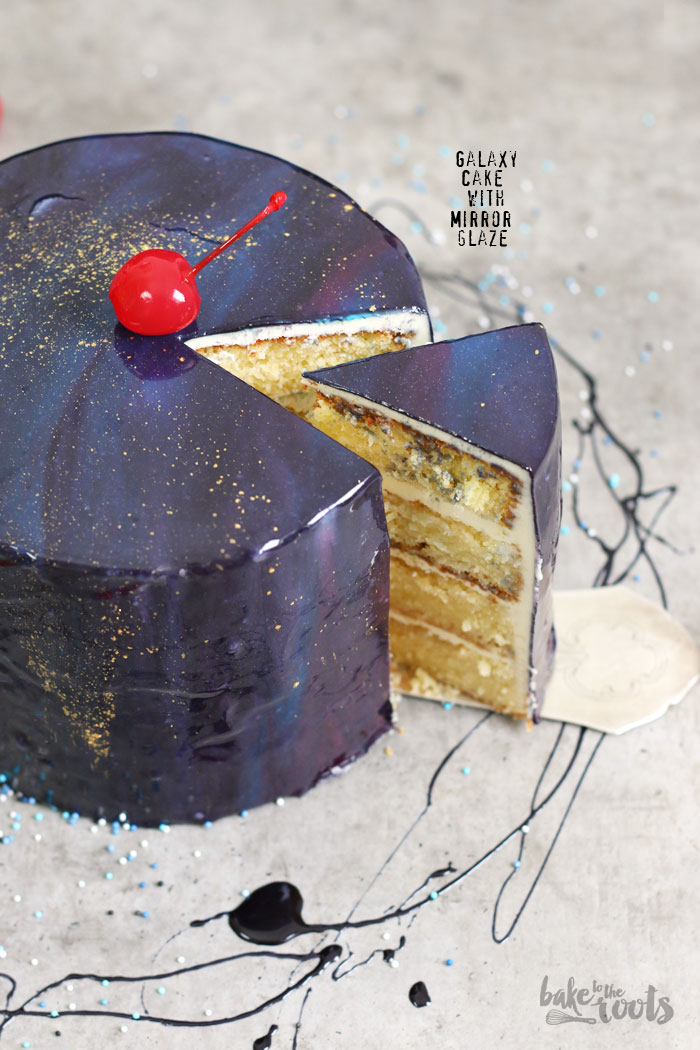
Don’t worry – I will not write down the opening sequence of a Star Wars movie… even though I could ;) Today it is all about cake, not the empire or rebels, stormtrooper or androids. I could use this cake as a weapon I guess, but I definitely prefer to eat the cake – nothin’ else. So, who wants a piece of this Galaxy Cake with Mirror Glaze?
If you know my blog, you know I sometimes write confusing stuff. That happens mostly when I write my texts late at night or when I haven’t been sleeping enough ;) Regular cakes can turn into Death Stars on those nights. Makes no sense at all, but who cares?!
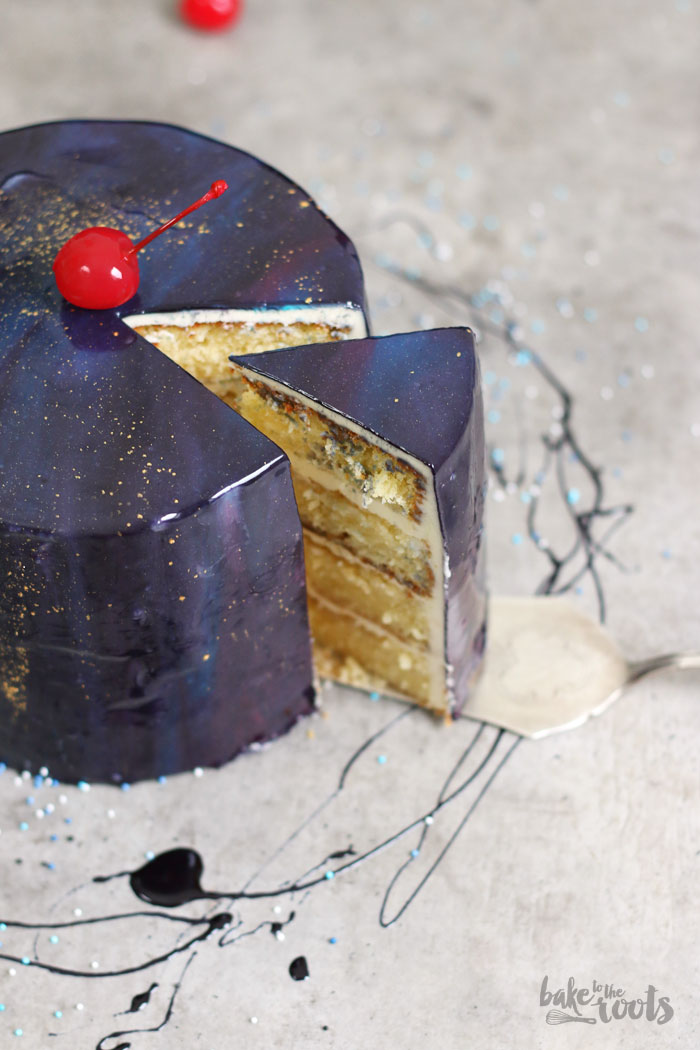
When it comes to fat, sugar and calories, this cake can turn into a Death Star for sure. It’s a plain white cake with a raspberry jam filling and an American buttercream – the basics for many layer cakes. If you need a recipe for one of those white cakes, go with this one, it’s easy and good. Works fine without the mirror glaze ;)
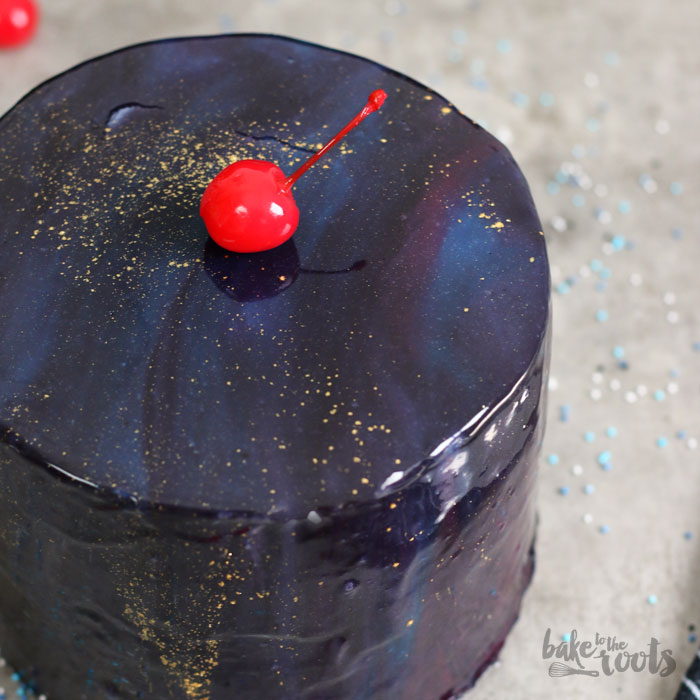
THE mirror glaze. This cake is my first attempt do make this kind of glaze/decoration. It has been a buzz lately to use this glaze for cakes, even though it has been used from pastry chefs for a very long time. Well… nearly everybody did it already, now I did it too. Finally ;)
When I saw pictures and videos of cakes like this for the fist time, I immediately thought “I HAVE to do this too!” – it took quite a while for me to give it a try. I thought it would be way too complicated, but it’s not! There is probably nothing easier when it comes to baking and decorating cakes!

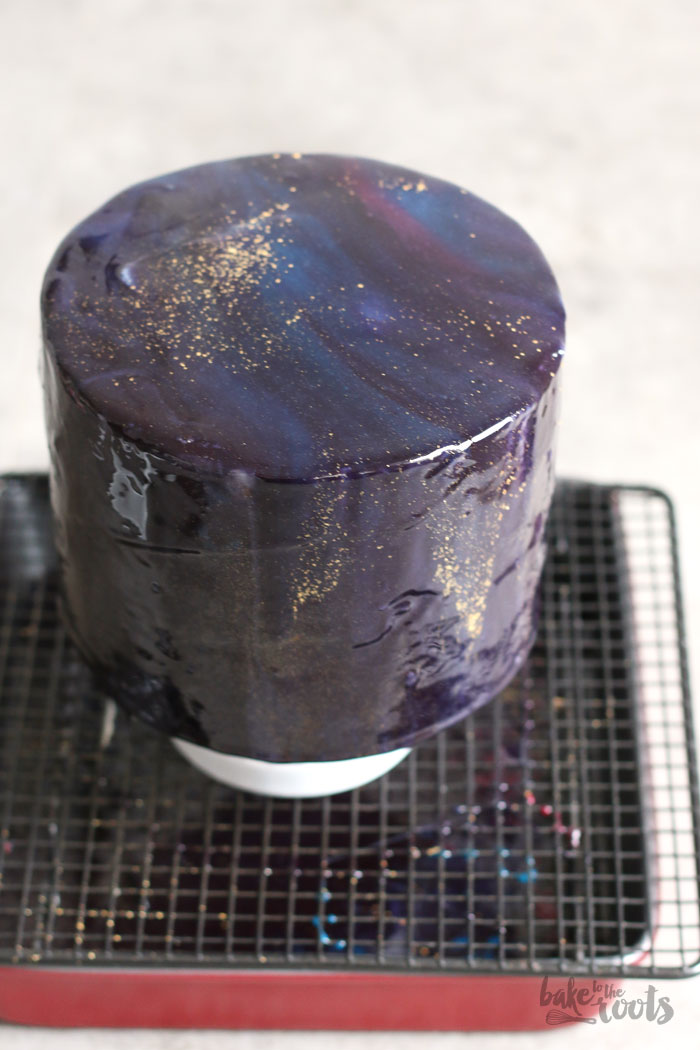
If you follow the recipe step-by-step, basically nothing can go wrong. The glaze is quite easy to handle. You mix everything together, wait a bit for it to cool down and then you are ready to go. The glaze is actually cooling down pretty fast, so work quick. If the glaze gets too cold and thick, reheat it in the microwave or over a pot with simmering water – after that, it’s good to work with it once again. That’s it – nothing else to worry about. Ok – the cake has to be coated very evenly cause everything shows underneath the thin mirror glaze, but that should be easy to do.
All I can say – try decorating a cake with mirror glaze! It is really not too complicated and the result ALWAYS looks stunning! So if you have a cake and all the ingredients you need – get started! May the glaze/force be with you! ;)
INGREDIENTS / ZUTATEN
1 cup (230g) butter
1/2 cup (115g) vegetable shortening (Palmin Soft*)
2 1/2 cups (500g) sugar
5 medium eggs
3 cups (360g) all-purpose flour
2 tsp. baking powder
1/2 tsp. salt
1/2 cup (120ml) milk
1/2 cup (120ml) buttermilk
2 tsp. vanilla extract
For the buttercream:
1 1/3 cup (300g) butter, at room temperature
4 cups (520g) confectioners’ sugar
1 1/2 tsp. vanilla extract
1-3 tbsp. heavy cream
3-4 tbsp. raspberry jam
For the mirror glaze:
5 tsp. powdered gelatin
1/2 cup (120ml) cold water
1 cup (200g) sugar
1/2 cup (160g) light corn syrup*
1/4 cup (60ml) water
1/2 cup sweetened condensed milk
8 oz. (220g) white chocolate, chopped
food color (black, purple, blue, pink, yellow)
gold powder/glitter
230g Butter
115g Palmin Soft*
500g Zucker
5 Eier (M)
360g Mehl (Type 405)
2 TL Backpulver
1/2 TL Salz
120ml Milch
120ml Buttermilch
2 TL Vanille Extrakt
Für die Buttercreme:
520g Puderzucker
300g weiche Butter
1 1/2 TL Vanille Extrakt
3-4 EL Himbeermarmelade
Für die Mirror Glaze:
5 TL gemahlene Gelatine
120ml kaltes Wasser
200g Zucker
160g Light Corn Syrup* (Glucose)
60ml Wasser
120ml gezuckerte Kondensmilch
220g weiße Schokolade, gehackt
Lebensmittelfarbe (schwarz, lila, blau, pink, gelb)
Goldpuder/Glitter
DIRECTIONS / ZUBEREITUNG
2. In a large bowl beat the butter and shortening until light and fluffy. Slowly add the sugar and mix until well combined. Add the eggs one at a time and mix well after each addition. Mix the flour with baking powder and salt. Mix the milk with buttermilk and vanilla extract. Add the flour mixture alternating with the milk mixture in three portions and mix until just combined – do not overmix. Divide the batter evenly between the tins and bake for 25-35 minutes (baked in two tins takes a bit more time) or until a toothpick inserted in center comes out clean. Take out of the oven and let cool down in the tins for some time, remove from the tins and let cool down completely on a wire rack.
3. For the buttercream add the butter to a large bowl and mix until light and fluffy. Add the confectioners’ sugar and vanilla extract and start mixing slowly, then on high speed until well combined, light and fluffy. If the buttercream is too thick, gradually add heavy cream and mix until you get the desired consistency.
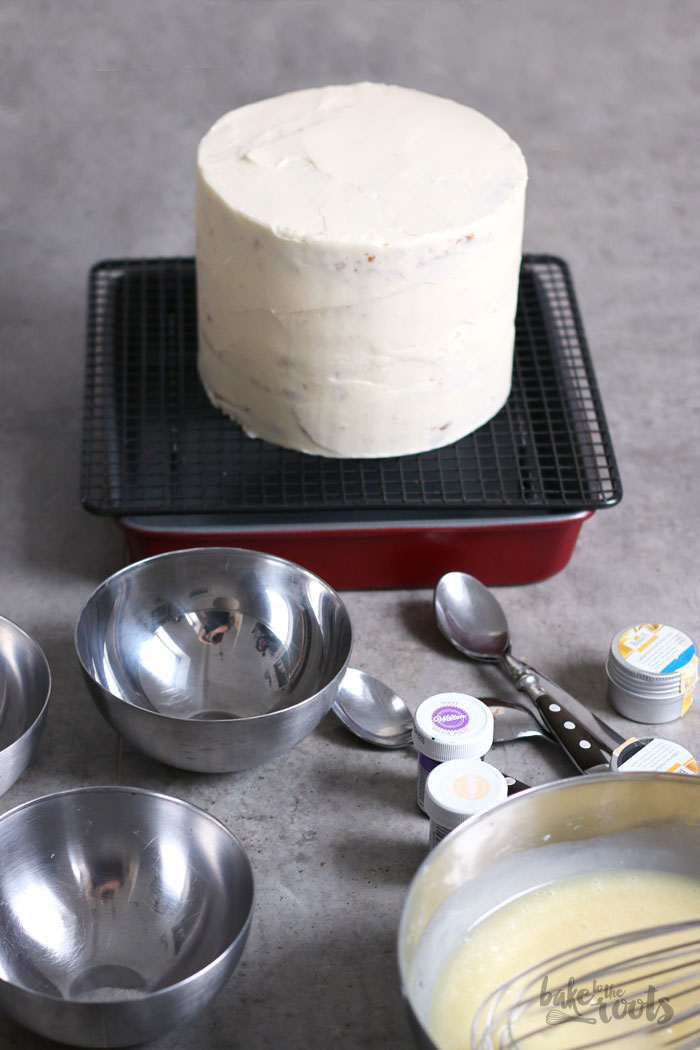
4. To assemble the cake, place the fist cake layer on a serving plate (cut off the top, if domed to get an even layer; if you baked in two forms, cut each cake in half to get 4 layers) and spread 1-2 tablespoons of raspberry jam on the cake. Top with some butter cream and repeat with the second and third cake layer. Finish the cake with the last cake layer (no jam this time) and coat the complete cake with a thin layer (crumb coat) of buttercream. Place in the fridge for about 20-30 minutes. Take out again and spread the remaining buttercream all over the cake. Make sure you get a nice and even surface this time or you will get problems when decorating the cake with the mirror glaze. Place in the fridge for at least 2 hours to cool completely.
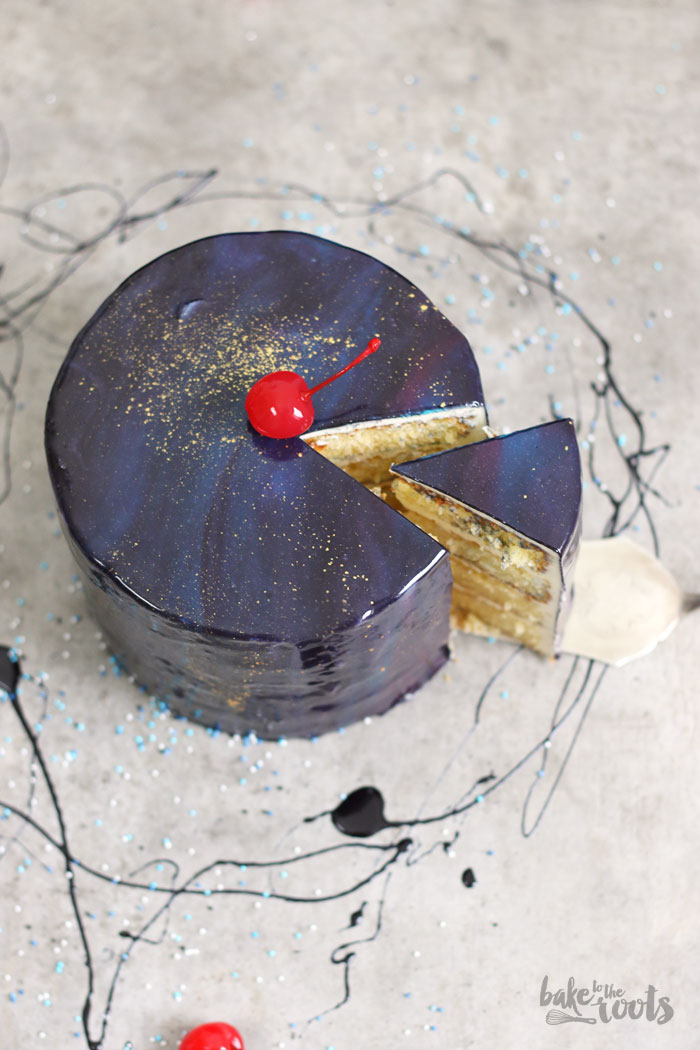
5. When the cake has cooled enough, you can start with the mirror glaze by mixing the powdered gelatin with the cold water. Let sit until thickened, for about 4-5 minutes. Add the sugar, corn syrup and water to a small saucepan and bring to a boil. Let cook for about 7-8 minutes until the sugar has dissolved completely. Take off the heat and mix in the gelatin until dissolved completely. Add the condensed milk and mix in. Add the chopped chocolate to a large bowl and pour the gelatin mix over the chocolate and let melt (2-3 minutes). Use a whisk or immersion blender to get a smooth mixture. The glaze is now ready for some color. Divide the glaze between several small bowls and a larger bowl. The large bowl with a larger amount of glaze is for the “base color” – in my case black. The smaller amounts were purple, blue, pink, and a tiny bit of yellow. Place the cooled cake on a wire rack over a bowl or baking sheet to catch all the overflowing glaze. Pour the base color first over the cake and cover the cake completely, drizzle the other colors to your liking on top. You can also pour the colors into the base color and then pour over the cake – you have to experiment a bit. Sprinkle the cake with some gold powder and let the glaze dry before you remove the cake from the wire rack.
2. Die Butter und das Palmin in einer großen Schüssel hell und luftig aufschlagen. Den Zucker langsam einrieseln lassen und weiter aufschlagen. Die Eier einzeln zugeben und jeweils gut unterrühren. Das Mehl mit dem Backpulver und Salz vermischen. Die Milch, Buttermilch und Vanille Extrakt ebenfalls vermischen. Die Mehlmischung abwechselnd mit der Milchmischung in drei Portionen zur Schüssel zugeben und nur kurz unterrühren. Den Teig gleichmäßig auf die Backformen aufteilen und dann für 25-35 Minuten backen (je nachdem in wievielen Formen gebacken wird) – mit einem Zahnstocher testen, ob noch Teig kleben bleibt und erst herausnehmen, wenn der Zahnstocher sauber herauskommt. Aus dem Ofen nehmen und in den Formen etwas abkühlen lassen, dann herauslösen und auf einem Kuchengitter komplett auskühlen lassen.
3. Für die Buttercreme die Butter in eine große Schüssel geben und hell und luftig aufschlagen. Den Puderzucker und den Vanille Extrakt zugeben und erst langsam, dann auf höchster Stufe aufschlagen, bis eine luftige Creme entstanden ist. Ist die Creme zu fest, nach und nach etwas Sahne zugeben, bis die Konsistenz passt.
4. Für den Zusammenbau der Torte den ersten Tortenboden auf eine Servierplatte legen (sollte der Boden zu sehr gewölbt sein, die Oberfläche mit einem Messer begradigen; bei zwei gebackenen Böden vorab horizontal halbieren, damit 4 Böden entstehen) und mit 1-2 Eßlöffeln Marmelade bestreichen. Das Ganze mit etwas Buttercreme bestreichen und dann die zweite Kuchenschicht auflegen und ebenso verfahren. Mit Kuchenschicht Nummer drei wiederholen und dann mit der letzten Kuchenschicht abschließen. Die komplette Torte dünn mit Buttercreme einstreichen (crumb coat) und dann für 20-30 Minuten in den Kühlschrank stellen. Die Torte mit der restlichen Creme einstreichen und dabei darauf achten, dass die Oberfläche glatt und sauber ist. Den Kuchen ein weiteres Mal für mindestens 2 Stunden in den Kühlschrank stellen.
5. Sobald der Kuchen gut durchgekühlt ist, kann man mit der Mirror Glaze anfangen. Die Gelatine mit dem kalten Wasser verrühren und für 4-5 Minuten quellen lassen. Den Zucker mit dem Corn Syrup und Wasser in einen kleinen Topf geben, aufkochen lassen und dann für 7-8 Minuten köcheln lassen, bis sich der Zucker komplett aufgelöst hat. Vom Herd nehmen und die Gelatine unterrühren. Die gezuckerte Kondensmilch ebenfalls unterrühren. Die gehackte Schockolade in eine große Schüssel geben und mit der Gelatine Mixtur übergiessen. Die Schokolade für 2-3 Minuten schmelzen lassen und dann mit einem Schneebesen oder Stabmixer zu einer glatten Soße verarbeiten. Die Glasur ist jetzt bereit für etwas Farbe. Die Glasur auf eine große und mehrere kleinere Schüssel aufteilen und dann mit Farbe versehen. Die größere Menge Glasur sollte Schwarz eingefärbt werden (als Basisfarbe) und die kleineren mit Lila, Blau, Pink und eine ganz kleine Portion mit Gelb. Den durchgekühlten Kuchen auf ein Gitter stellen, das über einer Schüssel oder einem Blech steht und die abtropfende Glasur auffangen kann. Jetzt je nach Belieben als erstes mit der Basisfarbe Schwarz anfangen und die Torte damit komplett übergießen, dann mit den anderen Farben Muster auf die Oberfläche gießen. Man kann die Farben auch vorher mischen und dann zusammen auf die Torte gießen – hier muss man ausprobieren. Die Torte mit etwas Goldpuder/Glitter bestreuen und dann komplett trocknen lassen, bevor man sie vom Gitter nimmt.

Craving more? Keep in touch on Facebook, Twitter, Instagram and Pinterest for new post updates and more. You can also contact me with any questions or inquiries!
Here is a version of the recipe you can print easily.
Galaxy Cake with Mirror Glaze
- Prep Time: 90
- Cook Time: 35
- Total Time: 300
Description
Delicious white cake with mirror glaze topping.
Ingredients
For the cake
- 1 cup (230g) butter
- 1/2 cup (115g) vegetable shortening (Palmin Soft)
- 2 1/2 cups (500g) sugar
- 5 medium eggs
- 3 cups (360g) all-purpose flour
- 2 tsp. baking powder
- 1/2 tsp. salt
- 1/2 cup (120ml) milk
- 1/2 cup (120ml) buttermilk
- 2 tsp. vanilla extract
For the buttercream
- 1 1/3 cup (300g) butter, at room temperature
- 4 cups (520g) confectioners’ sugar
- 1 1/2 tsp. vanilla extract
- 1-3 tbsp. heavy cream
- 3-4 tbsp. raspberry jam
For the mirror glaze
- 5 tsp. powdered gelatin
- 1/2 cup (120ml) cold water
- 1 cup (200g) sugar
- 1/2 cup (160g) light corn syrup
- 1/4 cup (60ml) water
- 1/2 cup sweetened condensed milk
- 8 oz. (220g) white chocolate, chopped
- food color (black, purple, blue, pink, yellow)
- gold powder/glitter
Instructions
- Preheat oven to 350º F (175°C). Line two (or four) 8 inch (20cm) springform tins with baking parchment, grease lightly and dust with flour. Set aside.
- In a large bowl beat the butter and shortening until light and fluffy. Slowly add the sugar and mix until well combined. Add the eggs one at a time and mix well after each addition. Mix the flour with baking powder and salt. Mix the milk with buttermilk and vanilla extract. Add the flour mixture alternating with the milk mixture in three portions and mix until just combined – do not overmix. Divide the batter evenly between the tins and bake for 25-35 minutes (baked in two tins takes a bit more time) or until a toothpick inserted in center comes out clean. Take out of the oven and let cool down in the tins for some time, remove from the tins and let cool down completely on a wire rack.
- For the buttercream add the butter to a large bowl and mix until light and fluffy. Add the confectioners’ sugar and vanilla extract and start mixing slowly, then on high speed until well combined, light and fluffy. If the buttercream is too thick, gradually add heavy cream and mix until you get the desired consistency.
- To assemble the cake, place the fist cake layer on a serving plate (cut off the top, if domed to get an even layer; if you baked in two forms, cut each cake in half to get 4 layers) and spread 1-2 tablespoons of raspberry jam on the cake. Top with some butter cream and repeat with the second and third cake layer. Finish the cake with the last cake layer (no jam this time) and coat the complete cake with a thin layer (crumb coat) of buttercream. Place in the fridge for about 20-30 minutes. Take out again and spread the remaining buttercream all over the cake. Make sure you get a nice and even surface this time or you will get problems when decorating the cake with the mirror glaze. Place in the fridge for at least 2 hours to cool completely.
- When the cake has cooled enough, you can start with the mirror glaze by mixing the powdered gelatin with the cold water. Let sit until thickened, for about 4-5 minutes. Add the sugar, corn syrup and water to a small saucepan and bring to a boil. Let cook for about 7-8 minutes until the sugar has dissolved completely. Take off the heat and mix in the gelatin until dissolved completely. Add the condensed milk and mix in. Add the chopped chocolate to a large bowl and pour the gelatin mix over the chocolate and let melt (2-3 minutes). Use a whisk or immersion blender to get a smooth mixture. The glaze is now ready for some color. Divide the glaze between several small bowls and a larger bowl. The large bowl with a larger amount of glaze is for the “base color” – in my case black. The smaller amounts were purple, blue, pink, and a tiny bit of yellow. Place the cooled cake on a wire rack over a bowl or baking sheet to catch all the overflowing glaze. Pour the base color first over the cake and cover the cake completely, drizzle the other colors to your liking on top. You can also pour the colors into the base color and then pour over the cake – you have to experiment a bit. Sprinkle the cake with some gold powder and let the glaze dry before you remove the cake from the wire rack.
Notes
- Enjoy baking!
Nutrition
- Serving Size: 12
*Affiliate Links (Advertising) Amazon Germany.


So I followed all the steps…but my glaze doesn’t seem to want to adhere. I used store bought frosting instead of making my own but I saw other recipes that used store bought as well. My glaze just dropped off the cake and all over the plate and counter :/
Hi Catherine,
can’t really give you advice on a product I don’t know – but in general, it helps if the cake is really cold and the frosting not too warm – then it normally sticks to the cake.
Cheers,
Marc
This is awesome. After the glaze dried, how did you get the cake off the rack and onto the cake stand? Thanks!
Hi,
as you can see on one of the pictures – there is a small paper cake board underneath the cake – same size as the cake. You place the cake with that on a bowl on the rack, glaze, let it dry and then just transfer/lift it to a cake stand :)
Cheers,
Marc