
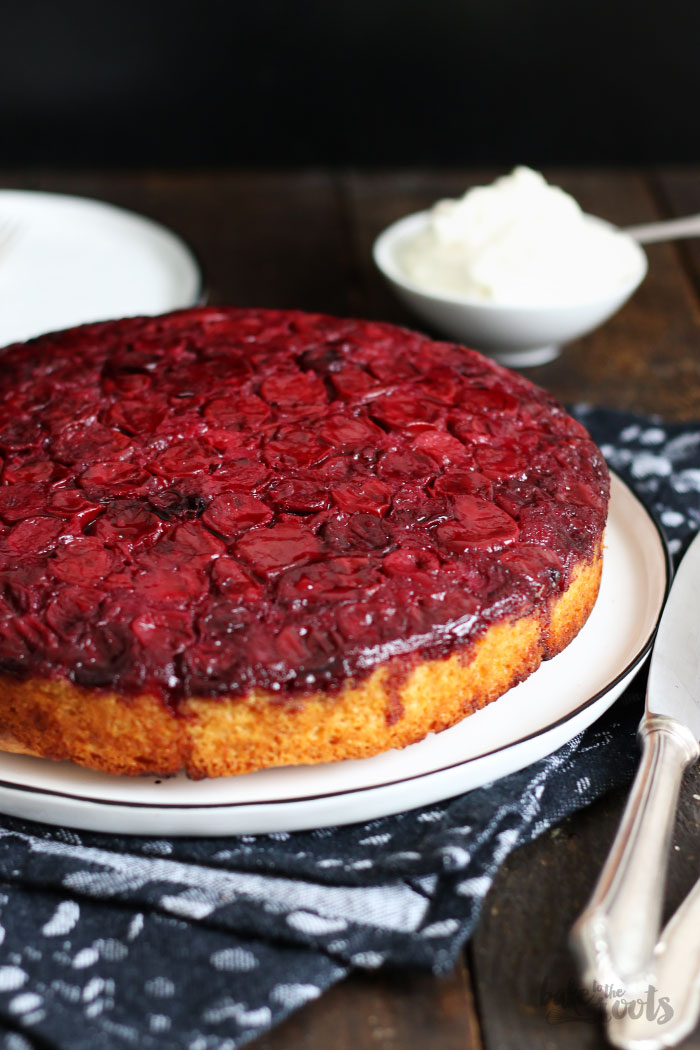
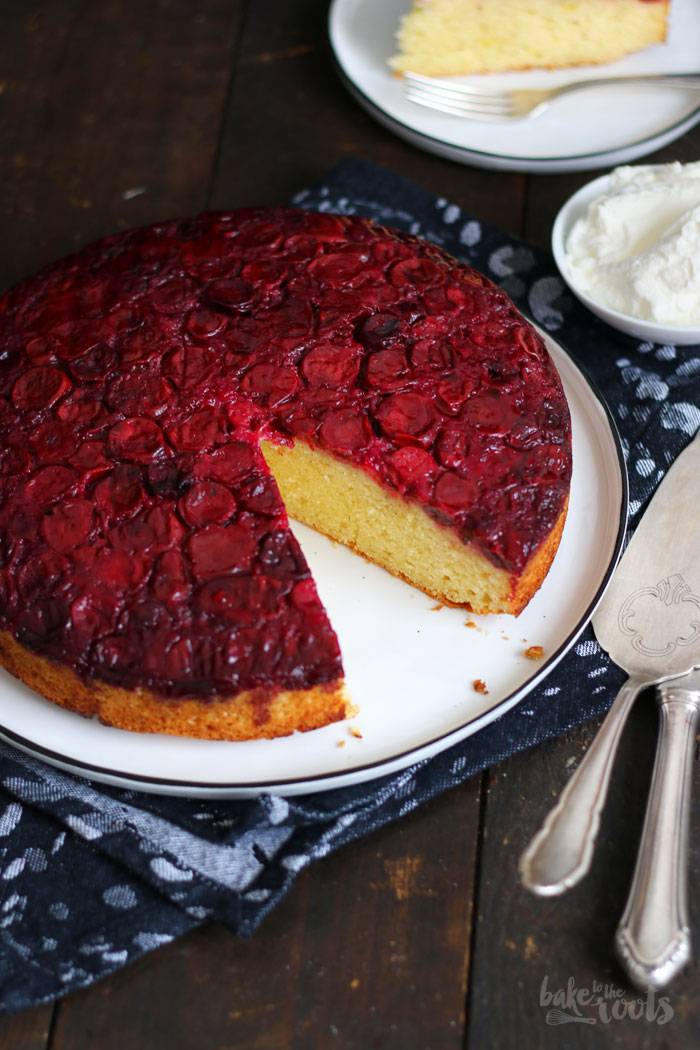
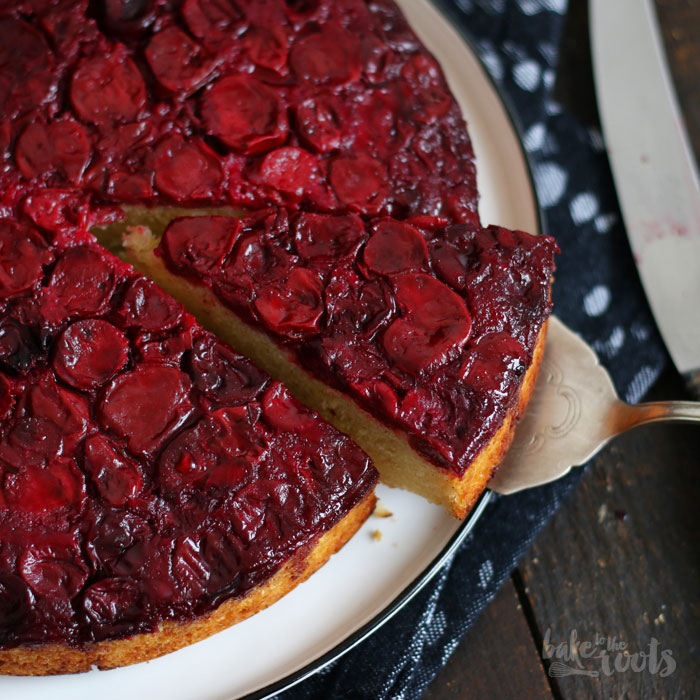
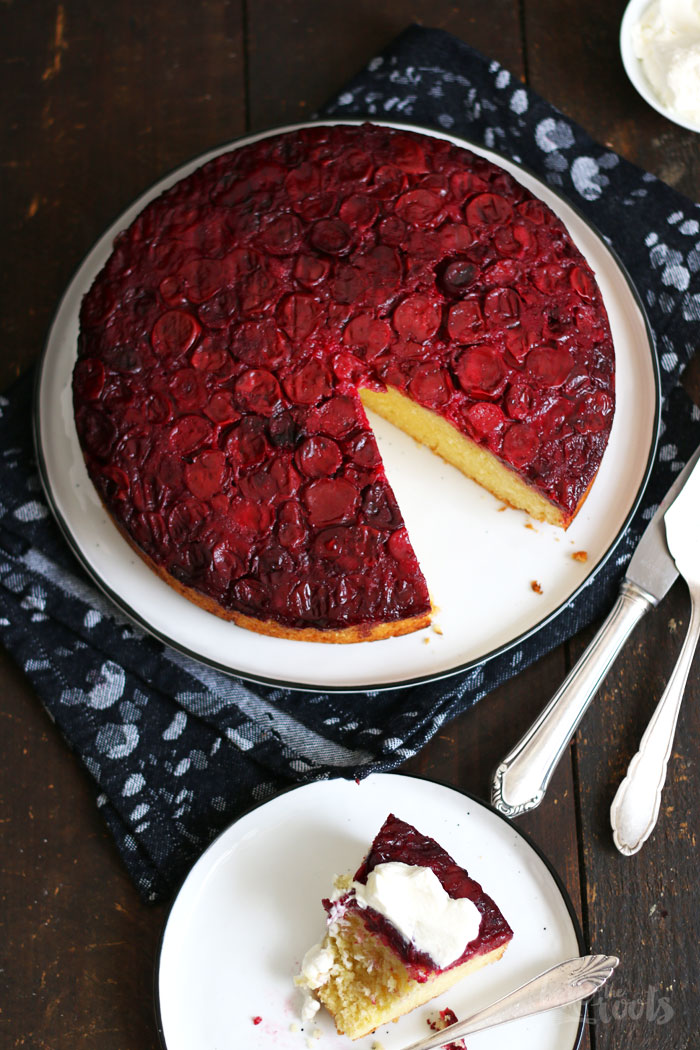
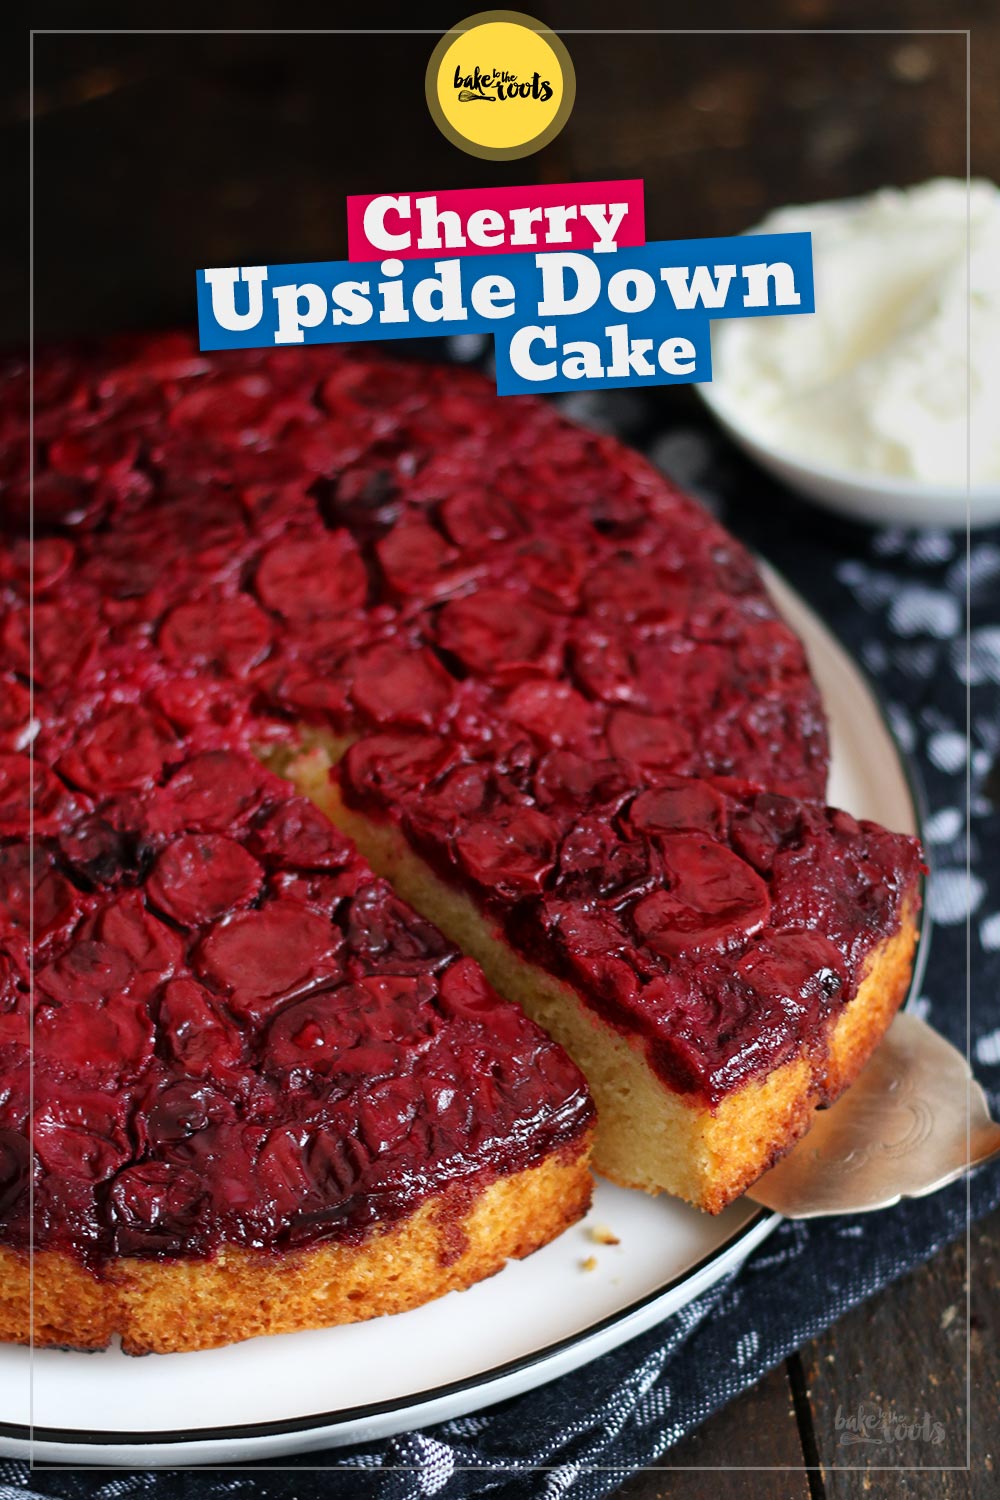
The season for cherries is almost over here. If you are lucky, you might still find some nice ones at the farmers market. Unfortunately, the season for cherries is way too short. I think I say that about all the fruits or berries… well it’s true! So hurry up and make one last cake with this little red fellas. This Cherry Upside Down Cake is easy to prepare and DAF (Delicious As F***). Oh and don’t worry if you can’t get hold of fresh cherries anymore – this cake works with frozen cherries just as good. Easy peasy!
I love Tarte Tatin and all those cakes you bake upside down. The juices from the fruits turn into a caramel-like sauce and cover the fruits or berries. Mmmmm…
I also like the surprise element in those cakes – many other people probably hate that part. When you bake a cake upside down, you never know how it will look like at the end. You are placing the fruits on the bottom, burying them with cake batter and then you can only hope for the best.
I have to admit – sometimes I am also not really happy with the result. When the fruits or berries stick to the baking tin and won’t come off, the whole cake can look like s***. Luckily you can reduce the risk of this disaster by using baking parchment in the tin and a tiny bit of fat to grease it. That normally helps a lot.
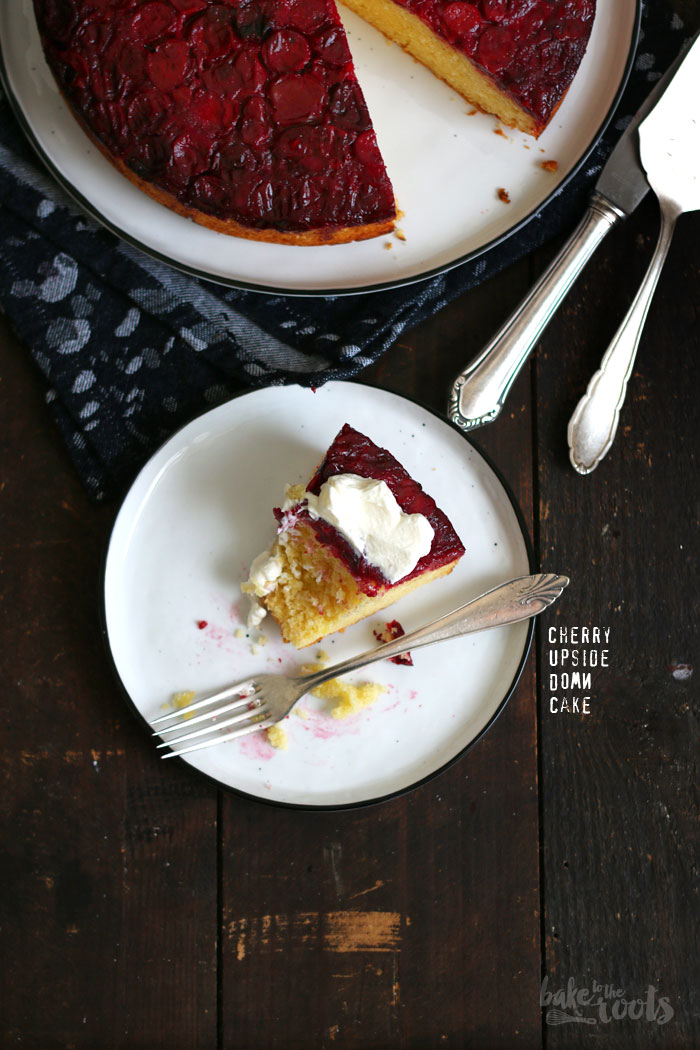
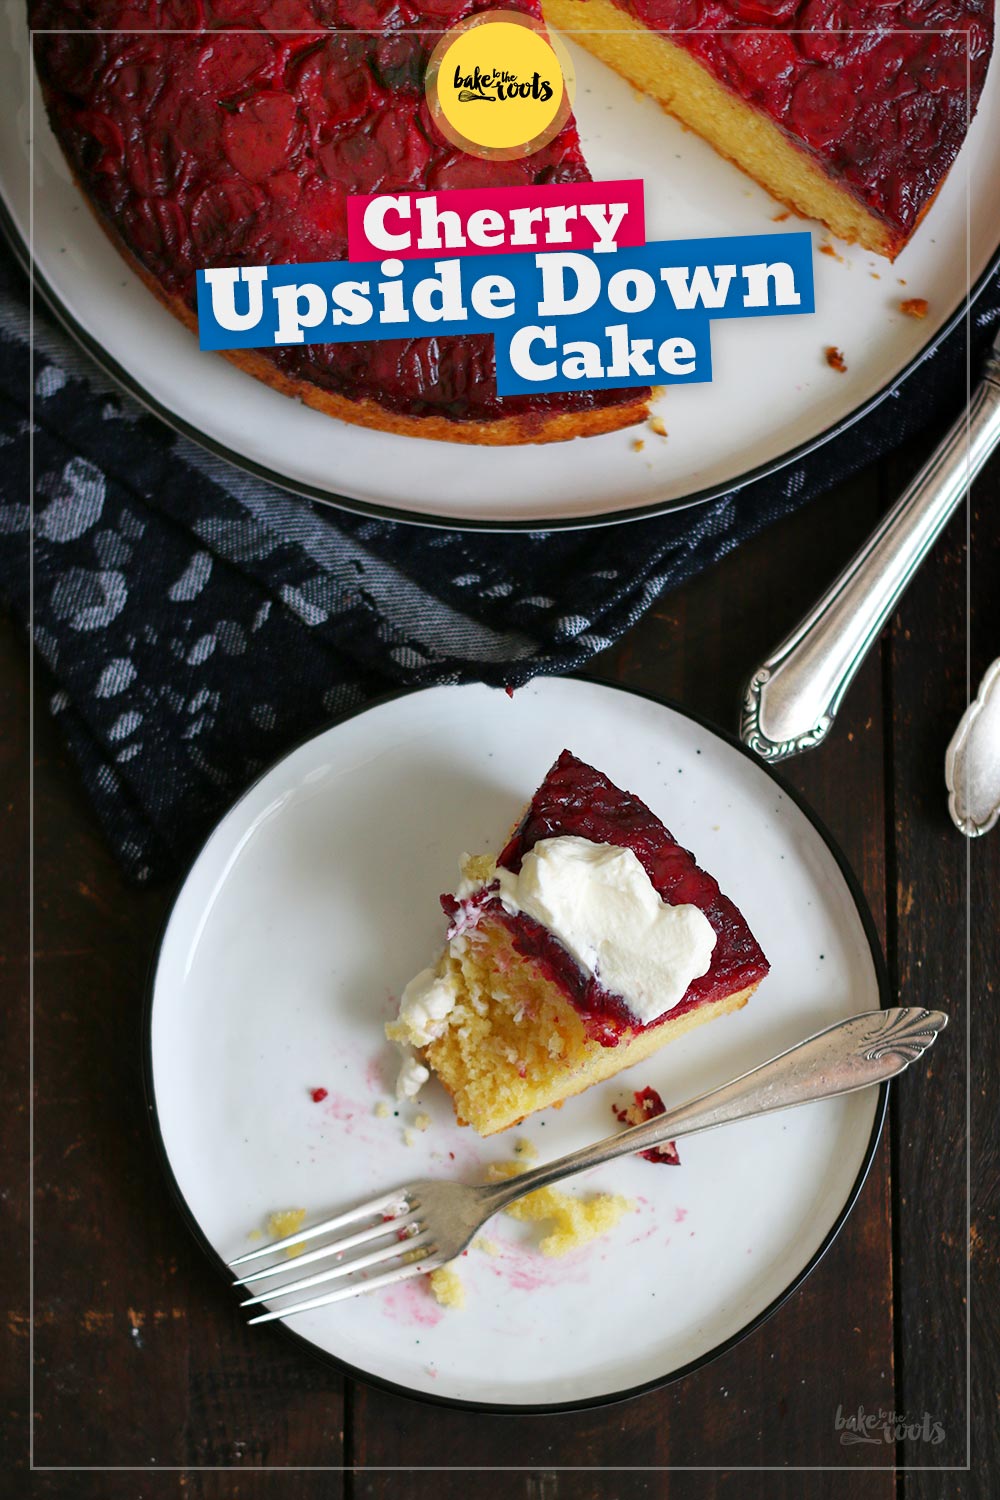
And if something is not where it should be after turning the cake, you can repair the cake easily most of the time by just pushing the fruits/berries back where they belong. And if it still looks bad, just add whipped cream on top and cover all the ugly spots. Done. Everybody’s happy.
So grab some cherries and get baking! You won’t regret it!
INGREDIENTS / ZUTATEN
For the cherry topping:
1/2 cup (120g) butter, melted (you need only 2 tbsp. here, the rest is for the batter)
21 oz. (600g) fresh or frozen cherries, pitted
2 tbsp. brown sugar
2 tbsp. lemon juice
For the cake batter:
2 cups (260g) all-purpose flour
2 tsp. baking powder
1/4 tsp. baking soda
1/4 tsp. salt
3/4 cup (150g) sugar
zest of 1/2 organic lemon
3 large eggs
1 cup (235g) sour cream (Schmand)
Für die Kirschenschicht:
120g Butter (für die Kirschen braucht man nur 2 EL, der Rest ist für den Teig)
600g frische oder gefrorene Kirschen, entsteint
2 EL brauner Zucker
2 EL Zitronensaft
Für den Teig:
260g Mehl (Type 405)
2 TL Backpulver
1/4 TL Natron
1/4 TL Salz
150g Zucker
Abrieb von 1/2 Bio-Zitrone
3 Eier (L)
235g Schmand (Sour Cream)
DIRECTIONS / ZUBEREITUNG
1. Preheat the oven to 220°C (425°F). Line a springform tin (23cm)* with baking parchment and set it on a baking sheet also lined with baking parchment. You will probably have some spillage, so this will help you to keep the oven clean. Set aside. Melt the butter.
2. Add the fresh or frozen cherries (no need to thaw them) to a bowl and mix with the brown sugar and lemon juice. Add two tablespoons of the melted butter and mix in. Keep the rest for later. Pour into the tin and press to the bottom to get a nice cherry layer. Place in the oven and bake for about 40-50 minutes until the cherries are soft and the liquids have turned into a syrup. Take it out of the oven and reduce the heat to 180°C (350°F).
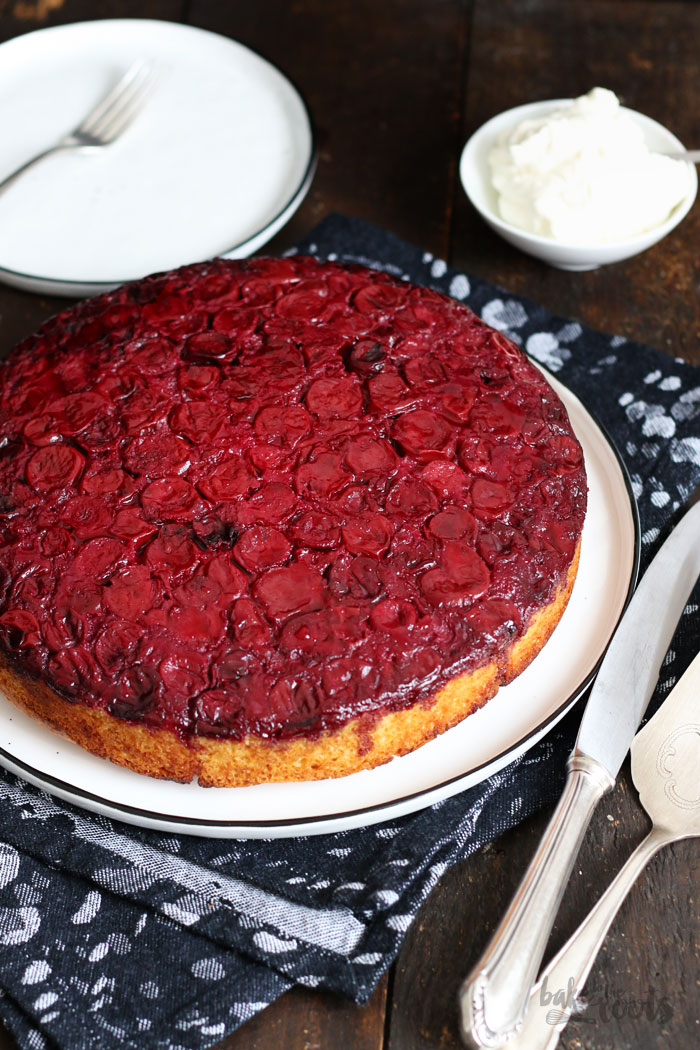
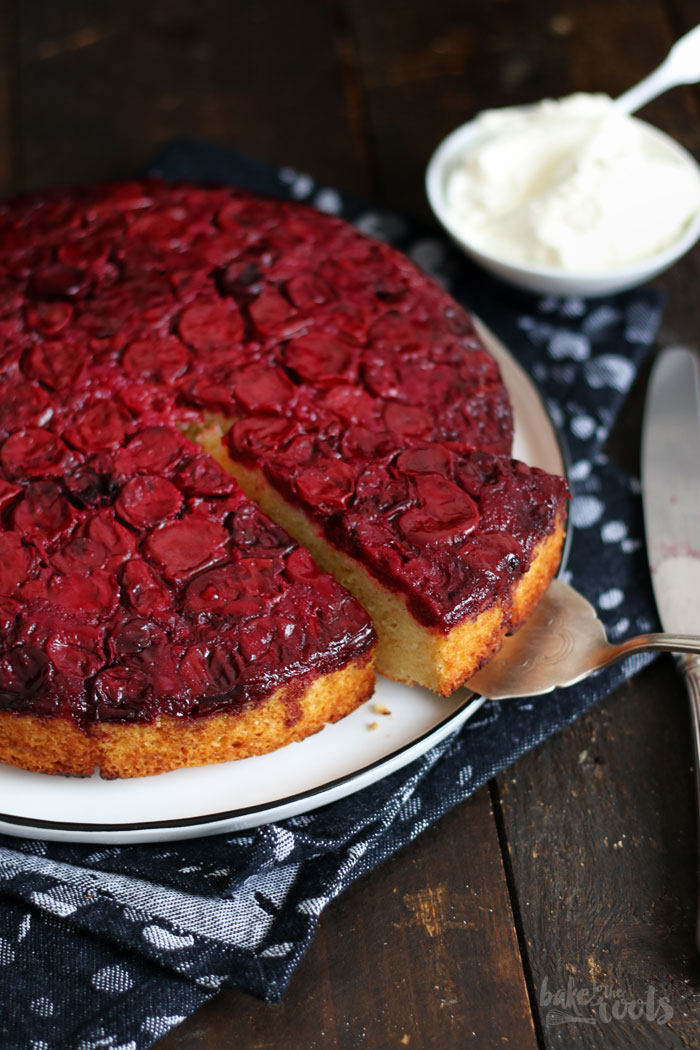
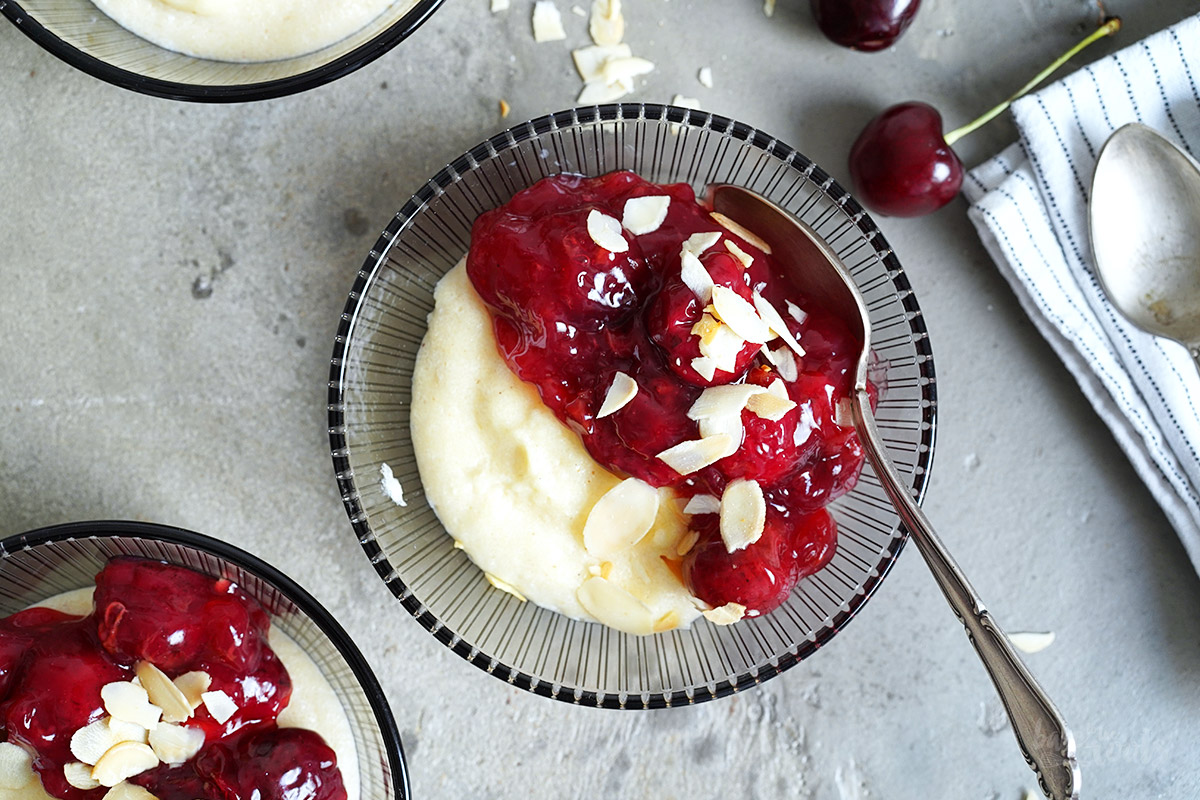
3. Add the flour, baking powder, baking soda, salt, sugar, and lemon zest to a large bowl and mix. In a separate bowl mix the eggs with sour cream (Schmand) until well combined, then add them together with the rest of the melted butter to the bowl with the flour and mix until well combined. Use a large spoon and place batter all over the cherries. If you pour the batter all at once into the tin, it will mix with the cherries, so be careful to keep that layer intact. Smooth out the top with a spatula and bake for about 45-50 minutes or until a toothpick inserted in the center comes out clean. Take it out of the oven and let cool down in the tin for about 10 minutes, then carefully remove it from the tin and turn it upside down. You should be able to peel off the baking parchment easily. Let it cool down completely. Serve with some whipped cream.
1. Den Ofen auf 220°C (425°F) Ober-/Unterhitze vorheizen. Eine Springform (23cm)* mit Backpapier auslegen und auf ein Backblech mit Backpapier stellen – die Kirschfüllung läuft schnell mal aus und so spart man sich einiges an Putzen. Zur Seite stellen. Die Butter schmelzen.
2. Die frischen oder gefrorenen Kirschen (man muss sie nicht auftauen) in eine Schüssel geben und mit dem Zucker und Zitronensaft vermischen. Zwei Esslöffel der geschmolzenen Butter darüberträufeln und vermischen – die restliche Butter zur Seite stellen. Die Kirschen in die Form füllen und zu einer glatten Schicht zusammendrücken. In den Ofen stellen und für etwa 40-50 Minuten backen, bis die Kirschen weich sind und die austretende Flüssigkeit dickflüssig geworden ist. Aus dem Ofen nehmen und die Temperatur auf 180°C (350°F) Ober-/Unterhitze reduzieren.
3. Das Mehl mit dem Backpulver, Natron, Salz, Zucker und Zitronenabrieb in einer großen Schüssel verrühren. In einer zweiten Schüssel die Eier mit dem Schmand verrühren und dann zusammen mit der restlichen geschmolzenen Butter in die Schüssel mit dem Mehl geben und alles gut verrühren. Mit einem großen Löffel den Teig vorsichtig auf der Kirschschicht verteilen, nach Möglichkeit hier nichts vermischen. Die Oberfläche glätten und dann für etwa 40-50 Minuten backen – mit einem Zahnstocher testen, ob noch Teig kleben bleibt, und erst herausnehmen, wenn der Zahnstocher sauber herauskommt. Aus dem Ofen nehmen und für etwa 10 Minuten in der Form abkühlen lassen, dann vorsichtig stürzen und aus der Form herauslösen. Das Backpapier sollte sich gut von den Kirschen abziehen lassen. Komplett auskühlen lassen und dann mit Schlagsahne servieren.
Craving more? Keep in touch on Facebook, Instagram and Pinterest for new post updates and more. You can also contact me with any questions or inquiries!
Here is a version of the recipe you can print easily.
Print
Upside Down Cherry Cake
- Prep Time: 00:20
- Cook Time: 01:40
- Total Time: 02:20
- Yield: 1 1x
- Category: Cakes
- Method: -
- Cuisine: International
- Diet: Vegetarian
Description
Delicious cherry cake baked upside down. You start with the cherries on the bottom and end up with a nice cake topped with caramelized cherries.
Ingredients
For the cherry topping:
1/2 cup (120g) butter, melted (you need only 2 tbsp. here, the rest is for the batter)
21 oz. (600g) fresh or frozen cherries, pitted
2 tbsp. brown sugar*
2 tbsp. lemon juice
For the cake batter:
2 cups (260g) all-purpose flour*
2 tsp. baking powder
1/4 tsp. baking soda
1/4 tsp. salt
3/4 cup (150g) sugar (fine)*
1/2 organic lemon, zest only
3 large eggs
1 cup (230g) sour cream (Schmand)
Instructions
1. Preheat the oven to 220°C (425°F). Line a springform tin (23cm)* with baking parchment and set it on a baking sheet also lined with baking parchment. You will probably have some spillage, so this will help you to keep the oven clean. Set aside. Melt the butter.
2. Add the fresh or frozen cherries (no need to thaw them) to a bowl and mix with the brown sugar and lemon juice. Add two tablespoons of the melted butter and mix in. Keep the rest for later. Pour into the tin and press to the bottom to get a nice cherry layer. Place in the oven and bake for about 40-50 minutes until the cherries are soft and the liquids have turned into a syrup. Take it out of the oven and reduce the heat to 180°C (350°F).
3. Add the flour, baking powder, baking soda, salt, sugar, and lemon zest to a large bowl and mix. In a separate bowl mix the eggs with sour cream (Schmand) until well combined, then add them together with the rest of the melted butter to the bowl with the flour and mix until well combined. Use a large spoon and place batter all over the cherries. If you pour the batter all at once into the tin, it will mix with the cherries, so be careful to keep that layer intact. Smooth out the top with a spatula and bake for about 45-50 minutes or until a toothpick inserted in the center comes out clean. Take it out of the oven and let cool down in the tin for about 10 minutes, then carefully remove it from the tin and turn it upside down. You should be able to peel off the baking parchment easily. Let it cool down completely. Serve with some whipped cream.
Notes
Enjoy baking!
Links marked with an asterisk (*) are affiliate links (advertising/Werbung) to Amazon Germany. If you click on one of those links and buy something via this link, I will get a commission for that sale. The price of whatever you buy is not affected in any way by this.


wao, das ist eine wunderbare Idee. Mal was anderes. Das Rezept werde ich gleich am Wochenende testen.
Ich bin nicht der erste, der einen Kuchen so gebacken hat… ;)
Aber das Ergebnis ist wirklich lecker!
Viel Spass beim Nachbacken!
Marc
Hi. Sieht toll aus. Kann ich aus Kirschen aus dem Glas benutzen? Ich habe noch welche übrig dich ich nicht wegschmeißen möchte. Danke und LG Ayesha
Hi. Sollte funktionieren. Von der Konsistenz her sind die ja nicht viel anders als gefrorene Kirschen nach dem Auftauen ;)
LG Marc