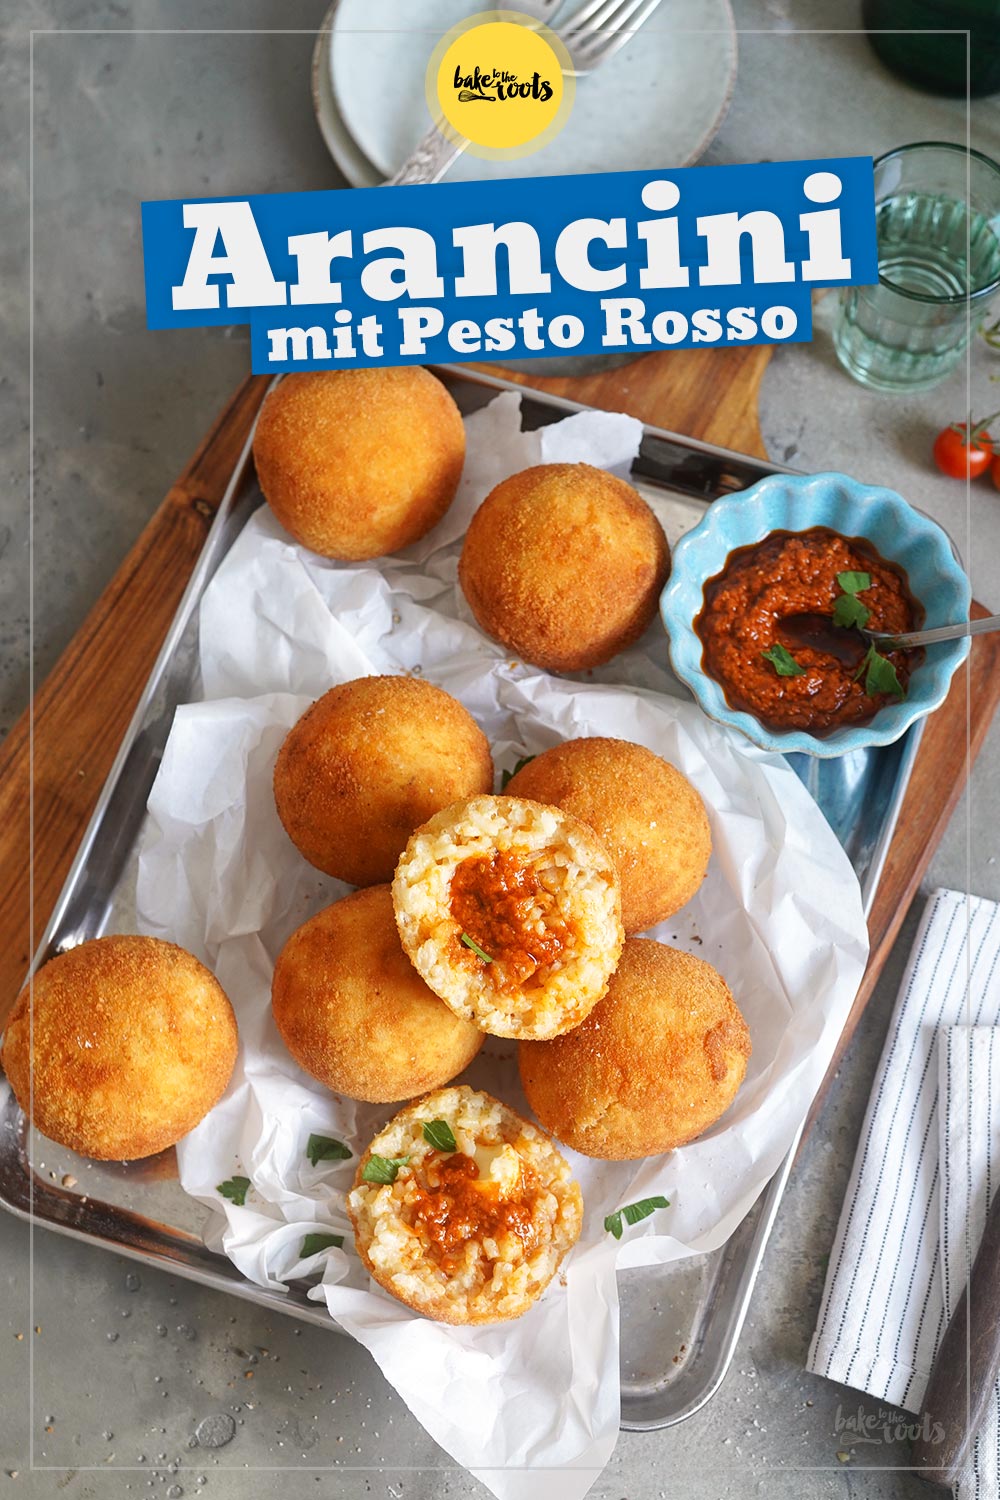
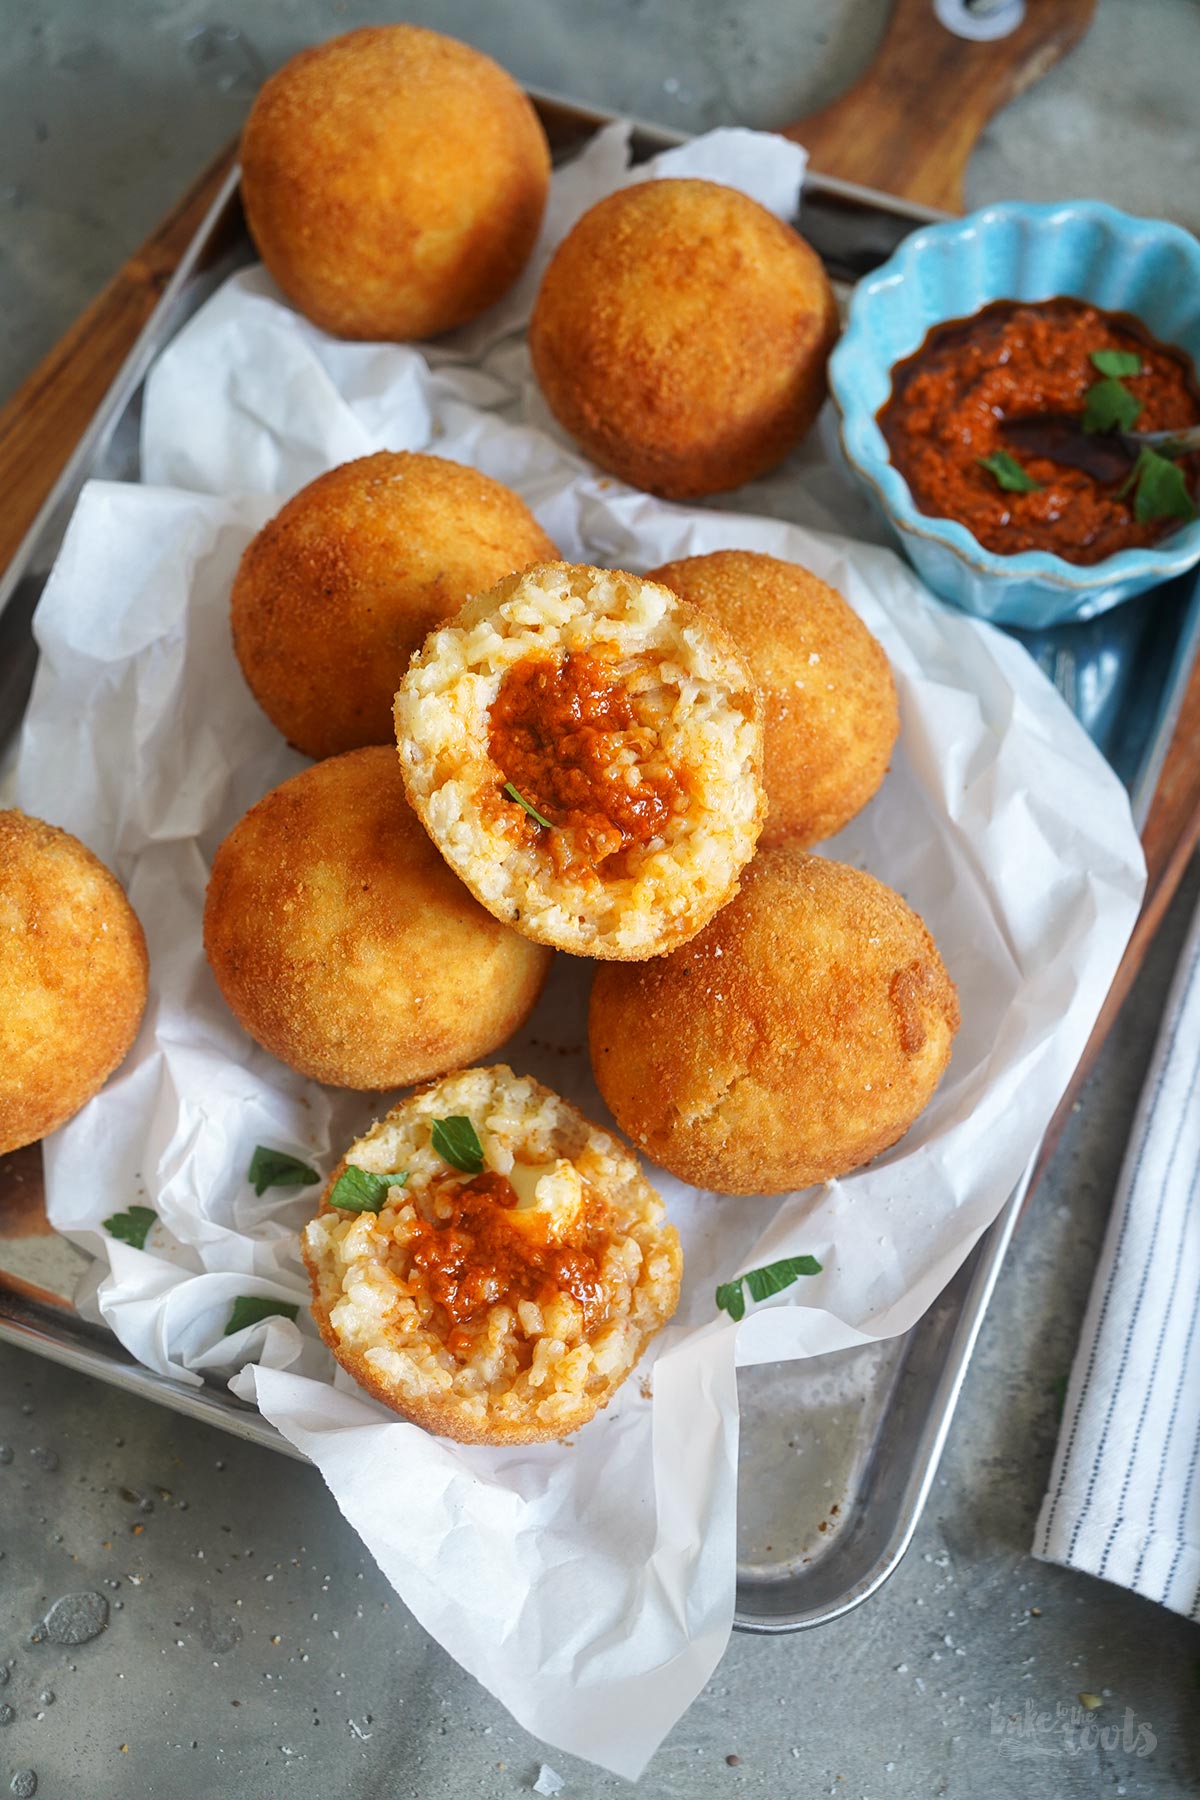
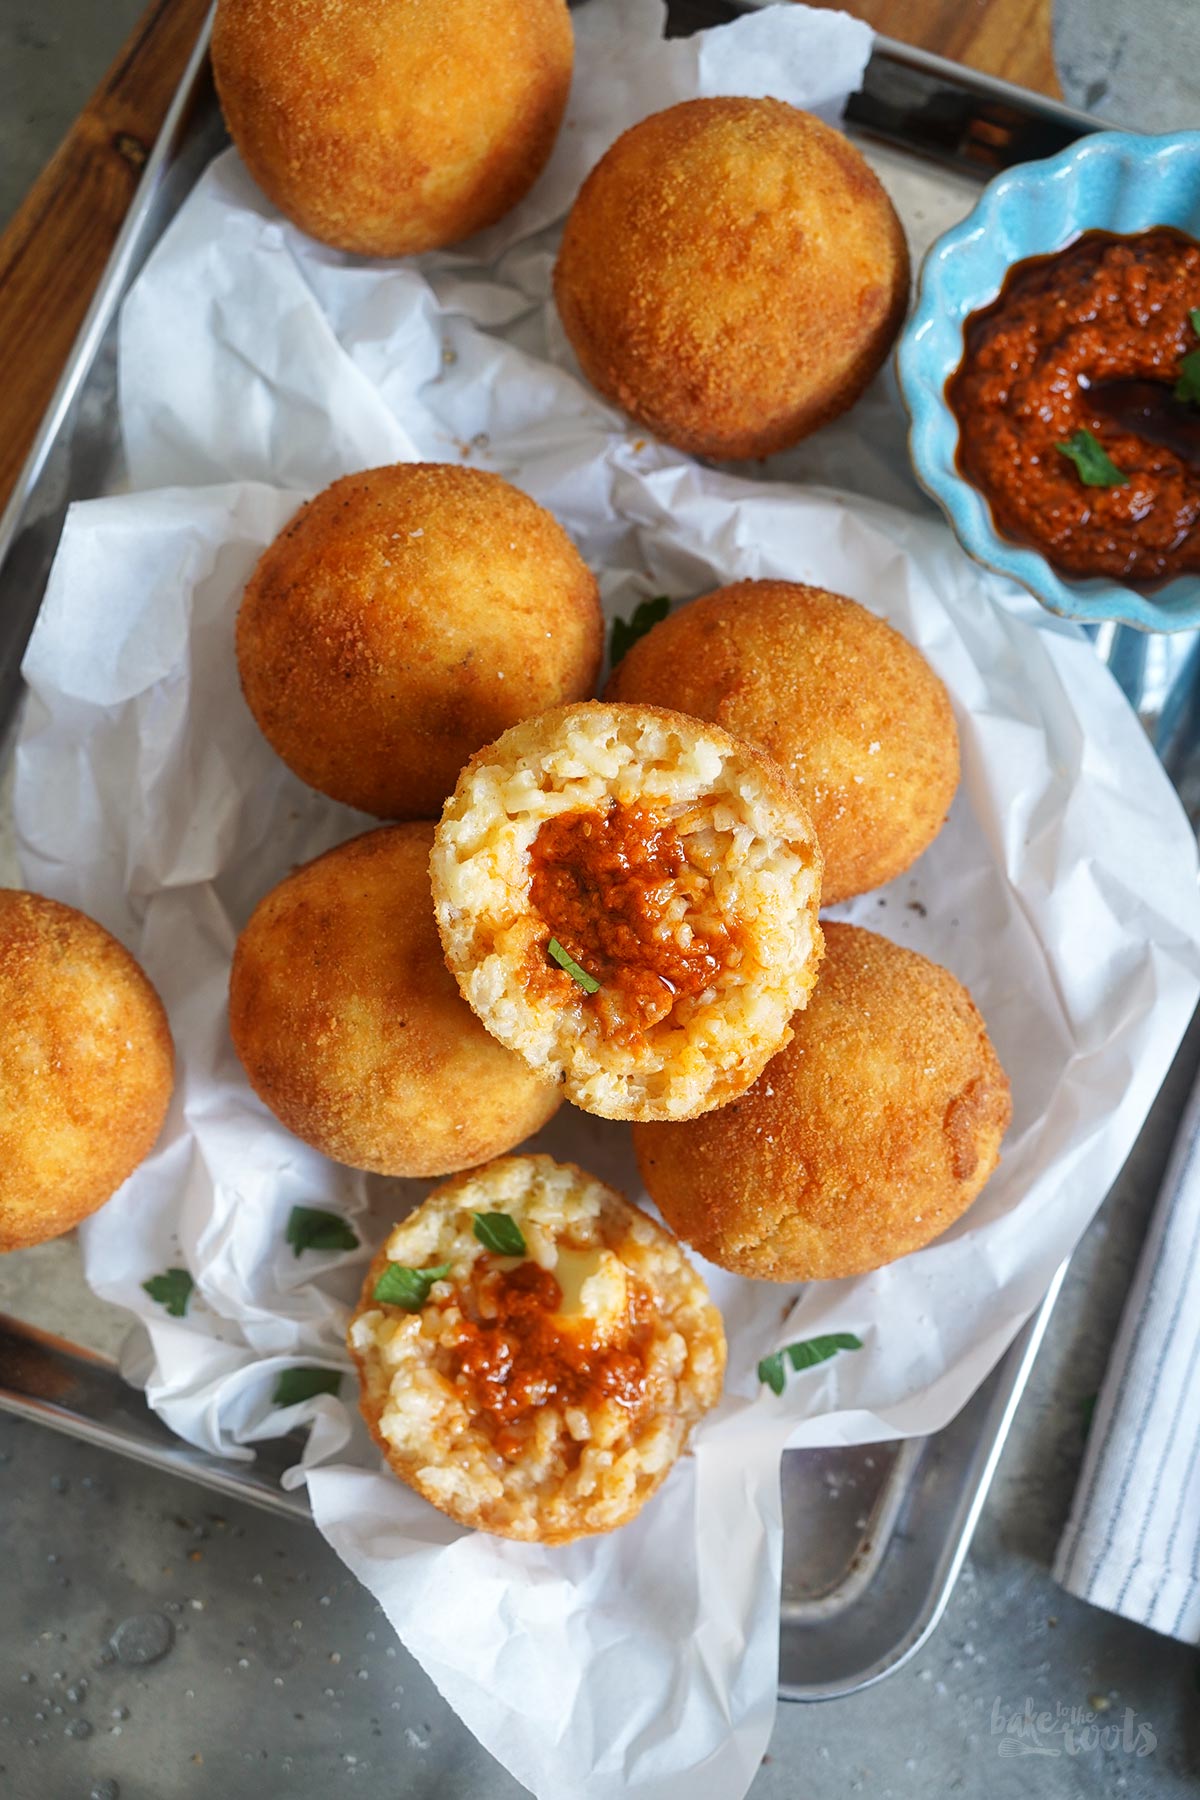
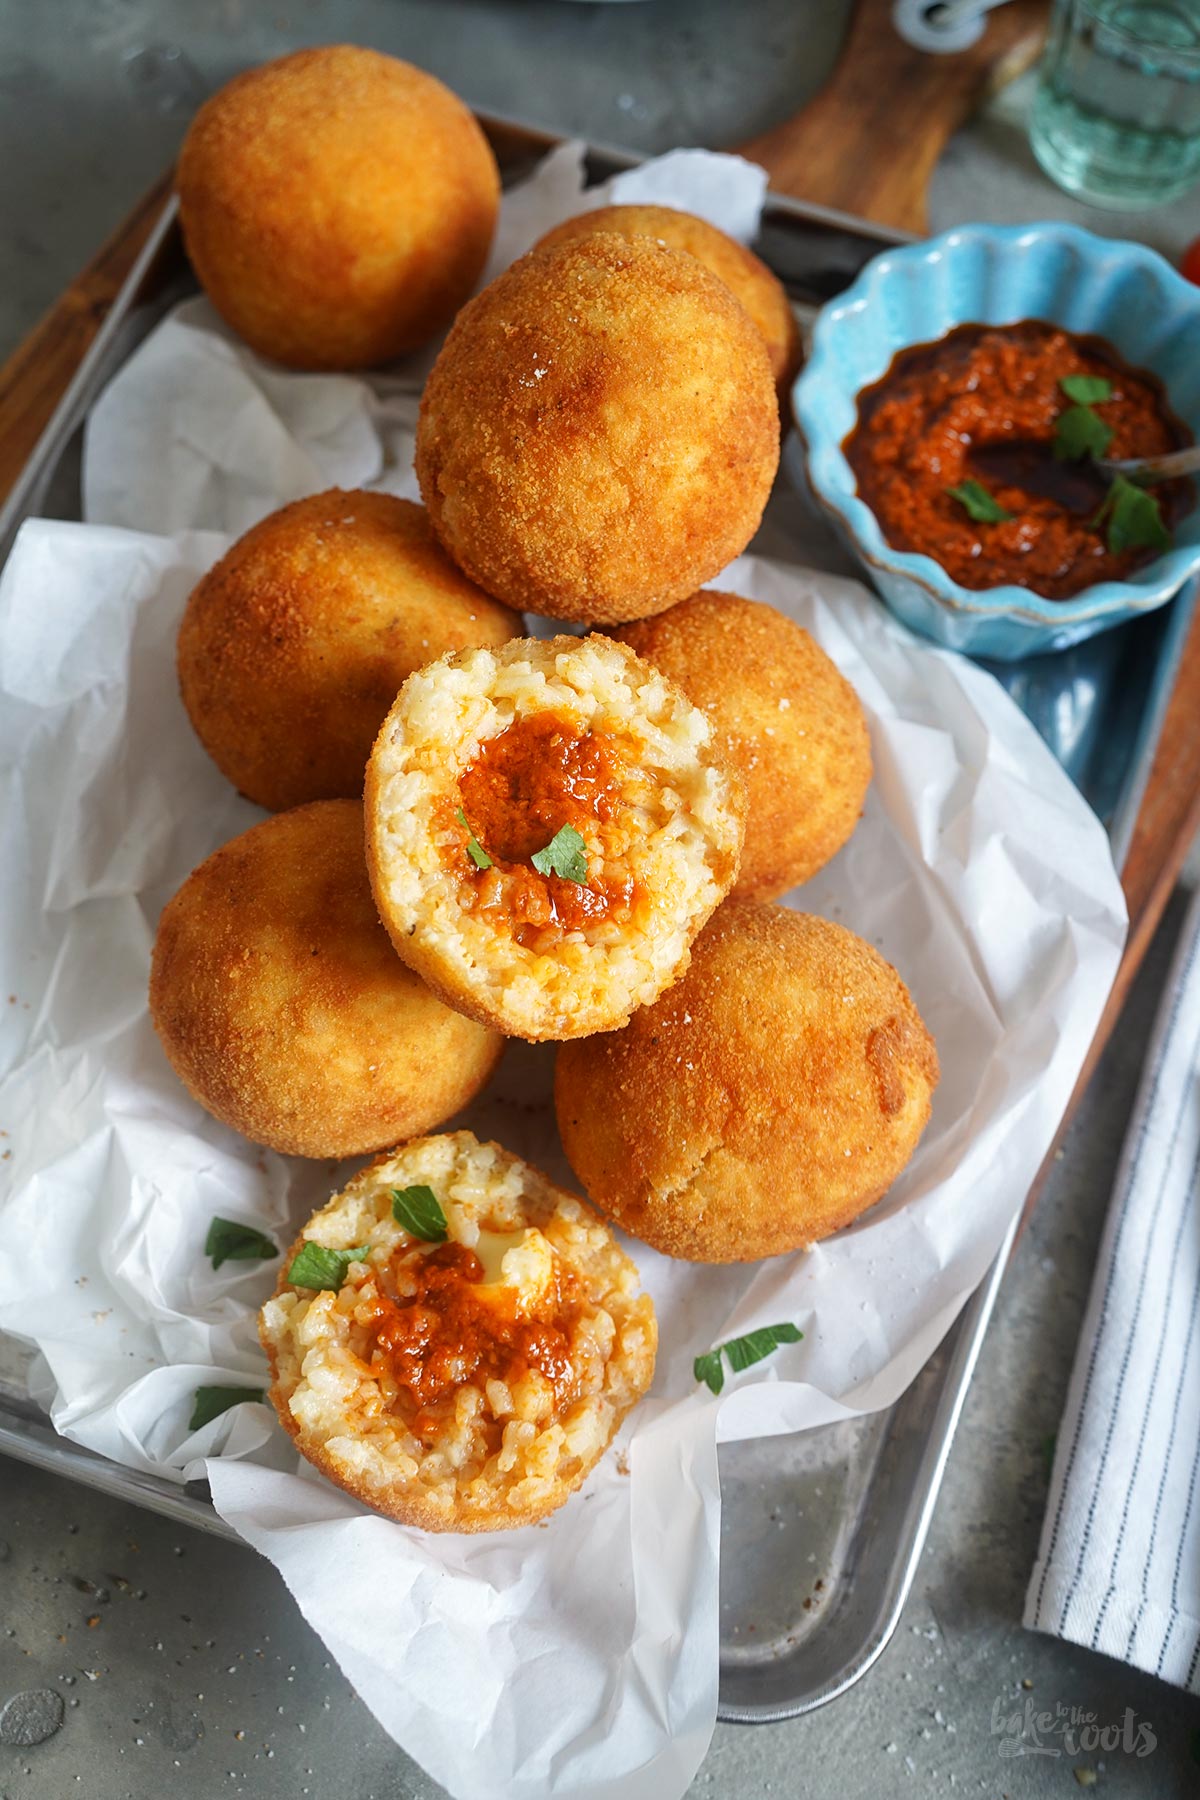
Anyone who has ever been to Sicily (or Italy in general, I guess) will probably know these oversized rice balls. Similar rice balls like these Arancini with Pesto Rosso & Mozzarella can be found on (almost) every corner in Sicily – served as a snack. A very big snack ;) We love these balls (hehe), although they don’t really qualify as a snack for us. As substantial as they are, they count as a full meal for us ;P
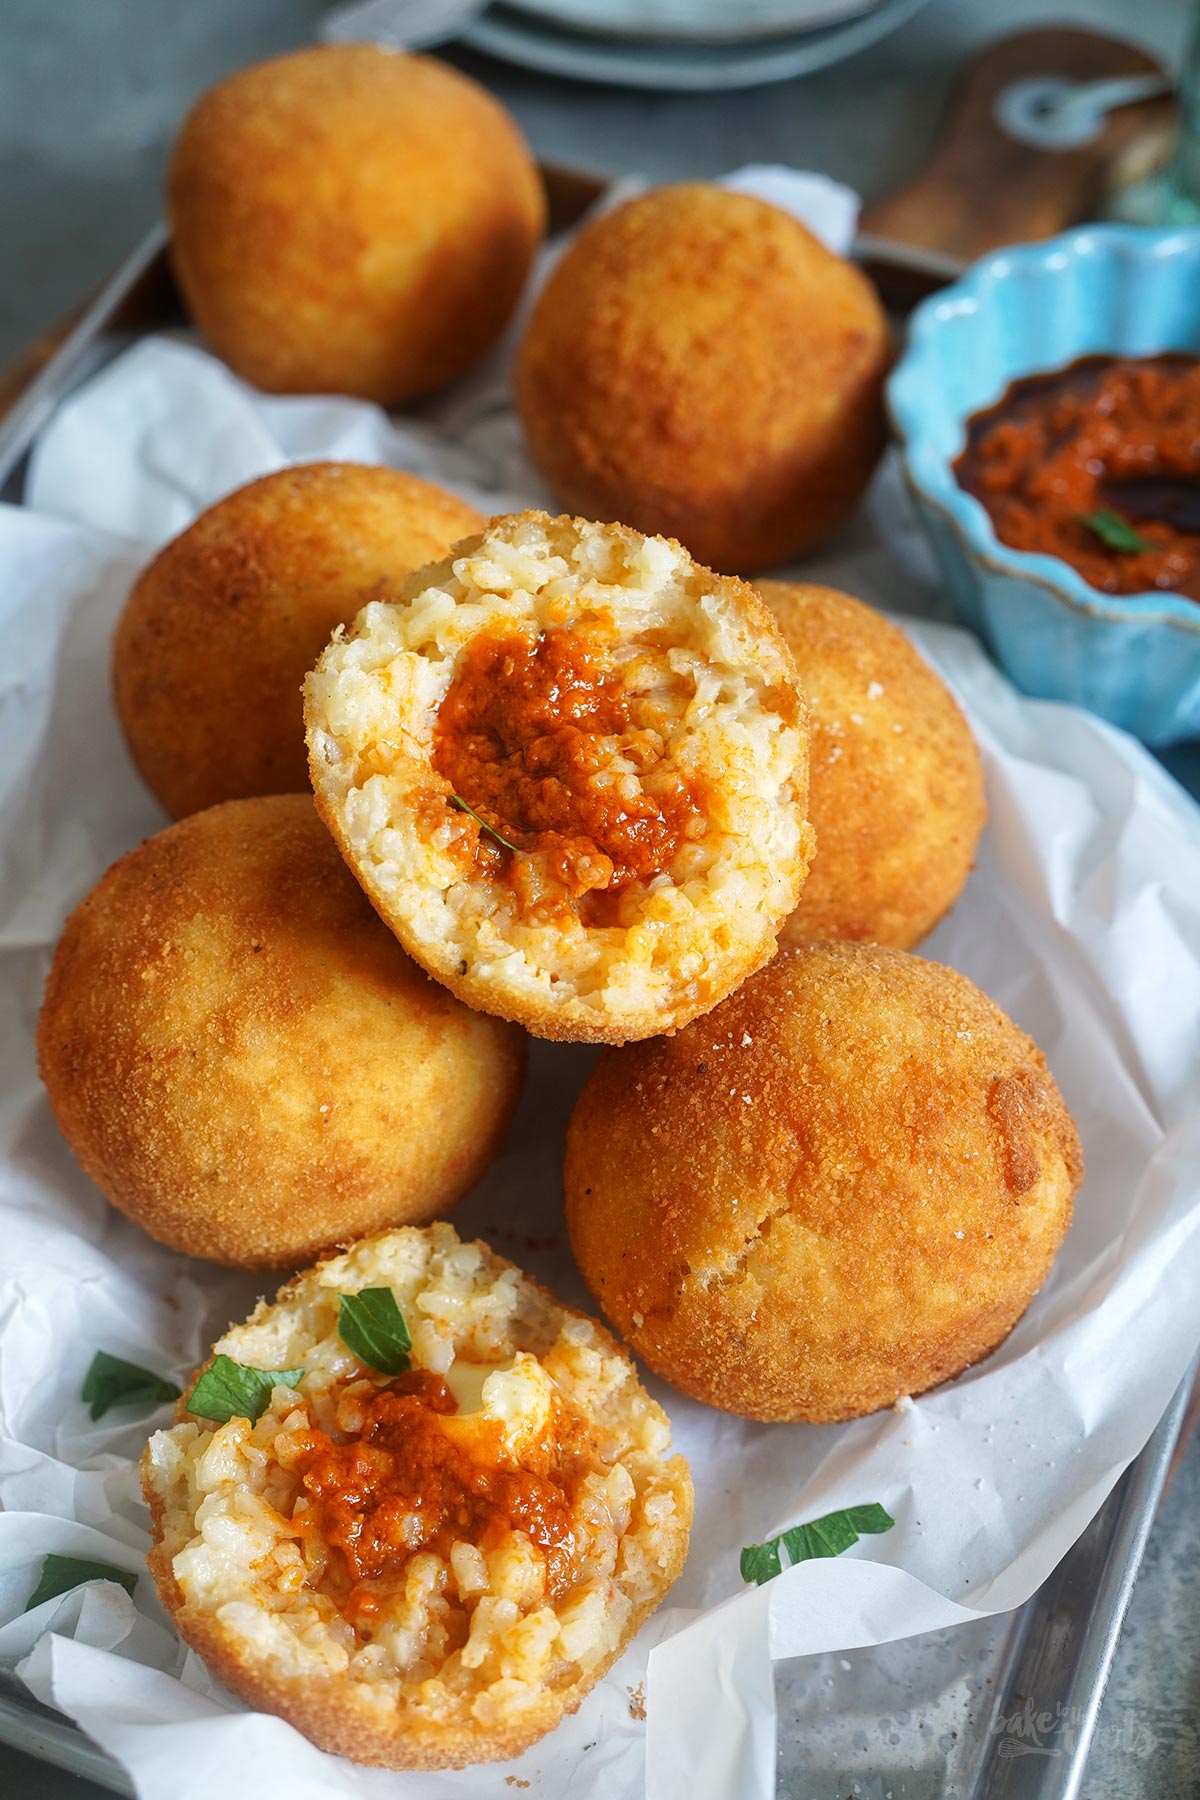
You won’t necessarily recognize it immediately from the photos, but the rice balls really have a decent size. Perhaps I should have picked one up and taken a photo of that. These little balls sit well in your hand. Like a really big snowball. However, you shouldn’t throw these rice balls – especially when they’re still hot! That could cause a lot of damage ;P
But since we all don’t play with food, that’s out of the question anyway. What’s on the plate, stays there – unless you want to put it in your mouth ;P
Arancini (a rice ball on its own is an Arancino) translates as »little oranges«. This doesn’t just refer to the shape and orange color of the coating – it also tells you the actual size of the rice balls. They are really like small oranges! Arancini come in two different shapes – round (of course), but also in a conical shape. However, if they are not round, they really do look like huge projectiles. You should not throw those either, though. We don’t play with food ;P
Arancini come with many different fillings. Ragù aka. meat sauce is, for example, a very poplar type of filling for Arancini. The same meat sauce you use for Spaghetti Bolognese or Lasagna can also be used here. However, that sauce should be slightly thicker than usual so you can fill the rice balls easily with it. Definitely a very nice filling to use ;)
I opted for a slightly less elaborate filling for my Arancini here. If you got some sauce leftover from a previous meal – like Spaghetti Bolognese – you can use that, of course! But if you don’t, you can get an equally delicious result by using pesto rosso and cheeeeze. We almost always have a small glass of pesto at home in case someone is craving for a very simple pasta dish ;P

So the filling can be very easy. Filling and shaping the rice balls can get a little more complicated though. Every Italian Nonna does this with ease, but if you are not that experienced, you can get a tool to help you. It’s called Arancini Maker* and can be used to make round or conical shaped Arancini. To be honest, that thing looks a bit strange, but it definitely makes the work easier… If you are talented, you can do everything by hand, of course ;P
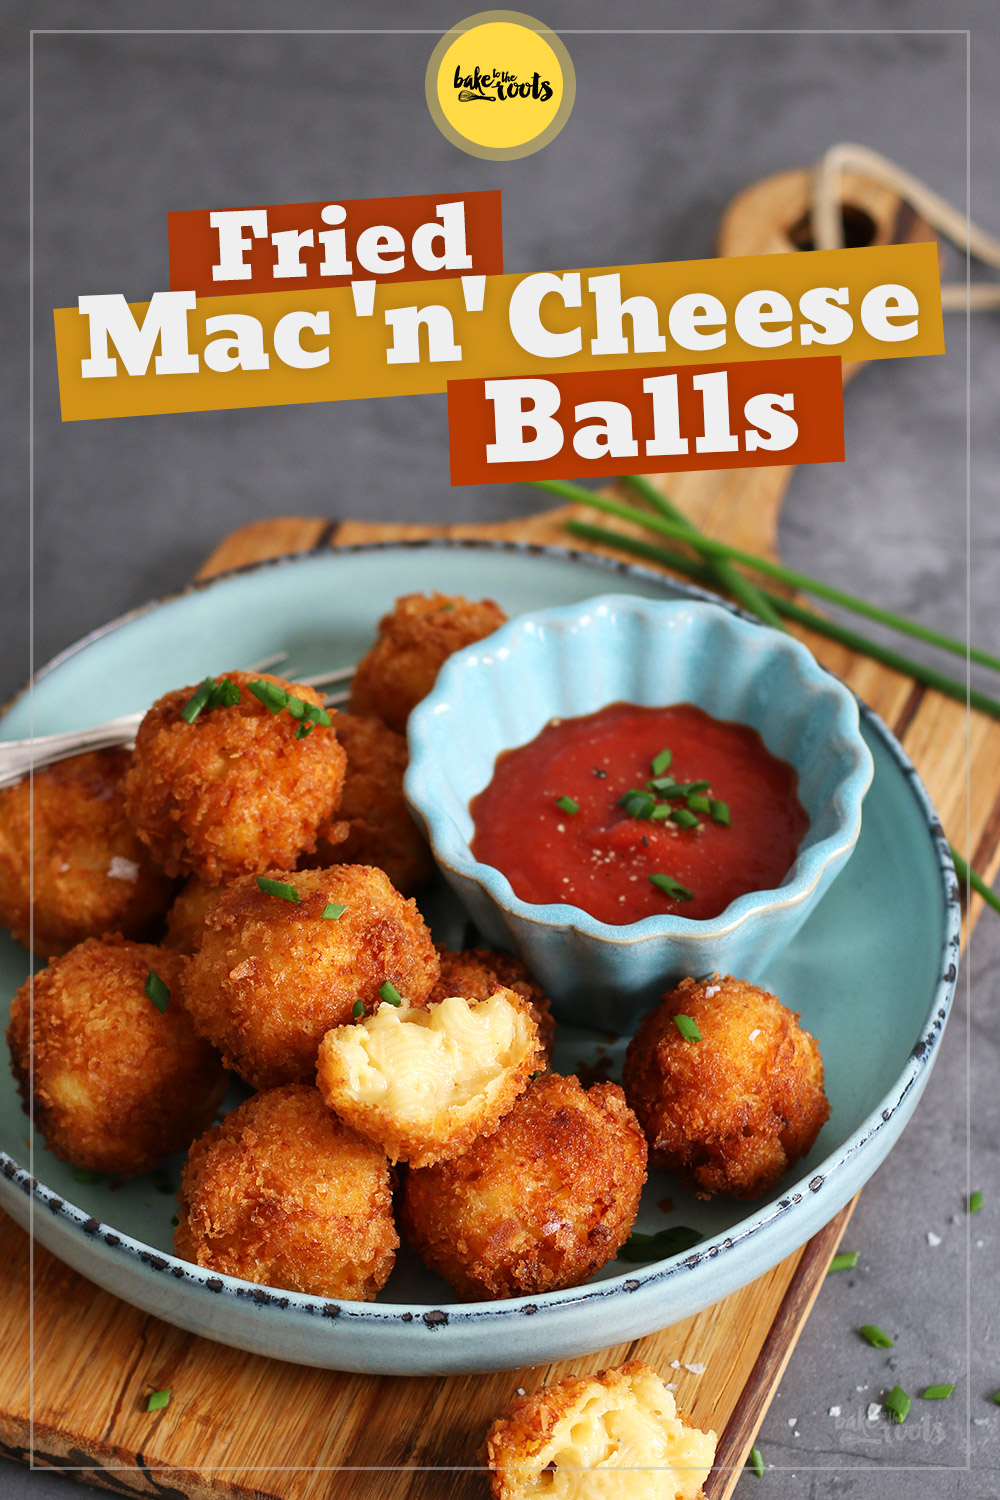
If you like deep-fried and round stuff, you might also want to take a look at these two recipes here. These delicious deep-fried Mac ‘n’ Cheese Balls are loved by everyone around me – so are the Sweet Potato Falafel with Hummus I prepare quite often. So good!
INGREDIENTS / ZUTATEN
(8 arancini)
For the risotto rice:
1 oz. (30g) butter
1 small red onion, very finely chopped
10.6 oz. (300g) risotto rice
1/2 cup (120ml) dry white wine
27 fl. oz. (800ml) warm veggie stock
1.7 oz. (50g) Parmesan, grated
salt, pepper
2 medium eggs
For the filling:
1/2 glass (about 3.5 oz./100g) Pesto Rosso
about 9 oz. (250g) mini mozzarella balls
For the rest:
2 medium eggs, lightly beaten
3.5 oz. (100g) breadcrumbs
3.5 oz. (100g) all-purpose flour
oil for frying
(8 Arancini)
Für den Risotto Reis:
30g Butter
1 kleine rote Zwiebel, sehr fein gehackt
300g Risotto Reis
120ml trockener Weißwein
800ml warme Gemüsebrühe
50g Parmesan, gerieben
Salz, Pfeffer
2 Eier (M)
Für die Füllung:
1/2 Glas (etwa 100g) Pesto Rosso
etwa 250g Mini Mozzarella Bällchen
Für den Rest:
2 Eier (M), verquirlt
100g Paniermehl
100g Mehl (Type 405)
Öl zum Frittieren

DIRECTIONS / ZUBEREITUNG
1. Peel the onion and chop it very finely. Add the butter to a large pan or large pot and sauté the onion until soft and glossy. Add the rice and sauté briefly. Deglaze with the white wine and let the liquid boil away almost completely. Reduce the heat slightly and gradually add the warm veggie broth to the rice. The rice should always be slightly covered with the broth. Let the risotto simmer for about 18-20 minutes, stirring constantly. You want the rice to absorb all the liquid but still have a bite aka. being al dente. Add the grated Parmesan and stir in. Season with salt and pepper and then let the rice cool down completely. You can prepare the risotto rice a day in advance and then store it in the fridge.
2. When ready to prepare the Arancini, loosen the rice slightly if it sticks together. Add the eggs and mix well. There are two ways to shape the Arancini – you can either do it by hand or with an Arancini maker*. Both ways are similarly easy. If you want to make them by hand, wet your hands slightly, add some rice to the palm of your hand and shape it into a ball. Press a well into the rice with your thumb and add some pesto and 1-2 mozzarella balls in the well. Add some more rice on top and shape into a ball again. The Arancini Maker will create quite large rice balls – if you do them by hand you have more control over the size ;) Place the rice balls on a plate and cover. Place in the fridge for about 1 hour.
3. Before you start deep-frying the Arancini, you need to coat the rice balls with breadcrumbs. To do this, have three bowls ready – one for the flour, one for the (lightly beaten) eggs, and one bowl for the breadcrumbs. Roll the cooled rice balls in the flour first, then in the egg, and finally in the breadcrumbs. Set aside on a plate.
4. Add oil to a (small) pot and heat up. The pot should be big enough to fit 2-3 rice balls and the oil should be high enough, so the rice balls can swim in it. I always use a smaller pot and only deep-fry two rice balls at a time. Heat the oil to a temperature of about 350°F (180°C) and deep-fry the Arancini until golden brown – this takes only a few minutes. Be careful not to let the temperature of the oil drop too much, or the rice balls will soak it up. Remove the nicely browned Arancini from the oil with a slotted spoon and let them drain on a plate with kitchen paper. Repeat until all rice balls are deep-fried. Serve the Arancini still warm with some salad or antipasti.
Tip: Leftover Arancini can easily be reheated briefly in the microwave.
1. Die Zwiebel schälen und sehr fein hacken. Die Butter in einer Pfanne oder großem Topf erhitzen und die Zwiebel glasig andünsten. Den Reis dazugeben und kurz mit anschwitzen lassen. Mit dem Weißwein ablöschen und die Flüssigkeit fast komplett verkochen lassen. Die Hitzezufuhr etwas reduzieren und die warme Gemüsebrühe nach und nach zum Reis dazugeben. Der Reis sollte immer nur minimal mit Gemüsebrühe bedeckt sein. Das Risotto unter ständigem Rühren etwa 18-20 Minuten köcheln lassen. Wenn alle Flüssigkeit aufgebraucht und vom Reis aufgesogen wurde – der Reis darf ruhig noch ein wenig Biss haben – den geriebenen Parmesan unterrühren und mit Salz und Pfeffer würzen. Den Reis komplett abkühlen lassen. Kann man prima einen Tag vorab erledigen und dann im Kühlschrank lagern.
2. Den Reis einmal auflockern, falls er stark zusammenklebt. Die Eier dazugeben und alles gut vermengen. Um die Arancini zu formen, gibt es jetzt zwei Möglichkeiten – entweder man erledigt das von Hand, oder mit einem Arancini Maker*. Beides ist ähnlich einfach. Für die Zubereitung ohne Gerät die Hände etwas anfeuchten, eine Portion Reis in die Hand geben und zu einer Kugel formen. Mit dem Daumen eine Mulde hineindrücken und etwas Pesto und 1-2 Mozzarellakugel in die Mulde geben. Dann etwas zusätzlichen Reis darauf packen und eine glatte Kugel formen. Mit dem Arancini Maker bekommt man recht große Kugeln – wenn man das von Hand erledigt, hat man etwas mehr Kontrolle über die Größe. Die fertigen Reiskugeln auf einen Teller setzen und abdecken. Für etwa 1 Stunde in den Kühlschrank stellen.
3. Bevor es ans Frittieren geht, müssen die Reiskugeln noch paniert werden. Dafür drei Schüsseln bereithalten – eine für das Mehl, eine für die beiden (verquirlten) Eier und eine Schüssel für das Paniermehl. Die durchgekühlten Arancini als Erstes im Mehl wälzen, dann im Ei und zum Abschluss im Paniermehl. Auf einem Teller zur Seite stellen.
4. Das Öl zum Frittieren in einen Topf füllen – die Reiskugeln sollten einigermaßen im Öl schwimmen können. Ich nehme hier immer einen kleinen Topf und frittiere dann immer nur zwei Kugeln pro Durchgang. Das Öl auf etwa 180°C (350°F) erhitzen und die Arancini nach einander goldbraun ausbacken – dauert einige Minuten pro Durchgang. Man sollte darauf achten, dass das die Temperatur des Fetts nicht zu stark sinkt, sonst saugen sich die Reiskugeln mit Fett voll. Die fertigen Arancini mit einem Schaumlöffel aus dem Fett holen und auf einem Teller mit Küchenpapier abtropfen lassen. Die Arancini noch warm mit etwas Salat oder Antipasti servieren.
Tipp: Übrig gebliebene Arancini kann man auch prima in der Mikrowelle einmal kurz aufwärmen.
Craving more? Keep in touch on Facebook, Twitter, Instagram and Pinterest for new post updates and more. You can also contact me with any questions or inquiries!
Here is a version of the recipe you can print easily.
Print
Arancini with Pesto Rosso & Mozzarella
- Prep Time: 00:20
- Cook Time: 00:35
- Total Time: 10:00
- Yield: 8 1x
- Category: Snack
- Cuisine: Italy
Description
A classic Italian dish that is quite popular all over the world: Deep-fried Aranchini. Delicious Risotto rice balls with a filling. In this case Pesto Rosso and mozzarella :)
Ingredients
For the risotto rice:
1 oz. (30g) butter
1 small red onion, very finely chopped
10.6 oz. (300g) risotto rice
1/2 cup (120ml) dry white wine
27 fl. oz. (800ml) warm veggie stock
1.7 oz. (50g) Parmesan, grated
salt, pepper
2 medium eggs
For the filling:
1/2 glass (about 3.5 oz./100g) Pesto Rosso
about 9 oz. (250g) mini mozzarella balls
For the rest:
2 medium eggs, lightly beaten
3.5 oz. (100g) breadcrumbs
3.5 oz. (100g) all-purpose flour
oil for frying
Instructions
1. Peel the onion and chop it very finely. Add the butter to a large pan or large pot and sauté the onion until soft and glossy. Add the rice and sauté briefly. Deglaze with the white wine and let the liquid boil away almost completely. Reduce the heat slightly and gradually add the warm veggie broth to the rice. The rice should always be slightly covered with the broth. Let the risotto simmer for about 18-20 minutes, stirring constantly. You want the rice to absorb all the liquid but still have a bite aka. being al dente. Add the grated Parmesan and stir in. Season with salt and pepper and then let the rice cool down completely. You can prepare the risotto rice a day in advance and then store it in the fridge.
2. When ready to prepare the Arancini, loosen the rice slightly if it sticks together. Add the eggs and mix well. There are two ways to shape the Arancini – you can either do it by hand or with an Arancini maker*. Both ways are similarly easy. If you want to make them by hand, wet your hands slightly, add some rice to the palm of your hand, and shape it into a ball. Press a well into the rice with your thumb and add some pesto and 1-2 mozzarella balls in the well. Add some more rice on top and shape into a ball again. The Arancini Maker will create quite large rice balls – if you do them by hand you have more control over the size ;) Place the rice balls on a plate and cover. Place in the fridge for about 1 hour.
3. Before you start deep-frying the Arancini, you need to coat the rice balls with breadcrumbs. To do this, have three bowls ready – one for the flour, one for the (lightly beaten) eggs, and one bowl for the breadcrumbs. Roll the cooled rice balls in the flour first, then in the egg, and finally in the breadcrumbs. Set aside on a plate.
4. Add oil to a (small) pot and heat up. The pot should be big enough to fit 2-3 rice balls and the oil should be high enough, so the rice balls can swim in it. I always use a smaller pot and only deep-fry two rice balls at a time. Heat the oil to a temperature of about 350°F (180°C) and deep-fry the Arancini until golden brown – this takes only a few minutes. Be careful not to let the temperature of the oil drop too much, or the rice balls will soak it up. Remove the nicely browned Arancini from the oil with a slotted spoon and let them drain on a plate with kitchen paper. Repeat until all rice balls are deep-fried. Serve the Arancini still warm with some salad or antipasti.
Notes
Leftover Arancini can easily be reheated briefly in the microwave.
Links marked with an asterisk (*) are affiliate links (advertising/Werbung) to Amazon Germany. If you click on one of those links and buy something via this link, I will get a commission for that sale. The price of whatever you buy is not affected in any way by this.