
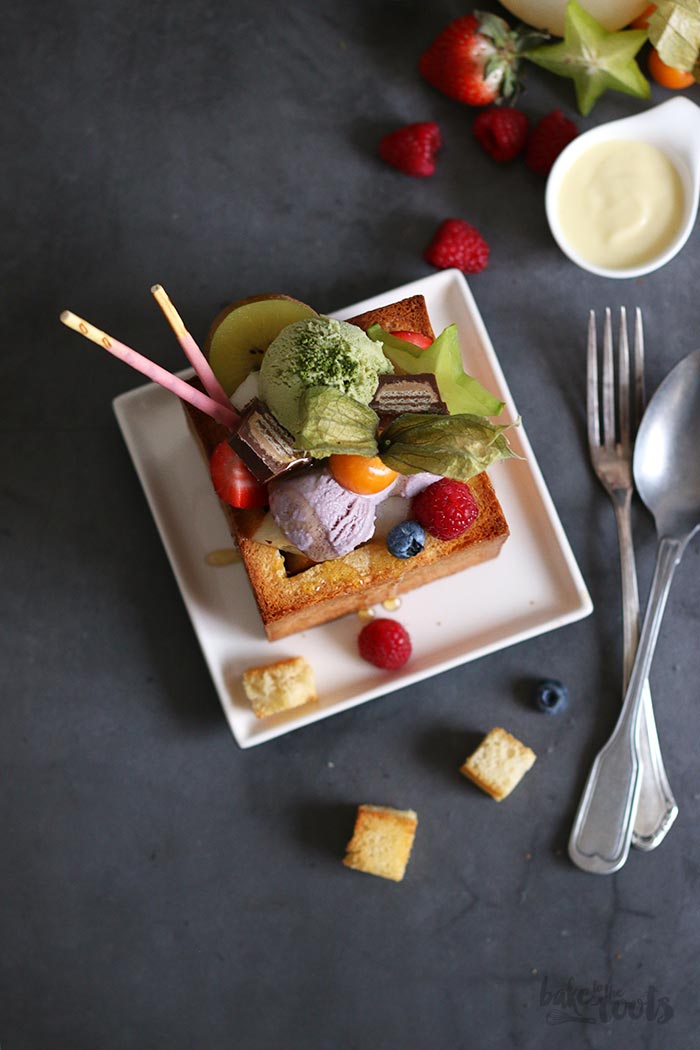
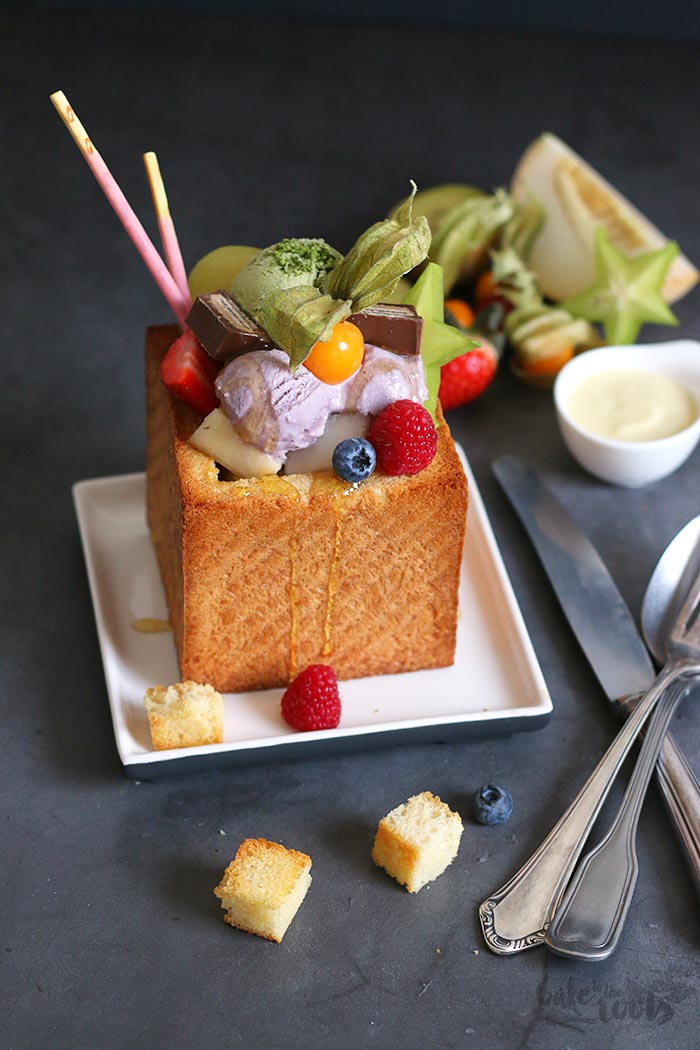
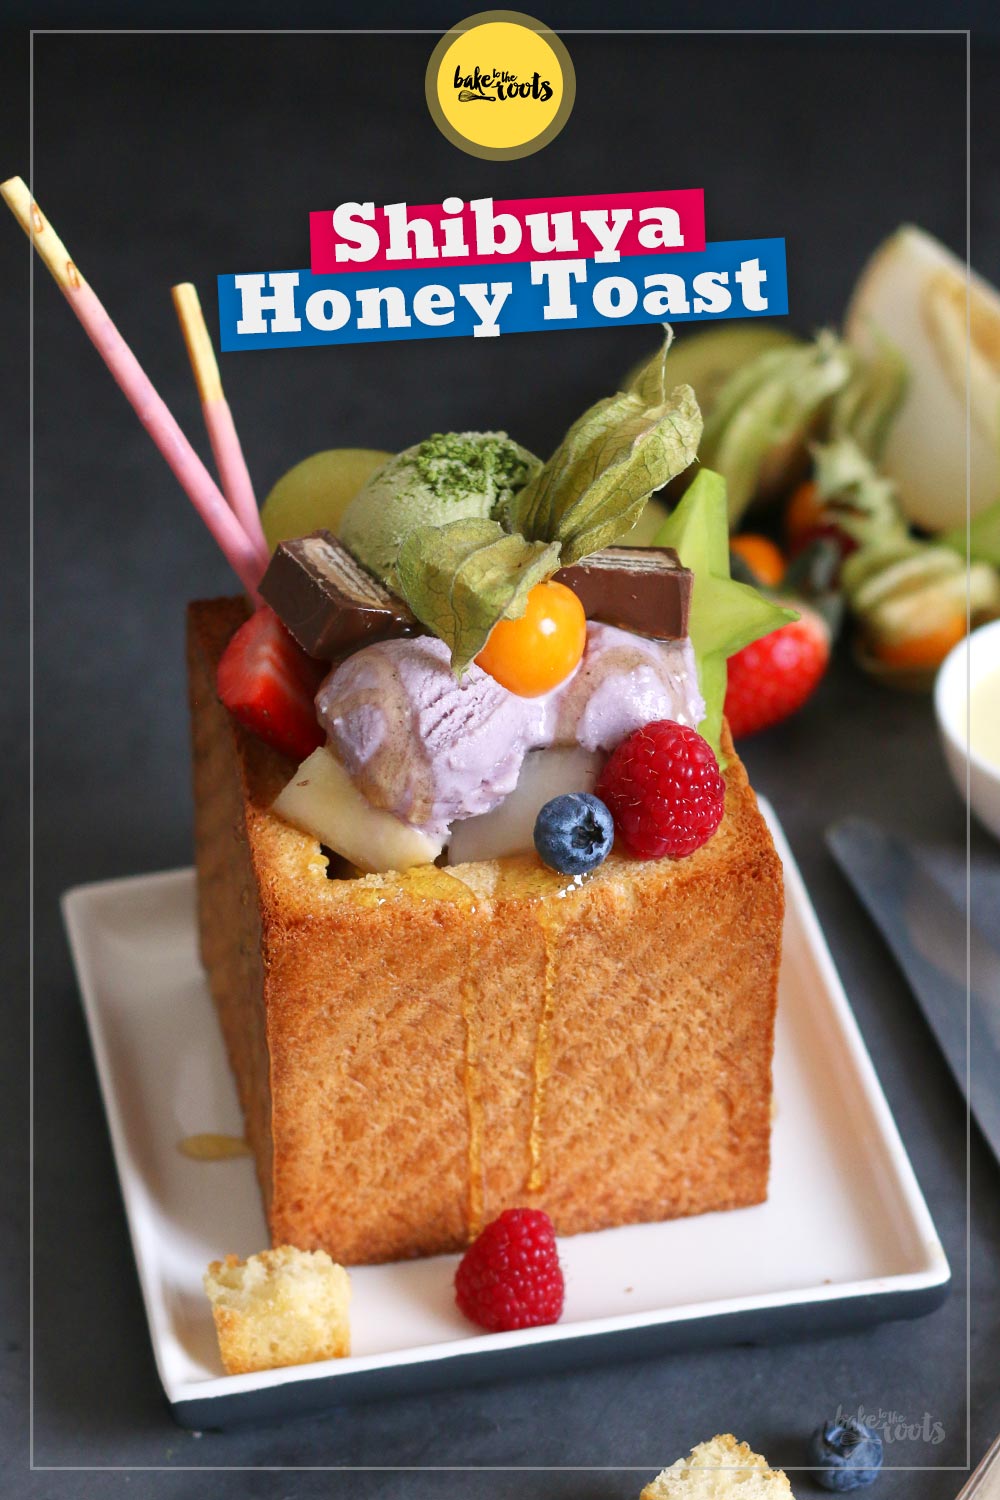
It’s time to cut back. That’s what people tend to do right now. Cut back on sweets, coffee, alcohol, fun… I don’t care. If I want something sweet I make something sweet. Something like this Shibuya Honey Toast with loads of fresh fruit and berries. Because I’m in a good mood I also throw some ice cream on top. More is more.
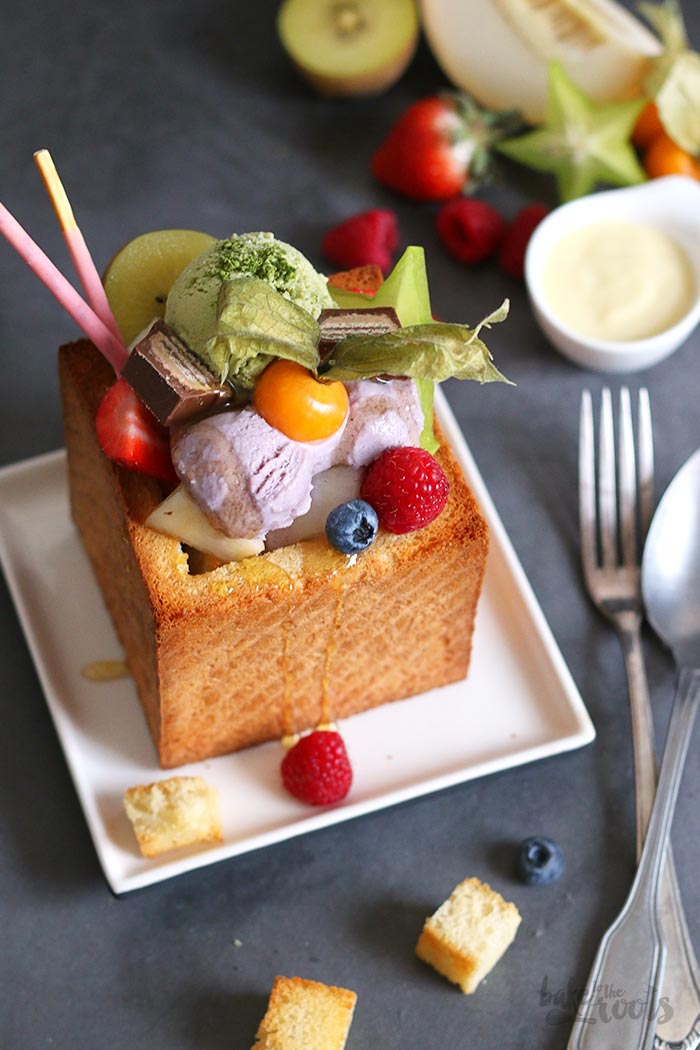
Shibuya Honey Toast is nothing new. This dessert has been known for quite a while already. The name gives it away I guess – coming from Shibuya in Tokyo this dish kind of got famous in the Shibuya district as a dessert served in Karaoke bars. Nowadays you can get Shibuya Toast all over the world were people like there desserts to be a bit over the top. I had my first one in Chiang Mai (Thailand) and fell in love instantly. I mean… look at it… how can you not fall in love with such a decadent dessert?!
I have to admit that this dessert is a lot. A lot of toast, a lot of fruit and decorations. This means you should definitely share this one here. It is too much for one person alone. Maybe if you had no food for days and need to get energy for a marathon – but besides that – you should better share. Sharing is caring after all – and it is also much better for your belly.
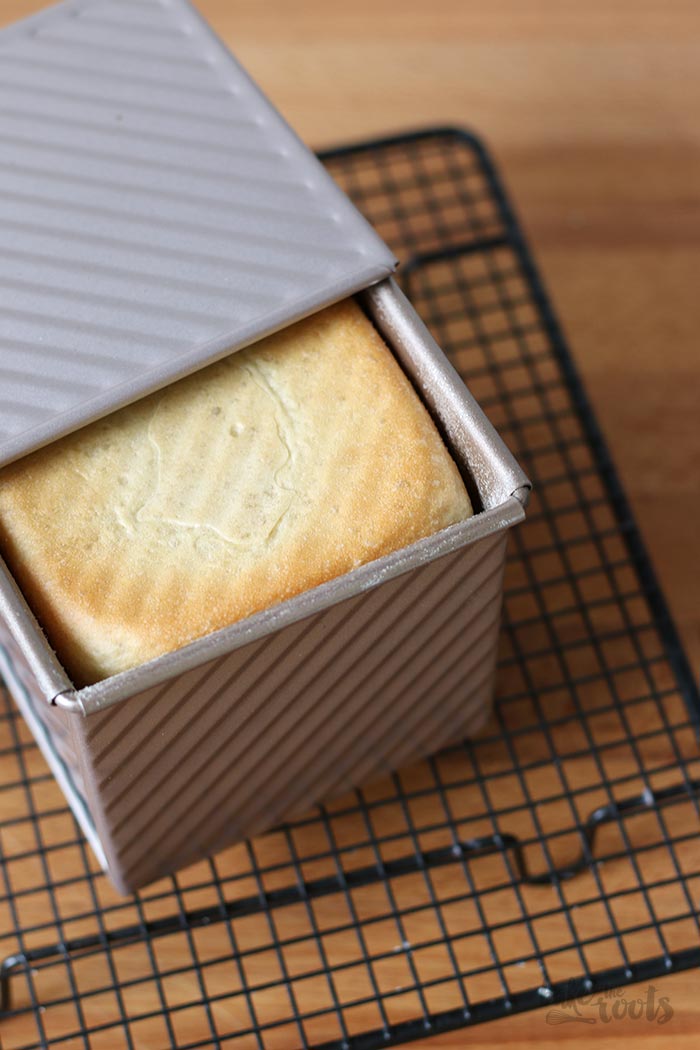
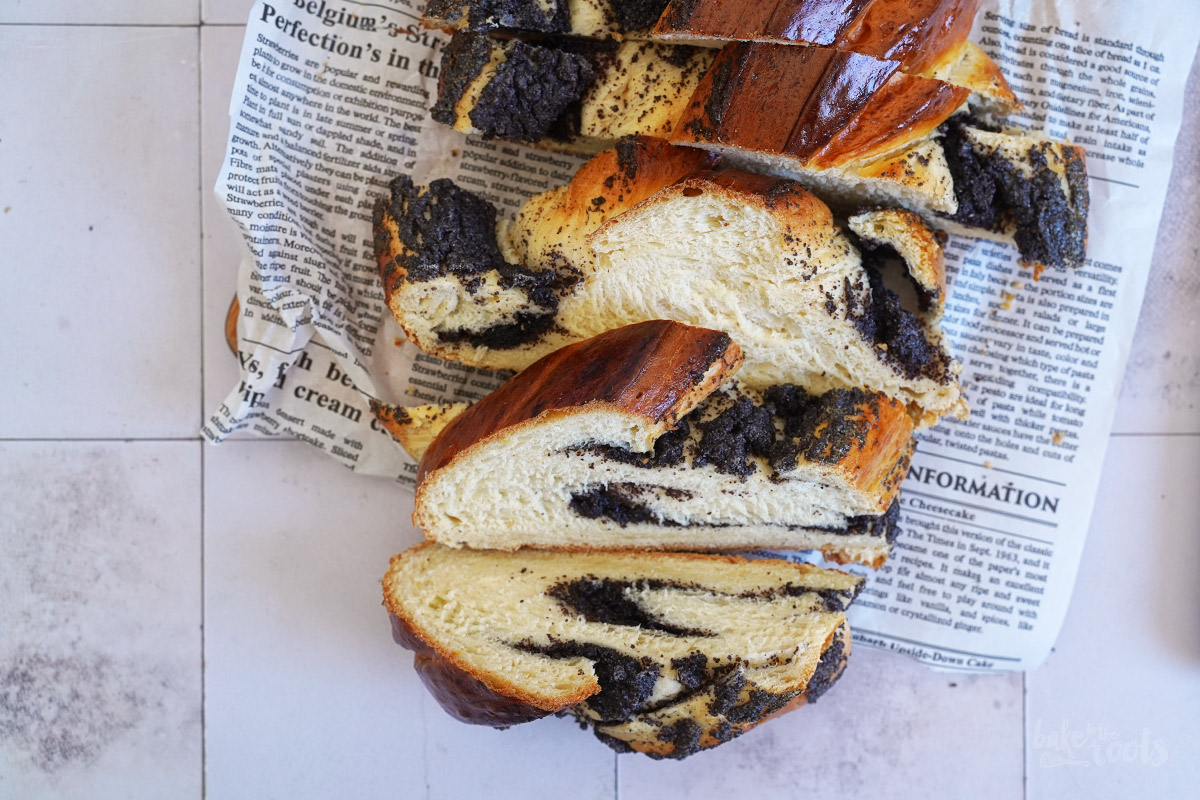
I made the bread for this Shibuya Toast. It is also a Japanese recipe and the bread is called Shokupan. Matchy match. To get this bread into the perfect shape you need a Shokupan baking tin* with a lid. I bought that one because I wanted to make everything perfect. To be honest – haven’t used the baking tin much after that. The small bread is cut, but a bigger baking tin with lid* would have been a better idea. If you are more than two in your household I recommend getting the larger tin and cutting the bread in half. Could have done that actually, but did not think about it. Only when I already had the smaller tin delivered. Lesson learned.
Well… that’s for the »I want to make everything from scratch« people. If you have a bakery that sells toast as a whole loaf you can also get one of those, of course. I haven’t seen uncut toast in the supermarkets so far, but in a »good old« bakery the chances might be better to get one…


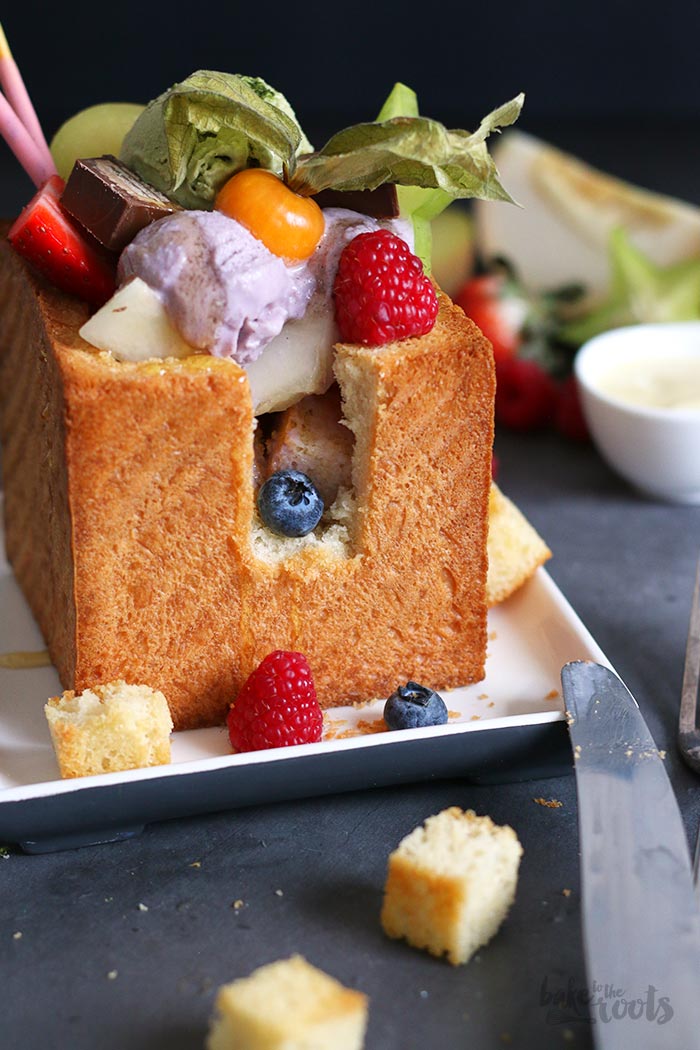
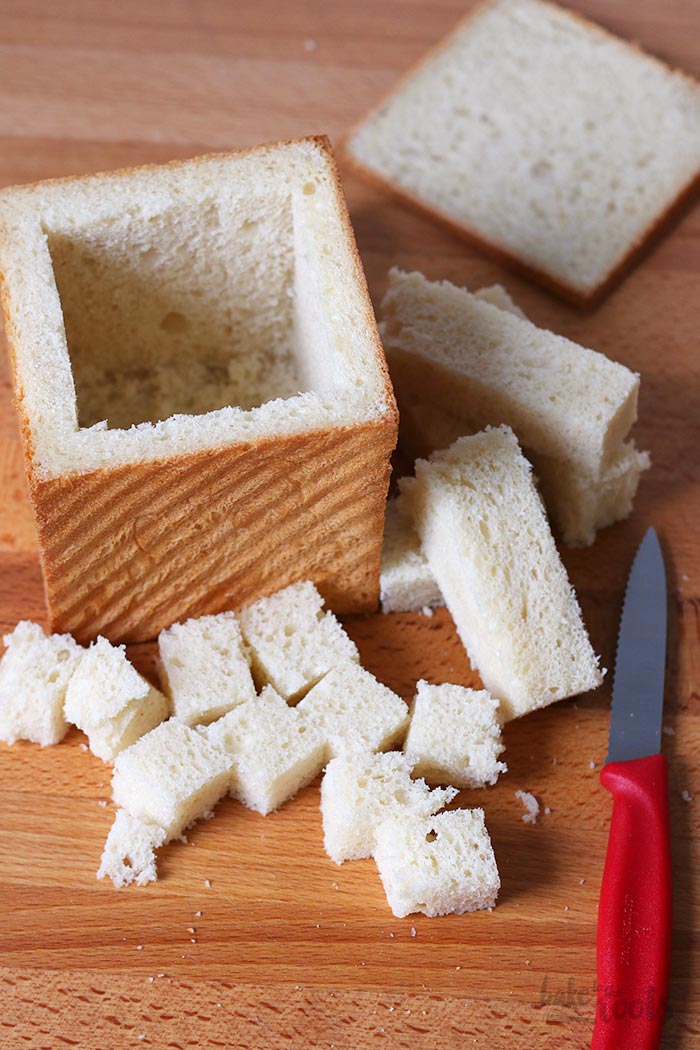
Be creative with the Shibuya Toast. The box is twice-baked and basically just the vessel for your dessert. The insides of the bread are diced and then mixed with fruits, berries, nuts or whatever to create a delicious »bread salad« that is served in the box. You can use any fruits or berries you like or whatever is in season. Raspberries, blackberries, strawberries, banana, apples… you name it. Chocolate, candy, ice cream… all of that makes the Shibuya Toast even better. I added Matcha Ice Cream* and Ube Ice Cream on top to finish my dessert. The ice cream melts slowly and mixes with the salad and bread… and makes everything even better. So good!
I actually wanted to enjoy one of these »bricks« on my next vacation but unfortunately, we had to cancel our trip to Tokyo due to recent events happening right now. Well… some other time. And until then I make this at home…
INGREDIENTS / ZUTATEN
(2-3 servings)
For the Shokupan:
2 cups (260g) all-purpose flour (plus more if needed)
1 tbsp. sugar
3/4 tsp. active dry yeast
1/4 tsp. salt
4 fl. oz. (120ml) lukewarm water
1.7 fl. oz. (50ml) milk
0.9 oz. (25g) butter, at room temperature
For the Shibuya toast/filling:
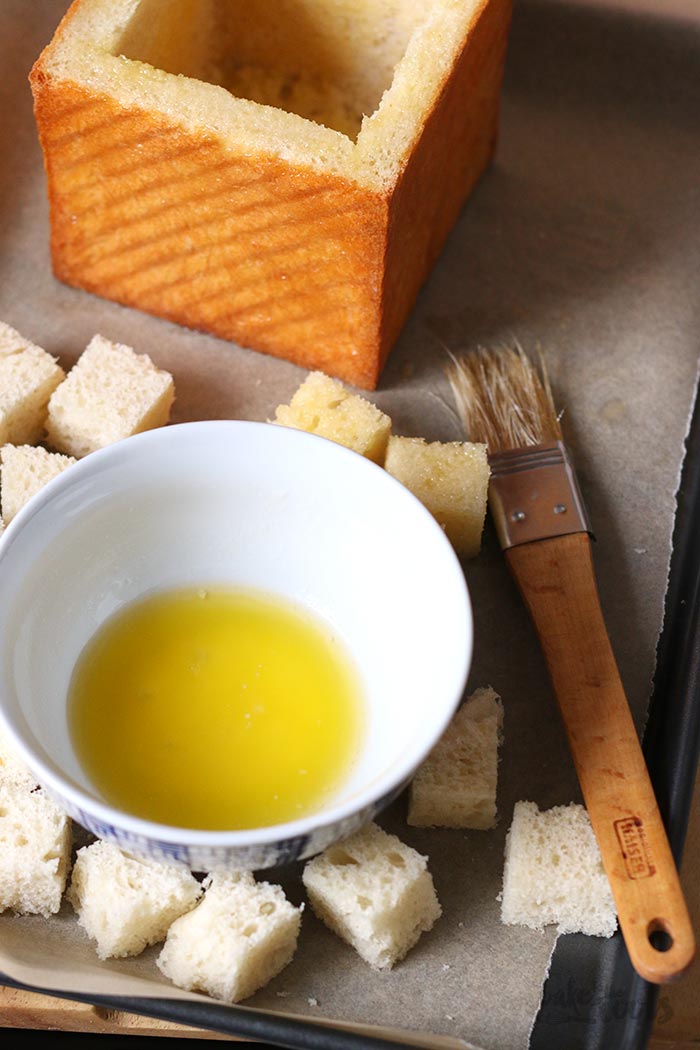
3 tbsp. butter, melted
1/2 cup fruits & berries (e.g. melon, strawberry, raspberry, …)
1-2 tsp. sugar
1-2 tbsp. sweetened condensed milk
1 tbsp. honey
For the decoration:
2-3 scoops of ice cream
some whipped cream (optional)
some fresh fruits/berries
some cookies or chocolate candies for garnish
vanilla sauce (optional)
(2-3 Portionen)
Für das Shokupan:
260g Mehl (Type 550)
1 EL Zucker
3/4 TL Trockenhefe
1/4 TL Salz
120ml lauwarmes Wasser
50ml Milch
25g weiche Butter
Für den Shibuya Toast/Füllung:
3 EL Butter, geschmolzen
1/2 Tasse Früchte und Beeren (z.B. Melone, Erdbeeren, Himbeeren, …)
1-2 TL Zucker
1-2 EL gezuckerte Kondensmilch
1 EL Honig
Für die Dekoration:
2-3 Kugeln Eiscreme
etwas Schlagsahne (optional)
einige frische Früchte/Beeren
einige Cookies/Schokoriegel für die Dekoration
Vanillesoße (optional)
DIRECTIONS / ZUBEREITUNG
1. For the Shokupan add the flour, sugar, yeast, and salt to a large bowl and mix to combine. Add the lukewarm water, milk, and butter and knead for about 10 minutes until you get a nice smooth dough. If the dough seems too wet, add some more flour. Cover the bowl and let the dough rise in a warm place for about 1 hour or until the volume has doubled.
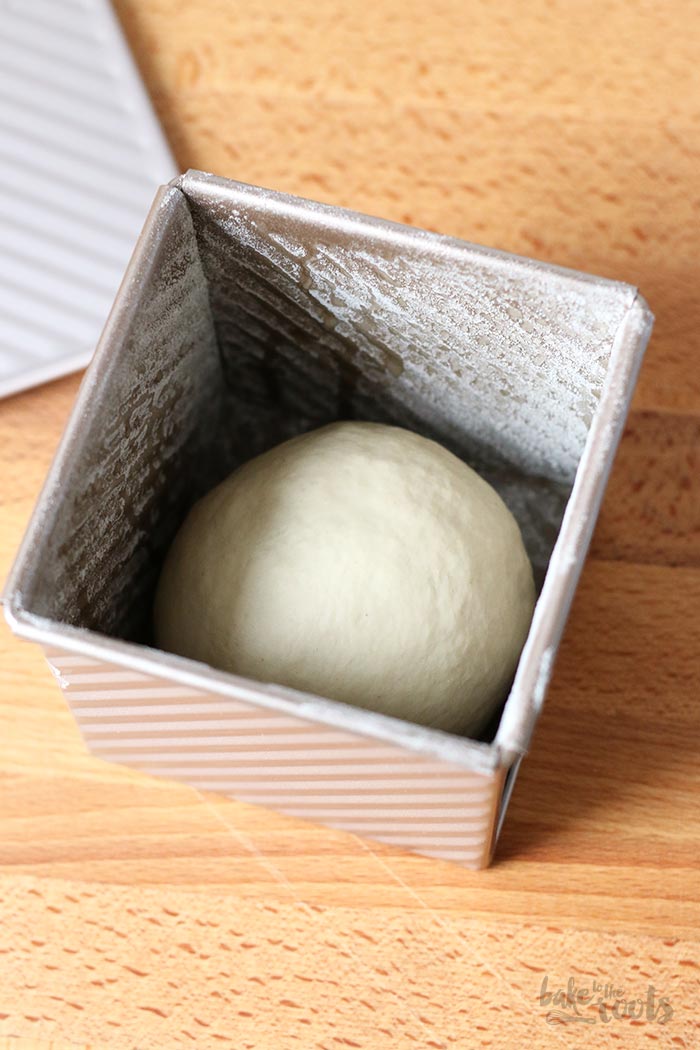
2. Grease a 11,5×11,5cm Shokupan tin* lightly and set aside. Place the dough on a floured surface and knock out the air. Shape it into a ball and place it inside the baking tin. Cover with the lid and let rise another 25-30 minutes in a warm place.
3. Preheat the oven to 200°C (390°F). Place the baking tin with the lid closed in the oven and bake the bread for about 40 minutes until the top of the bread looks golden brown (yes, you can check and remove the lid for that at the end). Take it out of the oven, tap the pan on all sides to loosen the bread a bit and remove it. Let it cool down completely on a wire rack. The bread can be made a day in advance and stored in a bread bag*
4. To finish the Shibuya toast preheat the oven to 180°C (350°F). Line a baking sheet with baking parchment and set aside. Cut off the crust on the top of the Shokupan bread. Use a sharp knife to cut a square into the bread. Leave a 1cm wall on all sides and keep the same distance to the bottom of the bread – you want basically an empty bread box remaining with all sides and the bottom intact. Cut the insides of the bread into 2cm large dices. Brush the pieces and the inside and outside of the breadbox with the melted butter and place everything on the prepared baking sheet. Bake/toast everything for about 10-15 minutes or until the box and bread pieces are crunchy and got some color. Take out of the oven and let cool a bit.
5. While the bread is in the oven cut the larger fruits (e.g. melon) you are using into smaller pieces. Add everything to a bowl, mix with the sugar and let them macerate a bit. When you are ready to serve add the bread dices to the bowl with the fruits/berries and mix to combine. Brush the inside of the breadbox with the sweetened condensed milk and fill it with the bread-fruit-mixture. If there is too much filling, serve it on the side in a small bowl. Drizzle with the honey, top with ice cream, whipped heavy cream, fresh fruits/berries, and cookies and/or chocolate candy pieces (all optional). Serve immediately with some vanilla sauce (also optional). You will need a fork and sharp knife to eat the breadbox.
1. Für das Shokupan Brot das Mehl mit dem Zucker, der Hefe und Salz in einer großen Schüssel vermischen. Das lauwarme Wasser, Milch und Butter dazugeben und alles für etwa 10 Minuten verkneten, bis ein glatter Teig entsteht. Sollte der Teig zu feucht sein, noch etwas Mehl dazugeben. Die Schüssel abdecken und den Teig an einem warmen Ort für etwa 1 Stunde gehen lassen, bis sich das Volumen in etwa verdoppelt hat.
2. Eine 11,5×11,5cm Shokupan Backform* leicht einfetten und zur Seite stellen. Den Teig auf eine bemehlte Fläche legen und die Luft rausboxen. Den Teig zu einer Kugel formen und in die Backform legen. Den Deckel schließen und den Teig noch einmal 25-30 Minuten gehen lassen.
3. Den Ofen auf 200°C (390°F) Ober-/Unterhitze vorheizen. Die Backform mit dem geschlossenen Deckel in den Ofen stellen und für etwa 40 Minuten backen – das Brot sollte eine schöne goldene Farbe bekommen haben (ja, man darf gegen Ende der Backzeit den Deckel lüften, um zu checken). Das Brot aus dem Ofen nehmen, auf die Seiten der Form klopfen, damit sich das Brot löst, und dann herausholen. Auf einem Kuchengitter abkühlen lassen. Man kann das Brot auch einen Tag vorher zubereiten und dann in einem Brotbeutel* aufbewahren.
4. Vor dem Servieren den Ofen auf 180°C (350°F) Ober-/Unterhitze vorheizen. Ein Backblech mit Backpapier auslegen und zur Seite stellen. Die Oberseite des Brotes abschneiden. Mit einem scharfen Messer einen Würfel in das Brot schneiden und dabei ringsum einen etwa 1cm breiten Rand stehen lassen – ebenfalls zur Unterseite des Brotes den gleichen Abstand einhalten. Den großen Brotwürfel in kleinere Würfel schneiden (etwa 2cm breit). Brotwürfel und die Brotbox mit der geschmolzenen Butter bestreichen, auf das vorbereitete Blech setzen und dann für etwa 10-15 Minuten backen. Die Würfel und die Box sollten schön knusprig sein und etwas Farbe bekommen haben. Aus dem Ofen holen und etwas abkühlen lassen.
5. Während das Brot im Ofen knusprig wird, die Früchte und Beeren in mundgerechte Stücke schneiden und zusammen mit dem Zucker in eine Schüssel geben und vermischen. Für ein paar Minuten marinieren lassen. Vor dem Servieren die gebackenen Brotwürfel mit dem marinierten Obst vermischen. Die Brotbox innen mit gezuckerter Kondensmilch bestreichen und dann die Obst-Brot-Mischung einfüllen. Was zu viel ist, in einer kleinen Schüssel für später aufbehalten und zur Box dazu reichen. Alles mit dem Honig beträufeln, mit Eiskugeln, Schlagsahne, frischen Früchten/Beeren, Cookies und/oder Schokoriegeln dekorieren (optional). Sofort servieren – wer mag, mit Vanillesoße (optional). Für das Dessert braucht man eine Gabel und ein scharfes Messer, um die Box essen zu können.
Craving more? Keep in touch on Facebook, Instagram and Pinterest for new post updates and more. You can also contact me with any questions or inquiries!
Here is a version of the recipe you can print easily.
Print
Shibuya Honey Toast
- Prep Time: 00:40
- Cook Time: 00:55
- Total Time: 03:30
- Yield: 1 1x
- Category: Dessert
- Method: -
- Cuisine: JApan
- Diet: Vegetarian
Description
Delicious sweet dessert from Japan: Shibuya Honey Toast. A breadbox stuffed with toasted bread, fruits and ice cream.
Ingredients
For the Shokupan:
2 cups (260g) all-purpose flour (plus more if needed)
1 tbsp. sugar
3/4 tsp. active dry yeast
1/4 tsp. salt
4 fl. oz. (120ml) lukewarm water
1.7 fl. oz. (50ml) milk
0.9 oz. (25g) butter, at room temperature
For the Shibuya toast/filling:
3 tbsp. butter, melted
1/2 cup fruits & berries (e.g. melon, strawberry, raspberry, …)
1-2 tsp. sugar
1-2 tbsp. sweetened condensed milk
1 tbsp. honey
For the decoration:
2-3 scoops of ice cream
some whipped cream (optional)
some fresh fruits/berries
some cookies or chocolate candies for garnish
vanilla sauce (optional)
Instructions
1. For the Shokupan add the flour, sugar, yeast, and salt to a large bowl and mix to combine. Add the lukewarm water, milk, and butter and knead for about 10 minutes until you get a nice smooth dough. If the dough seems too wet, add some more flour. Cover the bowl and let the dough rise in a warm place for about 1 hour or until the volume has doubled.
2. Grease a 11,5×11,5cm Shokupan tin* lightly and set aside. Place the dough on a floured surface and knock out the air. Shape it into a ball and place it inside the baking tin. Cover with the lid and let rise another 25-30 minutes in a warm place.
3. Preheat the oven to 200°C (390°F). Place the baking tin with the lid closed in the oven and bake the bread for about 40 minutes until the top of the bread looks golden brown (yes, you can check and remove the lid for that at the end). Take it out of the oven, tap the pan on all sides to loosen the bread a bit and remove it. Let it cool down completely on a wire rack. The bread can be made a day in advance and stored in a bread bag*
4. To finish the Shibuya toast preheat the oven to 180°C (350°F). Line a baking sheet with baking parchment and set aside. Cut off the crust on the top of the Shokupan bread. Use a sharp knife to cut a square into the bread. Leave a 1cm wall on all sides and keep the same distance to the bottom of the bread – you want basically an empty bread box remaining with all sides and the bottom intact. Cut the insides of the bread into 2cm large dices. Brush the pieces and the inside and outside of the breadbox with the melted butter and place everything on the prepared baking sheet. Bake/toast everything for about 10-15 minutes or until the box and bread pieces are crunchy and got some color. Take out of the oven and let cool a bit.
5. While the bread is in the oven cut the larger fruits (e.g. melon) you are using into smaller pieces. Add everything to a bowl, mix with the sugar and let them macerate a bit. When you are ready to serve add the bread dices to the bowl with the fruits/berries and mix to combine. Brush the inside of the breadbox with the sweetened condensed milk and fill it with the bread-fruit-mixture. If there is too much filling, serve it on the side in a small bowl. Drizzle with the honey, top with ice cream, whipped heavy cream, fresh fruits/berries, and cookies and/or chocolate candy pieces (all optional). Serve immediately with some vanilla sauce (also optional). You will need a fork and sharp knife to eat the breadbox.
Notes
Enjoy baking!
Links marked with an asterisk (*) are affiliate links (advertising/Werbung) to Amazon Germany. If you click on one of those links and buy something via this link, I will get a commission for that sale. The price of whatever you buy is not affected in any way by this.


mouth watering!!