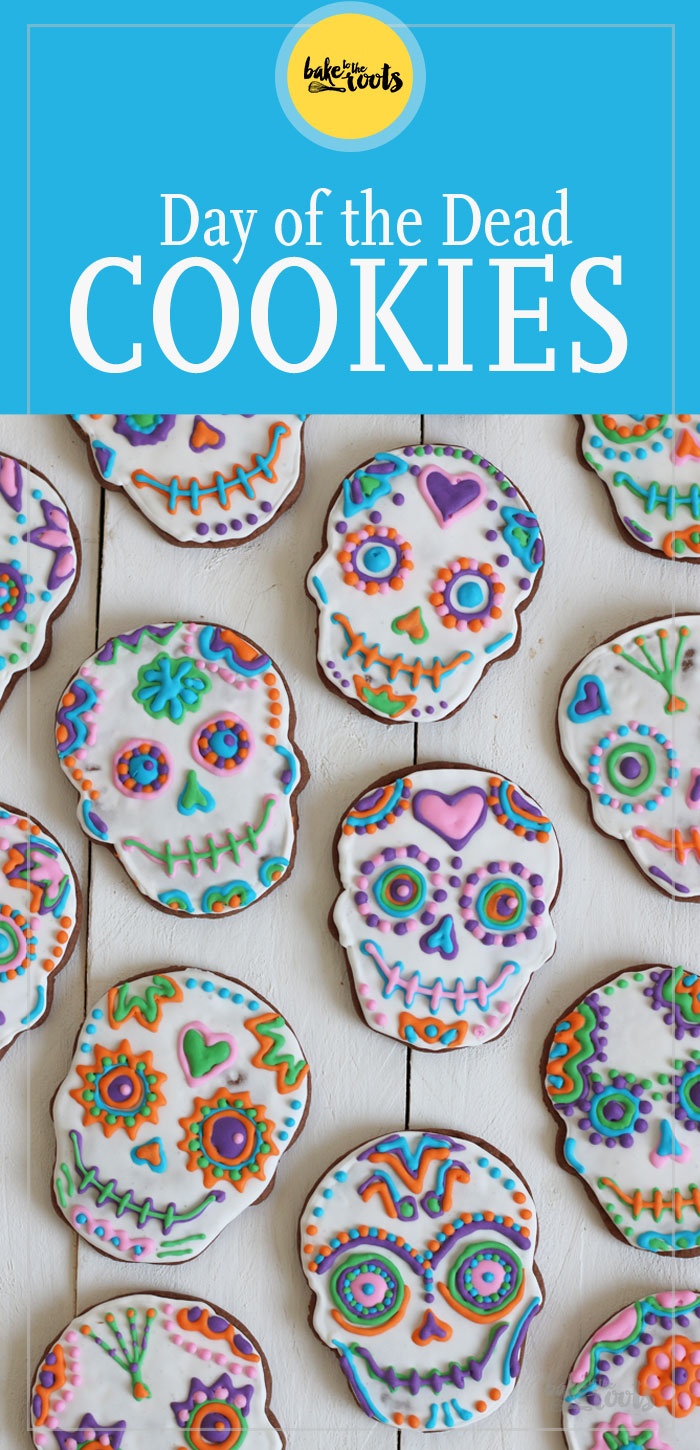
All Souls’ Day is not a public holiday here in Germany (well – it is a holiday, but you still have to work). In the south, the day before is a public holiday (All Saints’ Day). Anyway. Not sure how it is in other countries – many started celebrating Halloween on the 31st and that day got muuuuch bigger over the years than All Saints’ Day or All Souls’ Day together ;) In Mexico the 2nd of November is a big celebration even though it is not named All Souls’ Day – they call it “Día de los Muertos” aka. “The day of the dead”. And as you probably noticed already – I am celebrating that day this year with some special Day of the Dead Cookies… a day early though :P
“Día de los Muertos” or “Day of the dead” is not very well known here in Germany I suppose. Unless you watched the Disney movie “Coco”. A cute movie where Miguel (the main character) is helping his dead great-great-grandfather to be remembered by his daughter Coco… Really cute and very colorful. I could watch that movie over and over. Actually, I am watching it right now while writing this blogpost :P
Unlike the festivities for All Souls’ Day here in Germany, the “Day of the dead” celebrations are real celebrations with music, decorations, and good food. Here we in Germany it’s a (quite) depressing event where you just go to church and the cemetery maybe. I prefer the party where you celebrate with the dead and remember them in a happy way… ;)
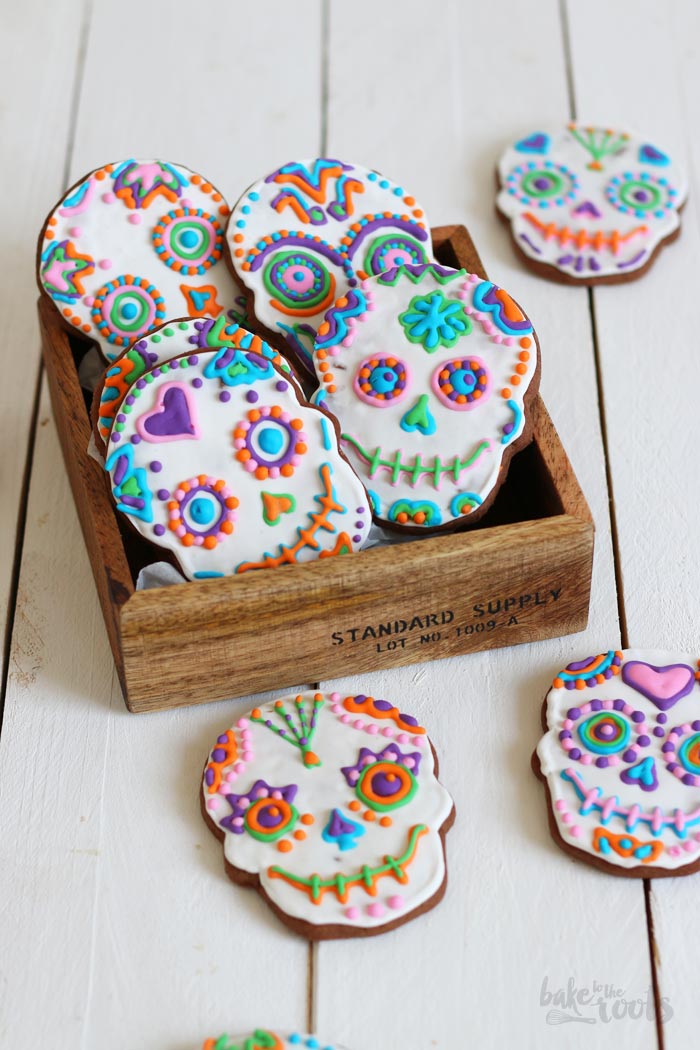
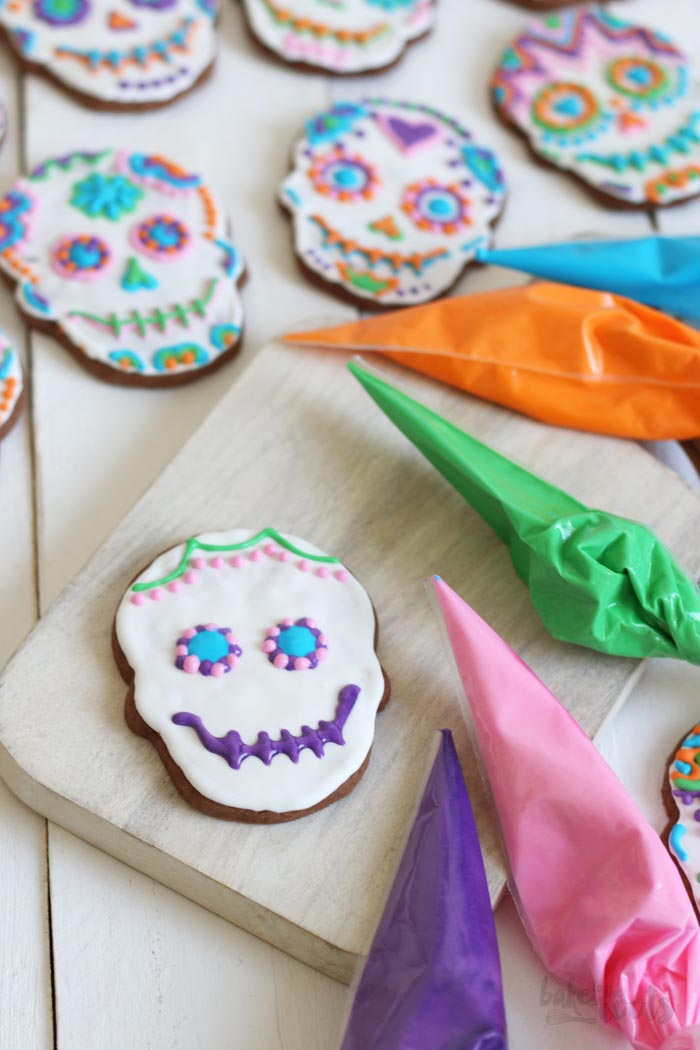
Well… that’s Germany. Hahaha ;) Decorating skull cookies is a lot of fun. Maybe not if you have to decorate 20 of them, but you can always get some help and do the job with someone together. That is even more fun!
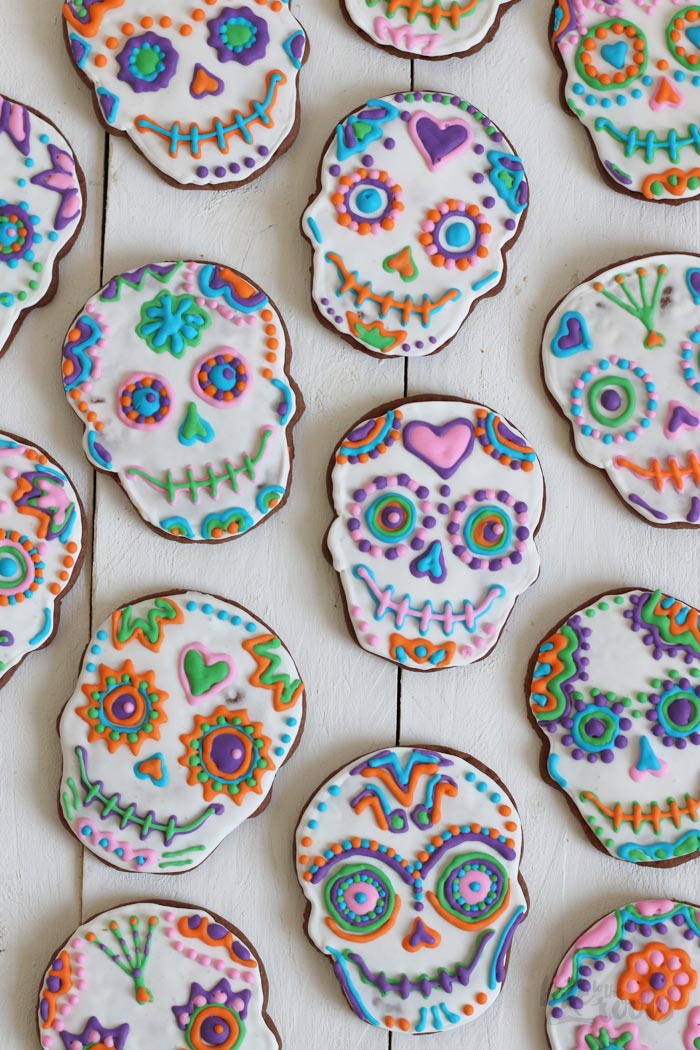
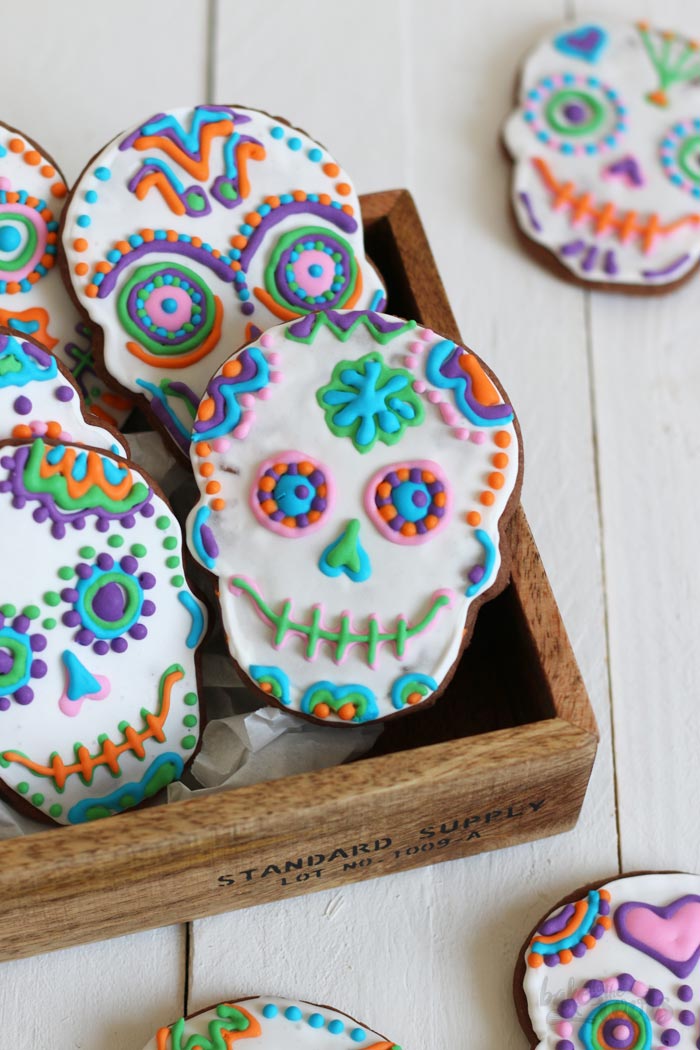
I got some cookie cutters for these scull cookies* but to be honest – not really necessary. I thought they would help with the decoration, but as soon as you add the white royal icing, you can’t see the faces that have been imprinted before ;) Regular skull cookie cutters* should be absolutely fine. Or paper templates ;)
Happy Día de los Muertos! Oh and happy Cookie Friday ;)
INGREDIENTS / ZUTATEN
For the dough:
3/4 cup (170g) butter
1/2 cup (100g) sugar
1 large egg
1 tsp. vanilla extract
2 cups (260g) all-purpose flour
2 tbsp. cocoa powder
1/4 tsp. baking powder
1/4 tsp. ground cinnamon
1/2 tsp. salt
For the icing:
3 1/2 – 4 cups (450g-520g) confectioners’ sugar
1/2 tsp. cream of tartar
3 medium egg whites, plus more if needed
1 tsp. fresh lemon juice, plus more if needed
food coloring
Für den Teig:
170g Butter
100g Zucker
1 Ei (L)
1 TL Vanille Extrakt
260g Mehl (Type 550)
2 EL Kakao
1/4 TL Backpulver
1/4 TL Zimt
1/2 TL Salz
Für das Royal Icing:
450-520g Puderzucker
1/2 TL reiner Weinstein (Cream of Tartar)
3 Eiweiß (M), plus ggf. mehr
1 TL frischer Zitronensaft
Lebensmittelfarben
DIRECTIONS / ZUBEREITUNG
2. Preheat the oven to 325°F (165°C). Line a baking sheet with baking parchment and set aside. Take about half of the dough and roll out on a floured surface – about 0.2 inches thick. Use “Day of the Dead” cookie cutters and cut out as many cookies as possible and place them on the prepared baking sheet. Roll out more dough and cut more cookies if there is still room on the baking sheet – if not, place leftover dough and already cut out cookies in the fridge for the next round. Bake the first batch of cookies for about 10-12 minutes. They should be firm but not dry or hard. Take out of the oven and let cool down on the baking sheet for some time, then transfer to a wire rack and let cool down completely. Repeat with the remaining dough until all dough is used.
3. For the royal icing add 3 1/2 cups of the confectioners’ sugar and the cream of tartar to a large bowl and mix until well combined. Add the egg whites and lemon juice and mix until you get a smooth and shiny icing. It should be thick, but runny enough to pour. Adjust with confectioners’ sugar or egg white if the icing is too liquid or too thick. Fill about 1/4 of the icing into a piping bag with a small round tip. Outline the cookies with the icing and let dry for about 5-10 minutes. Use the same icing (maybe with a larger round tip) to flood the cookies with icing within the outlines. Use a small spatula to smooth out the top and push the icing into all corners of the outlines. If the icing is too thick for the flooding, mix in some more egg white and/or lemon juice to get a slightly runnier icing. Let dry for at least 8 hours. Keep the remaining icing in an airtight container.
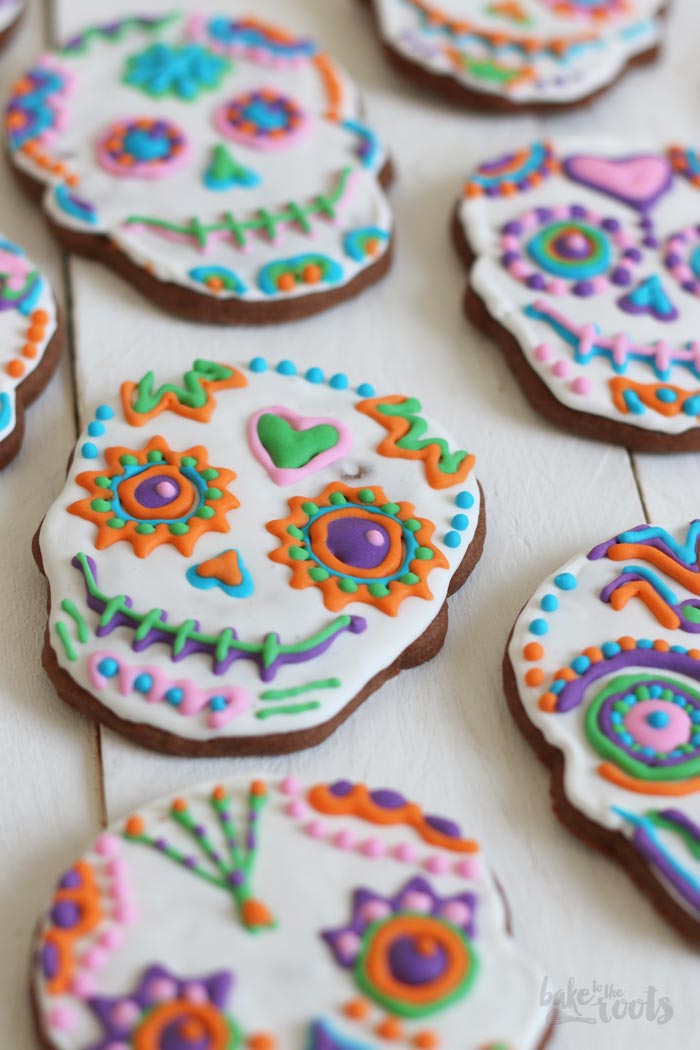
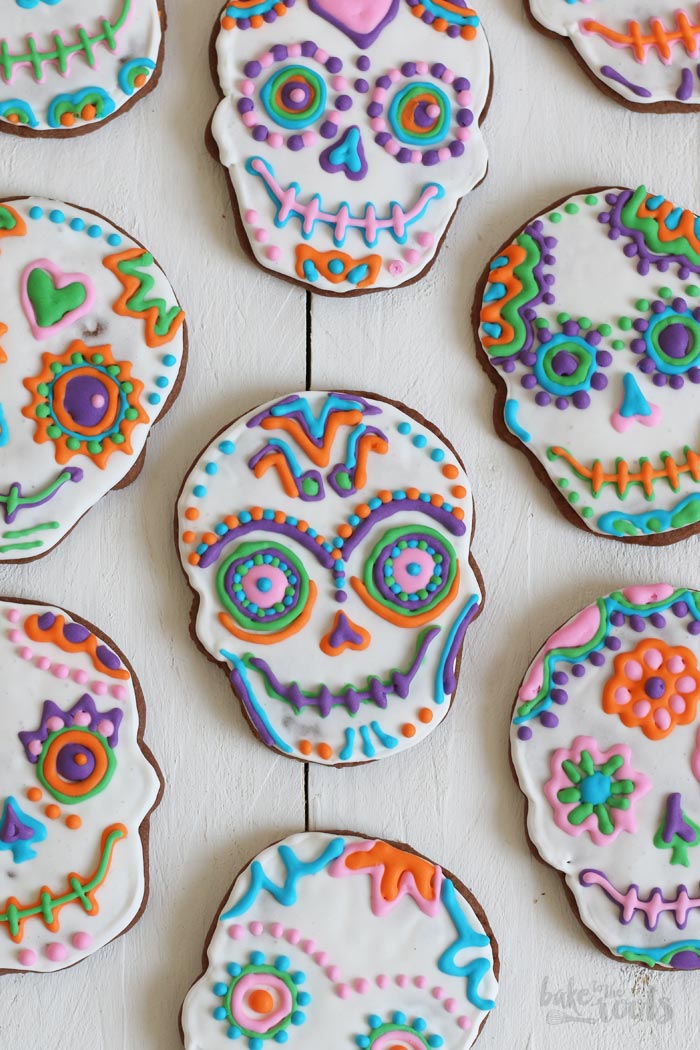
4. When the cookies are dry divide the icing into 5-6 equal portions and color each with some food coloring (keep some white just in case if you need it later). Fill into piping bags and decorate the cookies to your liking. Let dry completely (at least 2 hours) and store in an airtight container in a cool place.
2. Den Ofen auf 165°C (325°F) vorheizen. Ein Backblech mit Backpapier auslegen und zur Seite stellen. Die Hälfte des Teiges aus dem Kühlschrank nehmen und auf einer bemehlten Fläche etwa 0,5cm dick ausrollen. Mit Totenkopf-Ausstechern so viele Cookies wie möglich ausstechen und auf das Backblech legen. Mehr Cookies ausstechen, sollte noch Platz auf dem Blech sein – Teigreste und ausgestochene Cookies, die zu viel sind, zurück in den Kühlschrank legen. Die erste Ladung Cookies für 10-12 Minuten backen. Die Kekse sollten fest geworden sein, aber nicht hart oder trocken wirken. Aus dem Ofen holen und auf dem Blech etwas abkühlen lassen, dann auf einem Kuchengitter komplett auskühlen lassen. Mit dem restlichen Teig wiederholen, bis alles aufgebraucht ist.
3. Für das Royal Icing erst einmal etwa 450g des Puderzuckers und den Weinstein in einer großen Schüssel vermischen. Das Eiweiß und den Zitronensaft dazugeben und gut verrühren, bis eine glatte und glänzende Masse entstanden ist. Das Icing sollte dickflüssig, aber nicht zu fest sein – es sollte immer noch von einem Löffel runterfließen, wenn man es aus der Schüssel holt. Etwa 1/4 des Icings in einen Spritzbeutel mit kleiner runder Tülle füllen. Die äußere Kante der Cookies mit einer Outline (Rand) versehen und für 5-10 Minuten trocknen lassen. Mit dem Icing (vielleicht mit etwas größerer Tülle) die Cookies “flooden” – sprich die Fläche innerhalb der Outlines (Ränder) mit Icing füllen. Mit einem kleinen Spatel das Icing glätten und bis zu den Rändern der Cookies verteilen. Sollte das Icing zu dick dafür sein, noch einmal mit etwas Eiweiß und/oder Zitronensaft verrühren, damit es etwas gefügiger wird. Die Cookies für mindestens 8 Stunden trocknen lassen. Das restliche Icing in einer luftdichten Dose im Kühlschrank aufbewahren.
4. Sobald das Icing auf den Cookies trocken ist, das restliche Icing in 5-6 gleiche Portionen aufteilen und nach belieben einfärben (etwas weißes Icing für den Notfall zurückbehalten). In Spritzbeutel füllen und die Cookies nach Belieben dekorieren. Die fertigen Cookies für mindestens 2 Stunden trocknen lassen und dann in einer luftdichten Dose an einem kühlen Ort aufbewahren.
Craving more? Keep in touch on Facebook, Twitter, Instagram and Pinterest for new post updates and more. You can also contact me with any questions or inquiries!
Here is a version of the recipe you can print easily.

Dia de los Muertos aka. Day of the Dead Cookies
- Prep Time: 3h
- Cook Time: 12m
- Total Time: 13h
- Yield: 20 1x
- Category: Cookies
- Cuisine: Mexican
Description
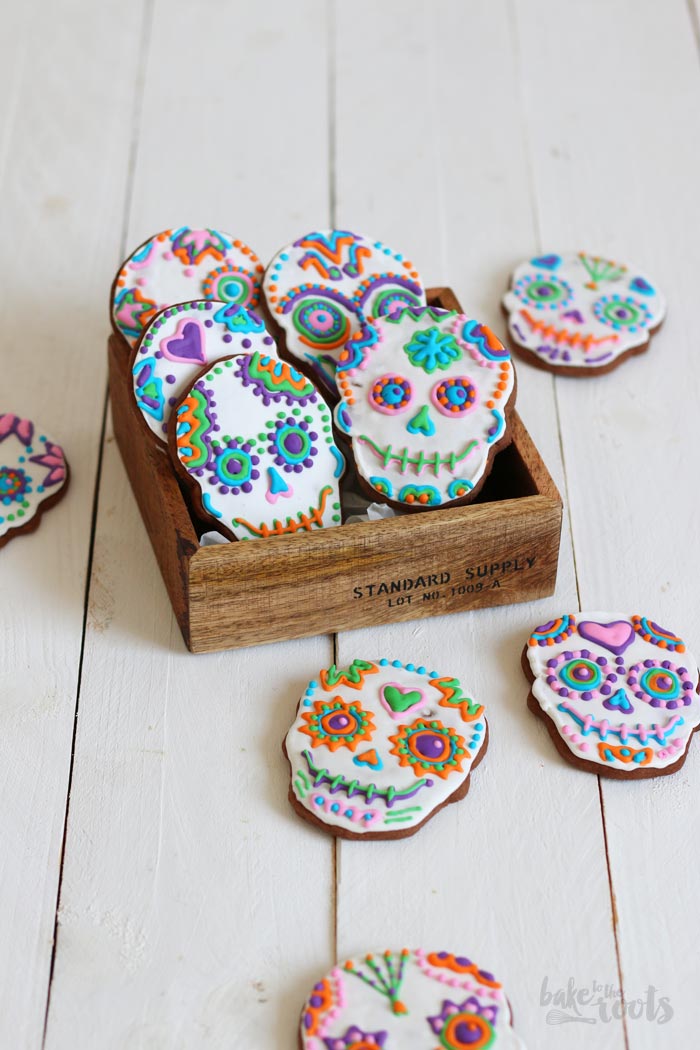
Let’s celebrate the Day of the Dead –Dia de los Muertos. What could be better than some colorful skull cookies?!
Ingredients
Instructions
Notes
Enjoy baking!
Links marked with an asterisk (*) are affiliate links (advertising/Werbung) to Amazon Germany. If you click on one of those links and buy something via this link, I will get a commission for that sale. The price of whatever you buy is not affected in any way by this.