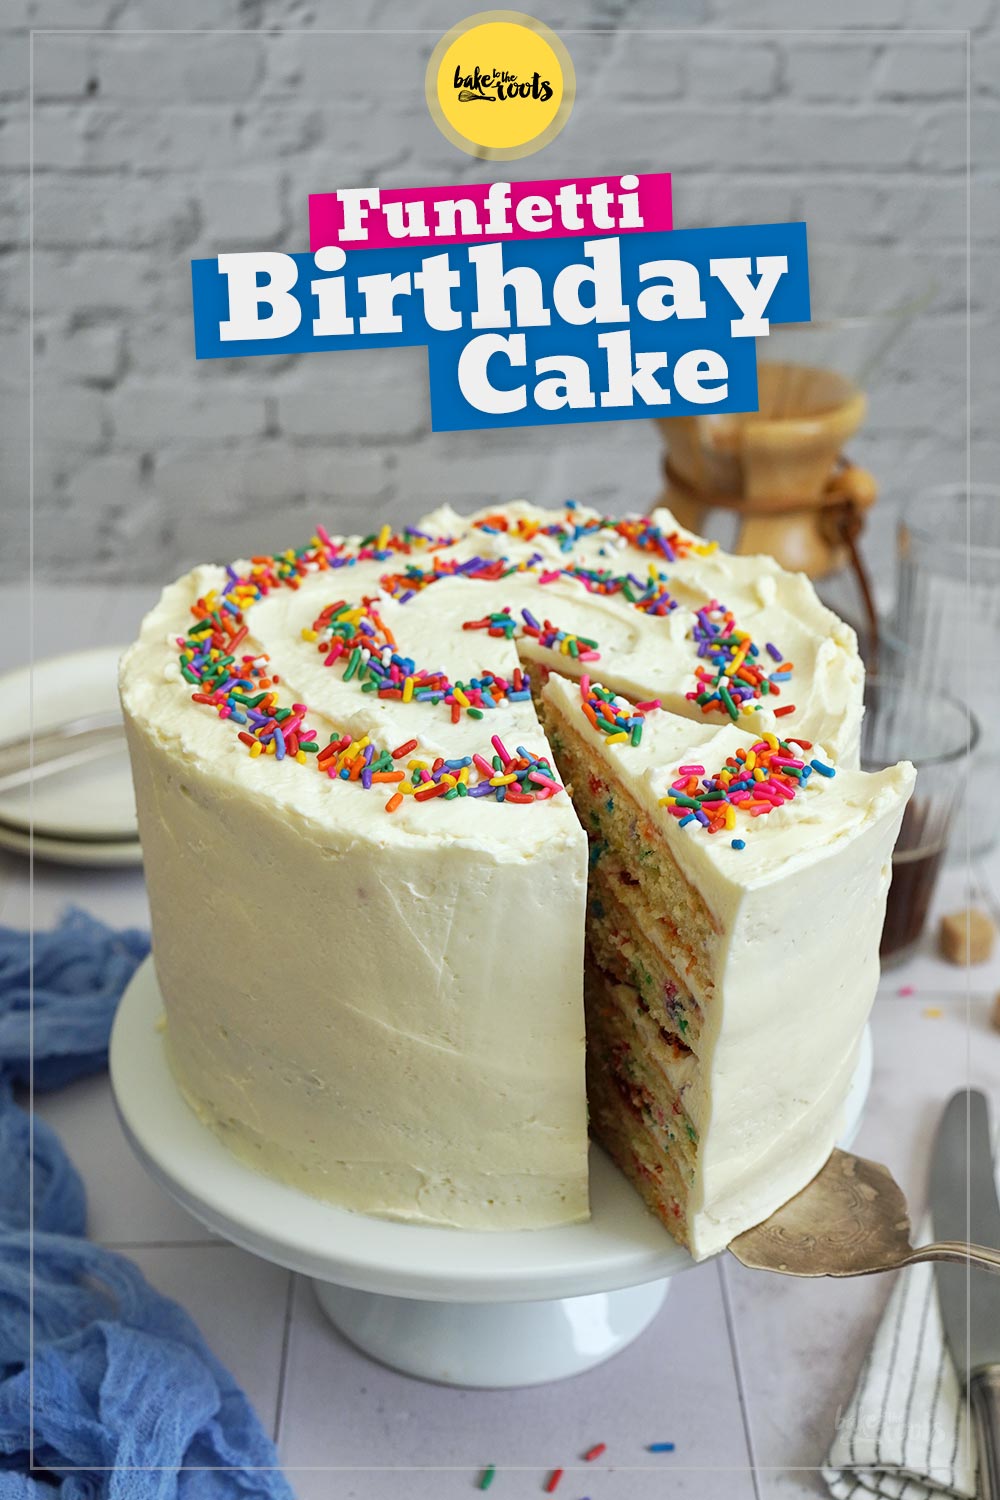
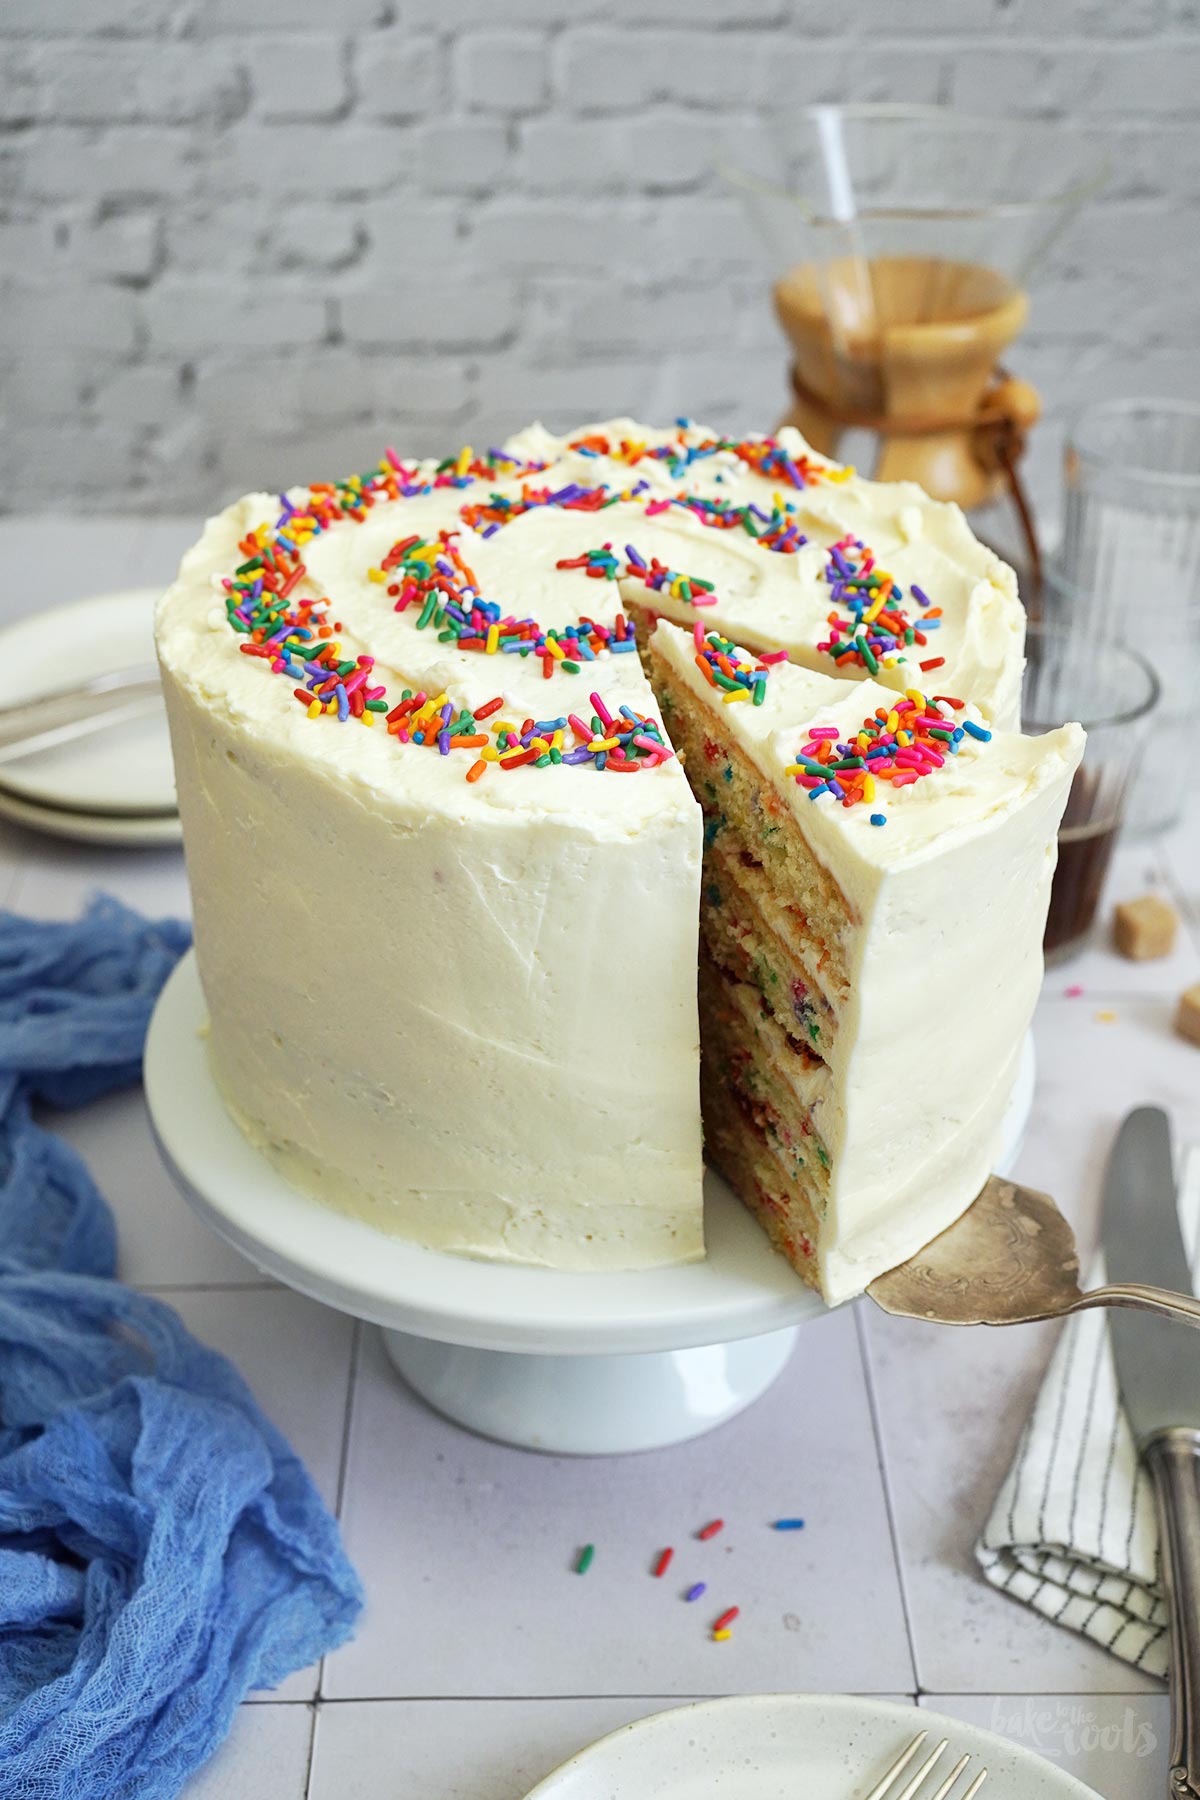
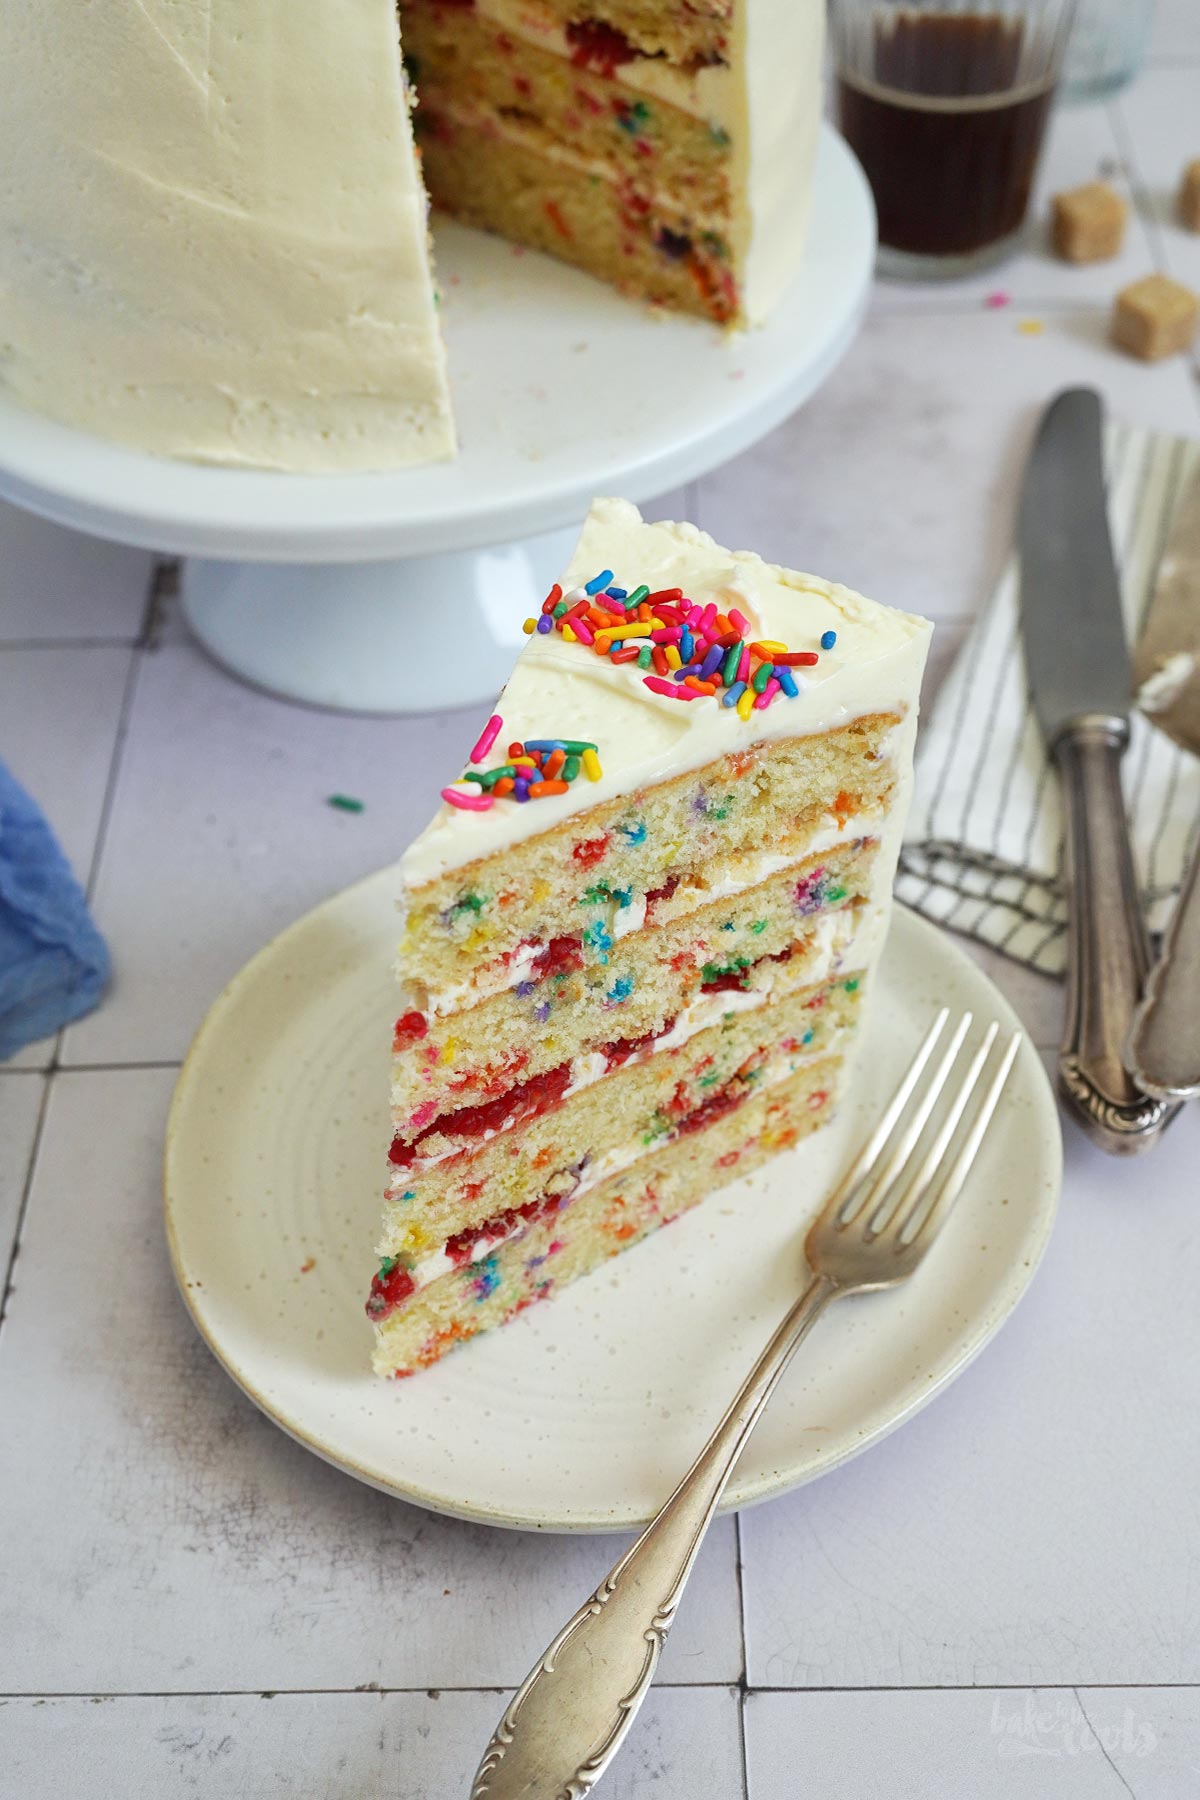
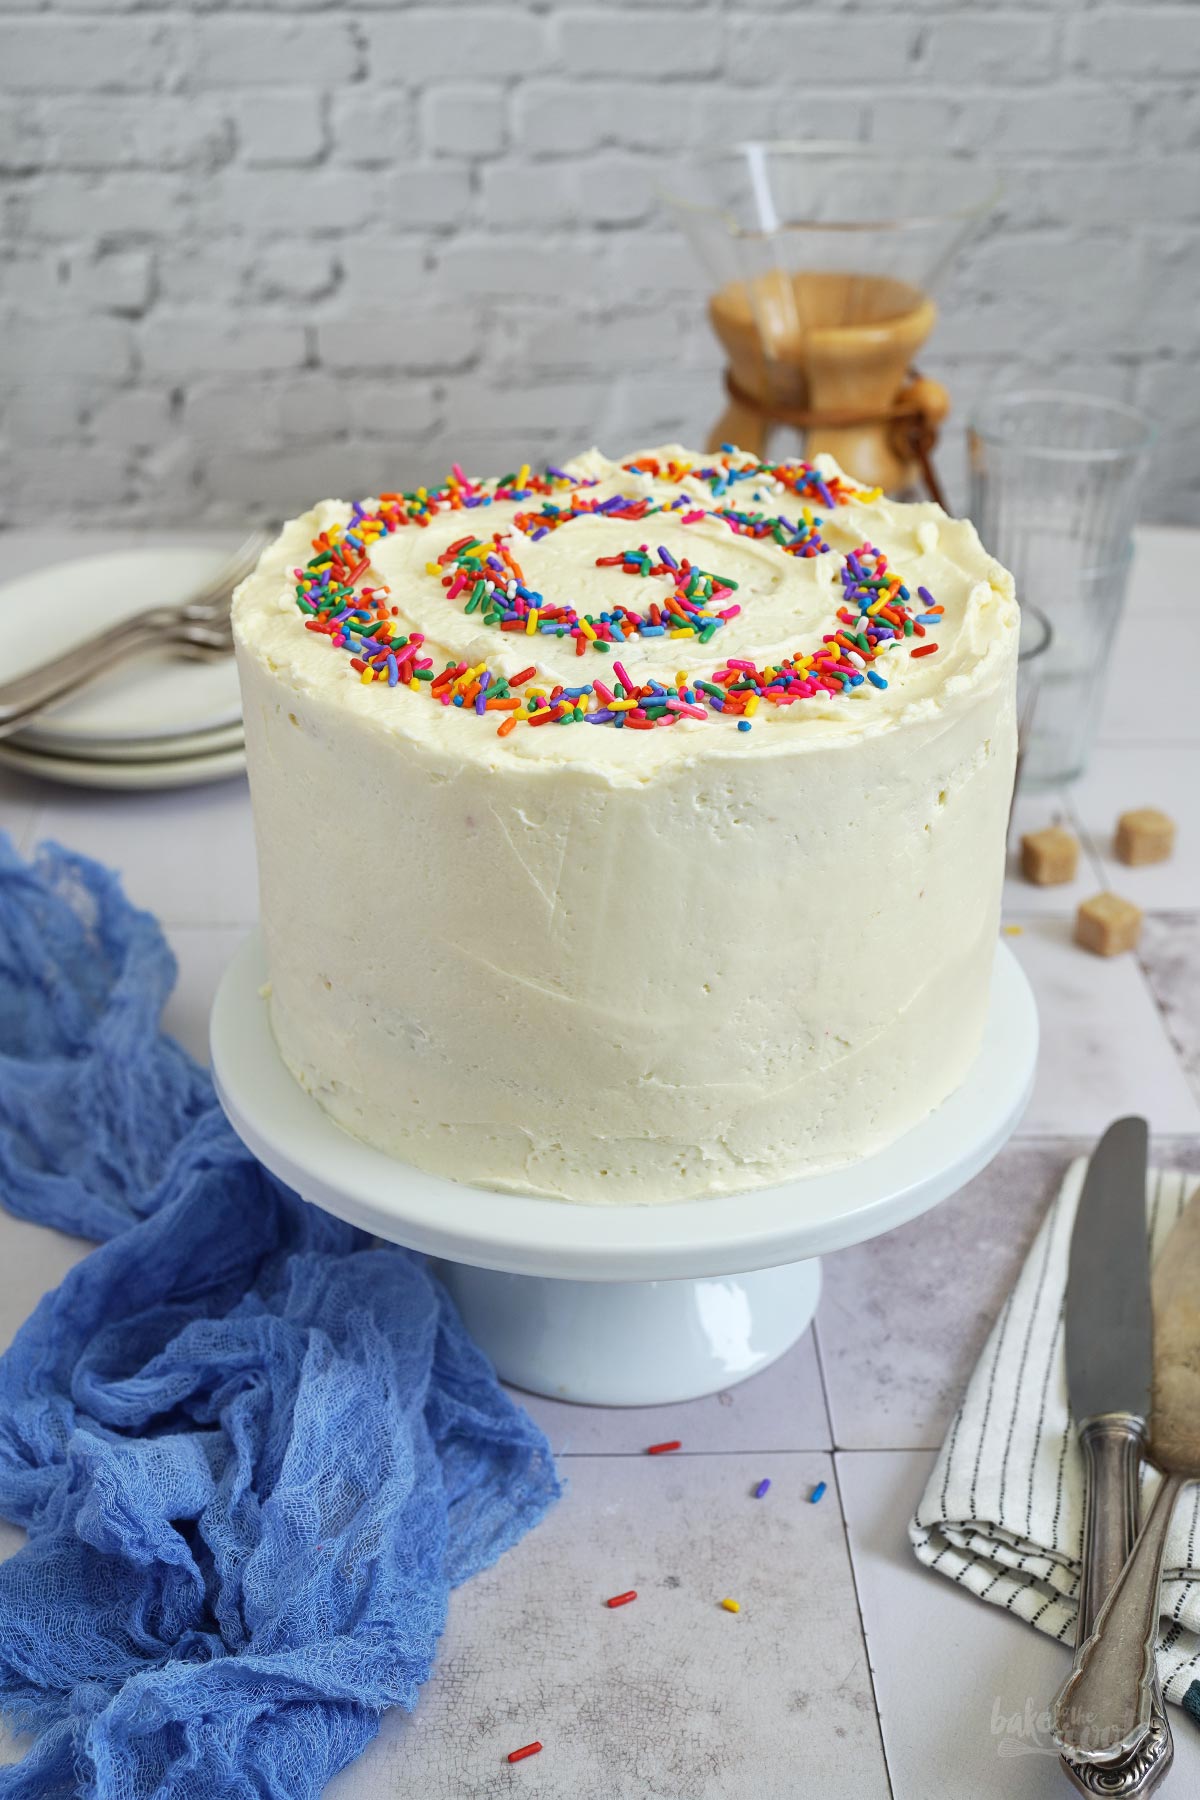
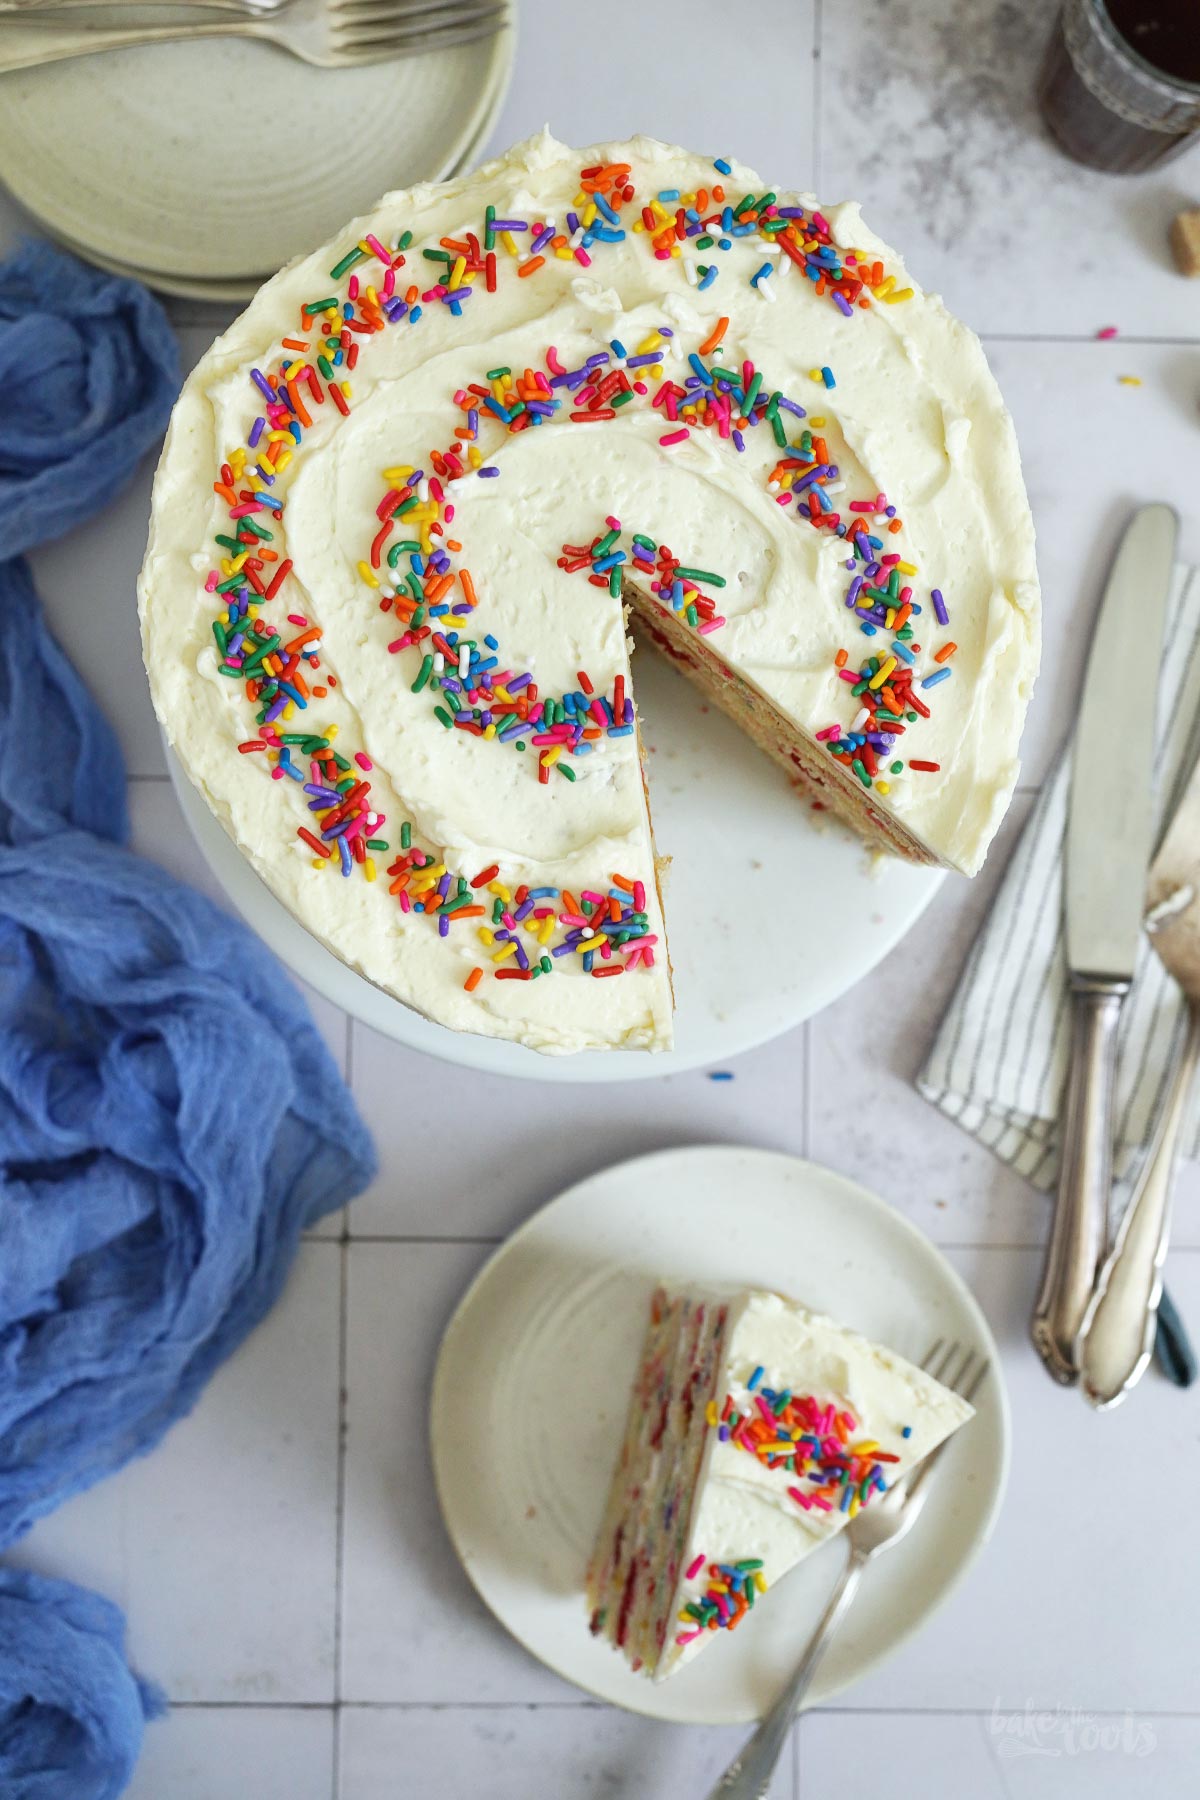
Special occasions need special cakes, right? A birthday without a cake would not be perfect, right? How about a small Funfetti Birthday Cake like this one here? Whoever gets one of these will definitely be happy. I would be happy if someone gave me a cake like that. Unfortunately, I am the one that has to bake those cakes for others. Always.
Well… this birthday cake is actually a celebration cake. A sweet treat to celebrate 10 years of »Bake to the roots« – the blog you are currently looking at. In January 2014, I published my first recipe here – delicious Tiramisu Cupcakes. Not the most beautiful cupcakes but absolutely delicious cupcakes.
A lot has happened since 2014. More than 1500 recipes have been published here – everything from cakes to cupcakes, but also a lot of cooking recipes. If you are looking for classic German bakes you are certainly in the right place.
Anyway. You probably ended up here because you wanted the recipe for this Funfetti Cake. Why else could you end up on a blog with recipes. Well, here we go…
The cake is quite easy to prepare – even though the recipe might look quite long. Occasionally you just have to explain things in a bit more detailed. What I love about cakes like that is the fact that you can prepare a lot in advance. The cake layers can be baked a day ahead, the same for the custard that is needed for the buttercream. This means you have less to do on the day you want to finish and serve the cake.
The buttercream I used is a »German buttercream«. Compared to American buttercream or other cake fillings it’s less sweet. I like it a lot, but it takes a bit more time to prepare than a simple American buttercream. You have to cook a custard first, let that cool down, then you mix the custard with butter and some additional confectioners’ sugar – the result is a really smooth and delicious buttercream.
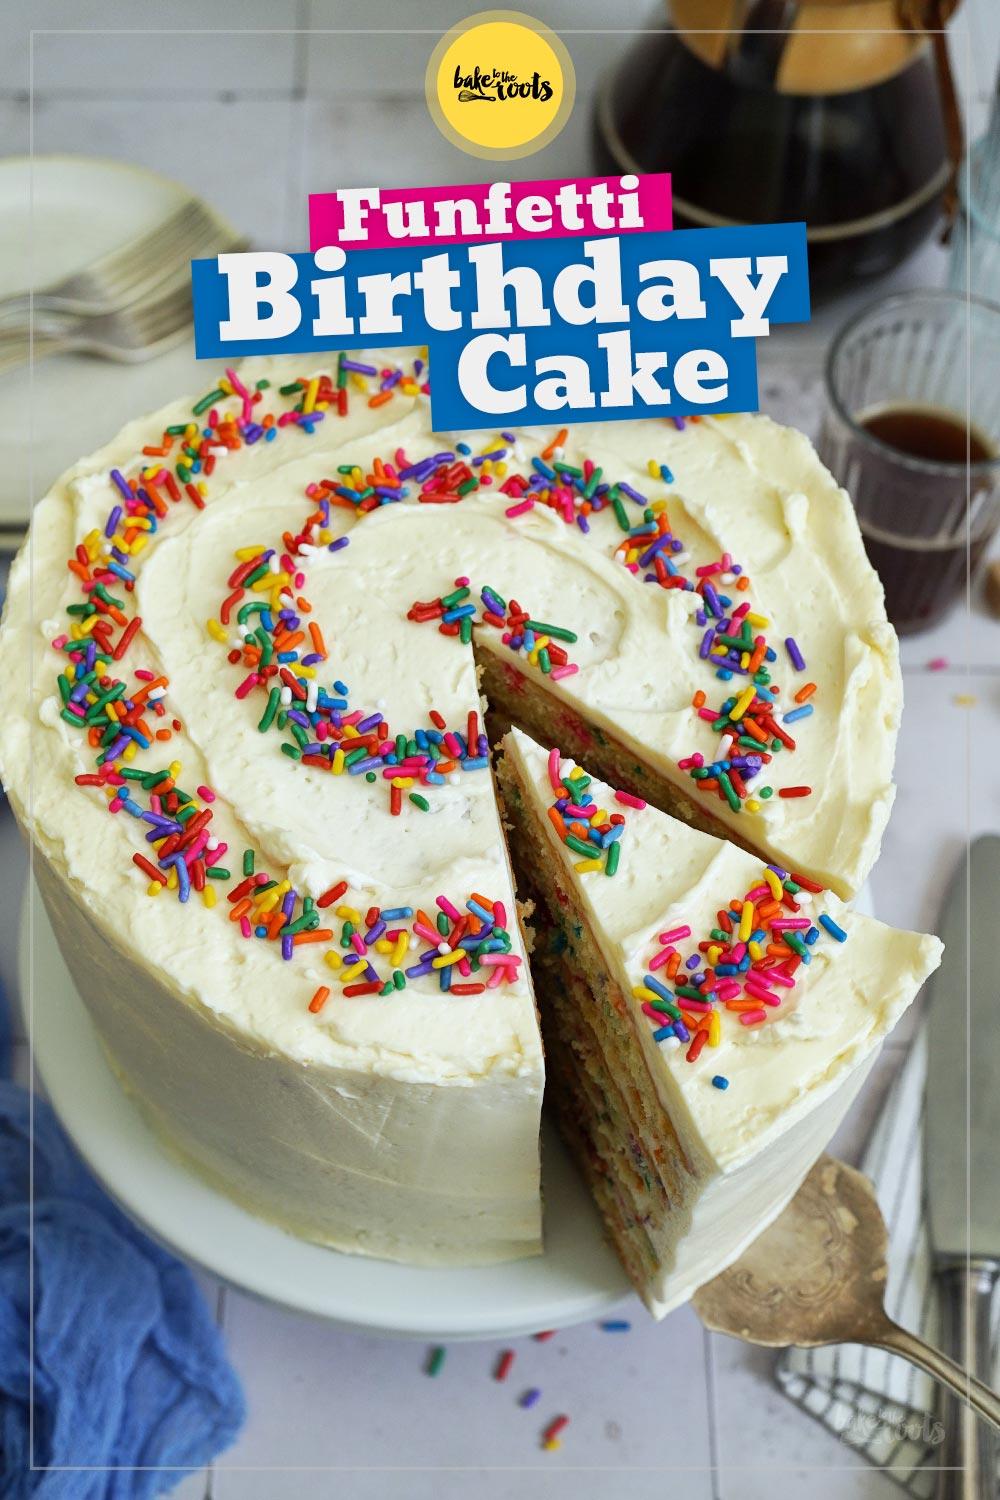
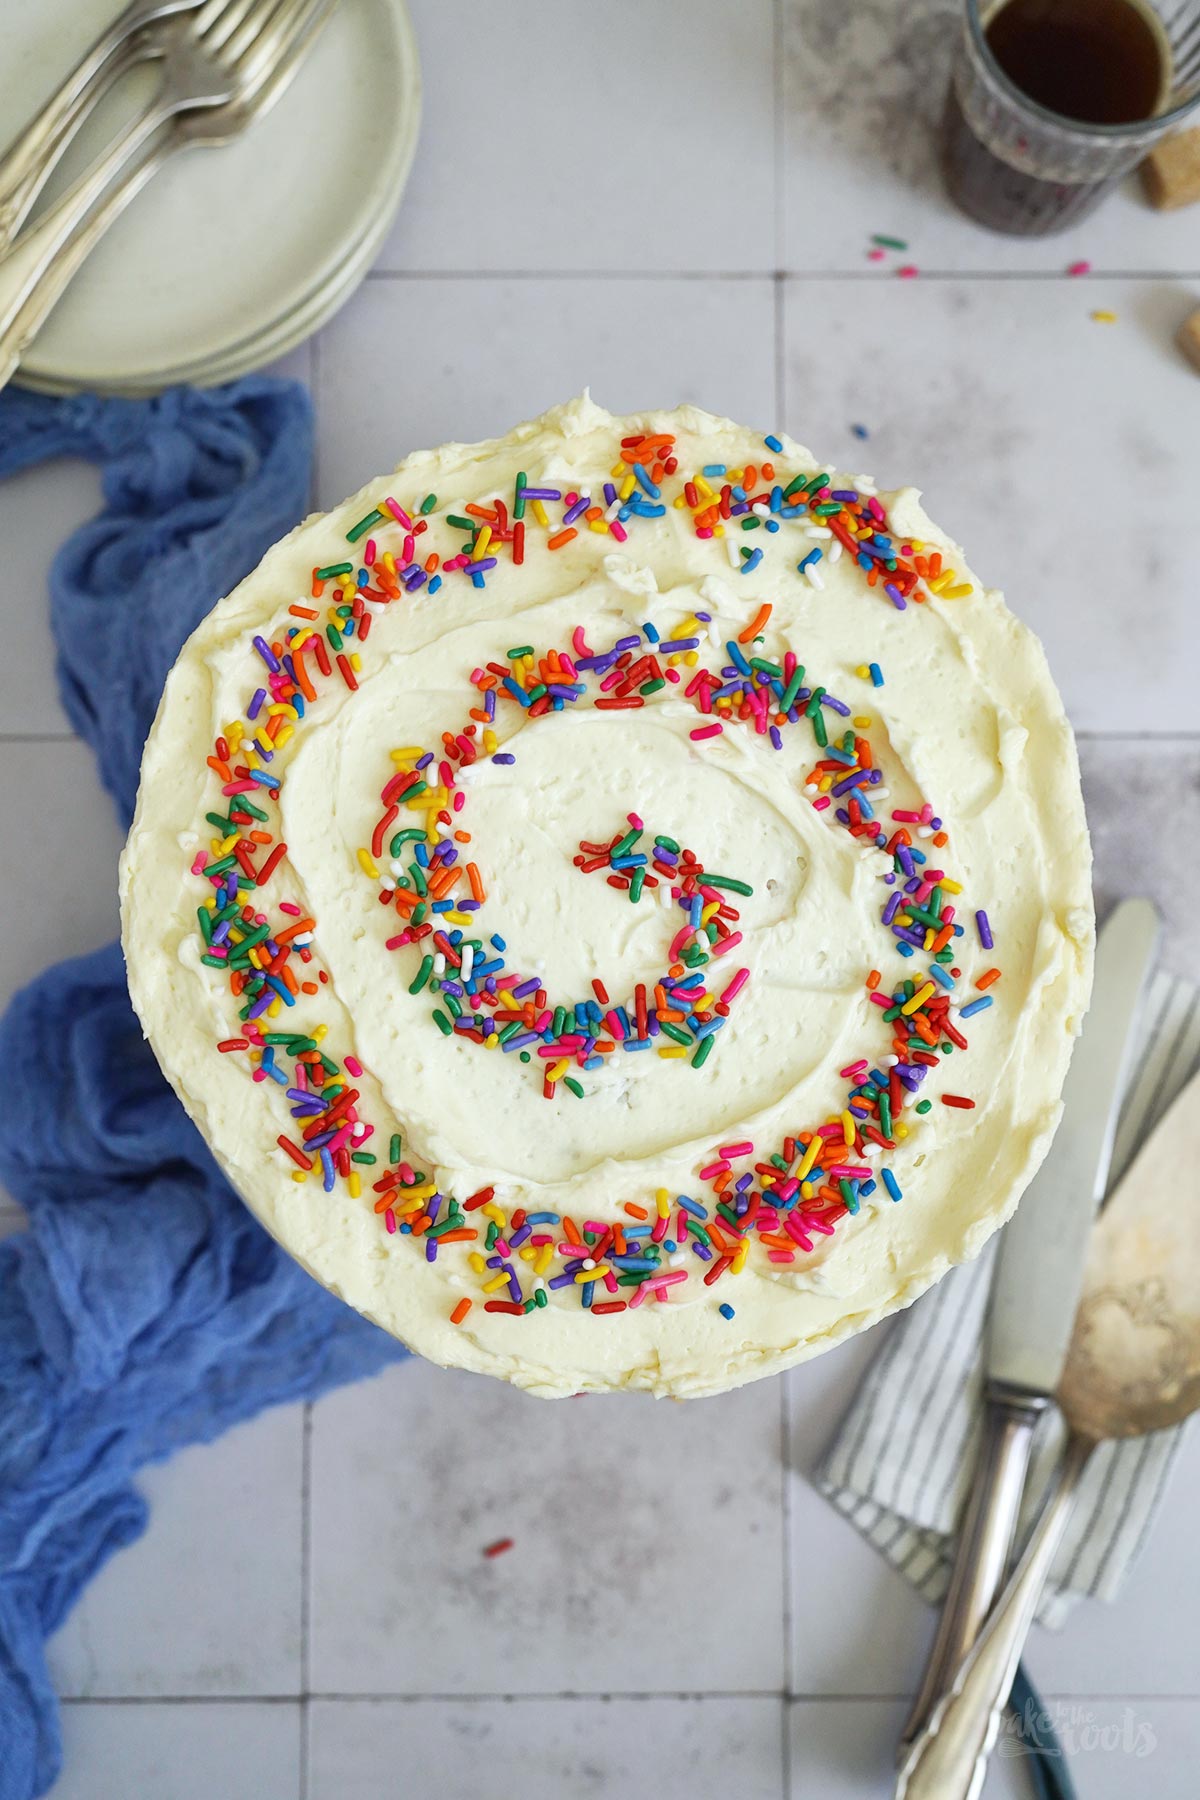
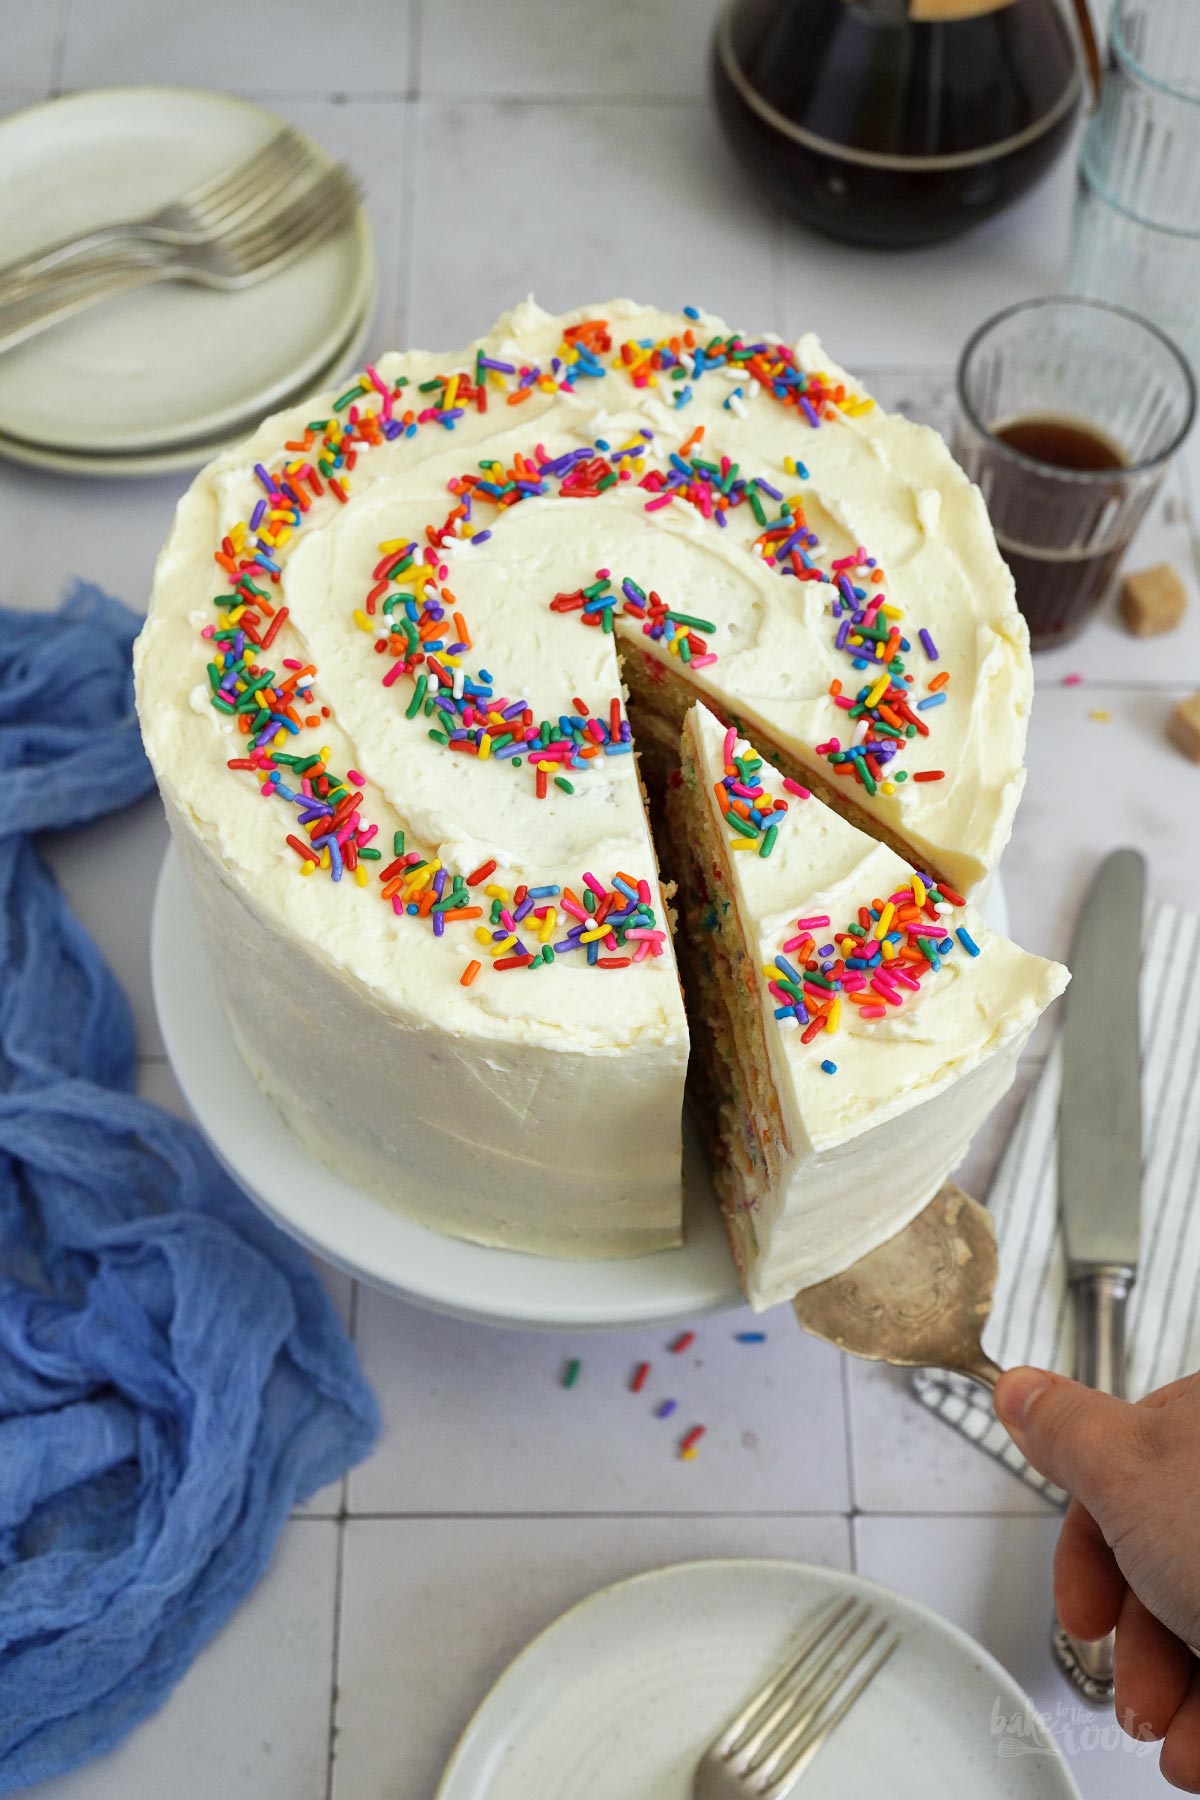
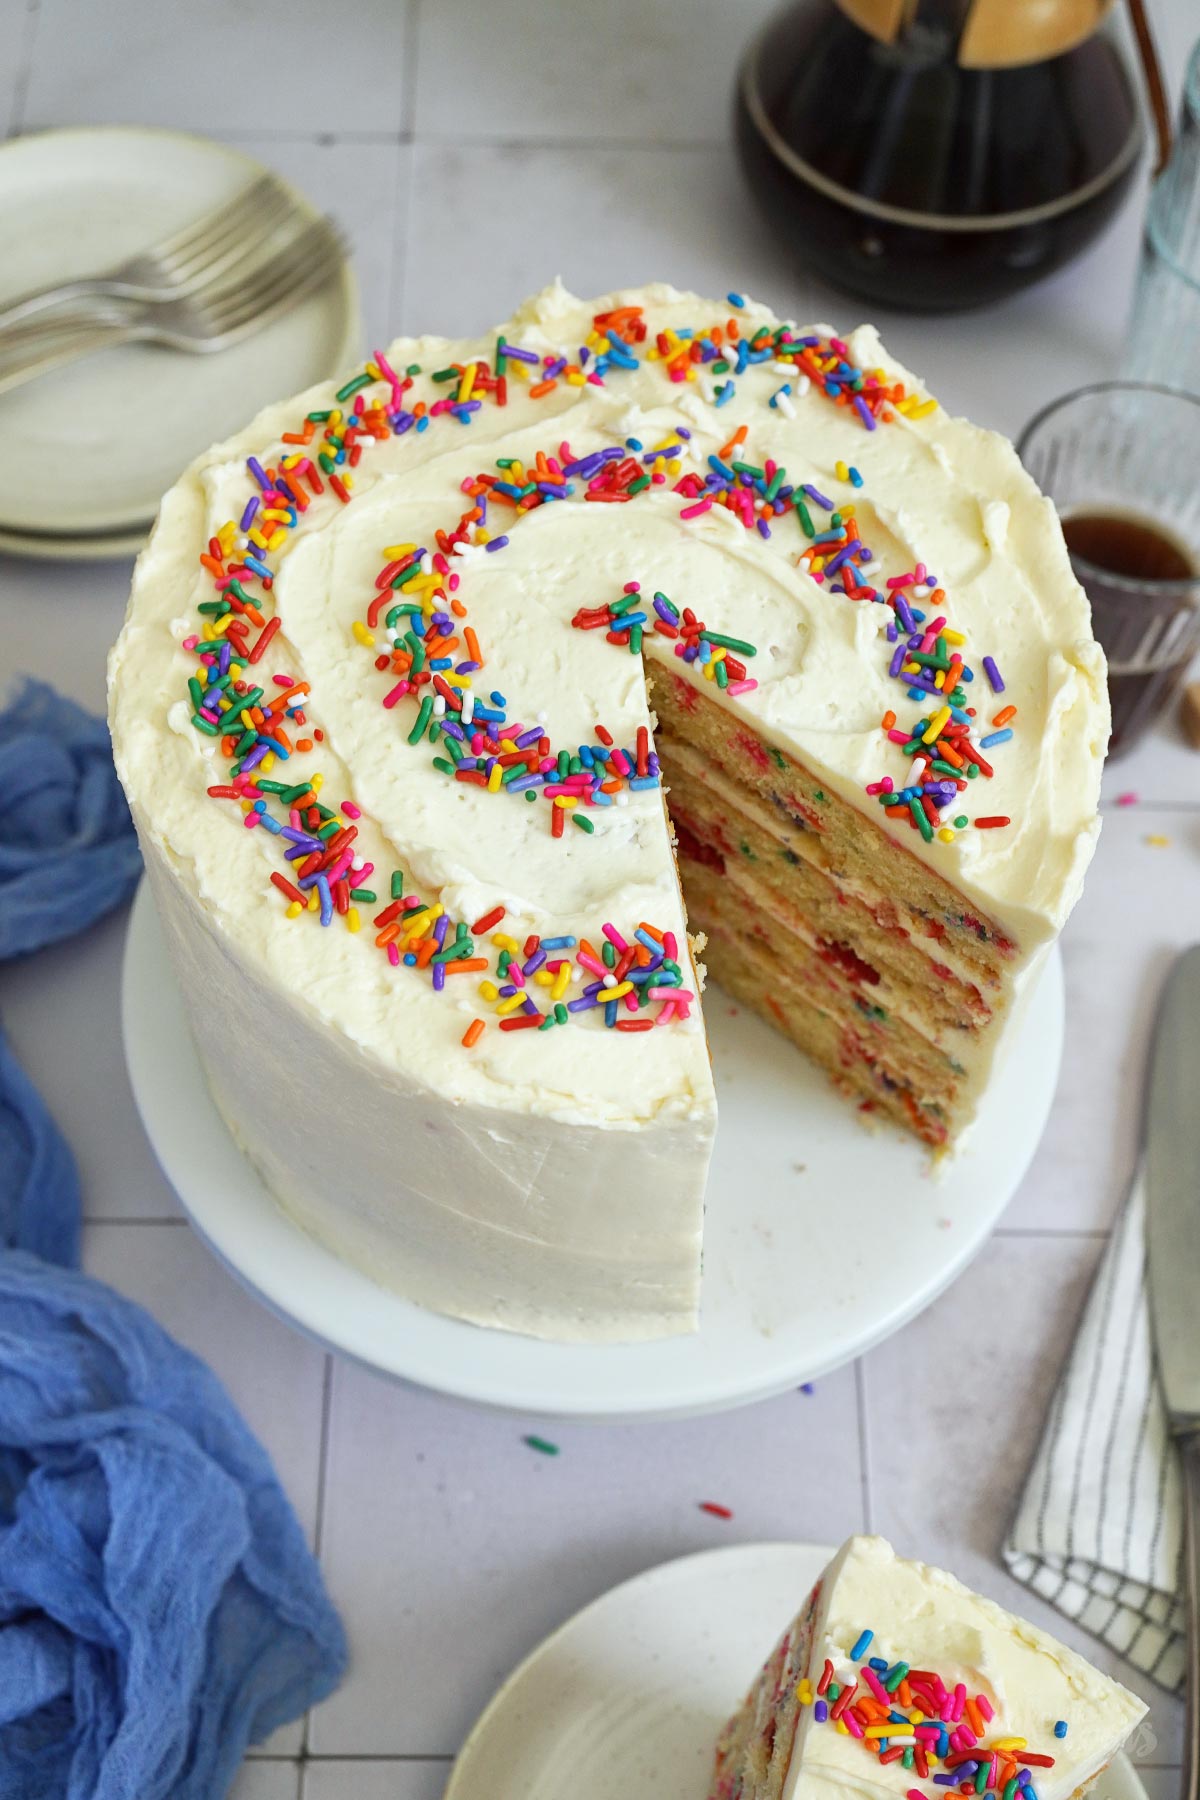
Assembling the cake should be an easy task. Just stack the cake layers with some buttercream in between on a serving plate and then finish the cake with a layer of buttercream all around. Even though I try to work very precisely my cakes never look very neat… but that is absolutely fine. I like the »rustic« look with swirls here and there. Straight edges are completely overrated.
INGREDIENTS / ZUTATEN
For the cake layers:
1 1/4 cups (290g) butter, at room temperature
1 cup (200g) sugar (fine)*
1/4 cup (60ml) vegetable oil
1 tsp. vanilla extract*
4 medium eggs, at room temperature
3 1/2 cups (450g) all-purpose flour*
1 tsp. baking powder
1 tsp. baking soda
1/2 tsp. salt
1 1/2 cups (360ml) buttermilk, at room temperature
2.5 oz. (70g) rainbow sprinkles
For the buttercream:
16.9 fl. oz. (500ml) milk
1.4 oz. (40g) cornstarch*
2 tbsp. sugar (fine)*
1 tsp. vanilla extract*
8.8 oz. (250g) butter, at room temperature
1/2 cup (60g) confectioners’ sugar
about 5.3 oz. (150g) fresh raspberries, halved
extra rainbow sprinkles for decorations
Für die Kuchenböden:
290g weiche Butter
200g Zucker (fein)*
60ml Pflanzenöl (z.B. Sonnenblumenöl)
1 TL Vanille Extrakt*
4 Eier (M), Zimmertemperatur
450g Mehl (Type 405)*
1 TL Backpulver
1 TL Natron
1/2 TL Salz
360ml Buttermilch, Zimmertemperatur
70g bunte Zuckerstreusel
Für die Buttercreme:
500ml Milch
40g Speisestärke*
2 EL Zucker (fein)*
1 TL Vanille Extrakt*
250g weiche Butter
60g Puderzucker
etwa 150g frische Himbeeren, halbiert
zusätzliche bunte Zuckerstreusel für die Dekoration

DIRECTIONS / ZUBEREITUNG
1. Measure out all the ingredients you need and let them come to room temperature – this way you will get the best results.
2. Preheat the oven to 180°C (350°F). Line (and lightly grease) four 20cm cake pans with baking parchment and set aside. Silicone molds* work really well here and can be used without baking parchment, for example.
3. Add butter and sugar to a large bowl and mix on high for 6-7 minutes until very light and fluffy. Add the oil and vanilla extract and mix until well combined. Next, add the eggs one after another and mix each time until well combined. In a second bowl combine flour, baking powder, baking soda, and salt. Add this mixture in three batches, alternating with the buttermilk, to the bowl, and mix until just combined. Add the rainbow sprinkles and fold them in. Divide the batter evenly between the cake pans, smooth out the tops, and bake the cake layers for about 25-26 minutes or until a wooden skewer inserted into the center of the cakes comes out clean (see note at the end). Take the cakes out of the oven and let them cool down inside the pans for some time, then remove them and let them cool down completely on a wire rack. The cake layers can be baked a day in advance – just make sure you wrap them airtight until you are ready to assemble the cake.
4. For the buttercream start by cooking a custard. Use about 3-4 tablespoons of the milk and mix it with cornstarch, sugar, and vanilla extract. Add the rest of the milk to a small saucepan and bring to a boil. Add the cornstarch mixture to the bubbling milk and stir it in. While stirring constantly let the custard cook for a moment until thickened nicely. Remove from the heat and immediately place a piece of plastic wrap (cling film) on top of the custard to prevent skin from forming. Let it cool down completely. That is something you can do a day in advance as well. If the custard gets chunky I recommend mixing it well (e.g., with an immersion blender) before using it in the buttercream.
5. To finish the buttercream add the butter and confectioners’ sugar to a large bowl and mix on high until very light and fluffy – my stand mixer needs 4-5 minutes for that. When the butter is fluffy, gradually add the custard (a spoonful each time) and mix until well combined. When all the custard is incorporated, mix for several minutes longer to get a smooth and silky buttercream.
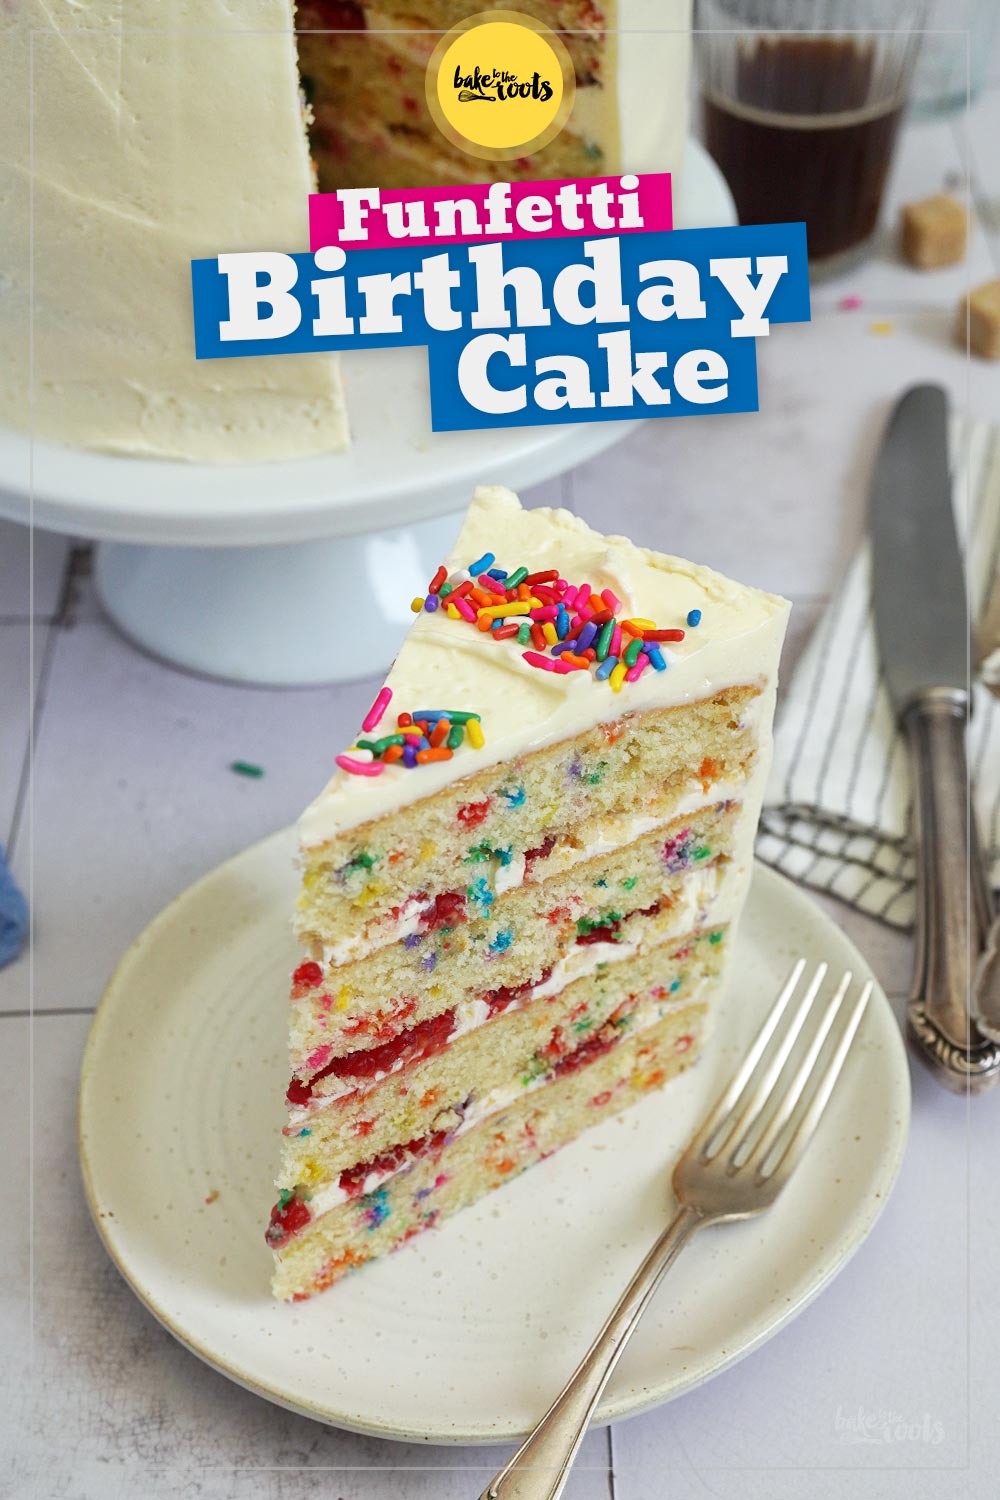
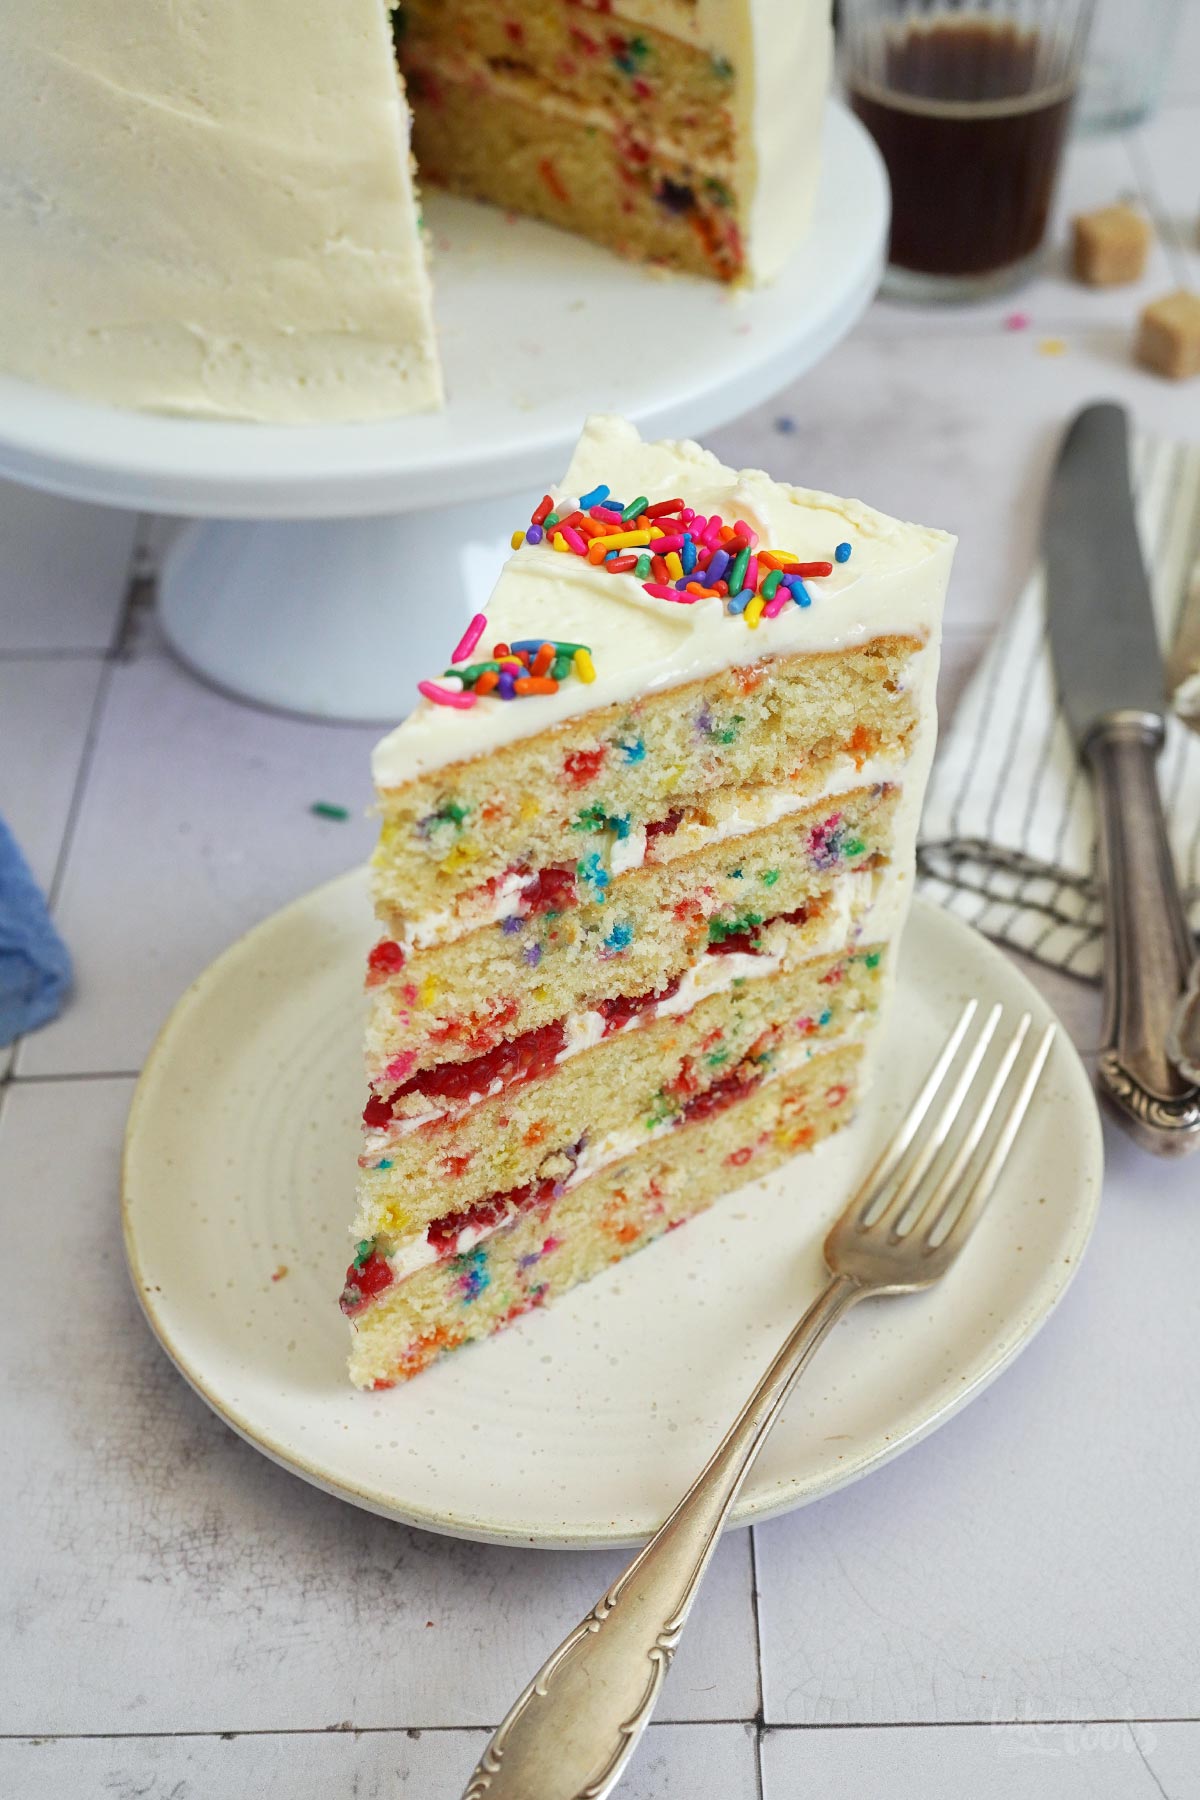
6. Before you assemble the cake, I recommend cutting off the edges of the cake layers. Use a round cutter that is slightly smaller than the cake layers and press it into the cakes to get perfectly round cake layers that are all the same size. Place the first cake layer on a serving plate and spread a small amount of buttercream on top. Press halved raspberries into the buttercream. Add the next cake layer on top and repeat the process with the buttercream and raspberries. Finish with a last cake layer and then use the remaining buttercream to completely cover the cake – top and sides. If you want the cake to look neat, you should smooth out the buttercream around the cake, but little waves here and there are also fine. Decorate the cake with some additional rainbow sprinkles to your liking.
Notes:
If your oven is not super big you most likely need to bake in two rounds – which is absolutely fine. If you have convection heat (fan) as an option for your oven, you can bake all cakes at once on several racks in the oven. Just make sure to lower the temperature to 160°C (320°F) and switch the positions of the cake pans halfway through the baking time for an even bake.
The amount of buttercream is only good for a thin layer between the cakes and on the outside (as you can see in the pictures). If you prefer cakes with more buttercream I recommend making 1.5 times the amount in the recipe.
1. Für dieses Rezept empfiehlt es sich, alle Zutaten vorab abzumessen und auf Zimmertemperatur kommen zu lassen – so erhält man das beste Ergebnis.
2. Den Ofen auf 180°C (350°F) Ober-/Unterhitze vorheizen. Vier runde Backformen (20cm) mit Backpapier auslegen und leicht einfetten. Ich verwende hier Silikonformen*, da kann man sich das Backpapier dann sparen.
3. Butter und Zucker in einer großen Schüssel etwa 6-7 Minuten auf höchster Stufe hell und luftig aufschlagen. Das Öl und den Vanille Extrakt dazugeben und unterrühren. Die Eier einzeln dazugeben und jeweils gut unterrühren. In einer separaten Schüssel, das Mehl mit Backpulver, Natron und Salz vermischen, dann in mehreren Portionen und abwechselnd mit der Buttermilch zur großen Schüssel dazugeben und nur kurz unterrühren. Nicht zu viel rühren – trotzdem sollte natürlich alles gut vermengt sein. Zum Schluss die Zuckerstreusel dazugeben und vorsichtig unterheben. Den Teig gleichmäßig auf die vorbereiteten Backformen aufteilen und glatt streichen. Die Kuchenböden für etwa 25-26 Minuten backen. Mit einem Zahnstocher testen, ob noch Teig kleben bleibt, und die Kuchen erst herausholen, wenn dieser sauber herauskommt (s. Hinweise am Ende des Rezepts). Die Kuchenböden aus dem Ofen nehmen und kurze Zeit in den Formen abkühlen lassen, dann herauslösen und auf einem Kuchengitter komplett abkühlen lassen. Die Kuchen kann man gut einen Tag im Voraus backen und nach dem Abkühlen dann luftdicht einpacken, bis es mit dem Zusammenbau der Torte weitergeht.
4. Für die Buttercreme muss als Erstes ein Pudding gekocht werden. Dafür etwa 3-4 Esslöffel der Milch mit Stärke, Zucker und Vanille Extrakt verrühren. Die restliche Milch in einem kleinen Topf zum Kochen bringen. Sobald die Milch heiß genug ist, die Stärkemischung einrühren und alles unter ständigem Rühren kurz köcheln lassen, damit der Pudding schön andicken kann. Vom Herd ziehen und dann sofort ein Stück Klarsichtfolie auf den Pudding legen, damit sich keine Haut bilden kann. Pudding vollständig abkühlen lassen. Den Pudding kann man ebenfalls einen Tag vorab zubereiten, wenn man das möchte. Sollte der Pudding nach dem Abkühlen etwas fester geworden sein, empfehle ich, ihn einmal gut durchzumixen (z.B. mit einem Pürierstab), bevor man ihn für die Buttercreme verwendet.
5. Butter und Puderzucker für die Buttercreme in einer großen Schüssel hell und luftig aufschlagen – mein Gerät braucht dafür etwa 4-5 Minuten. Sobald die Butter schön luftig ist, kann man den Pudding nach und nach (löffelweise) dazugeben und unterrühren. Wenn der komplette Pudding verarbeitet wurde, die Buttercreme noch einige Minuten zusätzlich aufschlagen, damit sie schön cremig wird.
6. Vor dem Zusammenbau der Torte empfehle ich, die Kuchenböden noch ein wenig in Form zu bringen. Dazu einfach die Böden mit einem runden Ausstecher (oder Tortenring), der etwas kleiner ist als die Kuchenböden, ausstechen – so wird man die oft sehr krosse Kruste los und bekommt gleich große Kuchenböden. Einen ersten Boden auf eine Servierplatte setzen und mit ein wenig Buttercreme bestreichen. Halbierte Himbeeren darauf verteilen und dann einen zweiten Kuchenboden auflegen. Den Prozess mit Buttercreme, Himbeeren und Kuchen wiederholen. Mit dem letzten Boden abschließen und dann die komplette Torte mit der verbliebenen Buttercreme einstreichen. Wer es ordentlich mag, arbeitet hier sauber – es ist aber auch in Ordnung, wenn man hier und da kleine Wellen in der Buttercreme sehen kann. Nach Belieben noch mit Zuckerstreuseln dekorieren.
Hinweise:
Bei einem normalgroßen Ofen bekommt man nicht alle vier Backformen auf einen Rost – es ist also in Ordnung, wenn man hier in zwei Runden backt. Wer einen Ofen mit Umluft hat, kann alles auf einmal in mehreren Ebenen backen. Dazu sollte man die Ofentemperatur dann aber auf 160°C (320°F) senken und die Kuchen nach der Hälfte der Backzeit einmal die Positionen tauschen lassen, damit alles gleichmäßig backt.
Die Menge der Buttercreme aus dem Rezept reicht nur für eine recht dünne Schicht zwischen den Torten und außenrum – kann man auf den Fotos sehen. Wer es hier üppiger mag, sollte besser die 1,5-fache Menge des Rezeptes zubereiten.
Craving more? Keep in touch on Facebook, Instagram and Pinterest for new post updates and more. You can also contact me with any questions or inquiries!
Here is a version of the recipe you can print easily.
Print
Funfetti Birthday Cake
- Prep Time: 01:00
- Cook Time: 00:25
- Total Time: 04:00
- Yield: 1 1x
- Category: Cakes
- Method: -
- Cuisine: International
- Diet: Vegetarian
Description
The perfect »little« cake to celebrate your birthday (or any other event) – a delicious Funfetti Birthday Cake! Great flavors and fun to look at.
Ingredients
For the cake layers:
1 1/4 cups (290g) butter, at room temperature
1 cup (200g) sugar (fine)*
1/4 cup (60ml) vegetable oil
1 tsp. vanilla extract*
4 medium eggs, at room temperature
3 1/2 cups (450g) all-purpose flour*
1 tsp. baking powder
1 tsp. baking soda
1/2 tsp. salt
1 1/2 cups (360ml) buttermilk, at room temperature
2.5 oz. (70g) rainbow sprinkles
For the buttercream:
16.9 fl. oz. (500ml) milk
1.4 oz. (40g) cornstarch*
2 tbsp. sugar (fine)*
1 tsp. vanilla extract*
8.8 oz. (250g) butter, at room temperature
1/2 cup (60g) confectioners‘ sugar
about 5.3 oz. (150g) fresh raspberries, halved
extra rainbow sprinkles for decorations
Instructions
1. Measure out all the ingredients you need and let them come to room temperature – this way you will get the best results.
2. Preheat the oven to 180°C (350°F). Line (and lightly grease) four 20cm cake pans with baking parchment and set aside. Silicone molds* work really well here and can be used without baking parchment, for example.
3. Add butter and sugar to a large bowl and mix on high for 6-7 minutes until very light and fluffy. Add the oil and vanilla extract and mix until well combined. Next, add the eggs one after another and mix each time until well combined. In a second bowl combine flour, baking powder, baking soda, and salt. Add this mixture in three batches, alternating with the buttermilk, to the bowl, and mix until just combined. Add the rainbow sprinkles and fold them in. Divide the batter evenly between the cake pans, smooth out the tops, and bake the cake layers for about 25-26 minutes or until a wooden skewer inserted into the center of the cakes comes out clean (see note at the end). Take the cakes out of the oven and let them cool down inside the pans for some time, then remove them and let them cool down completely on a wire rack. The cake layers can be baked a day in advance – just make sure you wrap them airtight until you are ready to assemble the cake.
4. For the buttercream start by cooking a custard. Use about 3-4 tablespoons of the milk and mix it with cornstarch, sugar, and vanilla extract. Add the rest of the milk to a small saucepan and bring to a boil. Add the cornstarch mixture to the bubbling milk and stir it in. While stirring constantly let the custard cook for a moment until thickened nicely. Remove from the heat and immediately place a piece of plastic wrap (cling film) on top of the custard to prevent skin from forming. Let it cool down completely. That is something you can do a day in advance as well. If the custard gets chunky I recommend mixing it well (e.g., with an immersion blender) before using it in the buttercream.
5. To finish the buttercream add the butter and confectioners‘ sugar to a large bowl and mix on high until very light and fluffy – my stand mixer needs 4-5 minutes for that. When the butter is fluffy, gradually add the custard (a spoonful each time) and mix until well combined. When all the custard is incorporated, mix for several minutes longer to get a smooth and silky buttercream.
6. Before you assemble the cake, I recommend cutting off the edges of the cake layers. Use a round cutter that is slightly smaller than the cake layers and press it into the cakes to get perfectly round cake layers that are all the same size. Place the first cake layer on a serving plate and spread a small amount of buttercream on top. Press halved raspberries into the buttercream. Add the next cake layer on top and repeat the process with the buttercream and raspberries. Finish with a last cake layer and then use the remaining buttercream to completely cover the cake – top and sides. If you want the cake to look neat, you should smooth out the buttercream around the cake, but little waves here and there are also fine. Decorate the cake with some additional rainbow sprinkles to your liking.
Notes
If your oven is not super big you most likely need to bake in two rounds – which is absolutely fine. If you have convection heat (fan) as an option for your oven, you can bake all cakes at once on several racks in the oven. Just make sure to lower the temperature to 160°C (320°F) and switch the positions of the cake pans halfway through the baking time for an even bake.
The amount of buttercream is only good for a thin layer between the cakes and on the outside (as you can see in the pictures). If you prefer cakes with more buttercream I recommend making 1.5 times the amount in the recipe.
Links marked with an asterisk (*) are affiliate links (advertising/Werbung) to Amazon Germany. If you click on one of those links and buy something via this link, I will get a commission for that sale. The price of whatever you buy is not affected in any way by this.