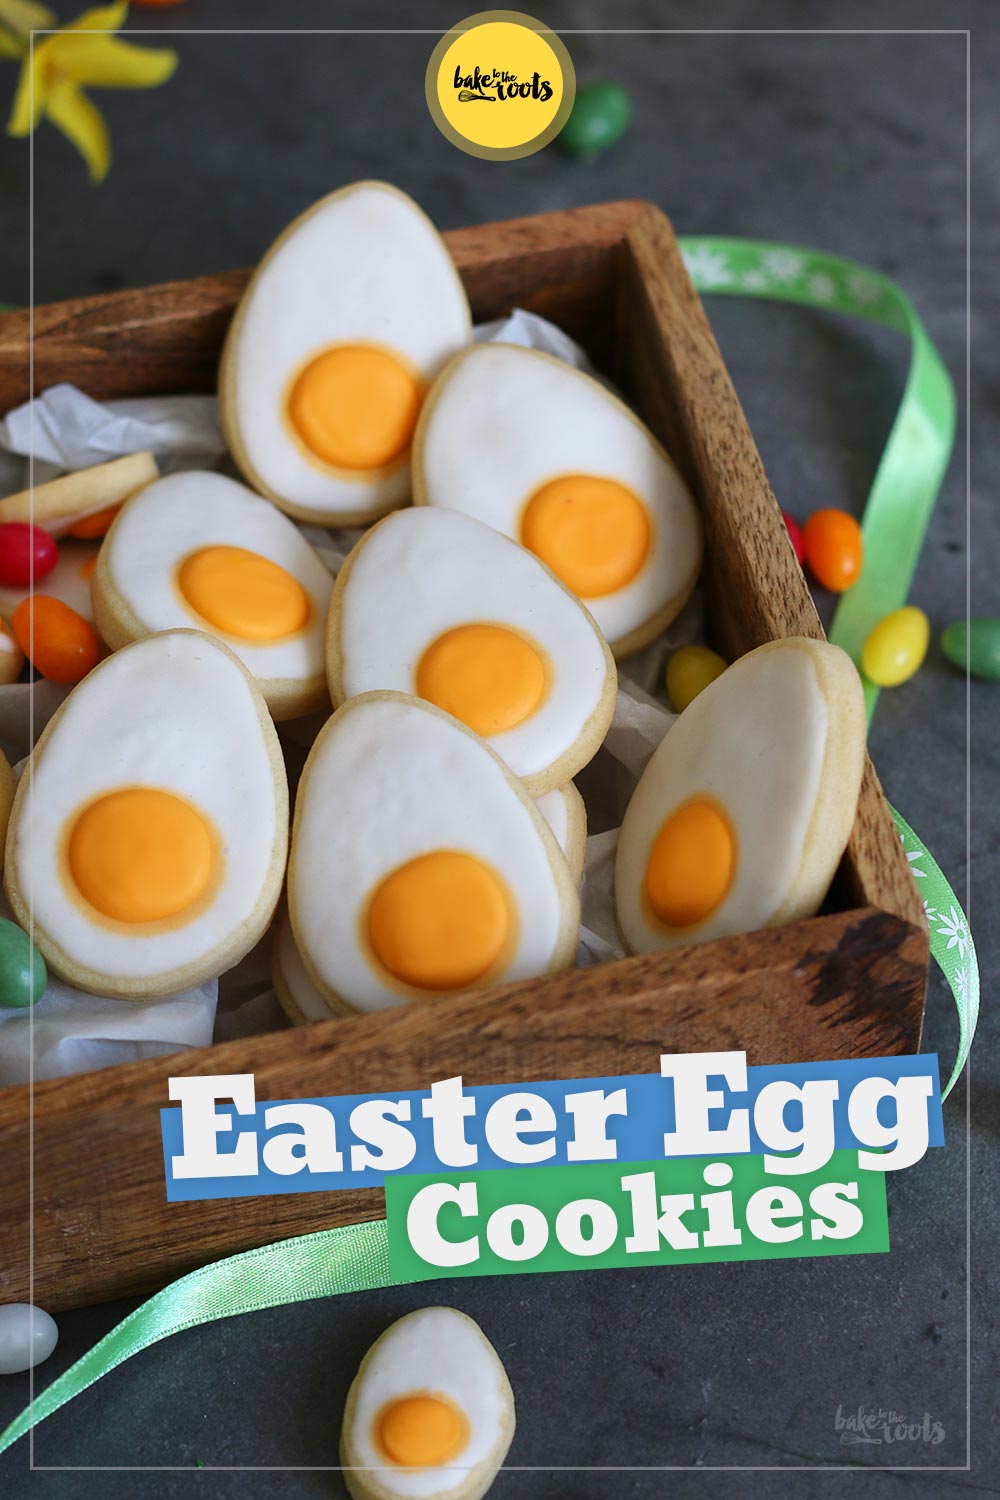
Easter without any Easter eggs is hard to imagine, right? Of course, they don’t necessarily have to be real eggs from the Easter Bunny, also not everyone likes chocolate eggs… How about Easter Egg Sugar Cookies? That’s something “eggy” you can nibble on, or you can use those eggs to decorate Easter nests. I think they make a pretty good addition to the good old chocolate Easter Bunny and all those other sweets you normally get ;)

I am not sure if this is the same everywhere in the world, but if you live in Germany you will definitely feel reminded of other Easter sweets if you look at these eggs here. Around Easter, you can get small Fondant Easter Eggs in basically every supermarket here in Germany. I used to like them a lot… these days, to be honest, I break out in a sweat just thinking about them. They are pure sugar bombs (with a tiny bit of chocolate to keep them in shape and some food color). If I’ve read correctly on a package they consist of more or less 90% sugar. That’s a bit much, to be honest. I feel safe to say – you should not eat that. Ever ;P
If you like the idea of a sweet treat that looks like an egg you can easily make something similar. Without that much sugar. Still with sugar, but much less ;) Simple sugar cookies with some white and orange icing to make them look like eggs… or is it a sunny side up egg or a hard-boiled egg cut in half? Well… you know what I mean ;)
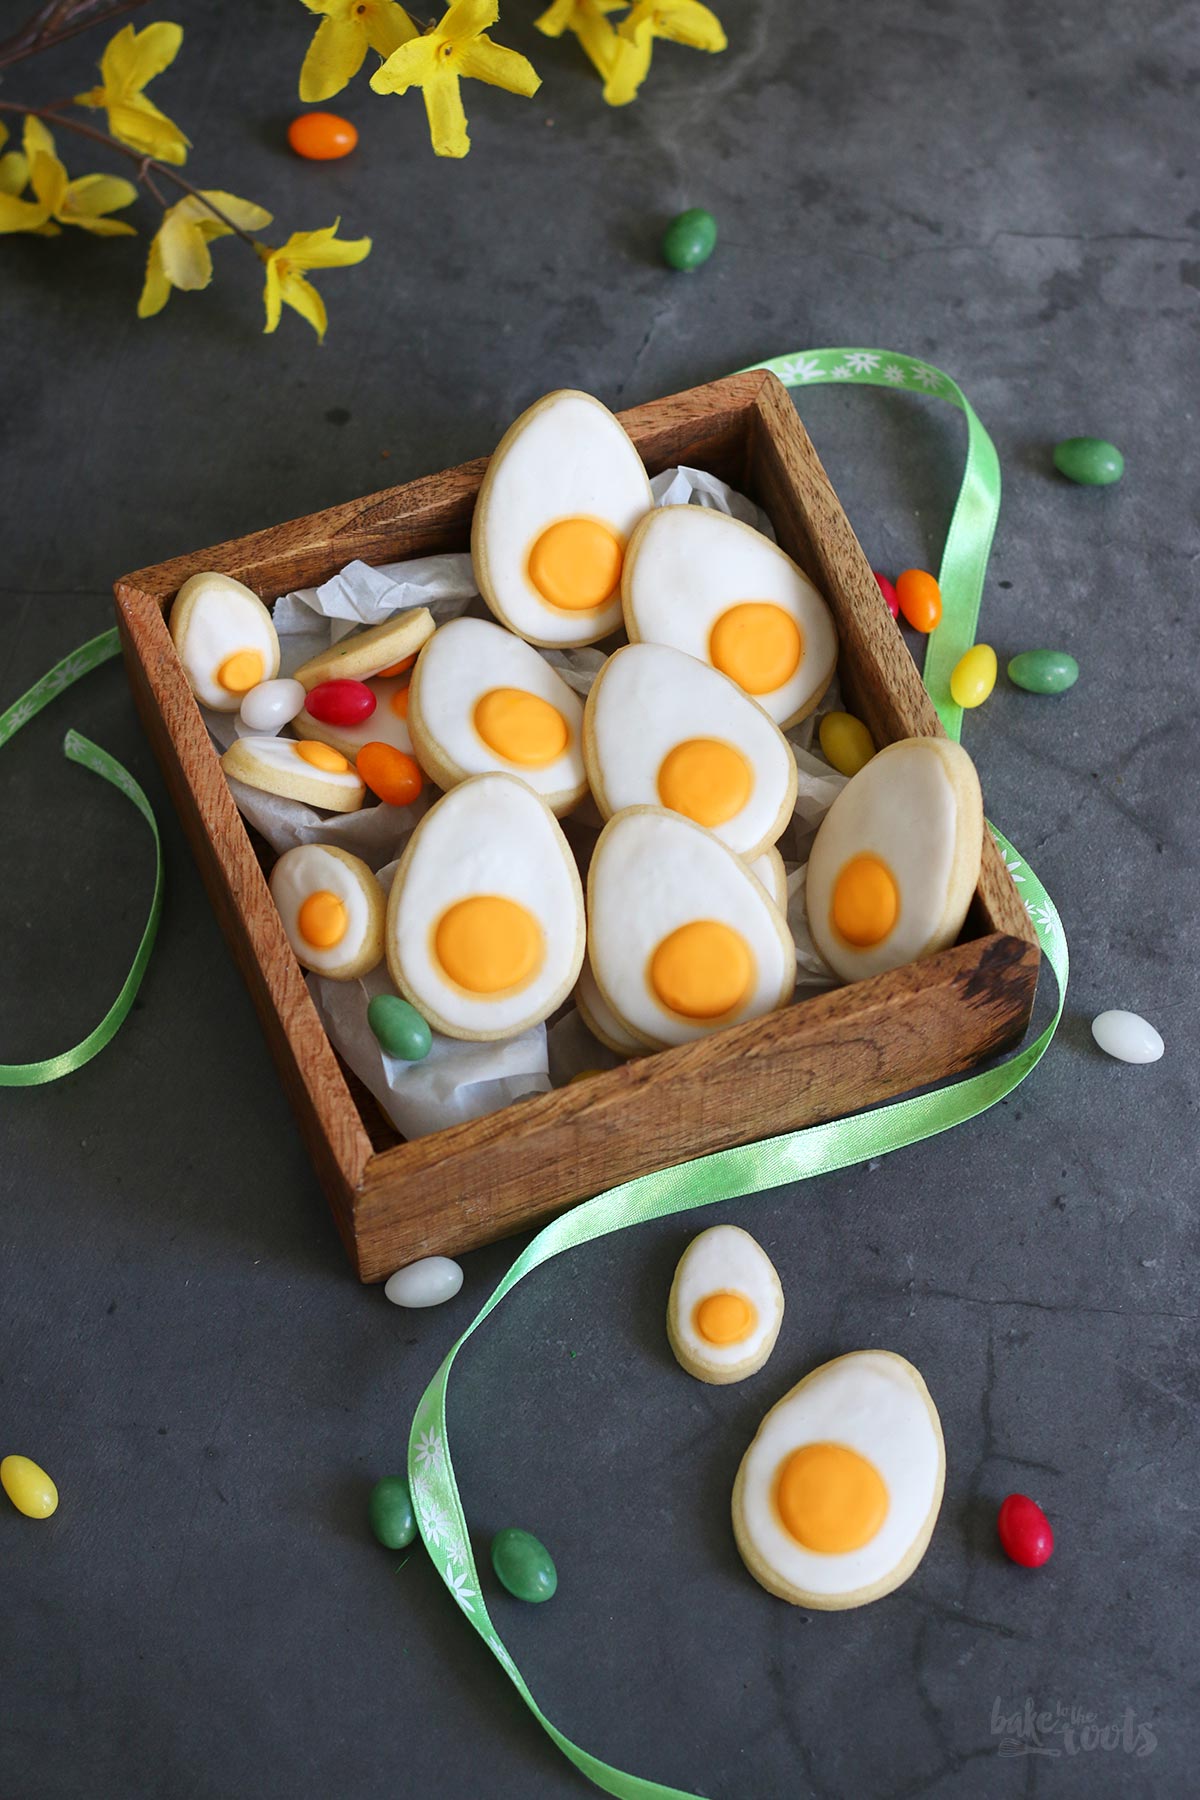
These Easter egg cookies are very easy to make. Basic cookies and a simple royal icing everybody will manage to whip up. There is something that can be tricky though. Something that can get you into trouble. Happened to me ;) I am not the most patient person when it comes to waiting times during baking. This means I did not wait long enough for the first royal icing layer to harden and get dry on these cookies here. When I added the second layer – the orange egg yolks – to the cookies the color, unfortunately, bled into the layer beneath. I think you can see that well in the pictures. Something that can be avoided easily. Give the cookies and the royal icing enough time to dry (best overnight) and you will not get small Easter Egg Cookies with an aura around the egg yolks ;P
INGREDIENTS / ZUTATEN
For the dough:
1 3/4 cups (220g) all-purpose flour
1/2 cup (70g) confectioners’ sugar
1 pinch of salt
2/3 cup (150g) cold butter
1 small egg
1/2 tsp. vanilla extract
For the Royal Icing:
15-18 oz. (450-520g) confectioners’ sugar
1/2 tsp. cream of tartar*
3 medium egg whites, plus more if necessary
1 tsp. lemon juice
orange food color
Für den Teig:
220g Mehl (Type 405)
70g Puderzucker
1 Prise Salz
150g kalte Butter
1 Ei (S)
1/2 TL Vanille Extrakt
Für das Royal Icing:
450-520g Puderzucker
1/2 TL reiner Weinstein (Cream of Tartar*)
3 Eiweiß (M), plus ggf. mehr
1 TL frischer Zitronensaft
orange Lebensmittelfarbe


DIRECTIONS / ZUBEREITUNG
2. Preheat the oven to 350°F (175°C). Line a baking sheet with baking parchment and set aside. Divide the dough in half (keep one half in the fridge) and roll out thinly on a lightly floured surface. Use an egg cookie cutter* to cut out eggs and place them on the baking sheet. Collect leftover dough and roll out again to get more cookies. Bake for about 10 minutes – the cookies should not get much of a color. Take out of the oven and let cool down on the baking sheet for some time, then transfer to a wire rack to cool down completely. Bake more cookies with the remaining dough sitting in the fridge.
3. For the royal icing mix about 15 oz. (450g) of the confectioners’ sugar and the cream of tartar* in a large bowl. Add the egg whites and lemon juice and mix until you get a smooth and glossy icing. The icing should be thick, but not too firm – you want it to still flow off a spoon when you get it out of the bowl. Fill a few tablespoons of the icing into a piping bag fitted with a small round piping tip. Pipe thin lines at the edges of the egg cookies (creating borders) and let dry for 5-10 minutes. Use the remaining icing to flood the cookies inside the borders. Use a small spatula to smooth the icing and spread it up to the edges of the cookies. If the icing is too thick for this, mix it again with some egg white and/or lemon juice to make it a little more pliable. Let the cookies dry for at least 8 hours (bit longer is even better). Store the remaining icing in an airtight container in the fridge.
4. Once the icing on the cookies is dry, color the remaining icing orange. You probably won’t need all of it. You can store leftovers in the fridge for a few days and decorate other cookies. Add the orange royal icing to a piping bag (round piping tip) and pipe the “yolks” onto the (dry) iced cookies and let dry once again for at least 4 hours. Store the finished cookies in an airtight tin in a cool place.
Tip: Let the cookies really dry for at least 8 hours in the first round, maybe even longer. Otherwise, there is a chance that the orange icing will “bleed” into the white icing over time and that does not look pretty.
2. Den Ofen auf 175°C (350°F) Ober-/Unterhitze vorheizen. Ein Backblech mit Backpapier auslegen und zur Seite stellen. Den Teig halbieren und auf einer leicht bemehlten Fläche dünn ausrollen (Rest im Kühlschrank lassen). Mit einem Ausstecher* Cookies in Form von Eiern ausstechen und auf das Blech setzen. Teigreste sammeln, erneut ausrollen und noch mehr Eier ausstechen. Für etwa 10 Minuten backen – die Kekse sollten kaum Farbe bekommen haben. Aus dem Ofen holen und erst auf dem Blech kurz abkühlen lassen und dann auf einem Kuchengitter komplett abkühlen lassen. Mit dem restlichen Teig noch mehr Kekse backen.
3. Für das Royal Icing erst einmal etwa 450g des Puderzuckers und den Weinstein* in einer großen Schüssel vermischen. Das Eiweiß und den Zitronensaft dazugeben und gut verrühren, bis eine glatte und glänzende Masse entstanden ist. Das Icing sollte dickflüssig, aber nicht zu fest sein – es sollte immer noch von einem Löffel runterfließen, wenn man es aus der Schüssel holt. Einige Esslöffel des Icing in einen Spritzbeutel mit kleiner runder Tülle füllen. Die äußere Kante der Eier-Cookies mit einer Outline (Rand) versehen und für 5-10 Minuten trocknen lassen. Mit dem Icing (vielleicht mit etwas größerer Tülle) die Cookies “flooden” – sprich die Fläche innerhalb der Outlines (Ränder) mit Icing füllen. Mit einem kleinen Spatel das Icing glätten und bis zu den Rändern der Cookies verteilen. Sollte das Icing zu dick dafür sein, noch einmal mit etwas Eiweiß und/oder Zitronensaft verrühren, damit es etwas gefügiger wird. Die Cookies für mindestens 8 Stunden (besser länger) trocknen lassen. Das restliche Icing in einer luftdichten Dose im Kühlschrank aufbewahren.
4. Sobald das Icing auf den Cookies trocken ist, das restliche Icing orange einfärben. Ihr werdet vermutlich nicht alles benötigen. Reste kann man einige Tage im Kühlschrank aufbewahren und noch weitere Cookies dekorieren. Das orange Royal Icing in einen Spritzbeutel füllen und die “Eigelbe” auf die getrockneten Cookies aufspritzen und noch einmal mindestens 4 Stunden trocknen lassen. Cookies in einer luftdichten Dose an einem kühlen Ort aufbewahren.
Tipp: Lasst die Cookies in der ersten Runde wirklich mindestens 8 Stunden trocknen – eventuell sogar länger – sonst besteht die Chance, dass das orange Icing später in das weiße Icing “ausblutet” und das schaut dann nicht schön aus.

Craving more? Keep in touch on Facebook, Twitter, Instagram and Pinterest for new post updates and more. You can also contact me with any questions or inquiries!
Here is a version of the recipe you can print easily.
Print
Easter Egg Sugar Cookies
- Prep Time: 00:30
- Cook Time: 00:10
- Total Time: 16:00
- Yield: 40 1x
- Category: Cookies
- Cuisine: America
- Diet: Vegetarian
Description
You definitely need Easter Eggs for Easter. They don’t have to be real. How about some Easter Egg Sugar Cookies to munch and for decorations?
Ingredients
For the dough:
1 3/4 cups (220g) all-purpose flour
1/2 cup (70g) confectioners’ sugar
1 pinch of salt
2/3 cup (150g) cold butter
1 small egg
1/2 tsp. vanilla extract
For the Royal Icing:
15-18 oz. (450-520g) confectioners’ sugar
1/2 tsp. cream of tartar*
3 medium egg whites, plus more if necessary
1 tsp. lemon juice
orange food color
Instructions
1. Add the flour, confectioners’ sugar, and salt to a large bowl and mix to combine. Add the cold butter in small pieces and cut into even smaller pieces with a pastry blender*. Whisk the egg and add together with the vanilla extract to the bowl – mix with a fork first, then knead with your hands to get a nice smooth dough. Try to work quickly so the butter is not melting. Wrap the dough in plastic wrap and place in the fridge for at least 1 hour or overnight.
2. Preheat the oven to 350°F (175°C). Line a baking sheet with baking parchment and set aside. Divide the dough in half (keep one half in the fridge) and roll out thinly on a lightly floured surface. Use an egg cookie cutter* to cut out eggs and place them on the baking sheet. Collect leftover dough and roll out again to get more cookies. Bake for about 10 minutes – the cookies should not get much of a color. Take out of the oven and let cool down on the baking sheet for some time, then transfer to a wire rack to cool down completely. Bake more cookies with the remaining dough sitting in the fridge.
3. For the royal icing mix about 15 oz. (450g) of the confectioners’ sugar and the cream of tartar* in a large bowl. Add the egg whites and lemon juice and mix until you get a smooth and glossy icing. The icing should be thick, but not too firm – you want it to still flow off a spoon when you get it out of the bowl. Fill a few tablespoons of the icing into a piping bag fitted with a small round piping tip. Pipe thin lines at the edges of the egg cookies (creating borders) and let dry for 5-10 minutes. Use the remaining icing to flood the cookies inside the borders. Use a small spatula to smooth the icing and spread it up to the edges of the cookies. If the icing is too thick for this, mix it again with some egg white and/or lemon juice to make it a little more pliable. Let the cookies dry for at least 8 hours (bit longer is even better). Store the remaining icing in an airtight container in the fridge.
4. Once the icing on the cookies is dry, color the remaining icing orange. You probably won’t need all of it. You can store leftovers in the fridge for a few days and decorate other cookies. Add the orange royal icing to a piping bag (round piping tip) and pipe the “yolks” onto the (dry) iced cookies and let dry once again for at least 4 hours. Store the finished cookies in an airtight tin in a cool place.
Notes
Let the cookies really dry for at least 8 hours in the first round, maybe even longer. Otherwise there is a chance that the orange icing will “bleed” into the white icing over time and that does not look pretty.
Links marked with an asterisk (*) are affiliate links (advertising/Werbung) to Amazon Germany. If you click on one of those links and buy something via this link, I will get a commission for that sale. The price of whatever you buy is not affected in any way by this.