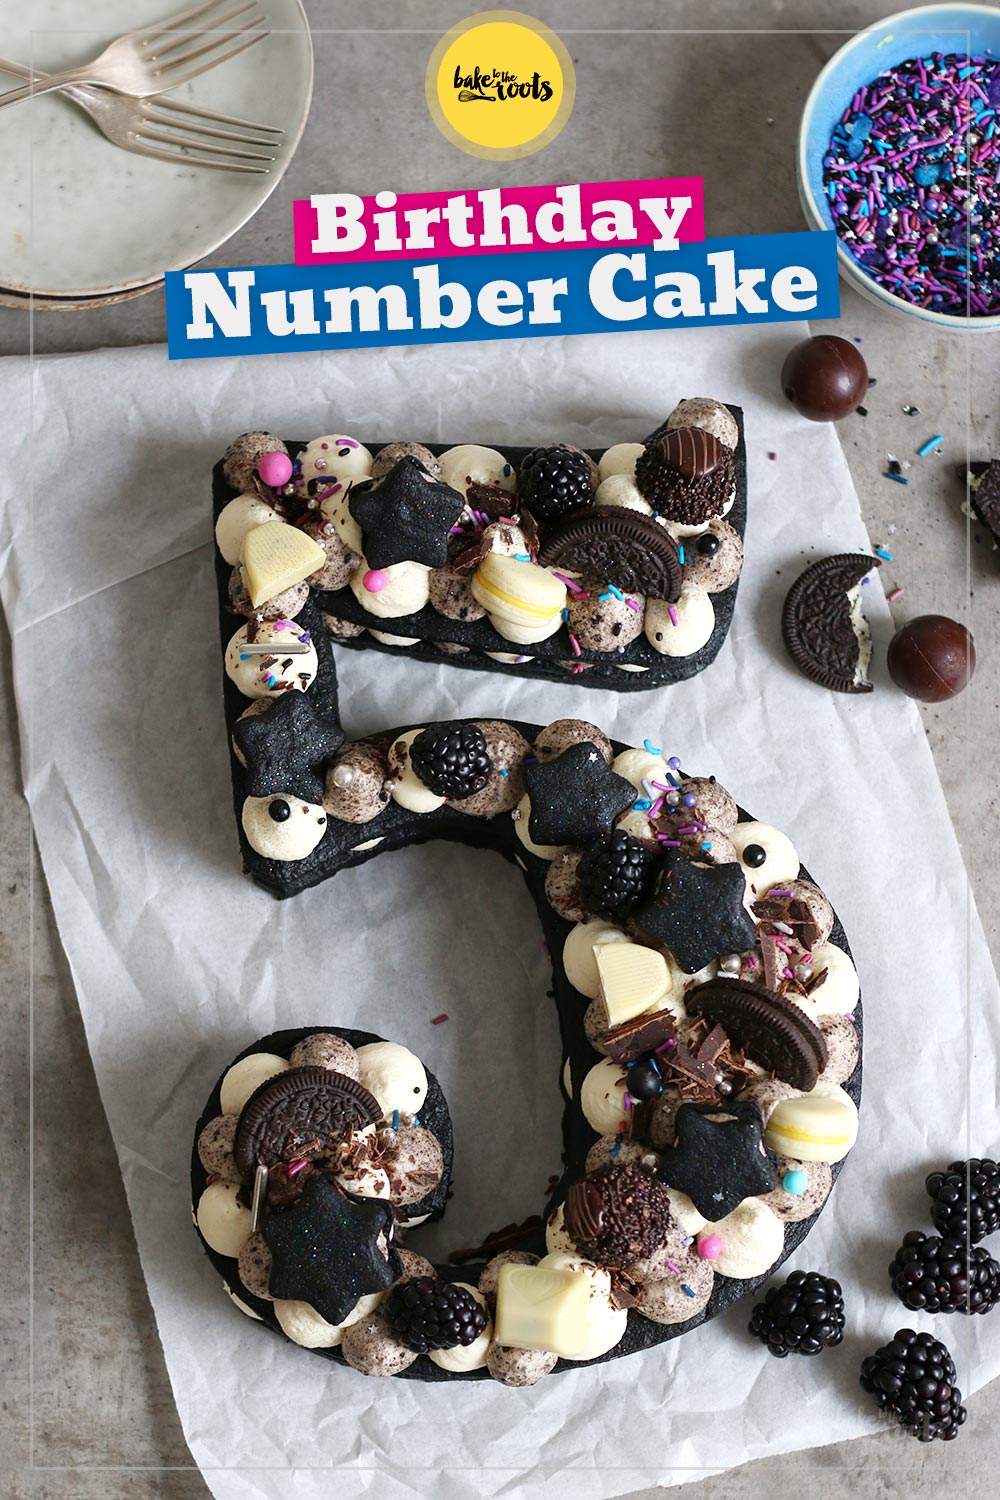
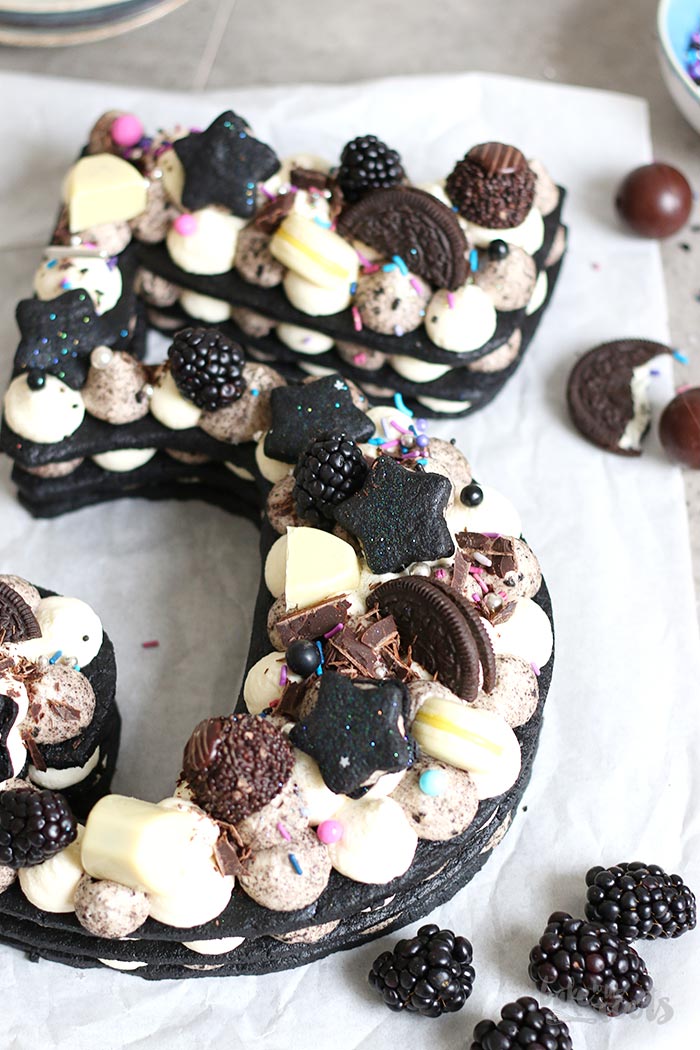
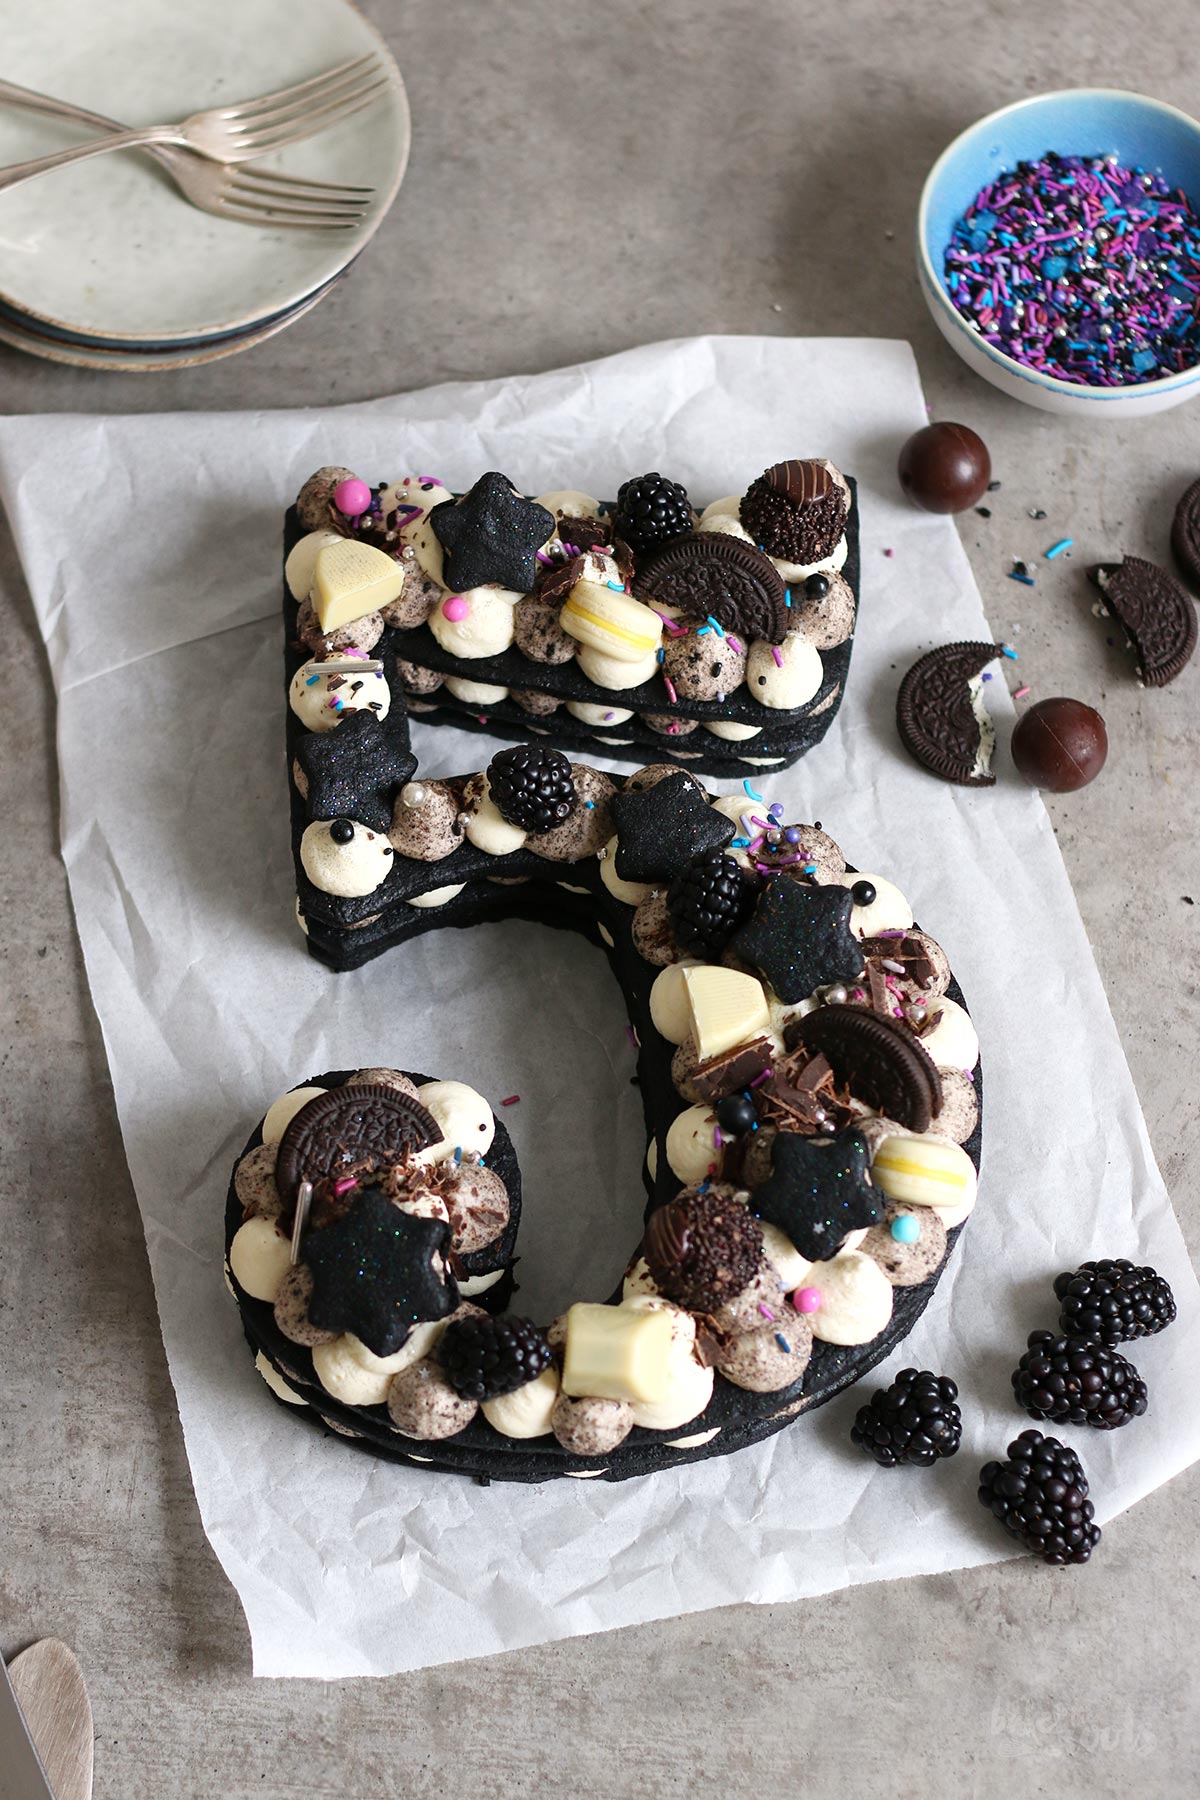
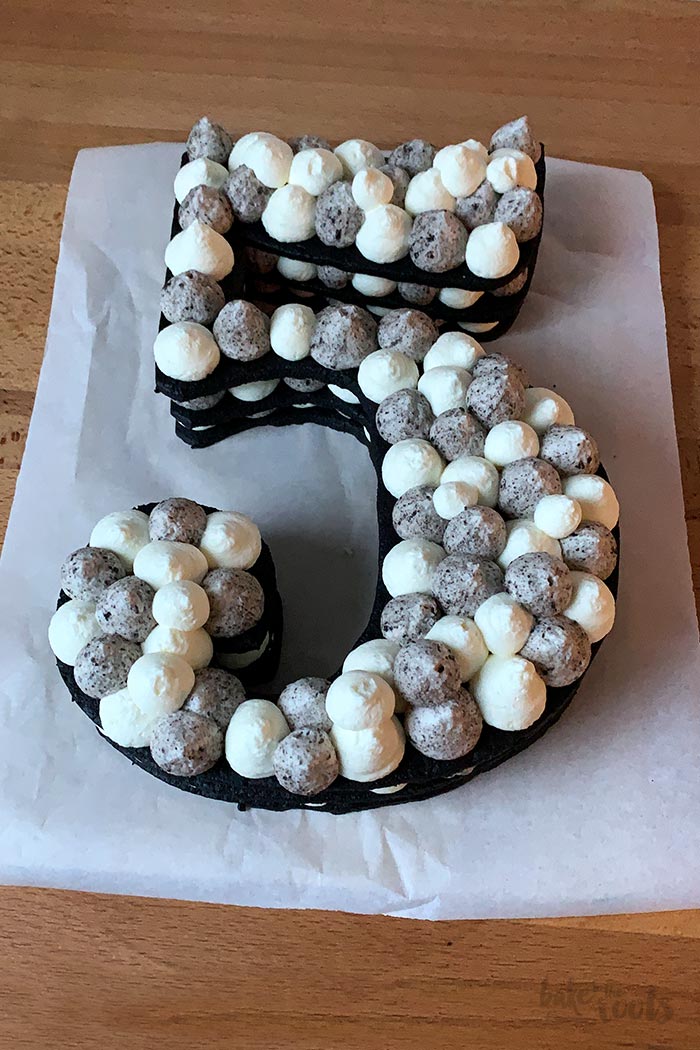
Happy Birthday to meeeeee! Well, not really me but Happy Birthday »Bake to the roots«! Five years have passed since I published something for the first time on here. Quite some time, right? To celebrate this day, I made an Oreo Cookie Cream Number Cake with guess what number? Five! So let’s get the party started! Well… maybe I should also invite some people? That cake is enough for several people.

Well… what can I say? It all started in January 2014. I posted a recipe for Tiramisu Cupcakes. There was not much to say back then so the articles turned out pretty short. Basically only the recipe plus a couple of sentences. That changed a bit over the years. Many blogs that started around the same time as me do not exist anymore, so I guess I am doing pretty well. My five years are nothing compared to the time other blogs already exist though. Two of my blogger colleagues – Gabi from »USA kulinarisch« and Zorra from »1x umrühren bitte aka. kochtopf« have been blogging since the Stone Age… no offense. I am very much impressed that they still do it and also so well. Let’s see if this blog still exists in 10 years…
There was a lot going on last year. And a lot of work. Some of you might know that I do this blog here only »on the side«. Normally I am working as an Art Director and since I am working in an agency again and not as a freelancer, things changed. I have to commute each day for quite some time now, so most of the articles you can read here have been written on a train, metro or tram. The three hours on public transportation each day have to be used to get some stuff done and not only sleep. So baking mostly happens on weekends now… like this birthday cake today. Fortunately, I also had some days off so I did not have to rush getting it ready.
Compared to the previous year I had to travel less this year for the blog. Instead, we had time to go on vacation to Thailand and Bali. Really nice places! If you ever go, you definitely have to check out Ubud. Such a lovely place! Maybe I should post some more pictures on my Instagram Travel Account so you can see for yourself.
Last year I also did a workshop for the first time. Not attending but showing people how to bake and decorate cupcakes. It’s an interesting experience to do it outside your own kitchen with many other people. I think it is really amazing what a hobby can turn into over the years. You end up on tv, newspapers, and magazines, travel around the world, sail the seven seas, write books… I would have never imagined anything like that to happen when I started this little blog with my first cupcakes five years ago. I just wanted to share some of my recipes.
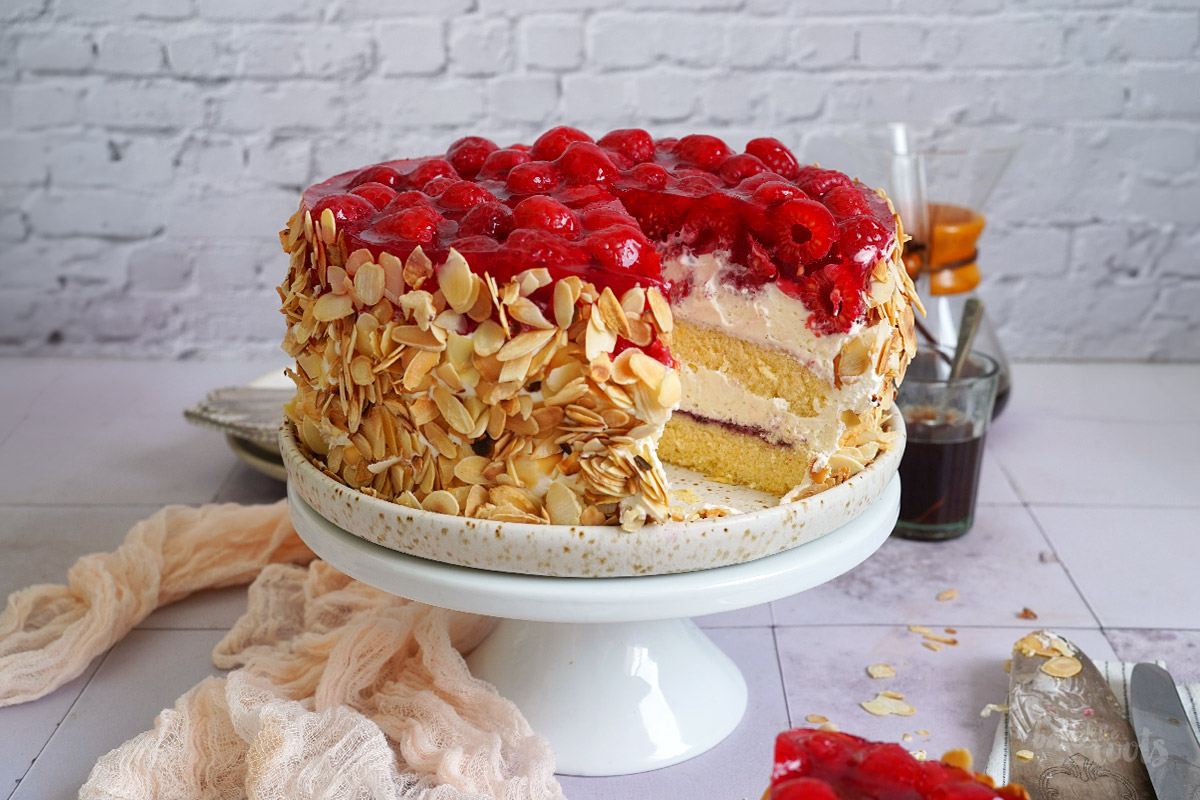
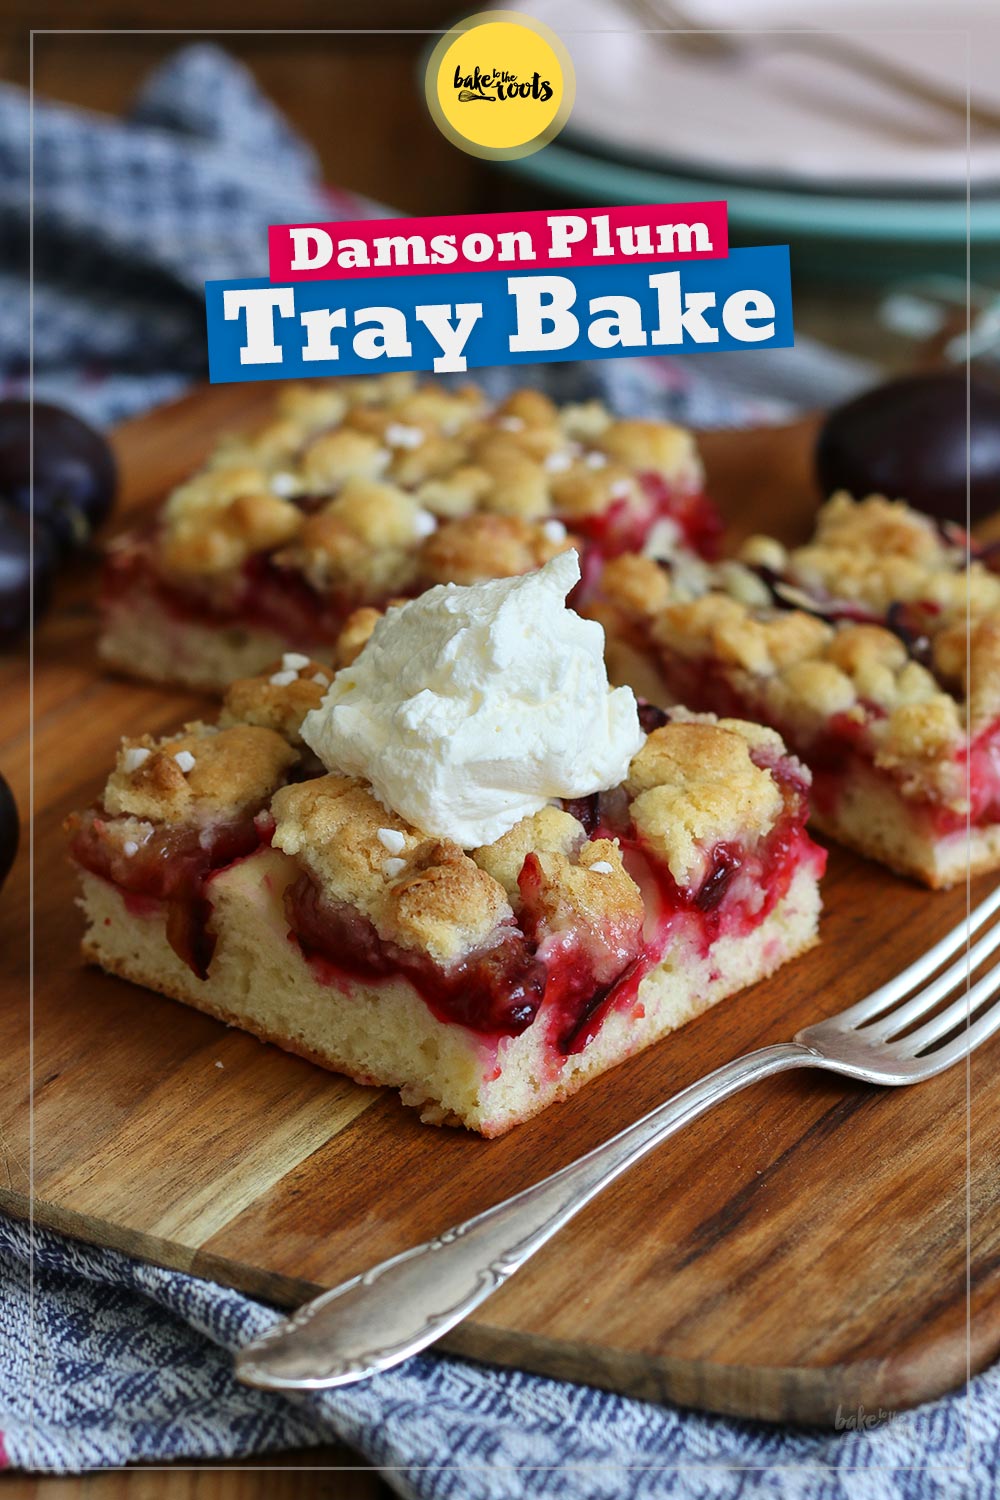
Well… back to the baking. I did this in a previous year already – showing you the best and worst of the blog from the previous year. With the top three recipes not much changed. Top spot (like the year before) belongs to my Hazelnut Nougat Mascarpone Cake with Toffifee. Runner-up is the recipe for a Plum Cake Tray Bake and again my Japanese Cotton Cheesecake on third place. I was a bit surprised that a savory recipe – my homemade pizza sauce – made it to the top 10 recipes. Very unusual for this blog.
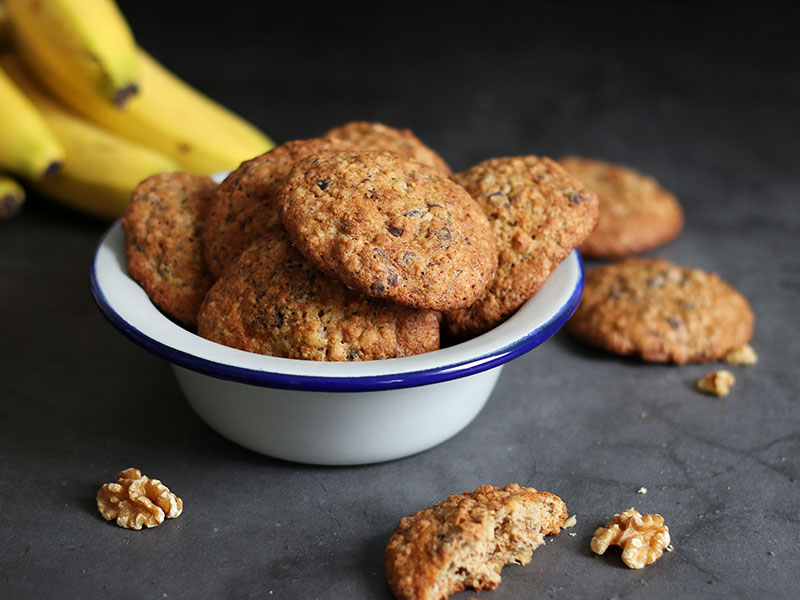
On the very end of my list are this time my raspberry vanilla jam, my homemade cranberry sauce and some compost cookie bars. I am not really surprised about the cookie bars. Even though they taste delicious, they do not look good. Maybe I have to make them again and get better pictures so more people want to make them.

Well… I have to say »Thank You!« to all my followers and readers of this blog here. If you were not coming back over and over again for the recipes, I would not have made it to the 5-year mark. Also thank you for all those kind comments and message you sent.
Thanks as well to all my blogger colleagues I meet from time to time and especially to my blogger bestie Andrea from Zimtkeks & Apfeltarte. We are currently in our third year of »Bake Together« and it is still a lot of fun doing it! Thanks as well to all the companies, publisher and magazines for all the nice collabs last year! What do you think? Five more years or even longer?
INGREDIENTS / ZUTATEN
For the dough:
1/2 cup (120g) butter, room temperature
1 cup (200g) sugar (fine)*
1 large egg
1 tsp. vanilla extract*
1 1/2 cups (200g) stronger all-purpose flour*
1/2 cup (60g) dark cocoa powder*
1/2 tsp. baking powder
1/2 tsp. salt
For the Oreo cream:
8-9 Oreos*
1 1/2 cups (360ml) cold heavy cream
1/2 cup (60g) confectioners’ sugar*
1 tbsp. cream stiffener*
For the whipped cream:
1 1/2 cups (360ml) cold heavy cream
1/2 cup (60g) confectioners’ sugar*
1 tbsp. cream stiffener*
1/2 tsp. vanilla extract*
For the decoration:
chocolate candy, sprinkles, macarons, chocolate shavings etc.
Für den Teig:
120g weiche Butter
200g Zucker (fein)*
1 Ei (L)
1 TL Vanille Extrakt*
200g Mehl (Type 550)*
60g schwarzes Kakaopulver*
1/2 TL Backpulver
1/2 TL Salz
Für die Oreo-Creme:
8-9 Oreos*
360ml kalte Schlagsahne
60g Puderzucker*
1 EL Sahnesteif*
Für die Schlagsahne:
360ml kalte Schlagsahne
60g Puderzucker*
1 EL Sahnesteif*
1/2 TL Vanille Extrakt*
Für die Dekoration:
Schokoriegel, Sprinkles, Macarons, Schokoraspeln usw.
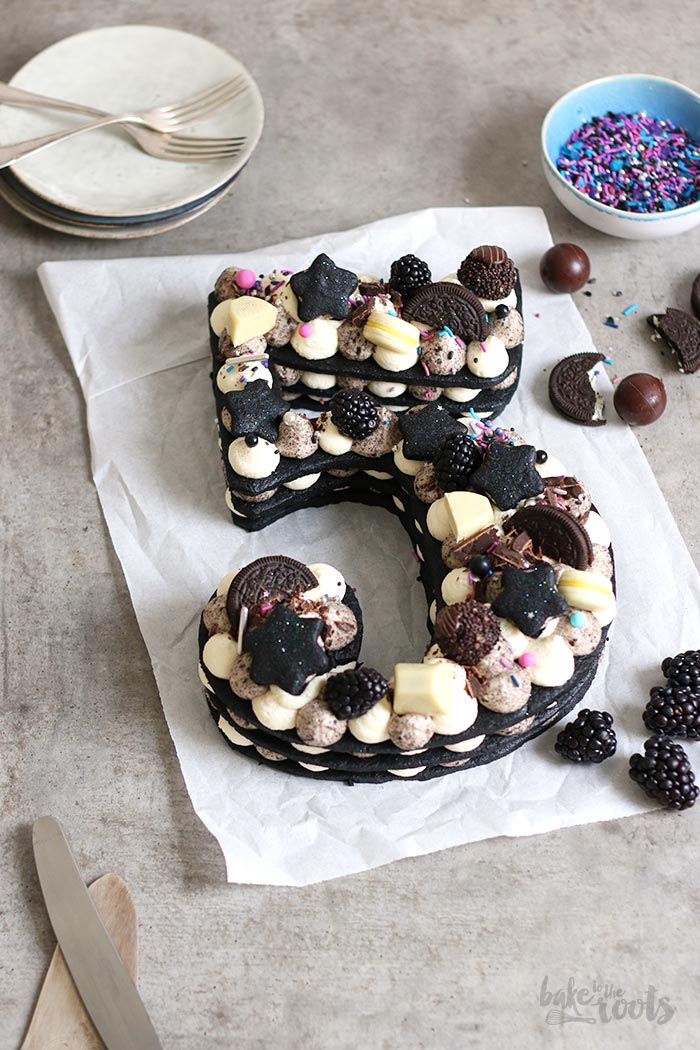
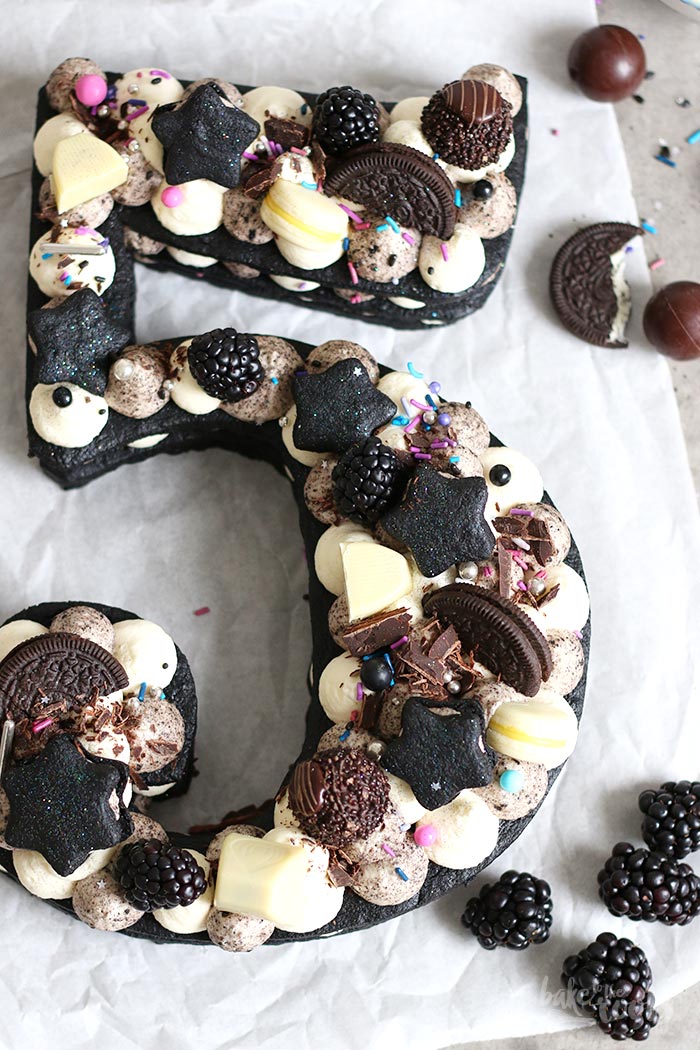
When it comes to decorating this cake, you should get as creative as possible. Go berserk with the decorations. More is more in this case. I decided to stick with a black’n’white theme and only some color with some sprinkles – you should do as much color as possible! If berries are in season – use them! You can also color the whipped cream if you are into that. More color means more fun.
DIRECTIONS / ZUBEREITUNG
1. Add the butter and sugar to a large bowl and mix first slowly, then on high speed until light and fluffy. Add the egg and vanilla extract and mix until well combined. Mix the flour with cocoa powder, baking powder, and salt in a smaller bowl and then sift into the bowl with the butter/sugar – mix until just combined. Shape the dough into a ball and place it in the fridge for about 30 minutes.
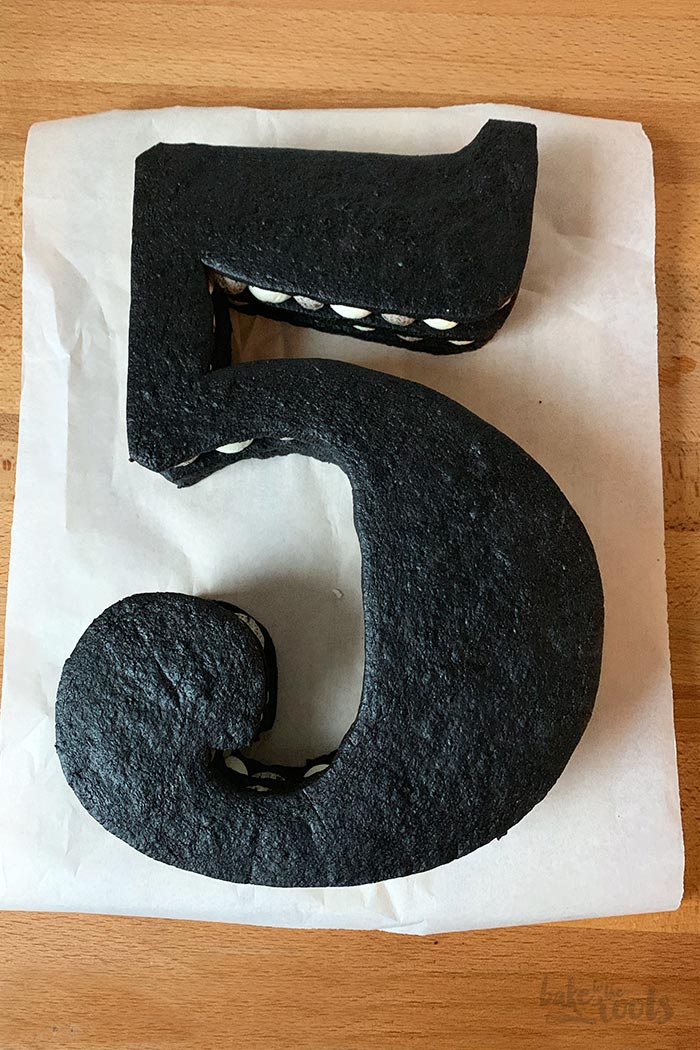
2. Preheat the oven to 180°C (350°F). Draw the number you want to make on a piece of cardboard or paper and cut it out. Take about 1/2 of the dough and roll it out on a piece of baking parchment to a thickness of about 0,5cm. This works best with a second sheet of baking parchment on top. Place your number on the dough and cut it out. Remove the dough around it and transfer the number with the baking parchment on a baking sheet or wooden board and place that in the fridge for about 20 minutes. Cooling the dough helps it to keep the shape. You can bake without freezing it, but then the dough will spread more. Bake the cake layer for about 10-12 minutes until firm. Take it out of the oven, remove it with the baking parchment from the baking sheet and let it cool down on a wire rack. Repeat with the remaining dough. With the third layer you might have to be a bit creative and do some patchwork to get a full number. With my »5« I had enough dough to also cut out some stars at the end for the decoration.
3. For the Oreo cream separate the filling from the cookies and place it in a small microwave-safe bowl. Add the cookies to a freezer bag and crush with a rolling pin to get fine crumbs. Set aside. Microwave the cream filling in several steps until melted. Set aside. Add the cold heavy cream to a large bowl and whisk until thick and creamy. Add the melted filling of the Oreos, the confectioners’ sugar, and cream stiffener and whisk until stiff peaks form. Fold in the crushed Oreo cookies – try not to deflate the whipped cream. Fill into a piping bag with a large round tip and place in the fridge until needed.
4. For the whipped cream add the cold heavy cream to a large bowl and whisk until thick and creamy. Mix the confectioners’ sugar with the stiffener and then add it together with the vanilla extract to the bowl and mix until stiff peaks form. Fill into a piping bag with a large round tip or star tip. Set aside.
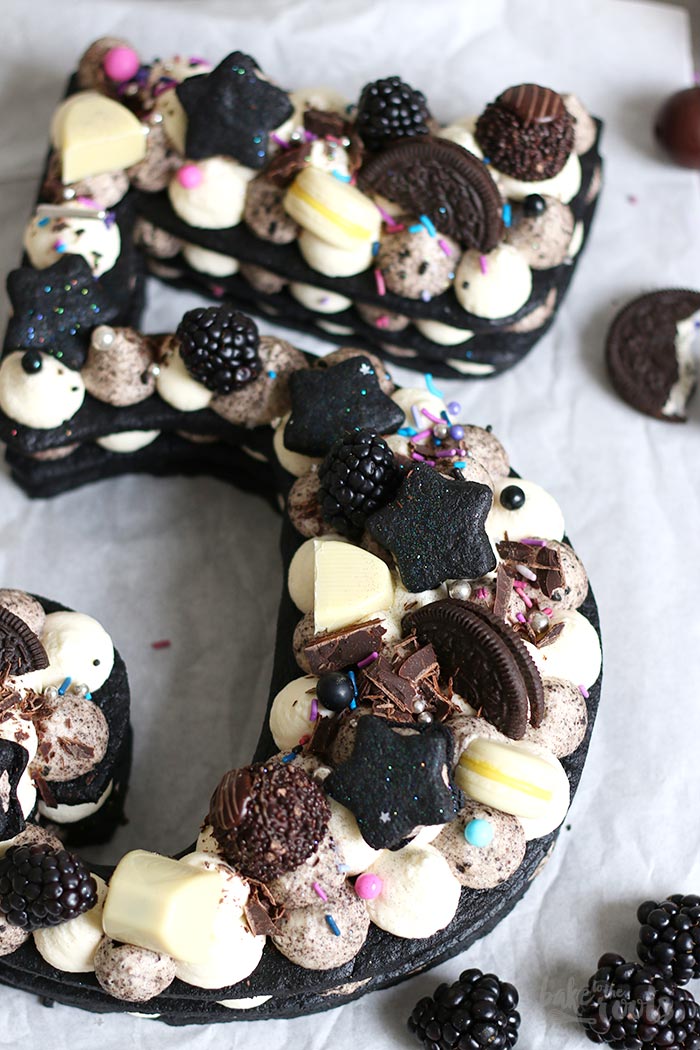
5. To assemble the cake, place the first number cookie layer on a serving plate. Pipe the two creams alternating on top of the number to cover it completely – don’t be shy with the cream, you have a lot. If you like, you can sprinkle with some chocolate shavings or sprinkles. Place the second number cookie on top of the cream and press lightly down to connect them. Repeat the piping, then add the last layer and pipe the creams on top as well. Before decorating I recommend to place the cake in the fridge for at least 4 hours or overnight. When ready to serve, decorate the top with your favorite sprinkles, macarons, chocolate candy, pieces of Oreos etc.
1. Die Butter und den Zucker in eine große Schüssel geben und erst langsam, dann auf höchster Stufe hell und luftig aufschlagen. Das Ei und den Vanille Extrakt dazugeben und gut unterrühren. Das Mehl mit dem Kakao, Backpulver und Salz in einer zweiten Schüssel vermischen und dann in die große Schüssel sieben und nur kurz unterrühren. Aus dem Teig eine Kugel formen, in Klarsichtfolie einschlagen und dann für etwa 30 Minuten in den Kühlschrank legen.
2. Den Ofen auf 180°C (350°F) Ober-/Unterhitze vorheizen. Die Nummer, die ihr haben wollt, auf ein Stück Pappe oder Papier zeichnen und ausschneiden. Vom Teig etwa die Hälfte auf einem Stück Backpapier (mit einem zweiten Stück Backpapier obendrauf) zu einer Dicke von etwa 0,5cm ausrollen. Die Vorlage auf den Teig legen und mit einem scharfen Messer die gewünschte Nummer ausschneiden. Teigreste um die Nummer entfernen und sammeln. Die Nummer mit dem Backpapier auf ein Backblech oder Brett legen und für etwa 20 Minuten in den Kühlschrank legen. Das soll helfen, dass der Teig beim Backen nicht so stark auseinanderläuft. Die Keks-Kuchenschicht für etwa 10-12 Minuten backen, dann herausholen und sofort mit dem Papier auf ein Kuchengitter ziehen und abkühlen lassen. Mit dem restlichen Teig wiederholen. Bei der dritten Nummer müsst ihr vermutlich etwas kreativ werden und den Teig beim Ausrollen etwas stückeln, damit ihr die ganze Nummer zusammenbekommt. Bei meiner »5« hatte ich am Ende noch ausreichend Teig übrig, um kleine Sterne für die Deko auszustechen.
3. Für die Oreo Creme die Füllung aus den Oreos kratzen und in eine mikrowellensichere Schüssel geben. Die Kekshälften in einen Gefrierbeutel geben und mit einem Nudelholz zu Bröseln verarbeiten. Zur Seite stellen. Die Füllung der Oreos in der Mikrowelle schmelzen und dann ebenfalls zur Seite stellen. Die kalte Sahne in eine Schüssel füllen und cremig aufschlagen, dann die geschmolzene Oreofüllung dazugeben, den Puderzucker und Sahnesteif und alles so lange aufschlagen, bis die Sahne steif und fest ist. Die Oreobrösel dazugeben und vorsichtig unterheben. Die Creme in einen Spritzbeutel mit großer runder Tülle füllen und bis zur weiteren Verwendung in den Kühlschrank legen.
4. Für die Schlagsahne die kalte Sahne in eine große Schüssel geben und aufschlagen. Bevor die Sahne fest wird, den Puderzucker, Sahnesteif und Vanille Extrakt dazugeben und dann so lange aufschlagen, bis die Sahne steif und fest ist. Ebenfalls in einen Spritzbeutel mit großer runder Tülle oder Sterntülle füllen und zur Seite legen.
5. Für den Zusammenbau des Kuchens als Erstes einen Nummernkeks auf eine Servierplatte oder Brett legen und dann die Oreo Creme und Schlagsahne abwechselnd auf die Keks-Kuchenschicht aufspritzen – man muss hier nicht sparen, es ist genug Creme/Schlagsahne da. Wer mag, kann ein paar Sprinkles oder Schokoraspeln auf die Füllung streuen. Den zweiten Keks auflegen, leicht festdrücken und dann wieder Creme/Schlagsahne aufspritzen, bis alles bedeckt ist. Mit dem dritten Keks ebenso verfahren. Vor dem Dekorieren empfehle ich, den Kuchen noch einmal gut durchzukühlen – mindestens 4 Stunden oder über Nacht. Vor dem Servieren dann nach Belieben mit Sprinkles, Schokoraspeln, Macarons, Schokoriegeln, Oreokeksstücken usw. dekorieren.
Craving more? Keep in touch on Facebook, Instagram and Pinterest for new post updates and more. You can also contact me with any questions or inquiries!
Here is a version of the recipe you can print easily.
Print
Oreo Cookie Cream Number Cake
- Prep Time: 01:00
- Cook Time: 00:00
- Total Time: 06:00
- Yield: 1 1x
- Category: Cakes
- Method: -
- Cuisine: International
- Diet: Vegetarian
Description
The perfect birthday cake with oreo cream filling and loads of chocolate candy topping. Easy to make and always a showstopper! No matter what number you have…
Ingredients
For the dough:
1/2 cup (120g) butter, room temperature
1 cup (200g) sugar (fine)*
1 large egg
1 tsp. vanilla extract*
1 1/2 cups (200g) stronger all-purpose flour*
1/2 cup (60g) dark cocoa powder*
1/2 tsp. baking powder
1/2 tsp. salt
For the Oreo cream:
8-9 Oreos*
1 1/2 cups (360ml) cold heavy cream
1/2 cup (60g) confectioners‘ sugar*
1 tbsp. cream stiffener*
For the whipped cream:
1 1/2 cups (360ml) cold heavy cream
1/2 cup (60g) confectioners‘ sugar*
1 tbsp. cream stiffener*
1/2 tsp. vanilla extract*
For the decoration:
chocolate candy, sprinkles, macarons, chocolate shavings etc.
Instructions
1. Add the butter and sugar to a large bowl and mix first slowly, then on high speed until light and fluffy. Add the egg and vanilla extract and mix until well combined. Mix the flour with cocoa powder, baking powder, and salt in a smaller bowl and then sift into the bowl with the butter/sugar – mix until just combined. Shape the dough into a ball and place it in the fridge for about 30 minutes.
2. Preheat the oven to 180°C (350°F). Draw the number you want to make on a piece of cardboard or paper and cut it out. Take about 1/2 of the dough and roll it out on a piece of baking parchment to a thickness of about 0,5cm. This works best with a second sheet of baking parchment on top. Place your number on the dough and cut it out. Remove the dough around it and transfer the number with the baking parchment on a baking sheet or wooden board and place that in the fridge for about 20 minutes. Cooling the dough helps it to keep the shape. You can bake without freezing it, but then the dough will spread more. Bake the cake layer for about 10-12 minutes until firm. Take it out of the oven, remove it with the baking parchment from the baking sheet and let it cool down on a wire rack. Repeat with the remaining dough. With the third layer you might have to be a bit creative and do some patchwork to get a full number. With my »5« I had enough dough to also cut out some stars at the end for the decoration.
3. For the Oreo cream separate the filling from the cookies and place it in a small microwave-safe bowl. Add the cookies to a freezer bag and crush with a rolling pin to get fine crumbs. Set aside. Microwave the cream filling in several steps until melted. Set aside. Add the cold heavy cream to a large bowl and whisk until thick and creamy. Add the melted filling of the Oreos, the confectioners‘ sugar, and cream stiffener and whisk until stiff peaks form. Fold in the crushed Oreo cookies – try not to deflate the whipped cream. Fill into a piping bag with a large round tip and place in the fridge until needed.
4. For the whipped cream add the cold heavy cream to a large bowl and whisk until thick and creamy. Mix the confectioners‘ sugar with the stiffener and then add it together with the vanilla extract to the bowl and mix until stiff peaks form. Fill into a piping bag with a large round tip or star tip. Set aside.
5. To assemble the cake, place the first number cookie layer on a serving plate. Pipe the two creams alternating on top of the number to cover it completely – don’t be shy with the cream, you have a lot. If you like, you can sprinkle with some chocolate shavings or sprinkles. Place the second number cookie on top of the cream and press lightly down to connect them. Repeat the piping, then add the last layer and pipe the creams on top as well. Before decorating I recommend to place the cake in the fridge for at least 4 hours or overnight. When ready to serve, decorate the top with your favorite sprinkles, macarons, chocolate candy, pieces of Oreos etc.
Notes
Have fun baking!
*These links link to either an article that contains advertising or are affiliate links to Amazon Germany (Advertising/Werbung).