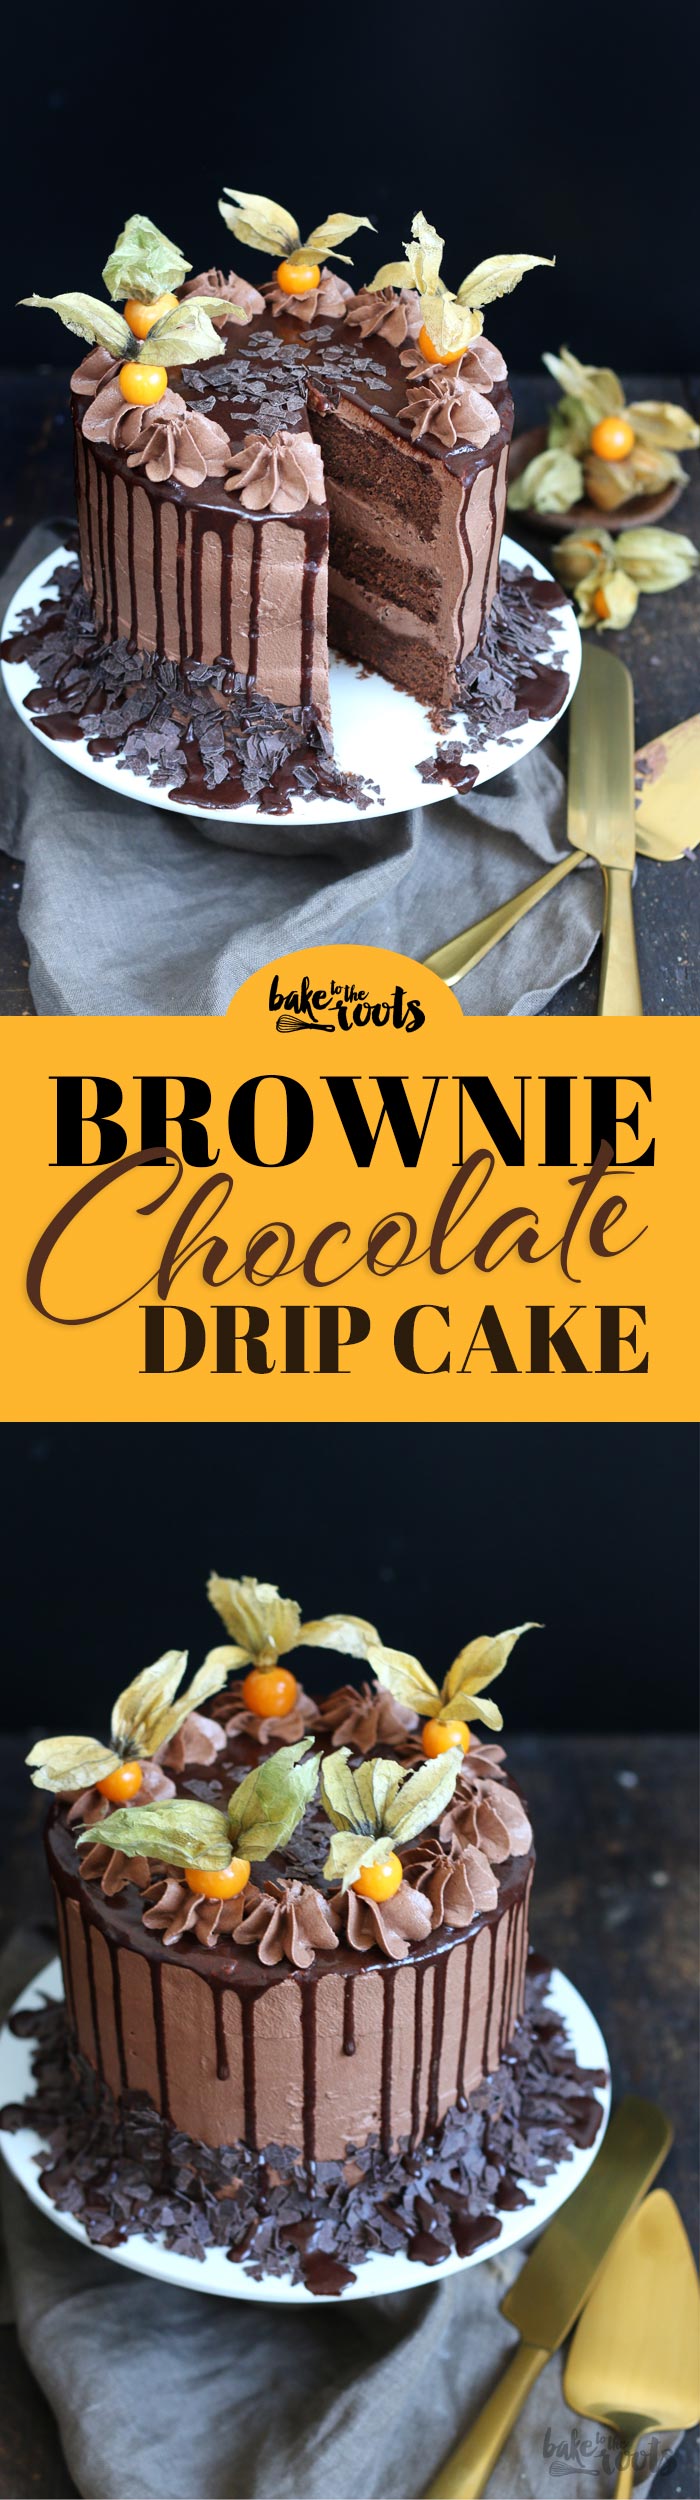
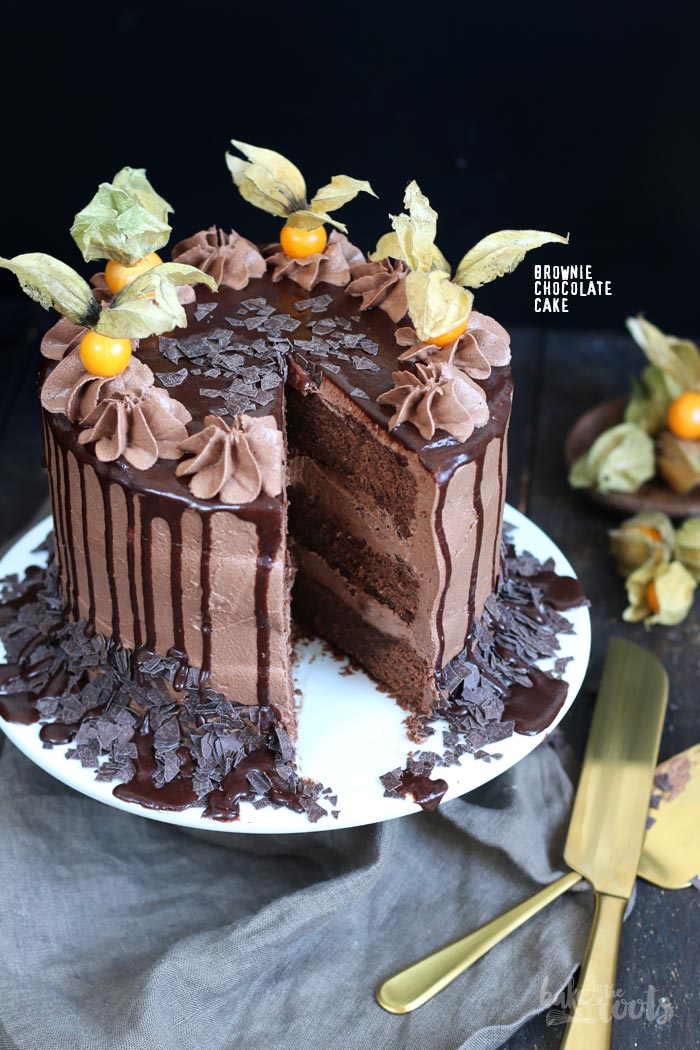
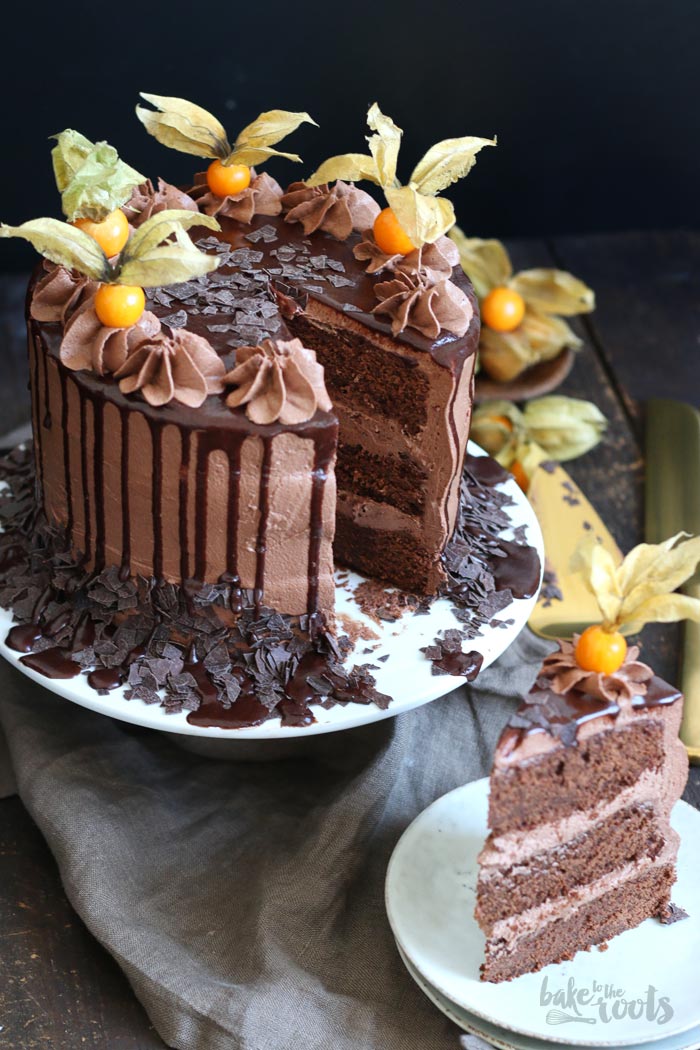
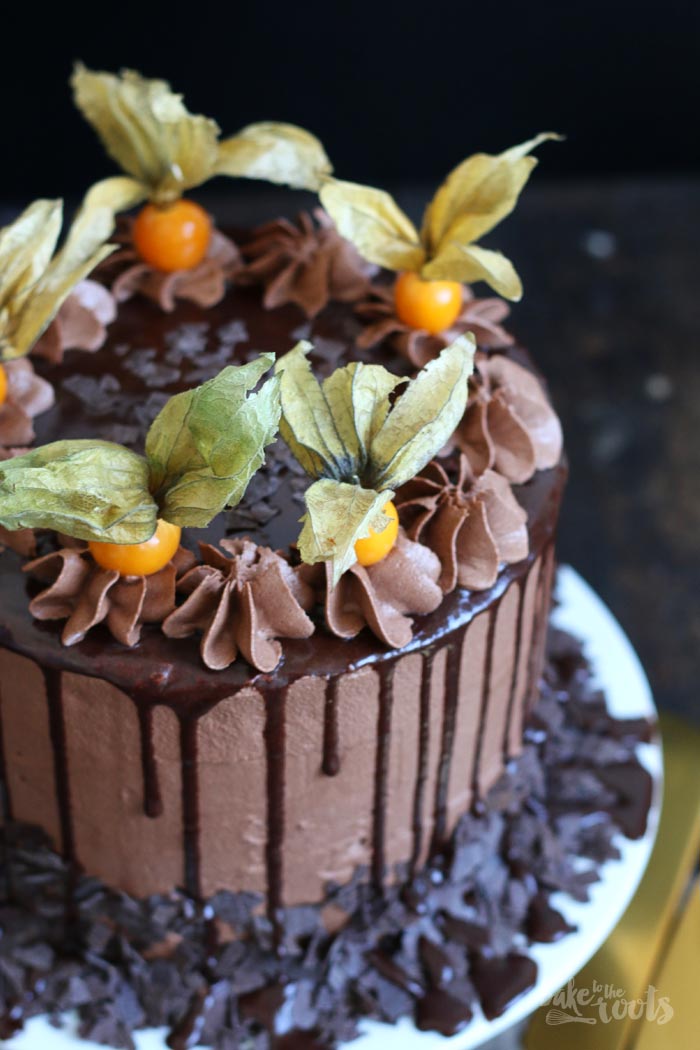
I’ve got a good amount of chocolate for you today! Or better said for your moms cause this is supposed to be a Mother’s Day cake ;) I know from my mom that she likes chocolate a lot, so it makes sense to make a Brownie Chocolate Drip Cake for Mother’s Day for her… and many others I suppose. So who wants a slice? ;)
When it comes to choosing a gift for Mother’s Day many go for flowers. Not the kind of gift I like to get for her. A bouquet of flowers normally does not last very long. Flowers in a pot are better I think ;) But in general I prefer baking something. I think you show more appreciation if you make something yourself and gift it. Since I am bad at drawing portraits, I bake most of the time ;)
Of course, it does not have to be a cake like this one here all the time. A bit less “complicated” is also fine. But this time I wanted to go big with loads of chocolate in many different ways ;)
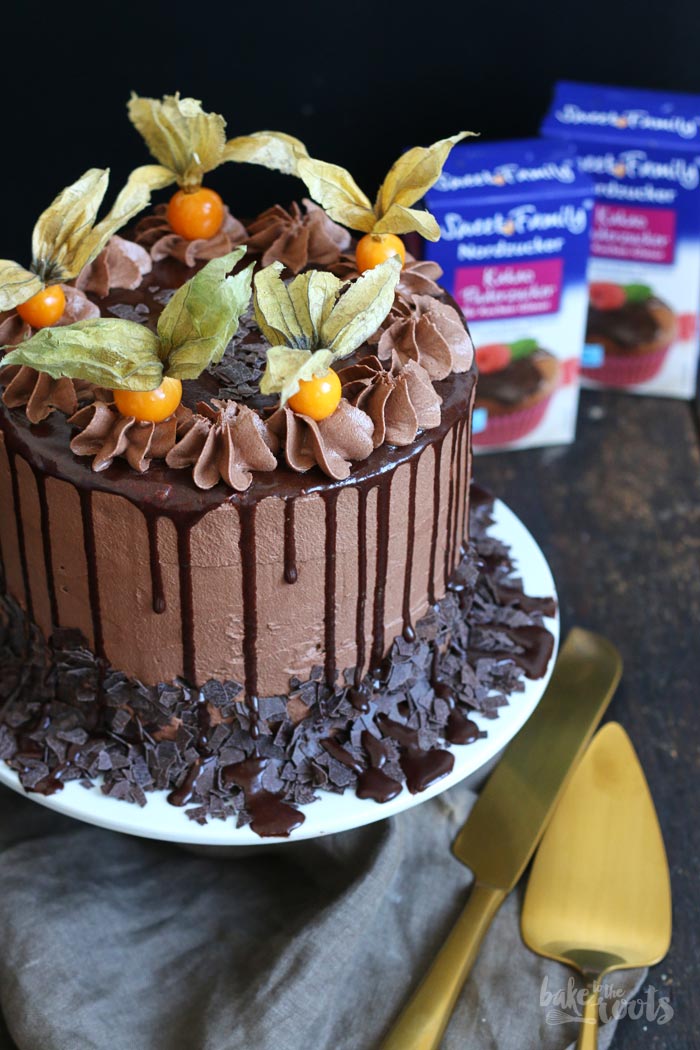
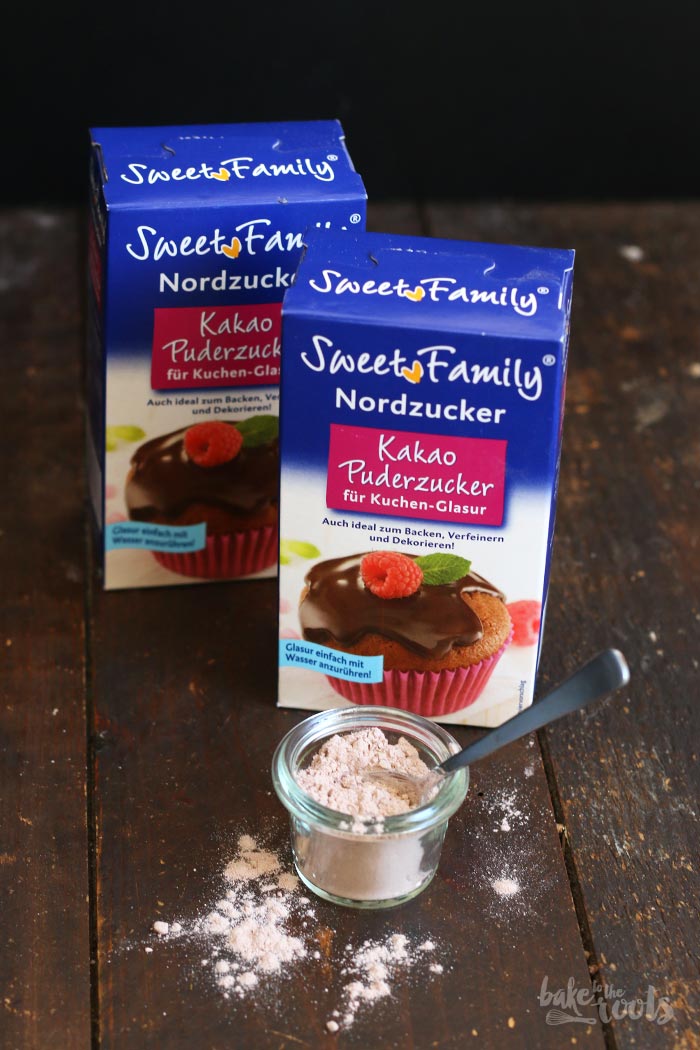
SweetFamily* asked me some time ago if I wanted to try their (more or less) new cocoa confectioners’ sugar. It’s out in the stores for quite some time already, but I haven’t used it so far, so it’s new for me ;)
The brand SweetFamily is well known for regular sugar, sugar to make jam and regular confectioners’ sugar. Now they also have this cocoa confectioners sugar with 10% of cocoa. You can use it to make an easy glaze, use it for the batter, topping, basically everything that is asking for confectioners’ sugar and cocoa ;)
I used the product for example for my dripping glaze on this cake. Instead of regular chocolate ganache. It’s much easier to prepare and handle than ganache. No need to melt chocolate (to the right temperature) and mixing it with heavy cream… and then wait until it got the right consistency. Nope. The cocoa confectioners’ sugar has to be mixed with some warm water – that’s all. Ready to go ;) If you want to know more about the product, check out the SweetFamily recipe website* (in German).
If you want to make the cake for Mother’s Day you can start preparing everything on Friday already. Bake the brownie cake layers and wrap them well. The day you want to serve the cake (or the day before) you can make the buttercream, assemble the cake and decorate it. If you do it this way you don’t have to do all at once and can relax a bit in between :P
Are you going to bake something for your mom? Or are you one of those buying a gift? Tell me ;)
INGREDIENTS / ZUTATEN
3/4 cup (170g) butter, melted
1/4 cup (60ml) vegetable oil
2 cups (400g) sugar
5 large eggs
1/2 cup (120ml) chocolate cream liquor
3/4 cup (180ml) milk
1/4 cup (60g) sour cream (Schmand)
2 1/2 cups (330g) all-purpose flour
3/4 cup (90g) cocoa powder
1 1/2 tsp. baking powder
1/4 tsp. salt
For the buttercream:
2 1/2 cups (570g) butter, at room temperature
1/4 cup (30g) cocoa powder, sifted
pinch of salt
2 tsp. instant espresso powder
1 tsp. hot water
2 tsp. vanilla extract
4 1/2 cups (580g) SweetFamily chocolate confectioners’ sugar, sifted
1-2 tbsp. heavy cream (optional)
For the glaze:
3.5 oz. (100g) SweetFamily chocolate confectioners’ sugar
2-3 tbsp. warm water
some fruits and chocolate sprinkles for decoration
170g Butter, geschmolzen
60ml Pflanzenöl (zum Backen)
400g Zucker
5 Eier (L)
120ml Schokoladenlikör
180ml Milch
60g Schmand
330g Mehl (Type 405)
90g Kakaopulver
1 1/2 TL Backpulver
1/4 TL Salz
Für die Buttercreme:
570g weiche Butter
30g Kakaopulver, gesiebt
Prise Salz
2 TL Instant Espresso Pulver
1 TL heißes Wasser
2 TL Vanille Extrakt
580g SweetFamily Kakao-Puderzucker, gesiebt
1-2 EL Sahne (optional)
Für die Glasur:
100g SweetFamily Kakao-Puderzucker
2-3 EL warmes Wasser
Früchte und Schokoladensplitter für die Dekoration
DIRECTIONS / ZUBEREITUNG
2. Add the melted butter, vegetable oil, and the sugar to a large bowl and mix for 4-5 minutes on medium-high speed until light and fluffy. Add the eggs one after another, mix well after each addition. Set aside.
3. Mix the chocolate liquor with milk and sour cream until well combined. Set aside. Sift the flour and cocoa into a bowl and mix with the baking powder, and salt until well combined. Add the flour mixture alternating with the chocolate liquor mix to the large bowl and mix until just combined. Divide the batter evenly between the prepared springform tins and bake for 28-32 minutes or until a toothpick inserted into the center of the cakes comes out clean. Take out the oven and let cool down on a wire rack. Once the cakes are cooled, remove from the tin. If you make the cakes in advance, wrap the cakes tightly and store at room temperature until needed – up to two days.
4. For the buttercream add the butter to a large bowl and mix on high speed until very light and fluffy. Add the cocoa powder and salt and mix in. Mix the espresso powder with the hot water and add together with the vanilla extract to the bowl and mix in. Gradually add the cocoa confectioners’ sugar and mix until you get a nice fluffy buttercream – takes about 5-8 minutes. Add some heavy cream and mix in if the buttercream seems too thick, add some more confectioners’ sugar if it is too soft. Set aside.
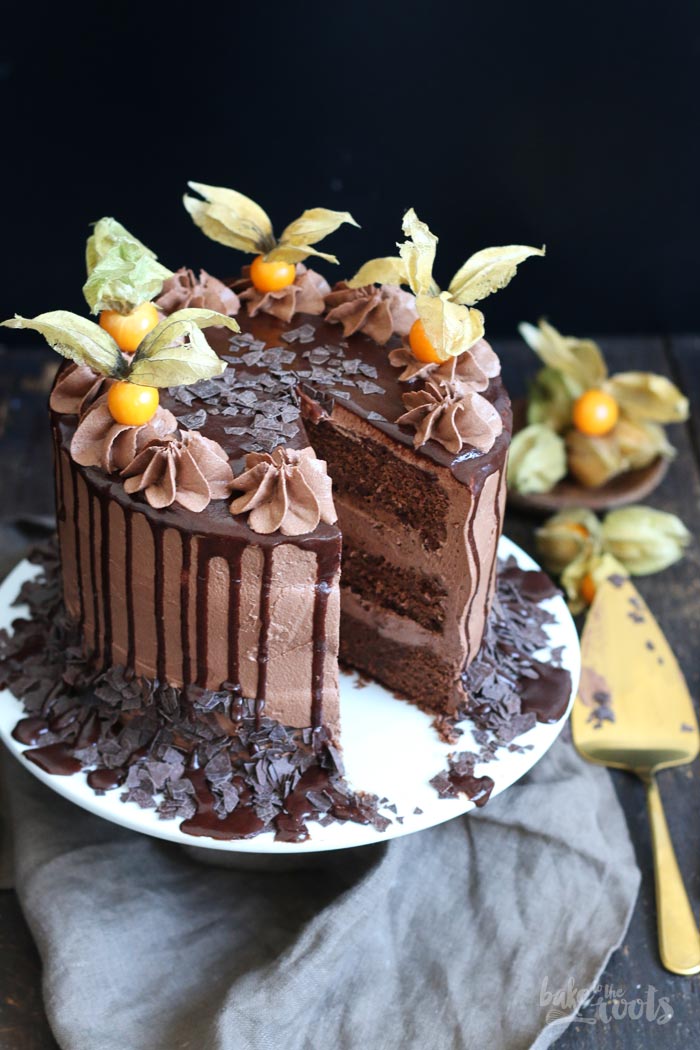
5. To assemble the cake, place the first cake layer on a serving plate, add some of the buttercream on top and spread evenly to cover the top of the cake layer completely. Add the second cake layer and repeat with some buttercream. Add the third cake layer on top and crumb coat the whole cake with a thin layer of buttercream. Place in the fridge for at least 20 minutes. Take the cake out of the fridge and cover the whole cake evenly with the remaining buttercream (keep some for the decoration). The cake should have an even and smooth surface. If you want to sprinkle the cake on the bottom with some chocolate sprinkles or similar, do it now, then place the cake in the fridge for at least 30 minutes up to one hour.
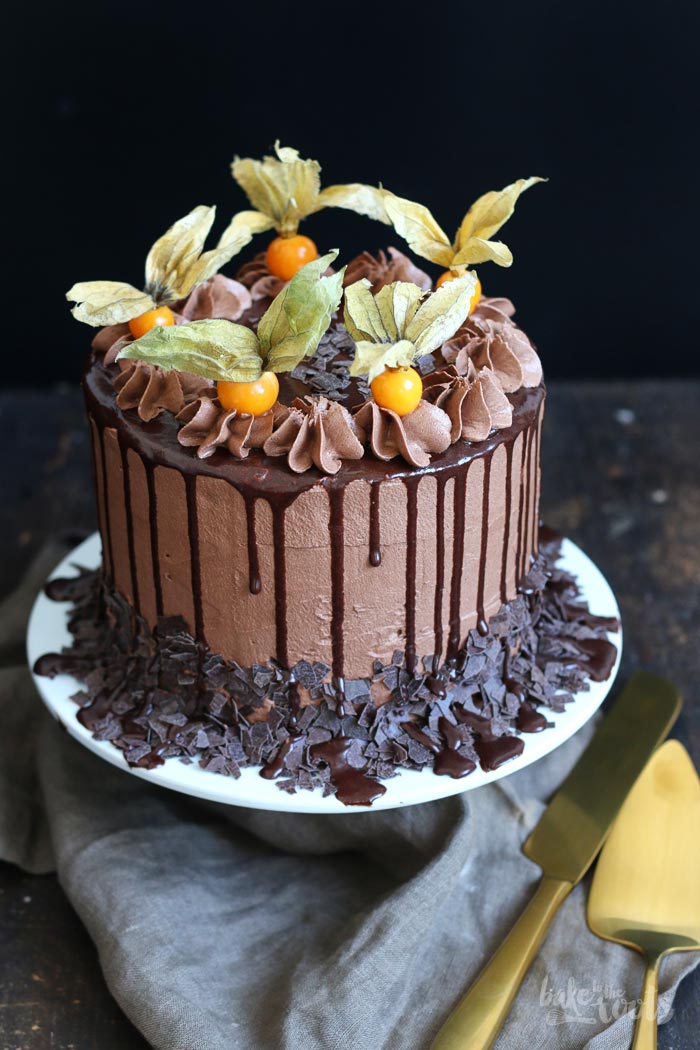
6. For the glaze mix the cocoa confectioners’ sugar with the water until you get a thick and smooth glaze. I recommend to press the glaze through a fine sieve before using it, so you get rid of sugar pieces, that did not dissolve completely. Pour the glaze on top of the cooled cake – do not add too much at once, it should just go to the edges of the cake and slightly run down on the sides. Add some more glaze on the edges with a small spoon to get a nice dripping pattern. Place again in the fridge for about 15-20 minutes so the glaze can dry a bit, then decorate with the remaining buttercream (fill into a piping bag with a star tip) and add some fruits you like on top. Store in a cool place or in the fridge if you do this cake in summer.
2. Die geschmolzene Butter, das Pflanzenöl und den Zucker in eine große Schüssel geben und für 4-5 Minuten hell und luftig aufschlagen. Die Eier einzeln dazugeben und jeweils gut unterrühren. Zur Seite stellen.
3. Den Schokoladenlikör mit der Milch und dem Schmand glatt rühren und zur Seite stellen. Das Mehl und das Kakaopulver in eine Schüssel sieben und mit dem Backpulver und Salz vermischen. Die Mehlmischung abwechselnd mit der Likör-Milch-Mischung zur großen Schüssel dazugeben und alles nur kurz verrühren. Den Teig gleichmäßig auf die vorbereiteten Formen verteilen und dann für 28-32 Minuten backen – ein Zahnstocher sollte sauber herauskommen, wenn man ihn in die Mitte der Kuchen steckt und wieder herauszieht. Die fertigen Kuchen aus dem Ofen nehmen und auf einem Kuchengitter abkühlen lassen. Sobald die Kuchen abgekühlt sind, kann man sie aus den Formen herausholen und verwenden. Man kann die Kuchen auch schon im Voraus backen und dann bis zur Verwendung luftdicht einpacken und bei Zimmertemperatur lagern (max. 2 Tage).
4. Für die Buttercreme die Butter in eine große Schüssel geben und auf höchster Stufe sehr hell und luftig aufschlagen. Das Kakaopulver und Salz dazugeben und unterrühren. Das Espresso Pulver mit dem heißen Wasser glatt rühren und dann zusammen mit dem Vanille Extrakt zur Schüssel dazugeben und unterrühren. Den Kakao-Puderzucker nach und nach zugeben und alles zu einer lockeren Creme aufschlagen – dauert etwa 5-8 Minuten. Sollte die Creme zu dick sein, etwas Sahne unterrühren. Wirkt die Mischung zu weich, noch etwas Puderzucker nachlegen. Zur Seite stellen.
5. Zum Zusammenbau der Torte die erste Kuchenschicht auf eine Servierplatte legen und etwas Buttercreme darauf verteilen – der Kuchen sollte komplett bedeckt sein mit der Creme. Die zweite Kuchenschicht auflegen und wieder mit Buttercreme bestreichen. Nach dem Auflegen der letzten Kuchenschicht die komplette Torte mit einer dünnen Schicht (Crumb Coat) einstreichen und für etwa 20 Minuten in den Kühlschrank stellen. Sobald die Buttercreme etwas fester geworden ist durch die Kühlung, kann die Torte mit dem Rest eingestrichen werden – wer die Torte mit ein paar Tupfen Buttercreme dekorieren möchte, sollte hier noch etwas von der Creme zurückbehalten. Die Seiten der Torte sollten so glatt wie möglich sein. Wer die Torte mit Schokosplittern dekorieren möchte, sollte das jetzt tun und ringsum in die Creme drücken. Die Torte dann erneut für mindestens 30 bis 60 Minuten in den Kühlschrank stellen.
6. Für die Glasur den Kakao-Puderzucker mit dem Wasser glatt rühren. Ich empfehle die Glasur vor dem Verwenden noch einmal durch ein feines Sieb zu pressen, um kleine Zuckerstücke, die sich eventuell noch nicht aufgelöst haben, herauszusieben. Die Glasur auf den Kuchen gießen – nicht zu viel auf einmal – die Glasur sollte gerade mal so über den Rand gehen, damit nicht zu viel an den Seiten herunter läuft. Mit einem kleinen Löffel noch etwas mehr Glasur auf die Ränder aufbringen für einen schönen Drip Effekt. Die Torte für etwa 15-20 Minuten zurück in den Kühlschrank stellen, damit die Glasur etwas fest werden kann, dann die Torte mit der restlichen Buttercreme und Früchten dekorieren. An einem kühlen Ort lagern, im Sommer besser im Kühlschrank.
Craving more? Keep in touch on Facebook, Twitter, Instagram and Pinterest for new post updates and more. You can also contact me with any questions or inquiries!
Here is a version of the recipe you can print easily.
Print
Brownie Chocolate Drip Cake
- Prep Time: 50
- Cook Time: 32
- Total Time: 150
Description
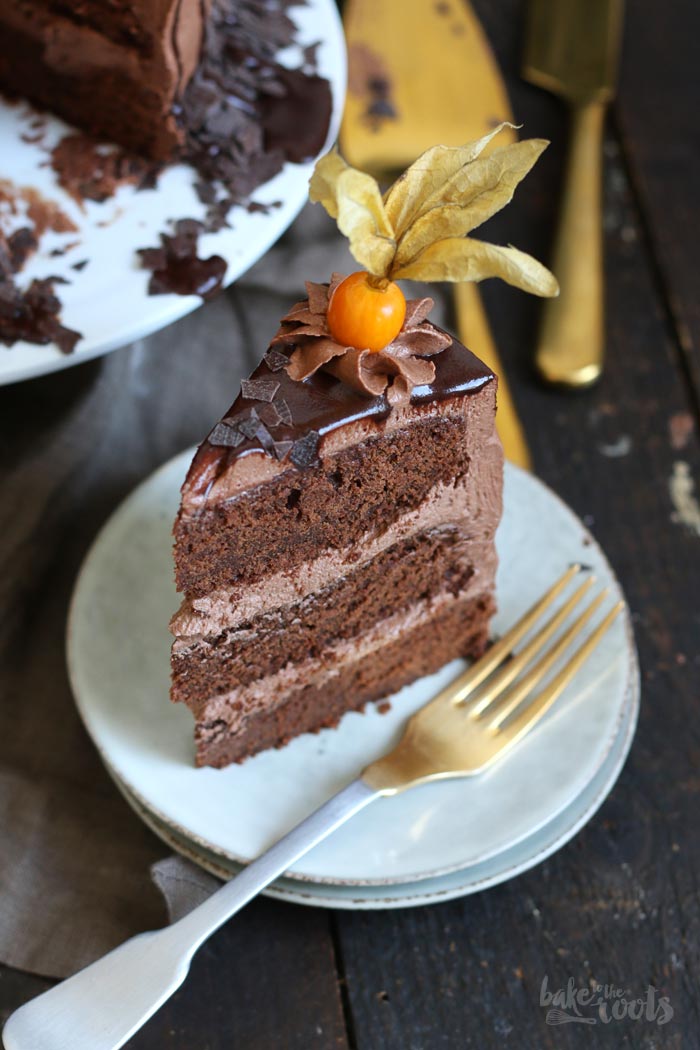
Delicious chocolate cake with brownie cake layers, a rich chocolate buttercream and a chocolate glaze that runs down the cake… mmmm :D
Ingredients
For the cake
- 3/4 cup (170g) butter, melted
- 1/4 cup (60ml) vegetable oil
- 2 cups (400g) sugar
- 5 large eggs
- 1/2 cup (120ml) chocolate cream liquor
- 3/4 cup (180ml) milk
- 1/4 cup (60g) sour cream (Schmand)
- 2 1/2 cups (330g) all-purpose flour
- 3/4 cup (90g) cocoa powder
- 1 1/2 tsp. baking powder
- 1/4 tsp. salt
For the buttercream
- 2 1/2 cups (570g) butter, at room temperature
- 3/4 cup (90g) cocoa powder, sifted
- pinch of salt
- 2 tsp. instant espresso powder
- 1 tsp. hot water
- 2 tsp. vanilla extract
- 4 cups (520g) confectioners‘ sugar, sifted
- 1-2 tbsp. heavy cream (optional)
For the glaze
- 3.5 oz. (100g) SweetFamily chocolate confectioners’ sugar
- 2-3 tbsp. warm water
- some fruits and chocolate sprinkles for decoration
Instructions
- Preheat the oven to 350°F (180°C). Line three 7 inches (18cm) springform tins with baking parchment and grease lightly. Set aside. Melt the butter and let cool down a bit.
- Add the melted butter, vegetable oil, and the sugar to a large bowl and mix for 4-5 minutes on medium-high speed until light and fluffy. Add the eggs one after another, mix well after each addition. Set aside.
- Mix the chocolate liquor with milk and sour cream until well combined. Set aside. Sift the flour and cocoa into a bowl and mix with the baking powder, and salt until well combined. Add the flour mixture alternating with the chocolate liquor mix to the large bowl and mix until just combined. Divide the batter evenly between the prepared springform tins and bake for 28-32 minutes or until a toothpick inserted into the center of the cakes comes out clean. Take out the oven and let cool down on a wire rack. Once the cakes are cooled, remove from the tin. If you make the cakes in advance, wrap the cakes tightly and store at room temperature until needed – up to two days.
- For the buttercream add the butter to a large bowl and mix on high speed until very light and fluffy. Add the cocoa powder and salt and mix in. Mix the espresso powder with the hot water and add together with the vanilla extract to the bowl and mix in. Gradually add the cocoa confectioners’ sugar and mix until you get a nice fluffy buttercream – takes about 5-8 minutes. Add some heavy cream and mix in if the buttercream seems too thick, add some more confectioners’ sugar if it is too soft. Set aside.
- To assemble the cake, place the first cake layer on a serving plate, add some of the buttercream on top and spread evenly to cover the top of the cake layer completely. Add the second cake layer and repeat with some buttercream. Add the third cake layer on top and crumb coat the whole cake with a thin layer of buttercream. Place in the fridge for at least 20 minutes. Take the cake out of the fridge and cover the whole cake evenly with the remaining buttercream (keep some for the decoration). The cake should have an even and smooth surface. If you want to sprinkle the cake on the bottom with some chocolate sprinkles or similar, do it now, then place the cake in the fridge for at least 30 minutes up to one hour.
- For the glaze mix the cocoa confectioners’ sugar with the water until you get a thick and smooth glaze. I recommend to press the glaze through a fine sieve before using it, so you get rid of sugar pieces, that did not dissolve completely. Pour the glaze on top of the cooled cake – do not add too much at once, it should just go to the edges of the cake and slightly run down on the sides. Add some more glaze on the edges with a small spoon to get a nice dripping pattern. Place again in the fridge for about 15-20 minutes so the glaze can dry a bit, then decorate with the remaining buttercream (fill into a piping bag with a star tip) and add some fruits you like on top. Store in a cool place or in the fridge if you do this cake in summer.
Notes
- Enjoy baking!
Nutrition
- Serving Size: 12
*I have partnered with “SweetFamily von Nordzucker” to show you this delicious cake! That is why I have to declare this here in Germany as Advertising. All I wrote in this article is still based on my own opinion and has not been affected by anybody :)