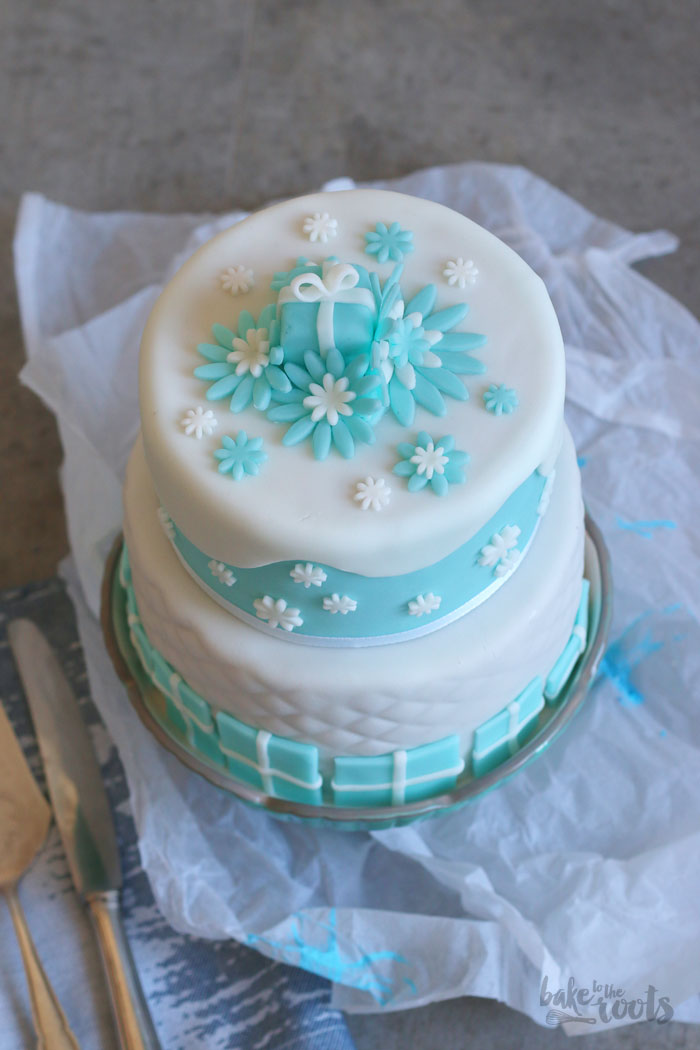
There are things that make you think »I can’t do that« or »that’s too complicated for me«. In moments like these, you just have to overcome your inner demons. At least sometimes. That’s what happened here with this Winter Chocolate Cake with Fondant Decorations. All that decorations stuff is not really my thing, but you should try everything at least once in life, right?! ;P
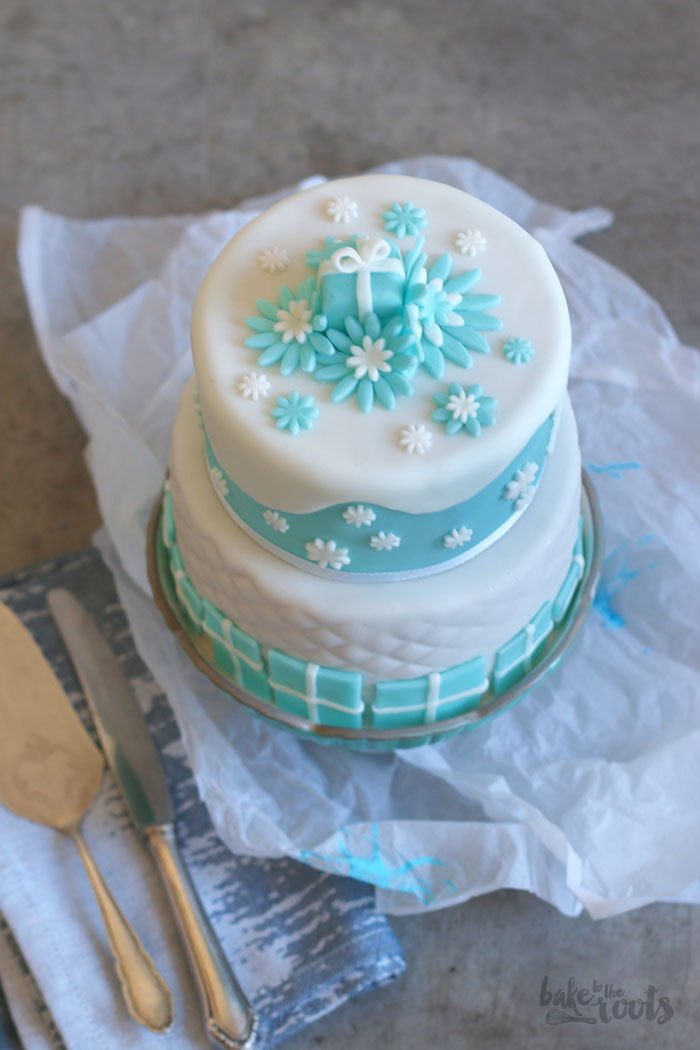
I am not a big fan of fondant, to be honest. I love what you can do with it and I admire everyone that is able to turn this sugar paste into works of art… but fondant is something that (almost) nobody really likes to eat. That stuff is just sweet, and pretty much everyone leaves it on their plate, eating only the cake and buttercream underneath. So why bother adding tons of it on a cake?! ;P
That’s exactly why I almost never use the sugary stuff for my cakes. But that doesn’t mean I’m not tempted to play with it. As a child, I loved working with clay and stuff like that, and generally enjoyed doing crafts. My family can tell you a thing or two about that. They were regularly showered with the results on birthdays or Christmas. I doubt that everyone was super happy about all the crappy things I made. Well, some things were crappy, not everything. ;P
Anyway. I digress. We’re here to talk about the »little« winter cake, not my childhood memories. ;))
There’s probably not much to say about the cake underneath the fondant. It’s a simple chocolate cake filled and covered with a delicious chocolate buttercream. The cake is quick and easy to prepare and not particularly complicated. The buttercream is a simple American chocolate buttercream made with milk chocolate coating (aka. couverture). If you don’t like it too sweet, you could use chocolate with a slightly higher amount of cocoa instead, of course.
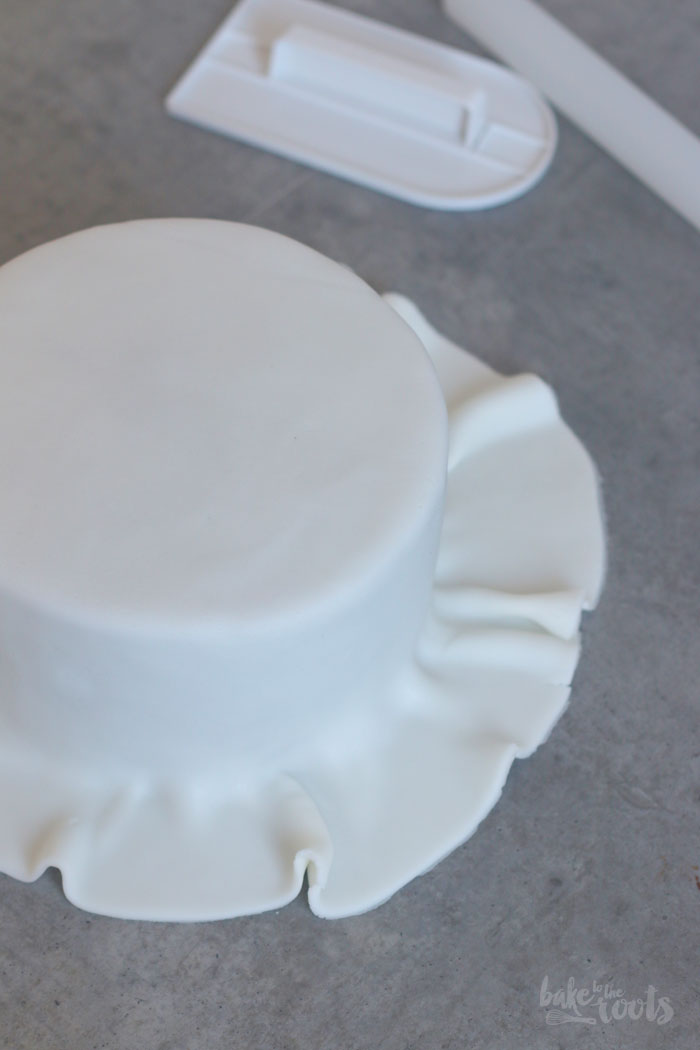
When it comes to fondant decorations, there are definitely experts who can conjure up beautiful things. I am not one of those experts. I can roll out fondant and manage to place it on the cake relatively wrinkle-free. There are many good videos on YouTube with tips and tricks for working with fondant – maybe check them if you are not sure how to work with fondant. You can use the same tools you use for baking to work with fondant, but if you want to work more often with fondant, you might want to get a small set for fondant decorations*. A silicone fondant mold* for flowers and other decorations is also very helpful when decorating a cake.
The recipe does not provide super-precise information on how much fondant you need for each layer and decoration – the amount of fondant is more of a rough estimate. It’s up to you to decide how elaborate you want the decoration to be, and you might need more (or less) of fondant accordingly. ;)
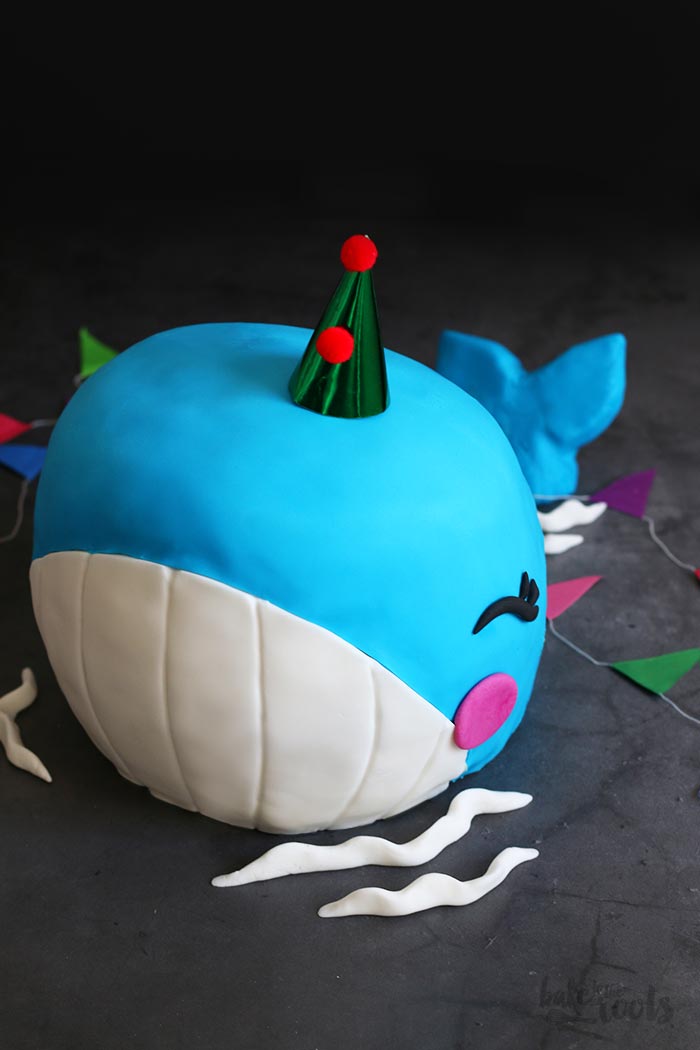

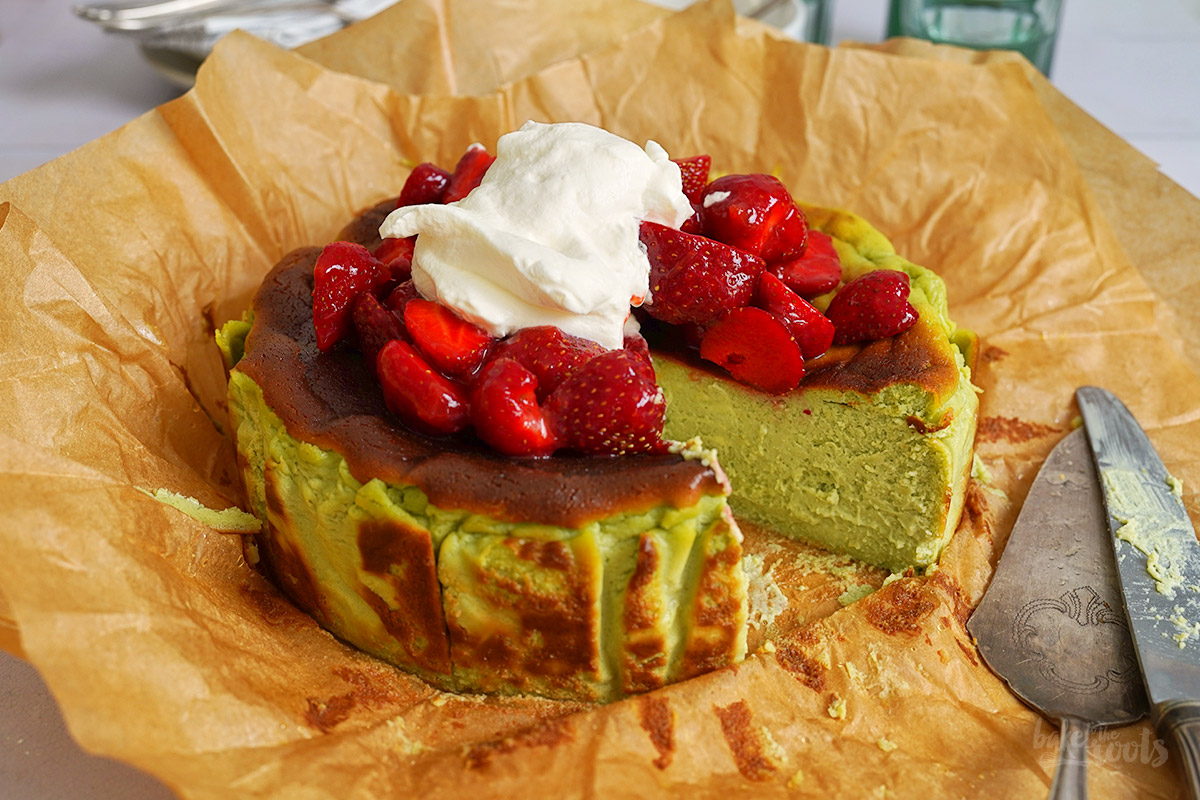
As already mentioned, fondant is not really our focus here on the blog. However, there are other recipes that use this colorful sugar mixture. If you want to bake a really sweet cake for a birthday, take a look at our little Baby Whale Cake. For that cake, you also have to work with fondant, but the decorations are minimal and easy to do.
If you prefer more lavish decorations, you can get a stunning looking result with buttercream. Easier to do, compared to fondant decorations. Our Retro Buttercream Layer Cake definitely looks great and, honestly, you can let your imagination run wild with this one and do whatever you want! More is more, right?! ;P
INGREDIENTS / ZUTATEN
For the cakes:
2 2/3 cups (350g) all-purpose flour
1 1/2 cups (300g) sugar
3/4 cup (150g) brown sugar
1 cup (120g) cocoa powder*
1/2 tsp. gingerbread spice
1 1/4 tsp. baking soda
1 tsp. baking powder
1/2 tsp. salt
3 large eggs
1 1/2 cups (360ml) buttermilk
3/4 cup (175g) butter, melted
3 tsp. vanilla extract*
1 1/4 cups (300ml) hot coffee
For the buttercream frosting:
15 oz. (425g) couverture milk chocolate*
1 1/4 cup (290g) butter, room temperature
1/3 cup (40g) cocoa powder*
2/3 cup (80g) confectioner’s sugar
1 pinch of salt
2 tsp. vanilla extract*
1/4 cup (120ml) heavy cream
For the decoration:
18 oz. (500g) white fondant*
9 oz. (250g) light blue fondant* (or any other color)
Für den Kuchen:
350g Mehl (Type 405)
300g Zucker
150g brauner Zucker
120g Backkakao*
1/2 TL Lebkuchengewürz
1 1/4 TL Natron
1 TL Backpulver
1/2 TL Salz
3 Eier (L)
360ml Buttermilch
175g Butter, geschmolzen
3 TL Vanille Extrakt*
300ml heißer Kaffee
Für die Buttercreme:
425g Vollmilchkuvertüre*
290g weiche Butter
40g Backkakao*
80g Puderzucker
1 Prise Salz
2 TL Vanille Extrakt*
120ml Schlagsahne
Für die Dekoration:
500g Fondant weiß*
250g Fondant hellblau* oder andere Farben
DIRECTIONS / ZUBEREITUNG
1. Preheat the oven to 180°C (350°F). Grease two 18cm (8-inch) baking tins* and two 15cm (6-inch) baking tins* and dust lightly with flour. Set them aside.
2. Combine the flour with both types of sugar, cocoa, gingerbread spice, baking soda, baking powder, and salt in a large bowl. Mix the eggs with buttermilk, melted butter, and vanilla extract. Add these wet ingredients to the bowl with the dry ingredients and stir well. Add the hot coffee and stir in as well – the batter will be quite runny, but that is ok.
3. Divide the batter evenly among the baking tins and bake the cakes in the preheated oven for about 30-35 minutes – or until a toothpick inserted into the centers of the cakes comes out clean. Take the cakes out of the oven and let them cool down inside the baking tins for about 10 minutes, then remove and let them cool down completely on a wire rack.
4. Chop the couverture chocolate for the buttercream and place it in a heatproof bowl. Place the bowl on top of a saucepan with simmering water (it should not touch the water) and slowly melt the chocolate. Set aside and let to cool down to room temperature.
5. Add the butter to a large bowl and mix on high speed until light and fluffy. Add the cocoa, confectioners’ sugar, and salt and mix for several minutes, first on low speed and then on high speed. Next, add the vanilla extract, heavy cream, and the cooled chocolate (sauce) and mix for about 6-8 minutes – the buttercream should look light and fluffy.
6. Cut off domed tops of the cakes (if needed) and place the first larger cake on a serving plate. Spread some buttercream on top and place the second cake on top. Coat everything with a thin layer of buttercream. Repeat the process with the smaller cakes as well. Place both layered cakes in the fridge for about 30 minutes. When nicely cooled, coat the cakes (as neatly as possible) with the remaining buttercream and then place them in the fridge for at least 2 hours more (or overnight).
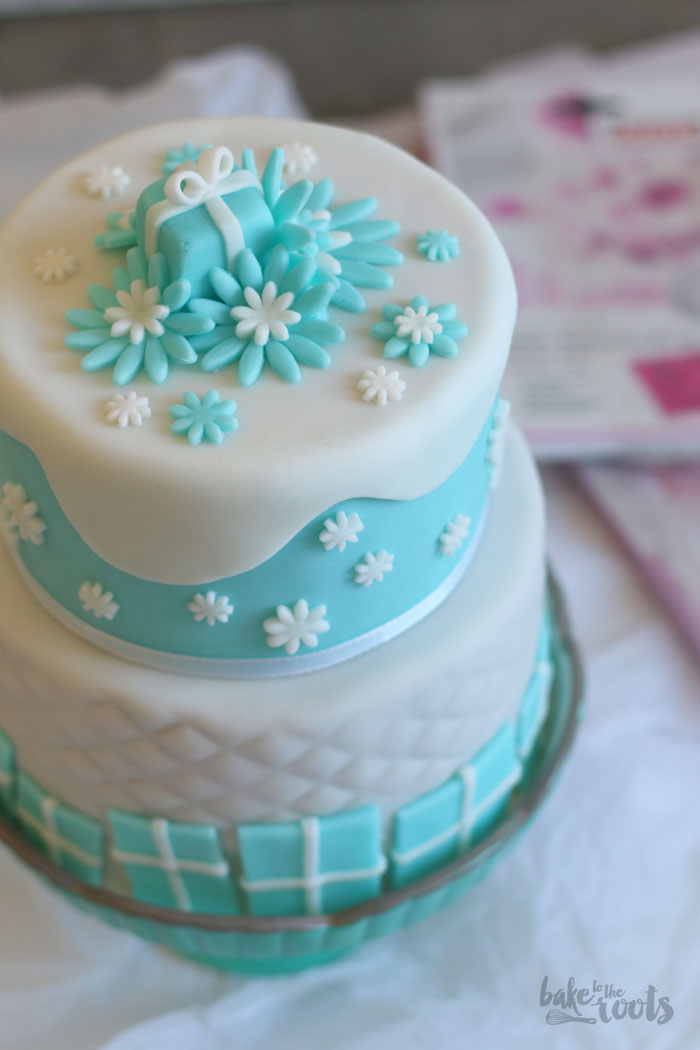
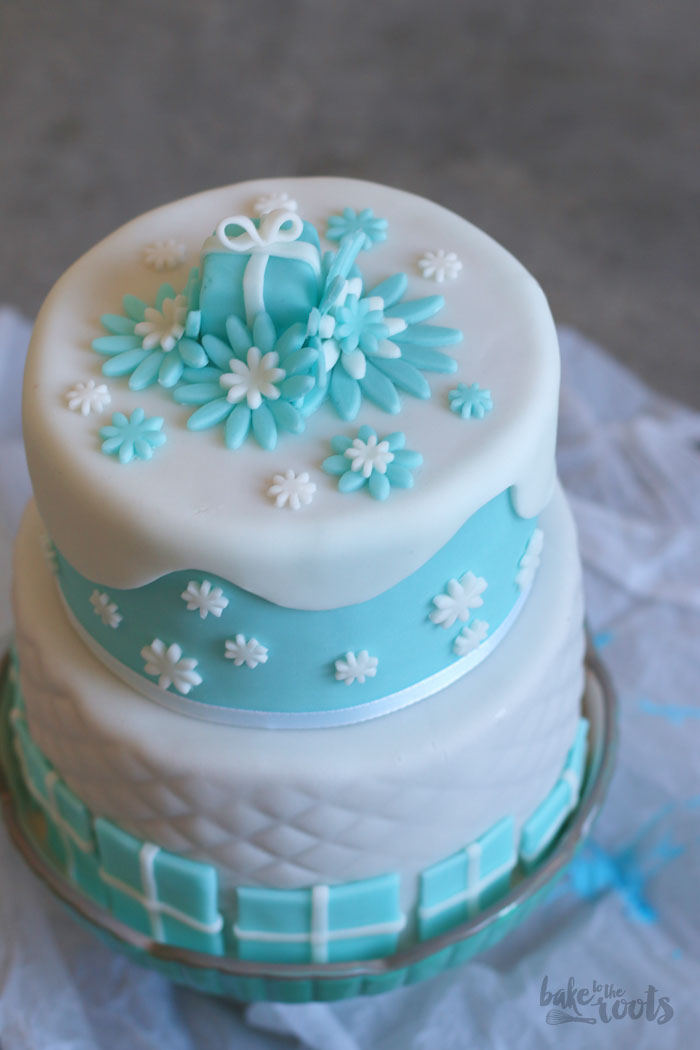
7. Roll out about half of the white fondant (thinly) and cover the larger cake with it – the fondant should lie neatly and smooth on the cake. Be careful not to smear the fondant with the dark buttercream. For the smaller cake, use either white or colored fondant and cover it smoothly as well. Place the smaller cake on top of the larger one, and then decorate with additional fondant. Ice flowers and snowflakes are suitable for a winter theme.
1. Den Ofen auf 180°C (350°F) Ober-/Unterhitze vorheizen. Zwei 18cm (8-inch) Backformen* und zwei 15cm (6-inch) Backformen* einfetten und mit Mehl ausstauben. Zur Seite stellen.
2. Das Mehl mit beiden Zuckersorten, Kakao, Lebkuchengewürz, Natron, Backpulver und Salz in einer großen Schüssel vermengen. Die Eier mit Buttermilch, geschmolzener Butter und Vanille Extrakt verrühren, zur großen Schüssel dazugeben und alles gut unterrühren. Den heißen Kaffee dazugeben und ebenfalls unterrühren – der Teig wird recht flüssig sein, aber das ist ok.
3. Den Teig gleichmäßig auf die Backformen verteilen und für etwa 30-35 Minuten im vorgeheizten Ofen backen. Mit einem Zahnstocher testen, ob noch Teig kleben bleibt und die Kuchen erst herausnehmen, wenn dieser sauber herauskommt. Die Kuchen aus dem Ofen holen und in der Form etwa 10 Minuten abkühlen lassen, dann aus den Formen lösen und auf einem Kuchengitter komplett auskühlen lassen.
4. Die Kuvertüre für die Buttercreme hacken und in eine hitzebeständige Schüssel geben. Diese Schüssel dann auf einen Topf mit köchelndem Wasser stellen (die Schüssel sollte das Wasser nicht berühren) und die Schokolade langsam schmelzen lassen. Zur Seite stellen und auf Zimmertemperatur abkühlen lassen.
5. Die Butter in eine große Schüssel geben und auf höchster Stufe hell und luftig aufschlagen. Kakao, Puderzucker und Salz zugeben und erst auf niedriger Stufe und dann auf höchster Stufe einige Minuten aufschlagen. Vanille Extrakt, Schlagsahne und abgekühlte Schokolade zugeben und alles für etwa 6-8 Minuten aufschlagen – die Creme sollte luftig und hell aussehen.
6. Die abgekühlten Kuchenschichten begradigen, falls notwendig, dann die erste der größeren Kuchenschichten auf eine Servierplatte setzen und Buttercreme darauf verteilen. Die zweite Kuchenschicht auflegen und dann alles mit einer dünnen Schicht Buttercreme einstreichen. Die kleineren Kuchen ebenfalls mit Buttercreme dazwischen stapeln und mit Creme einstreichen. Beide Kuchen für etwa 30 Minuten in den Kühlschrank stellen. Die Kuchen mit der restlichen Buttercreme (möglichst sauber) einstreichen und dann noch einmal mindestens 2 Stunden (oder über Nacht) in den Kühlschrank stellen.
7. Etwa die Hälfte des weißen Fondants dünn ausrollen und dann den größeren Kuchen damit einschlagen – das Fondant sollte sauber und glatt aufliegen. Darauf achten, dass man das Fondant nicht mit der Buttercreme beschmiert. Für den kleineren Kuchen entweder weißes oder farbiges Fondant verwenden und ebenfalls glatt einschlagen. Den kleineren Kuchen auf den großen setzen und dann mit zusätzlichem Fondant dekorieren. Für ein Winterthema eignen sich Eisblumen und Schneeflocken.

Craving more? Keep in touch on Facebook, Instagram and Pinterest for new post updates and more. You can also contact me with any questions or inquiries!
Here is a version of the recipe you can print easily.
Print
Winter Chocolate Cake (with Fondant Decorations)
- Prep Time: 01:30
- Cook Time: 00:35
- Total Time: 05:00
- Yield: 1 1x
- Category: Cakes
- Cuisine: International
- Diet: Vegetarian
Description
If you are looking for a nice winter themed cake, check out this little fella here – a delicious chocolate cake with chocolate buttercream and icy decorations!
Ingredients
For the cakes:
2 2/3 cups (350g) all-purpose flour
1 1/2 cups (300g) sugar
3/4 cup (150g) brown sugar
1 cup (120g) cocoa powder*
1/2 tsp. gingerbread spice
1 1/4 tsp. baking soda
1 tsp. baking powder
1/2 tsp. salt
3 large eggs
1 1/2 cups (360ml) buttermilk
3/4 cup (175g) butter, melted
3 tsp. vanilla extract*
1 1/4 cups (300ml) hot coffee
For the buttercream frosting:
15 oz. (425g) couverture milk chocolate*
1 1/4 cup (290g) butter, room temperature
1/3 cup (40g) cocoa powder*
2/3 cup (80g) confectioner’s sugar
1 pinch of salt
2 tsp. vanilla extract*
1/4 cup (120ml) heavy cream
For the decoration:
18 oz. (500g) white fondant*
9 oz. (250g) light blue fondant* (or any other color)
Instructions
1. Preheat the oven to 180°C (350°F). Grease two 18cm (8-inch) baking tins* and two 15cm (6-inch) baking tins* and dust lightly with flour. Set them aside.
2. Combine the flour with both types of sugar, cocoa, gingerbread spice, baking soda, baking powder, and salt in a large bowl. Mix the eggs with buttermilk, melted butter, and vanilla extract. Add these wet ingredients to the bowl with the dry ingredients and stir well. Add the hot coffee and stir in as well – the batter will be quite runny, but that is ok.
3. Divide the batter evenly among the baking tins and bake the cakes in the preheated oven for about 30-35 minutes – or until a toothpick inserted into the centers of the cakes comes out clean. Take the cakes out of the oven and let them cool down inside the baking tins for about 10 minutes, then remove and let them cool down completely on a wire rack.
4. Chop the couverture chocolate for the buttercream and place it in a heatproof bowl. Place the bowl on top of a saucepan with simmering water (it should not touch the water) and slowly melt the chocolate. Set aside and let to cool down to room temperature.
5. Add the butter to a large bowl and mix on high speed until light and fluffy. Add the cocoa, confectioners’ sugar, and salt and mix for several minutes, first on low speed and then on high speed. Next, add the vanilla extract, heavy cream, and the cooled chocolate (sauce) and mix for about 6-8 minutes – the buttercream should look light and fluffy.
6. Cut off domed tops of the cakes (if needed) and place the first larger cake on a serving plate. Spread some buttercream on top and place the second cake on top. Coat everything with a thin layer of buttercream. Repeat the process with the smaller cakes as well. Place both layered cakes in the fridge for about 30 minutes. When nicely cooled, coat the cakes (as neatly as possible) with the remaining buttercream and then place them in the fridge for at least 2 hours more (or overnight).
7. Roll out about half of the white fondant (thinly) and cover the larger cake with it – the fondant should lie neatly and smooth on the cake. Be careful not to smear the fondant with the dark buttercream. For the smaller cake, use either white or colored fondant and cover it smoothly as well. Place the smaller cake on top of the larger one, and then decorate with additional fondant. Ice flowers and snowflakes are suitable for a winter theme.
Notes
Make something amazing in the kitchen!
Links marked with an asterisk (*) are affiliate links (advertising/Werbung) to Amazon Germany. If you click on one of those links and buy something via this link, I will get a commission for that sale. The price of whatever you buy is not affected in any way by this.