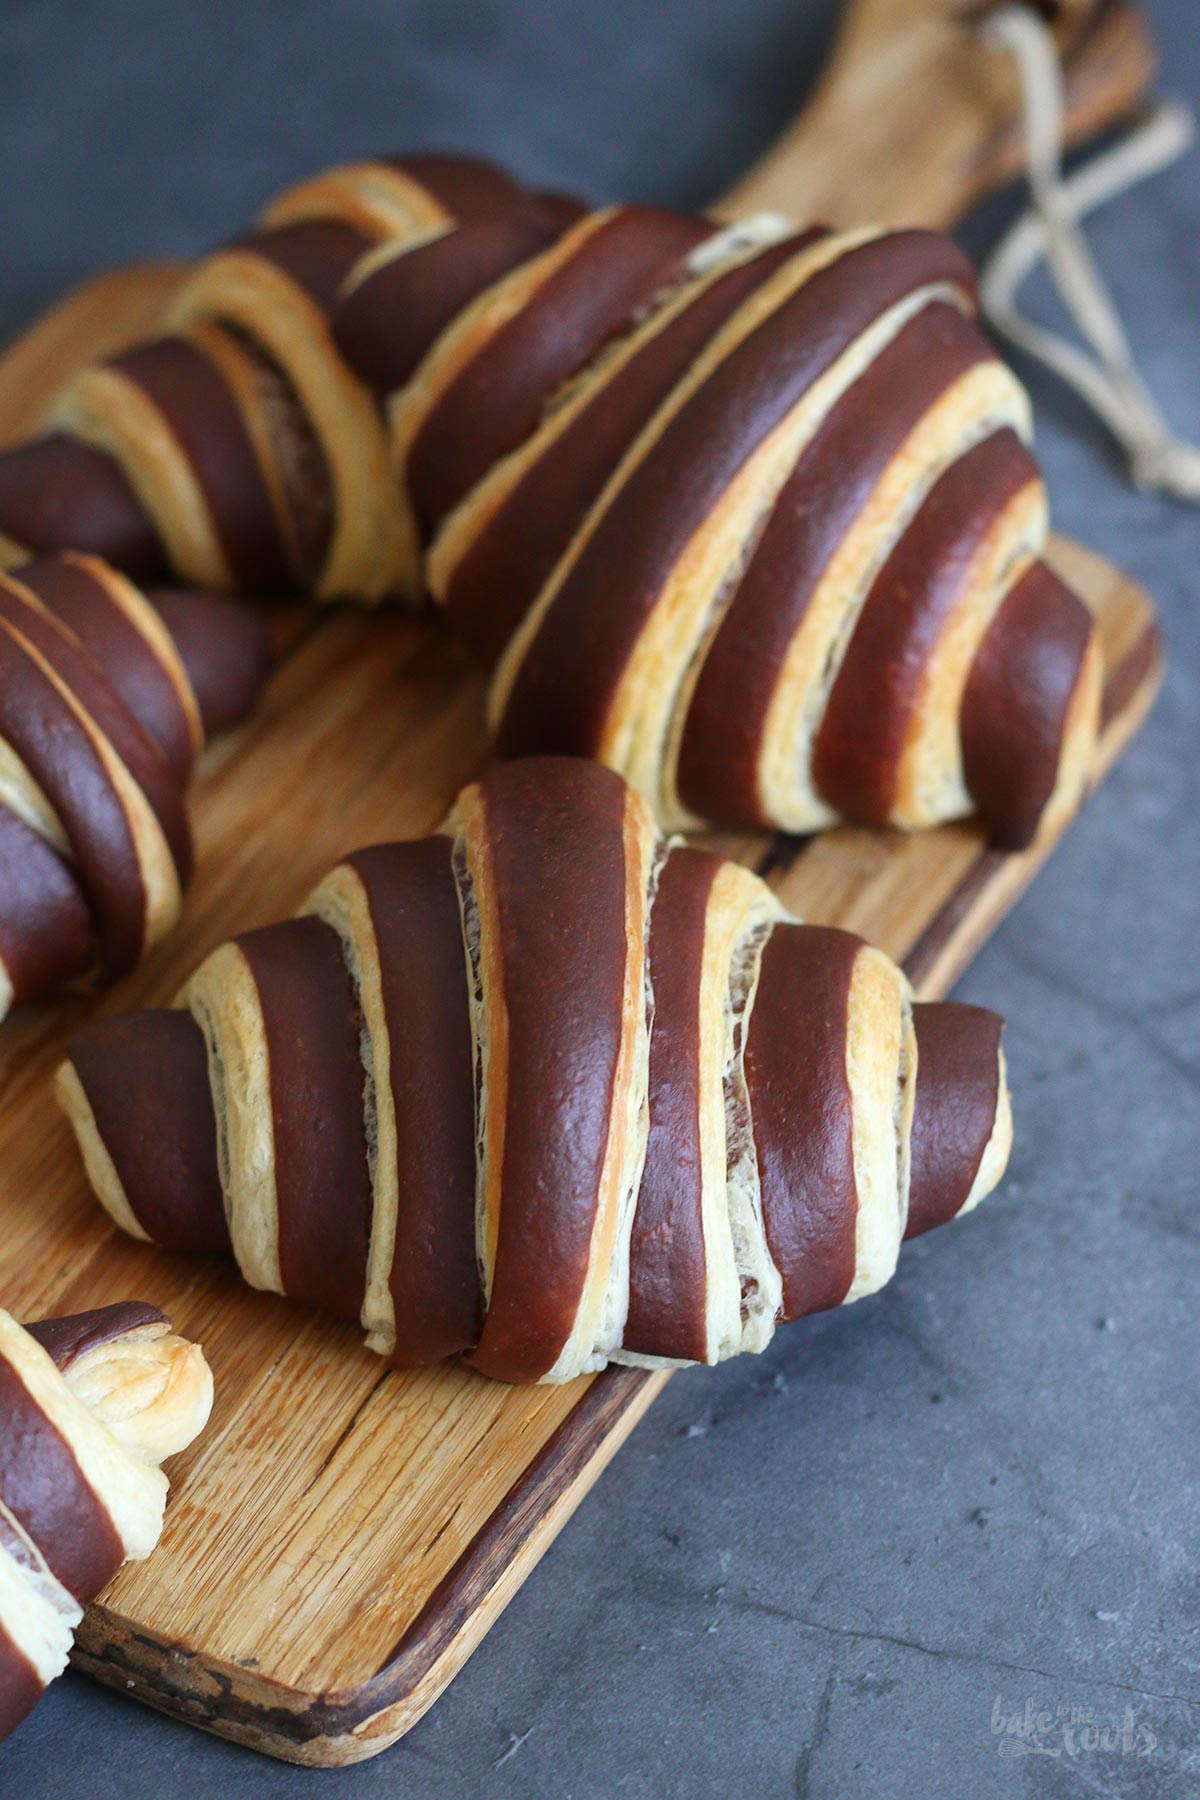
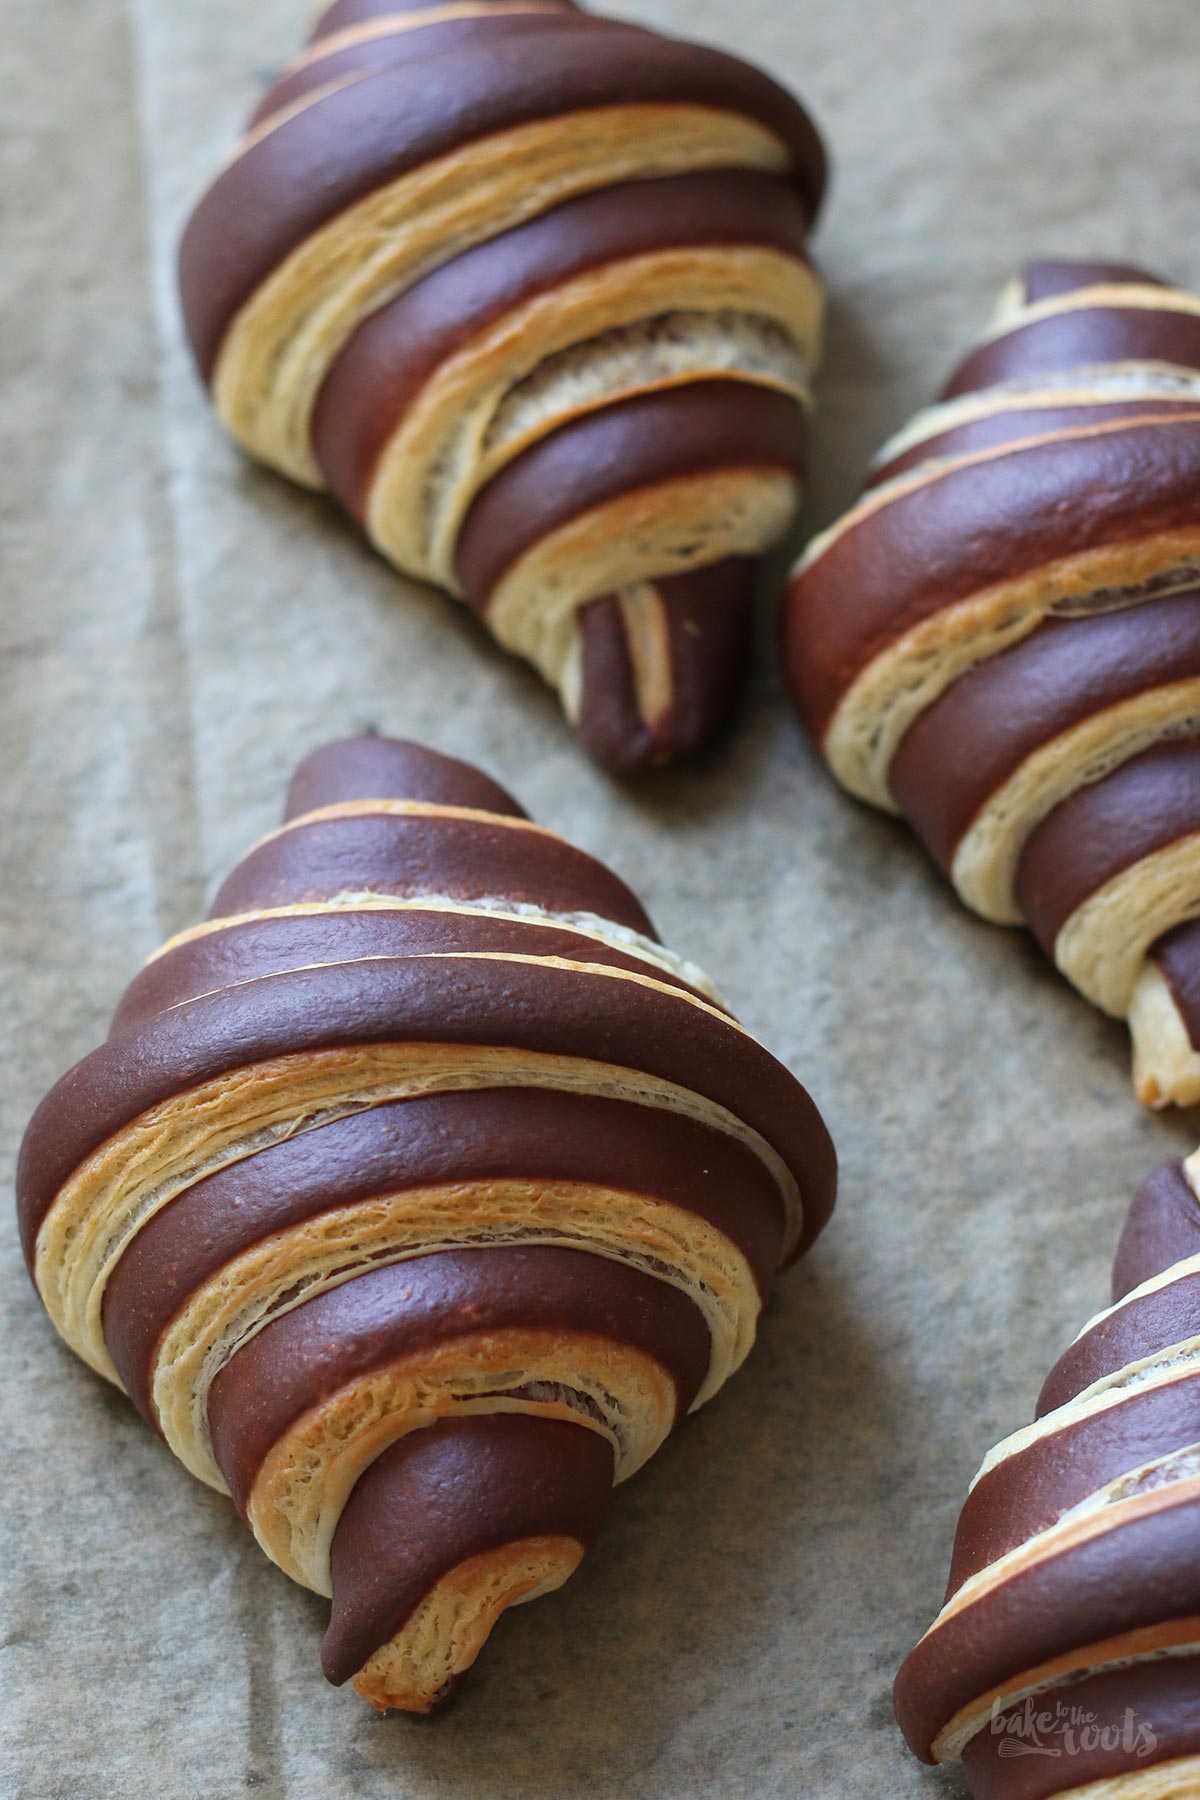
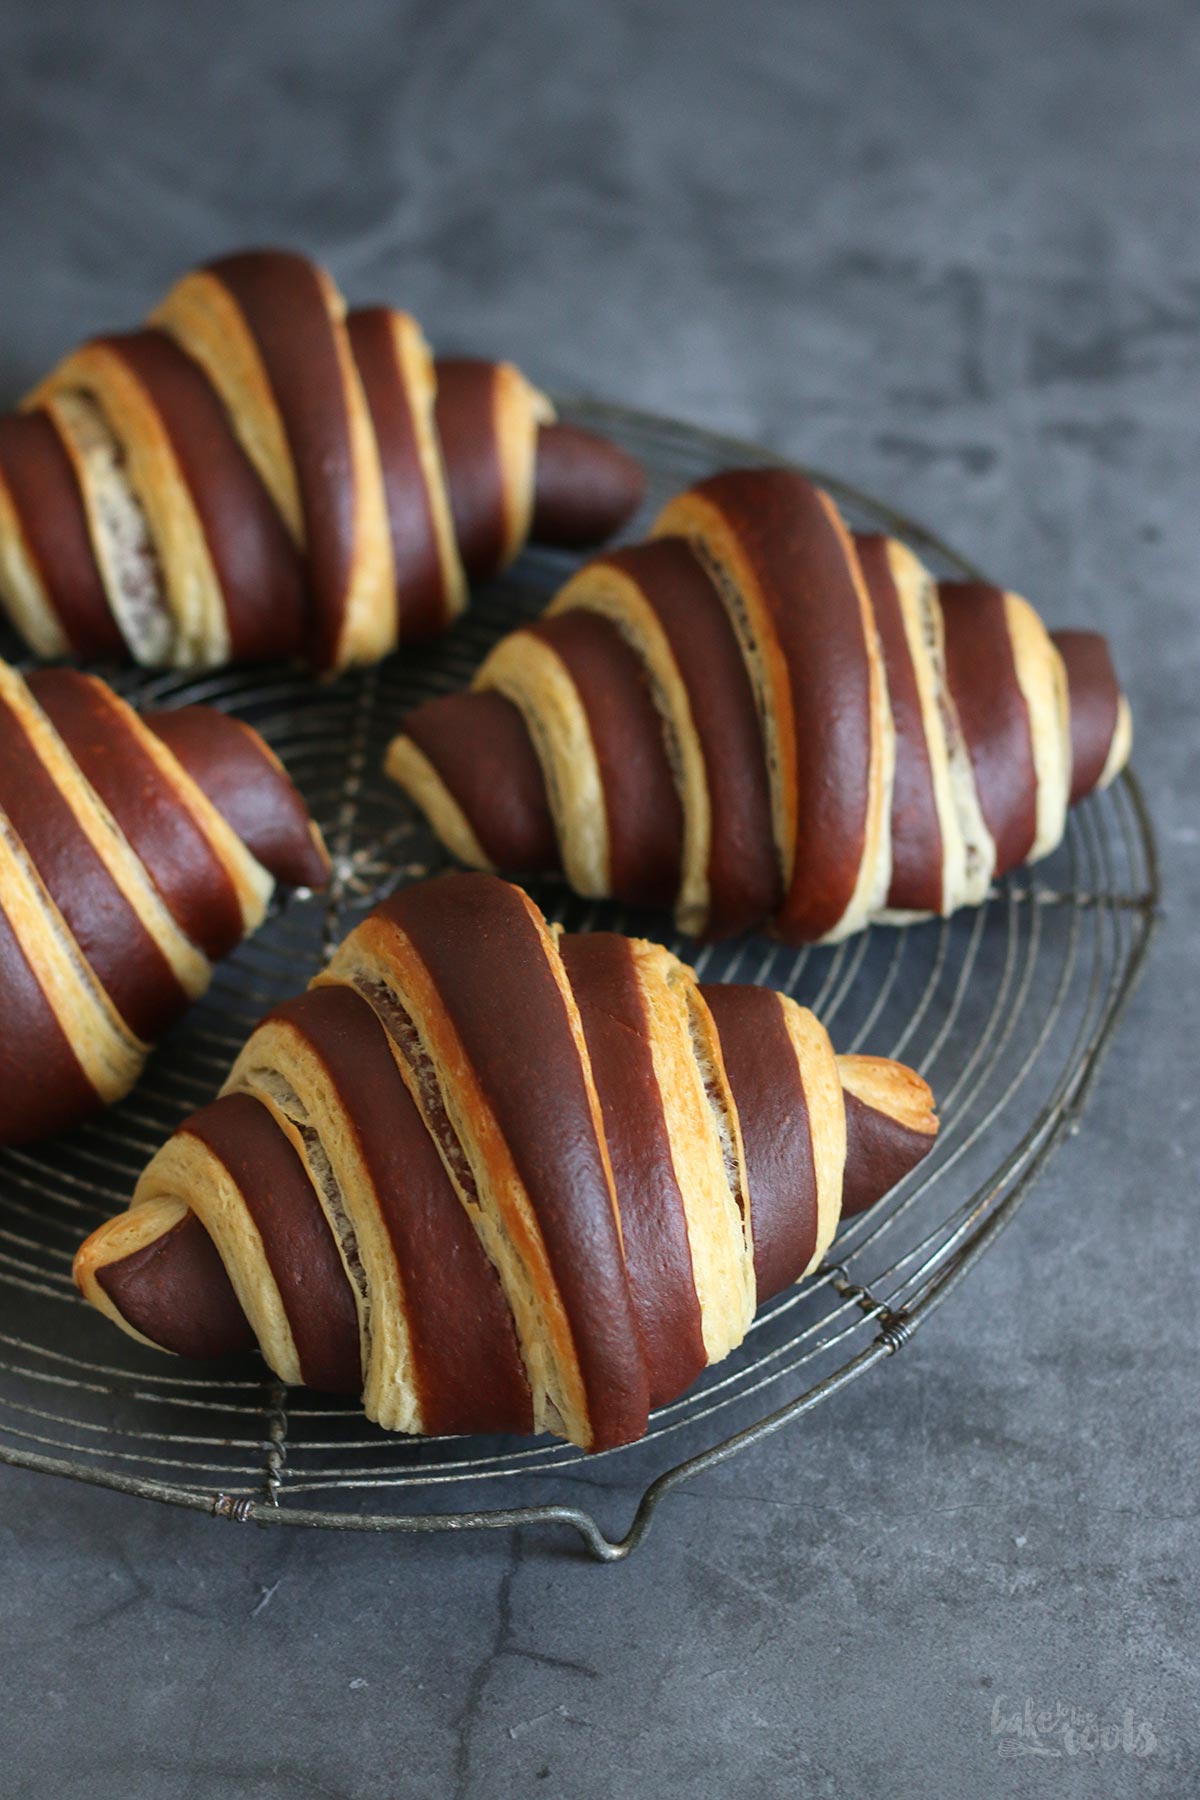
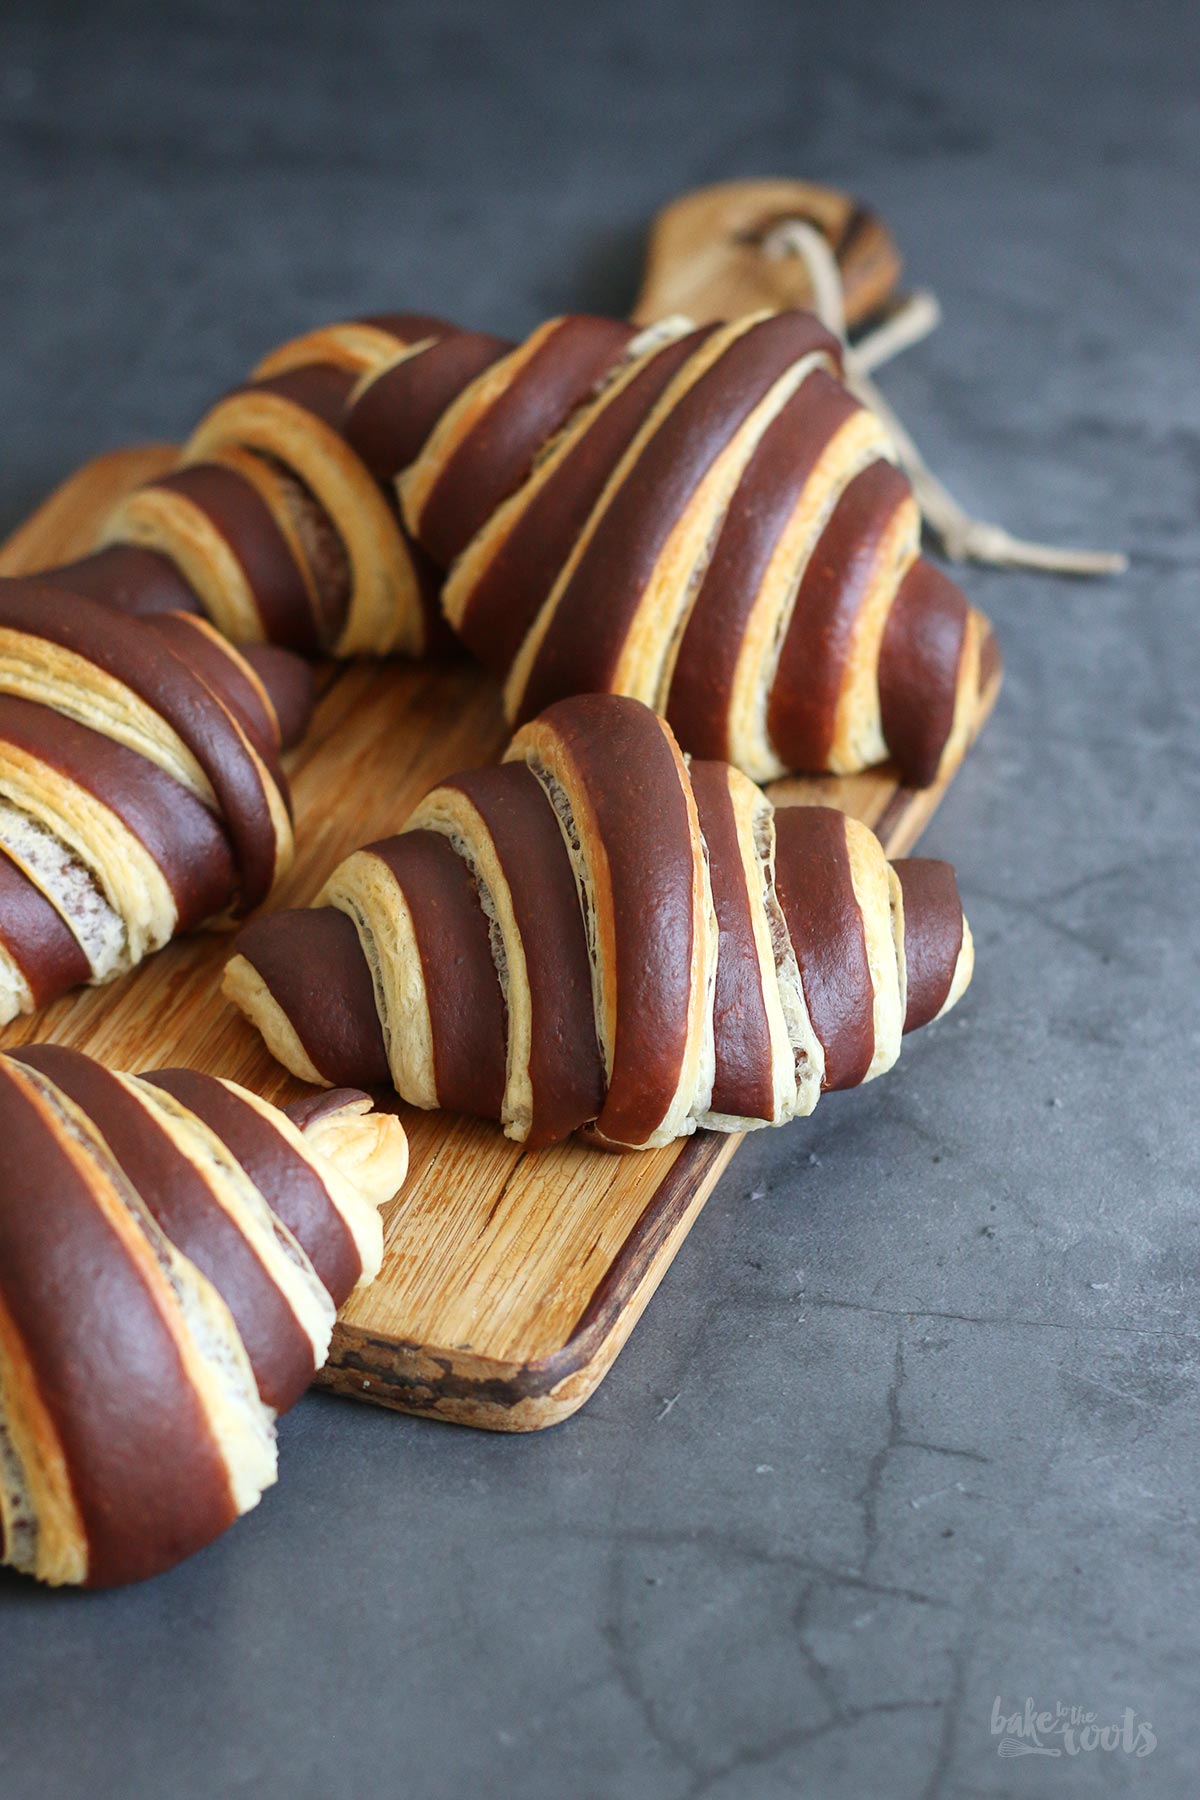
It’s the last Sunday of the month and some people might know what this means here on the blog… it’s time for a new “Bake Together – The Baking Surprise” with Andrea from Zimtkeks & Apfeltarte. Yay! ;) This month we picked a topic that is probably perfect for any kind of lockdown ;P Something you can make at home while working from home (because most of the time you spend is waiting time): delicious croissants! This kind of pastry is always a small challenge for me, but I think these Chocolate Croissants turned out quite nice. Don’t you think so? ;)
In a world, before COVID, croissants were actually too much effort for me to bake them at home on a regular basis. Well, they still are too much effort, but I can make an exemption from time to time. Although… that’s actually wrong. I don’t really mind the effort to make the dough. I rather have a problem with the results. That does not mean that I fail when making croissants or that they do not turn out delicious ;) No. It’s the fact that you take several hours of your time to make these little pastries (with a lot of waiting, I know), you bake 10-12 croissants and you can only eat one or two yourself before they get stale the next day and are not as nice anymore.
You know what I mean? Croissants are perfect on the day they come out of the oven, but unlike cookies or a cheesecake, they do not stay fresh/nice for days. I can eat a cheesecake for 3-4 days and it tastes probably as good on the third day as it tastes on the first day. Croissants and anything with a danish dough or puff pastry dough should be eaten fresh…
The fact that we are in a lockdown situation right now does not make it easier to get rid of the baked goods I create – to be honest – but in this case, here I was able to get some people to come over to grab a couple of croissants and take them home ;P
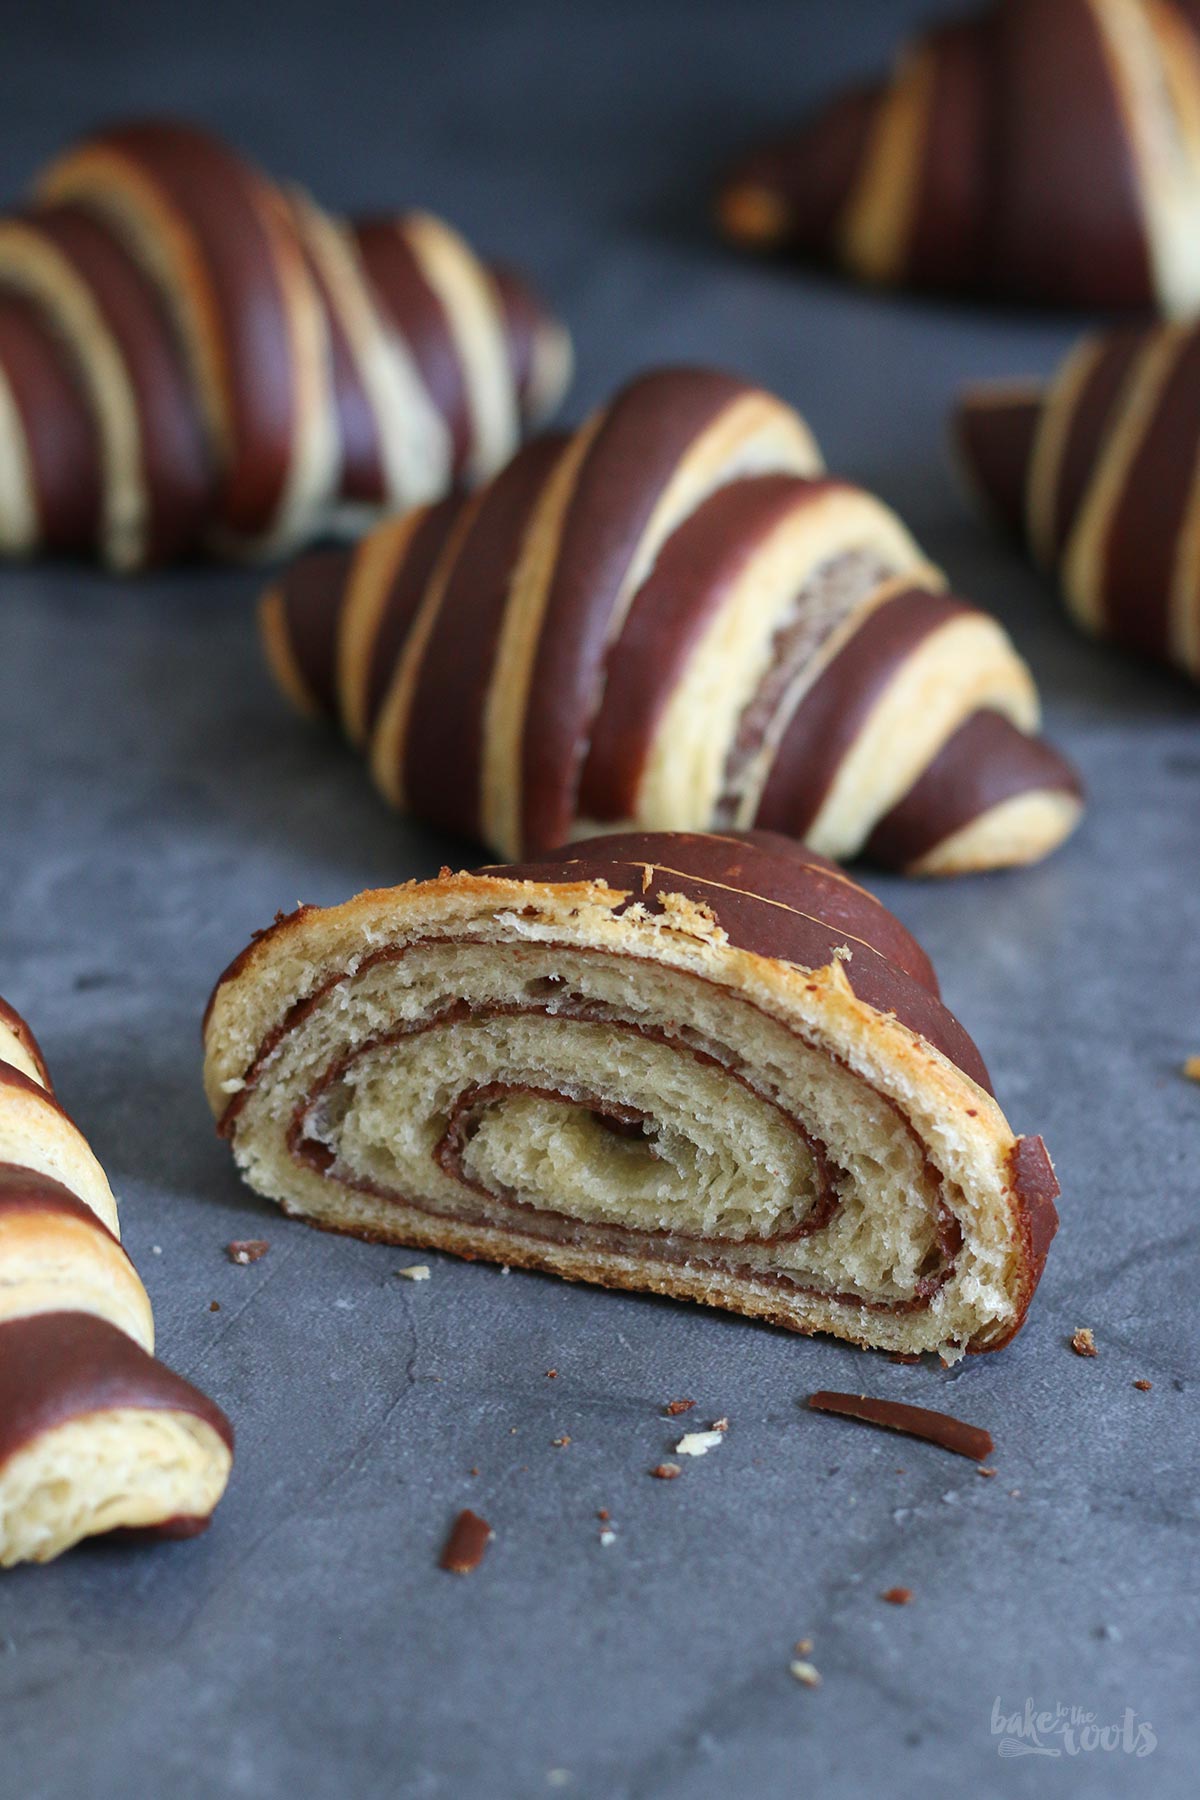
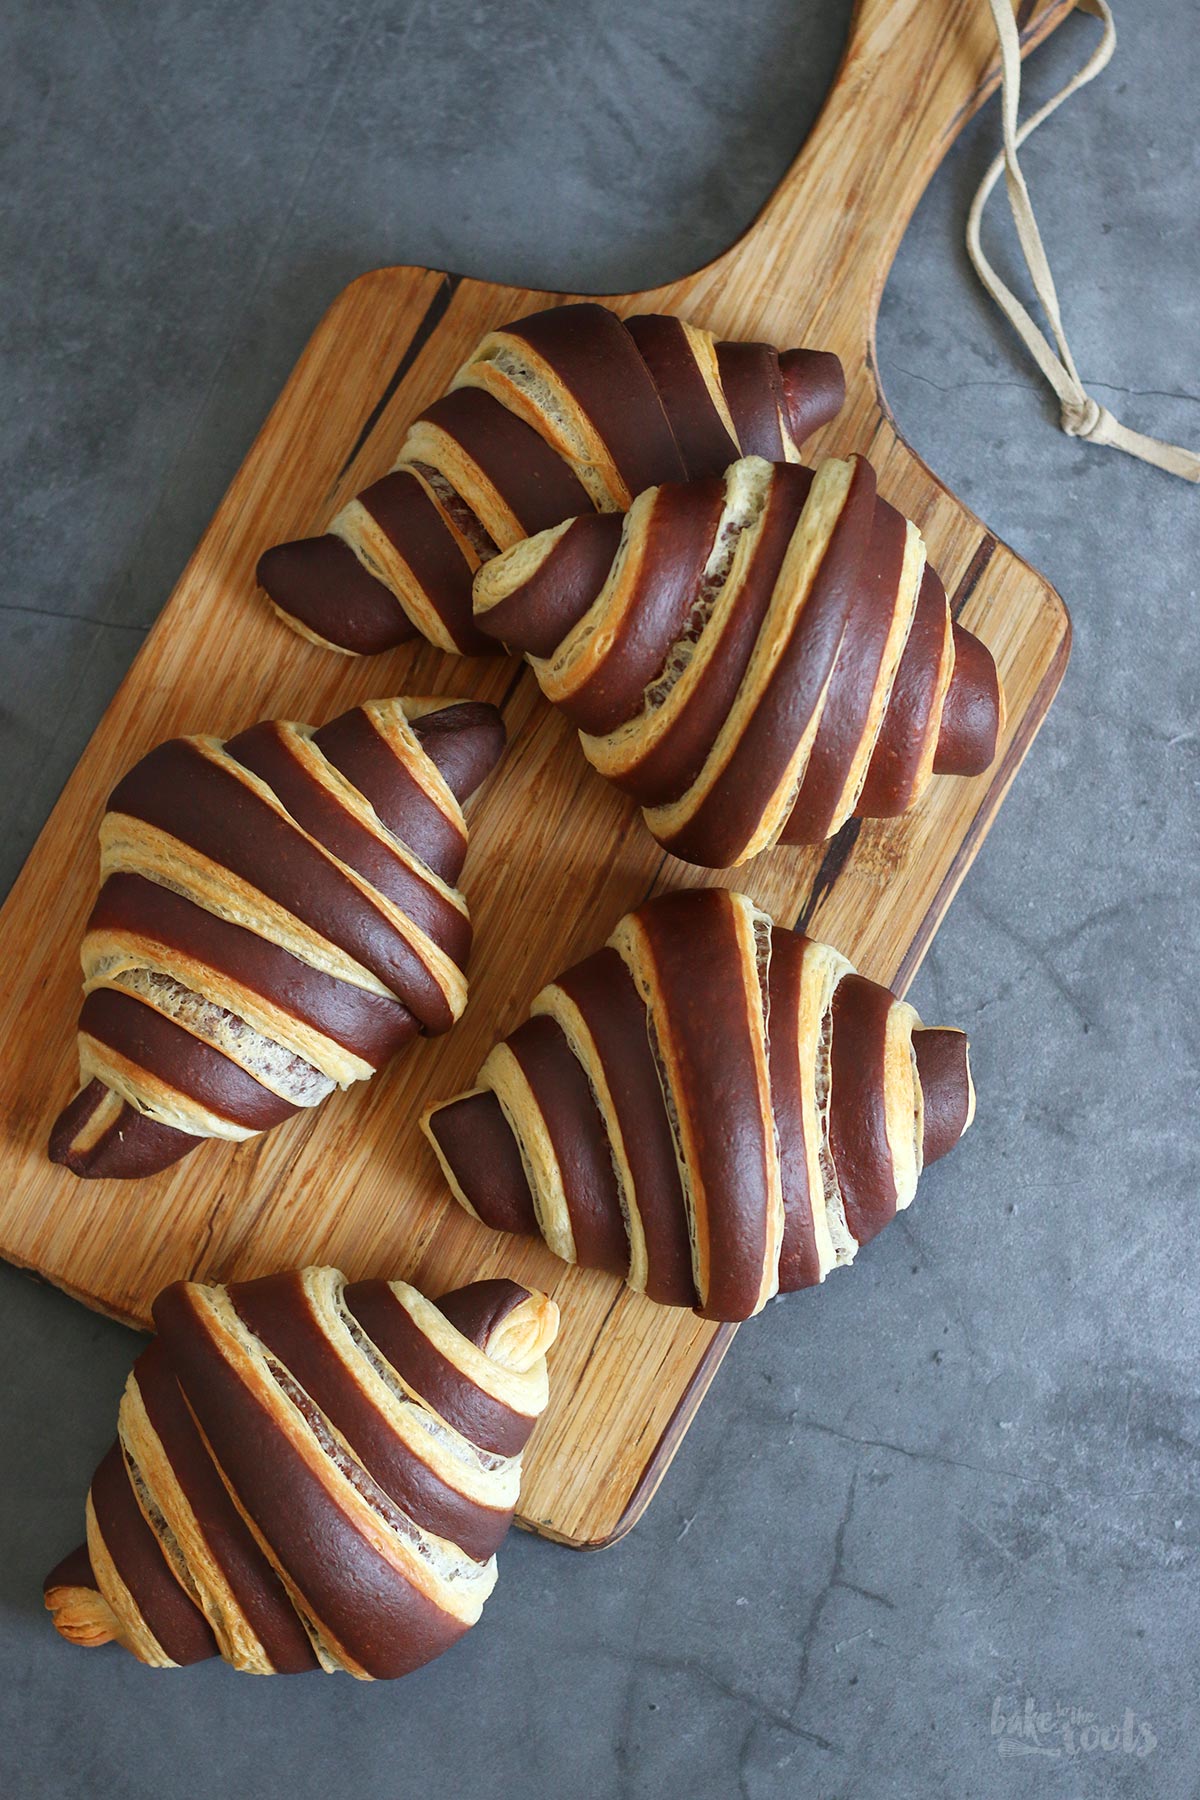
Well… as you can see these croissants have layers of chocolate (dough) inside. That is something I wanted to try for quite some time now. They are not yet perfect, but for the first attempt also not bad I think. They could be a bit airier and puffed up inside – really good croissants have huge air pockets inside – so there is room for improvement here ;) I guess I have to play with the ingredients a bit more (I think I used a bit too much dry yeast) and maybe I can do something about the cooling times in between the turns.. we’ll see. You will probably see the results here someday if everything turns out well ;P
Oh, one more thing. The croissants can easily be filled if you want to do that. You can add a small piece of chocolate onto the dough, for example, and roll it up or you make some additional ganache or chocolate cream to fill the croissants after baking. Both works fine here.
If you want to try some other pastries with a typical danish (puff) pastry, check out these recipes as well. I’ve already tried the famous cronuts and a few other “fluffy” pastries with that kind of dough.

INGREDIENTS / ZUTATEN
(10 croissants)
For the dough:
5 oz. (140g) lukewarm milk
0.4 oz. (12g) active dried yeast
17.3 oz. (490g) all-purpose flour
1.8 oz. (50g) sugar
0.35 oz. (10g) salt
4.2 oz. (120g) water, at room temperature
4.2 oz. (120g) butter, at room temperature
For the chocolate layer:
6.4 oz. (180g) of the dough
2 tbsp. cocoa
2-3 tbsp. water
For the butter layer:
6.4 oz. (180g) butter, at room temperature
(10 Croissants)
Für den Teig:
140g lauwarme Milch
12g Trockenhefe
490g Mehl (Type 550)
50g Zucker
10g Salz
120g Wasser, Zimmertemperatur
120g weiche Butter
Für die Schokoladenschicht:
180g des Teigs (s. oben)
2 EL Kakao
2-3 EL Wasser
Für die Butterschicht:
180g weiche Butter
DIRECTIONS / ZUBEREITUNG
1. Mix the lukewarm milk with the dried yeast and let sit for about 8-10 minutes so it can bubble up a bit.
2. Mix the flour with sugar, and salt in a large bowl. Add the yeast milk, water, and butter and knead for about 5-6 minutes until you get a nice smooth dough that is coming off the sides of the bowl. Cut off about 6.3 oz. (180g) of the dough. Wrap the rest of the dough very loosely into plastic wrap and place in a large bowl in the fridge. Mix the cocoa powder and water for the chocolate layer until you get a very thick chocolate paste – do not add too much water. Mix that chocolate paste with the dough piece you cut off and knead until you get a dough that is evenly brown due to the chocolate paste. Wrap loosely into plastic wrap and place in the fridge as well. Let both dough portions rest in the fridge for at least 4 hours (or overnight).
3. Draw a 6.7×6.7 inches (17x17cm) square on a large piece of baking parchment, flip the paper and place the butter inside that drawn square (you should be able to still see it through the paper). Fold the paper over the butter along the sides of the square to create a package that seals in the butter completely. Use a rolling pin to press and roll out the butter into that square shape to get one even layer. Place in the fridge along with the dough.
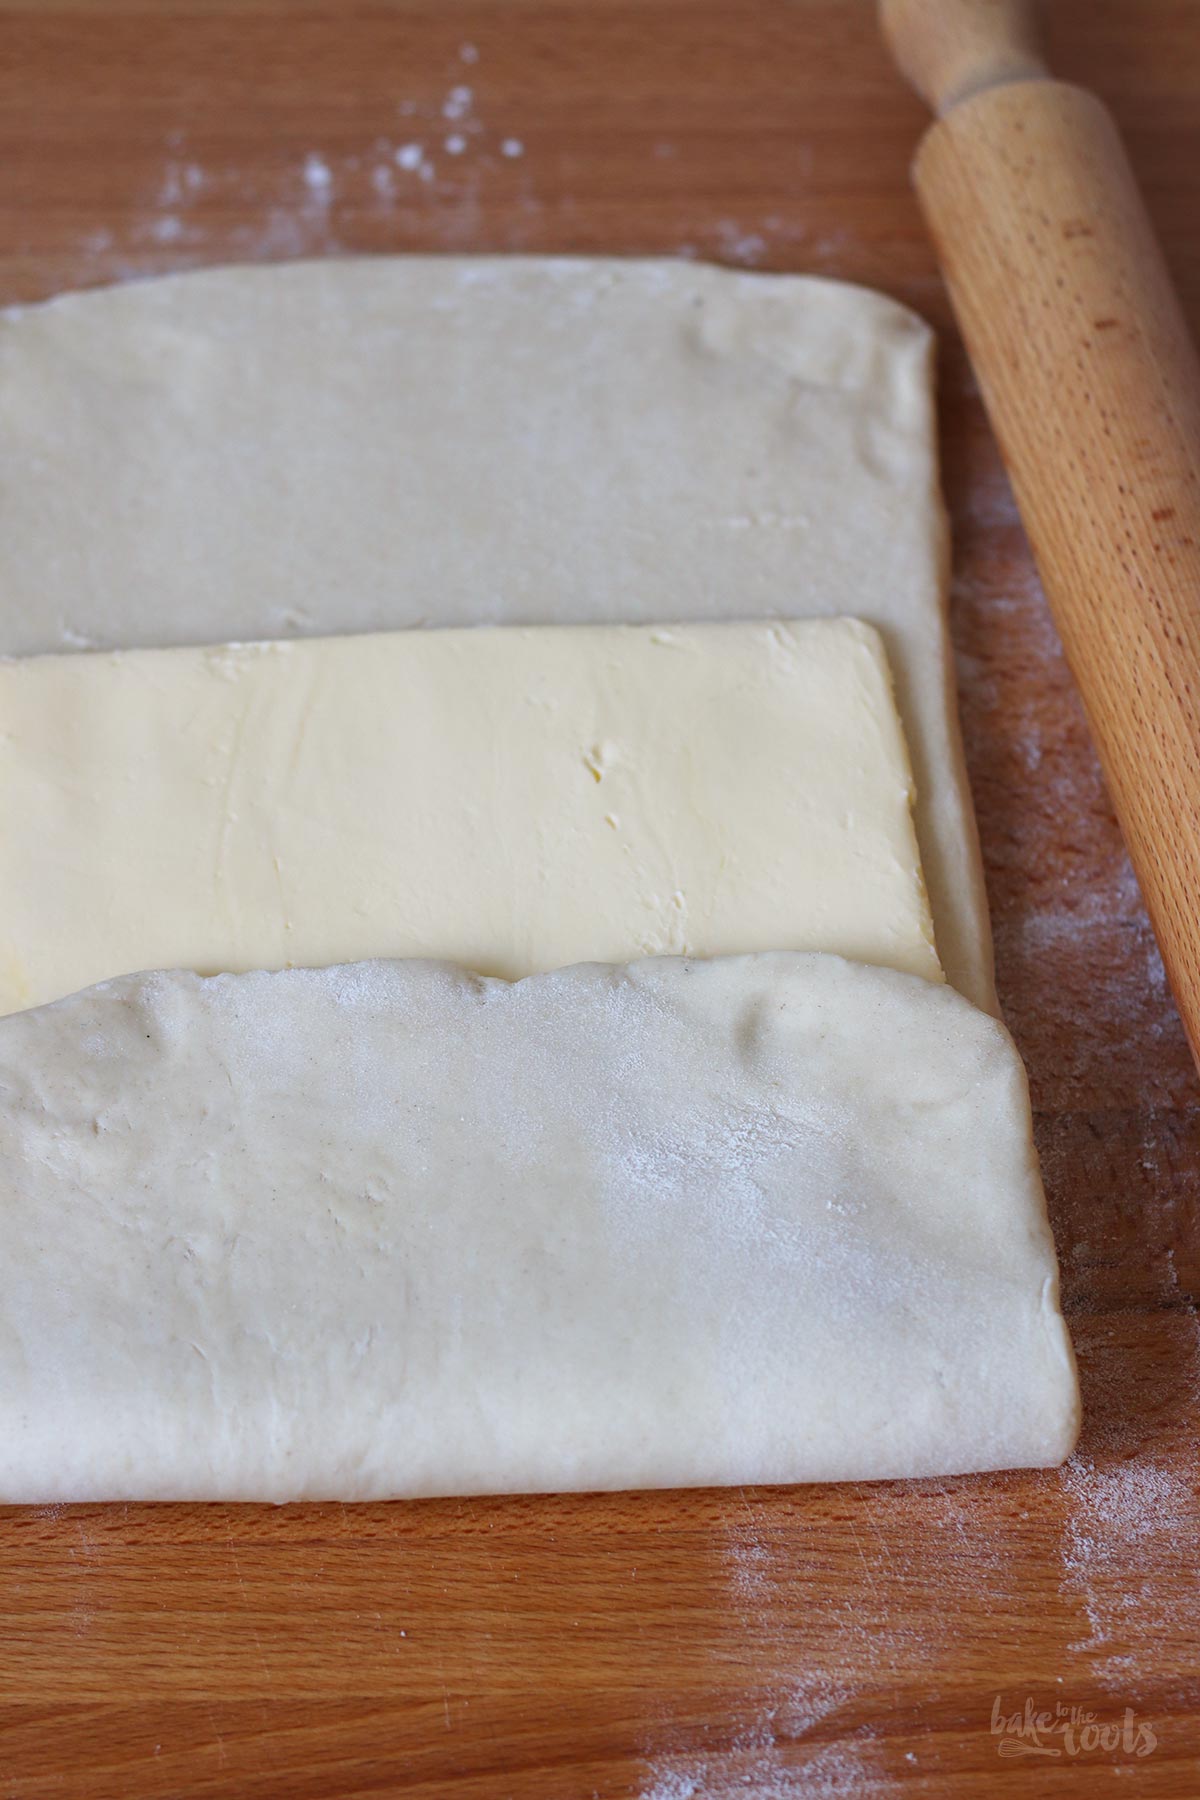
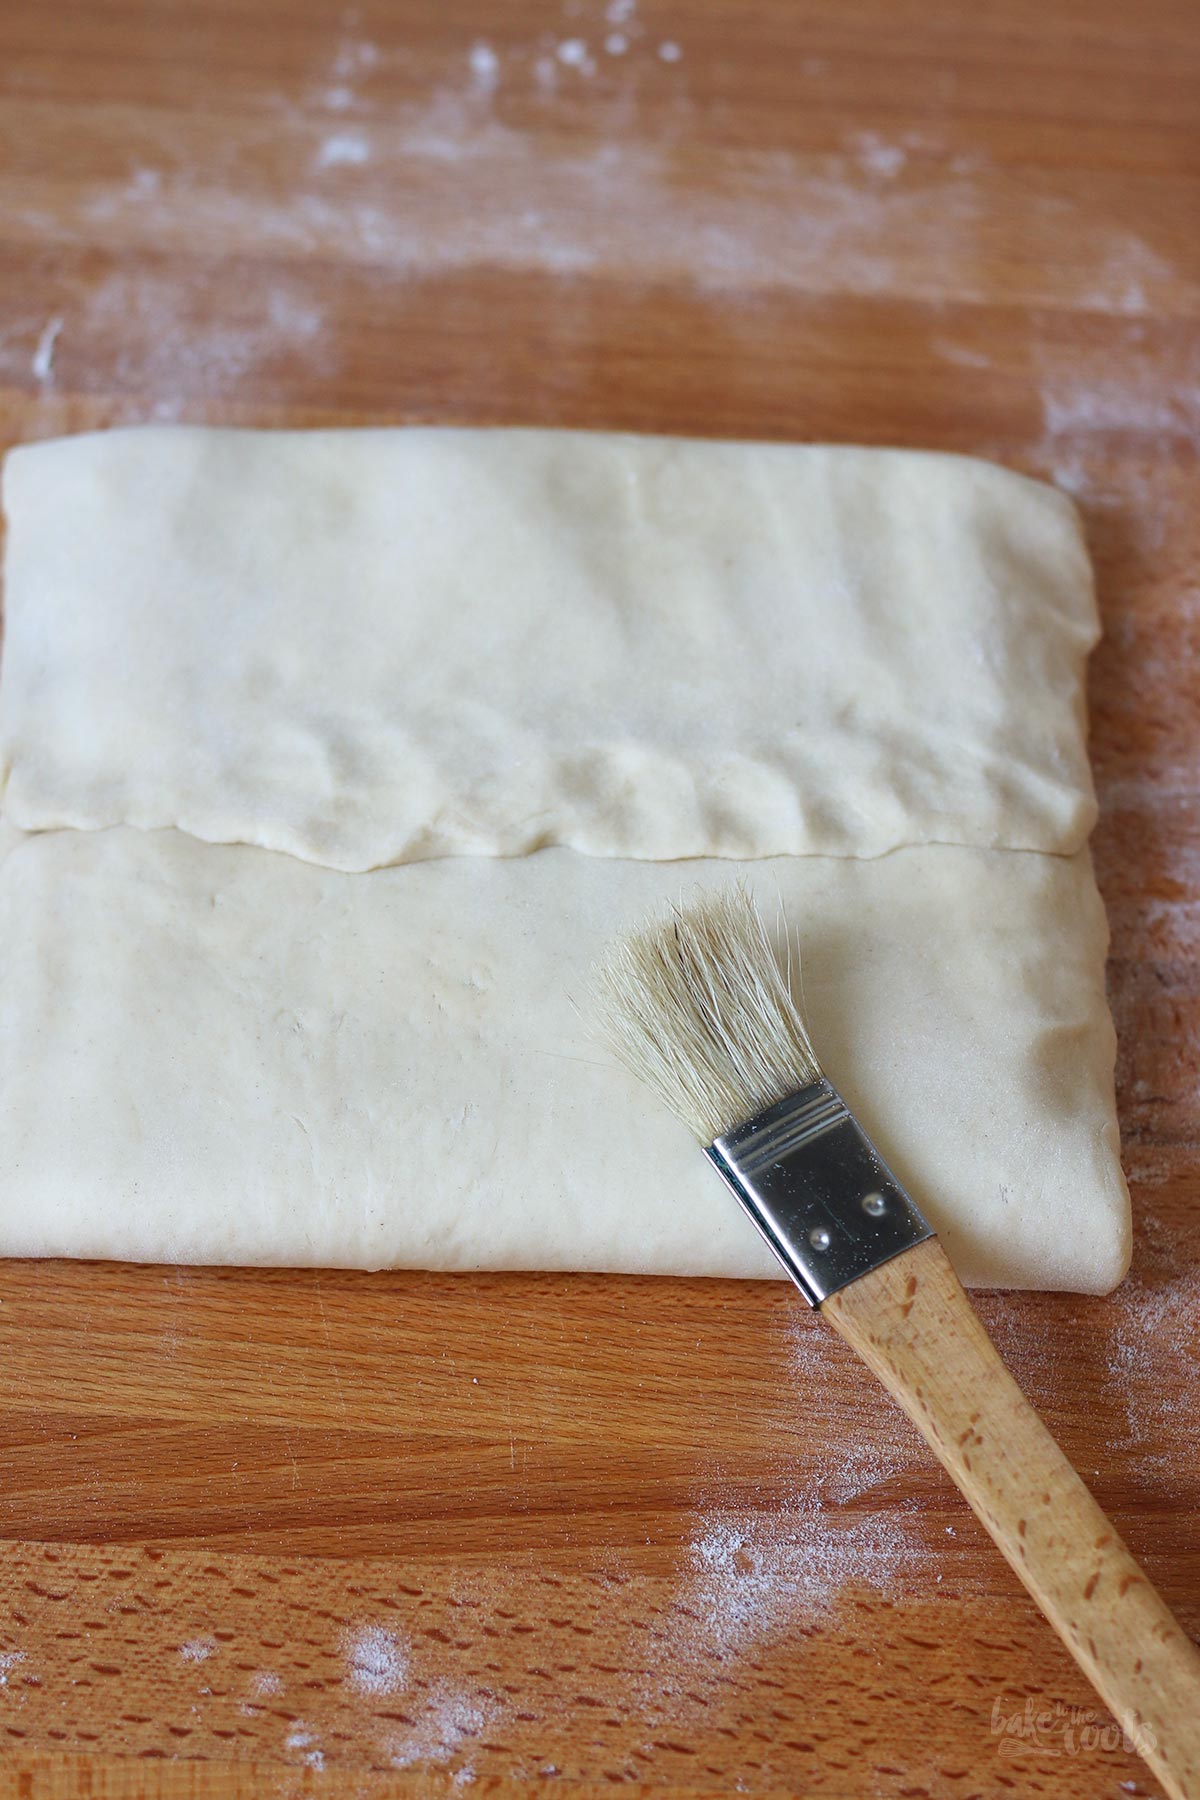
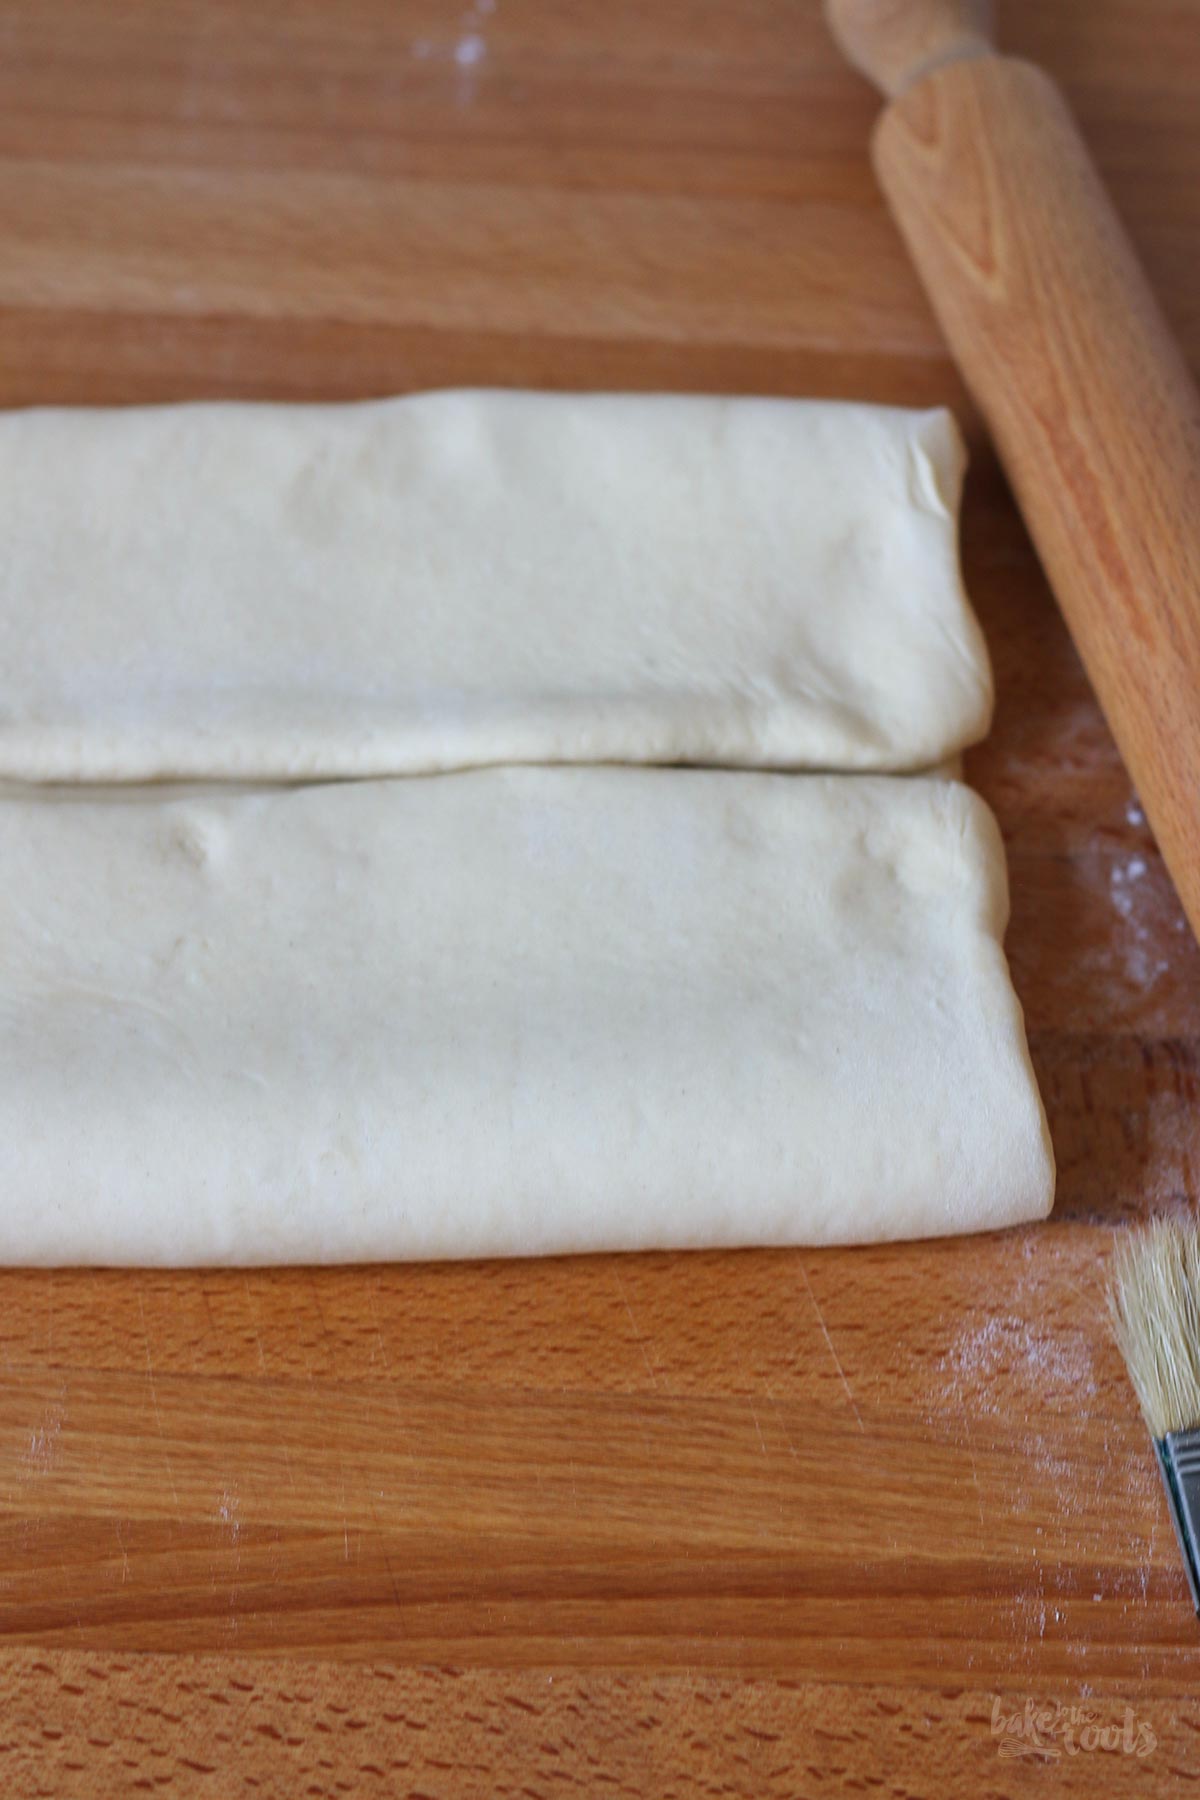
4. Take out the large piece of dough and roll out on a lightly floured surface to a rectangle that is roughly double the size of the butter layer – about 14×7 inches (35x18cm). Remove any flour on the surface with a brush, then place the butter layer (without the paper) on top of the dough in the center of the rectangle and fold the dough on the longer sides over the butter. Pinch the edges together to seal in the butter completely. Gently press and roll out the dough-butter-package to a rectangle of roughly 20×8 inches (50x20cm). Once again remove flour with a brush. Fold the sides of the rectangle towards the center to create an (almost square) package and then fold once more in the same direction to create a package that has four layers – this is called a “double turn”. Wrap loosely into plastic wrap and place in the fridge for 1 hour.
5. Roll out the dough once more on a floured surface – this time place the package in front of you, the longer sides should be facing away from you and you should be able to see the four layers of the package in front of you. Roll out to create a rectangle with a size of about 20×10 inches (50x25cm). Remove flour with a brush and fold the longer sides towards the center, but this time you will do a “single turn” by folding about 1/3 on one side towards the center and then folding 1/3 from the opposite side towards the center as well (almost like wrapping a gift box) – you will create a new package with three layers this time. Wrap loosely into plastic wrap and place in the fridge for 1 1/2 hours this time.
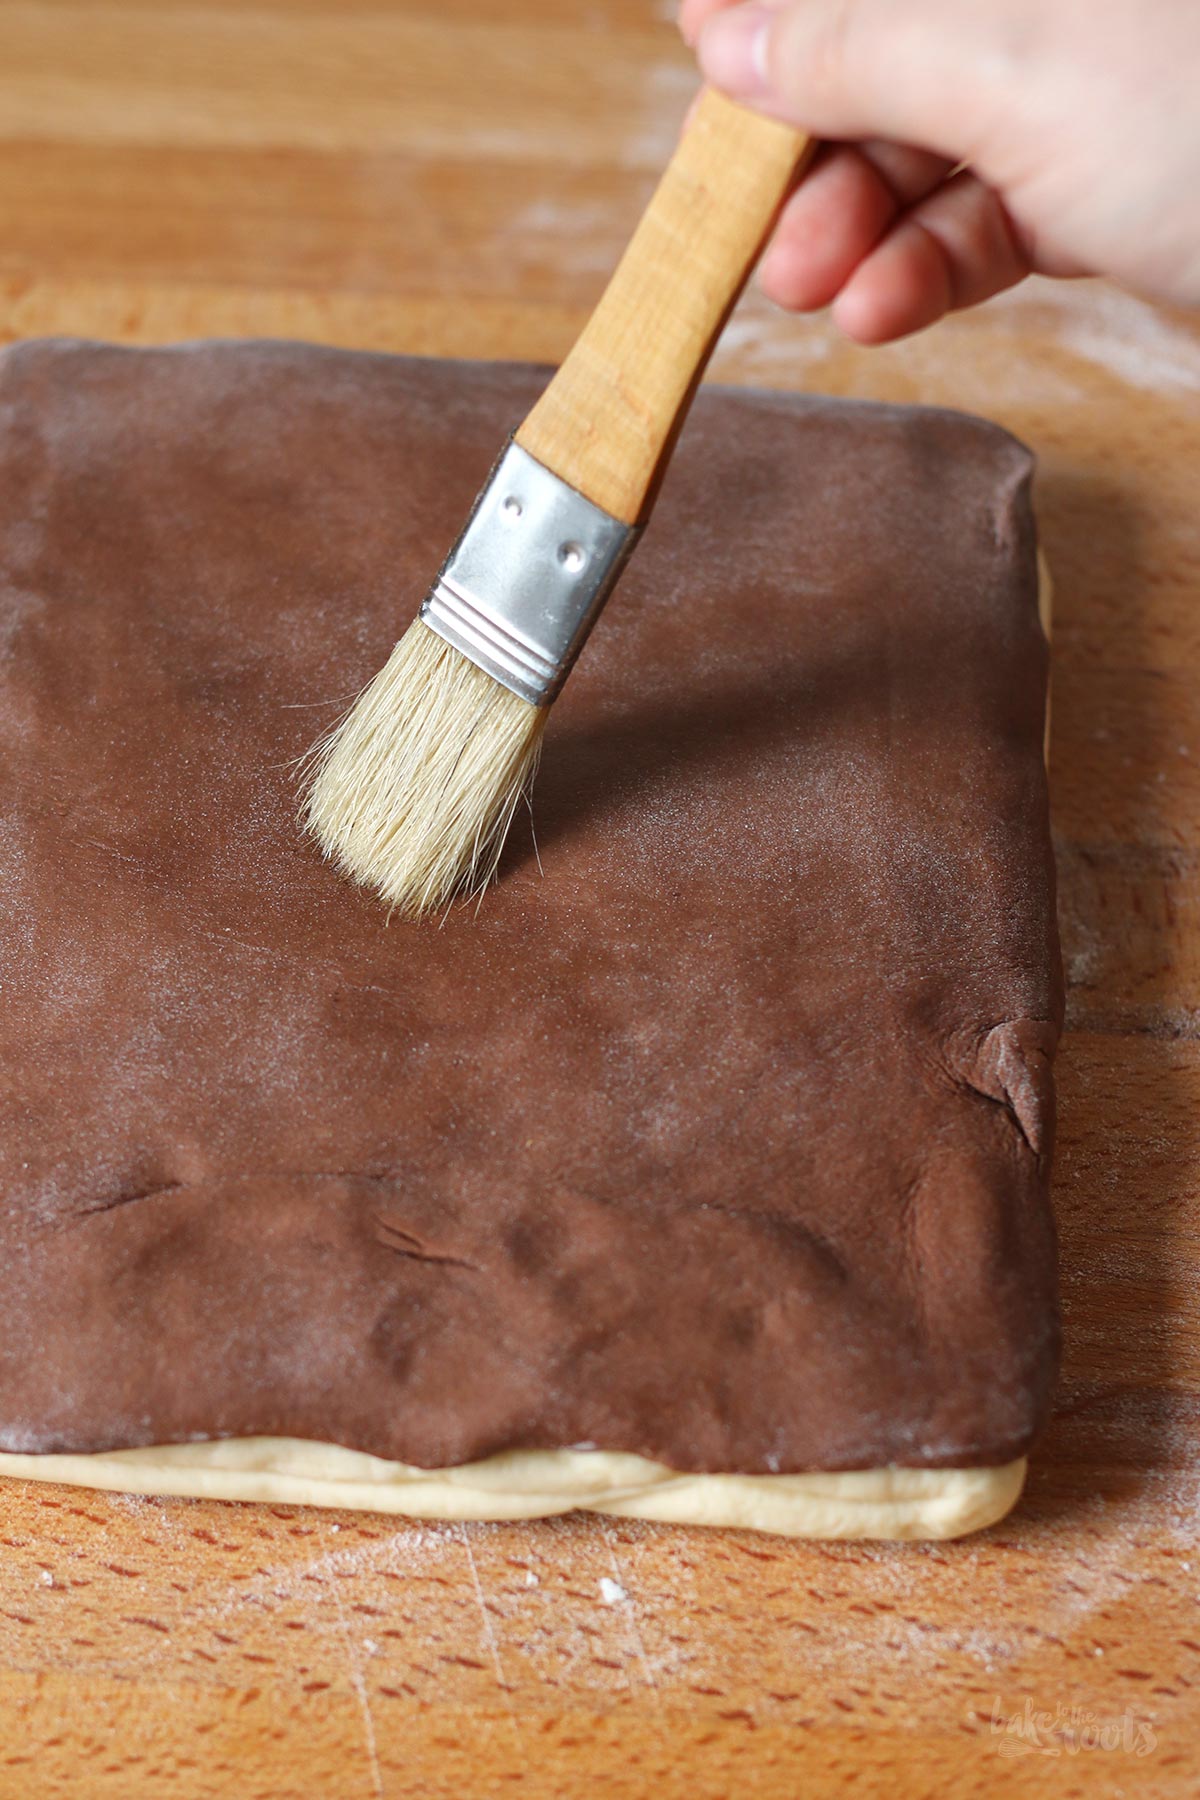
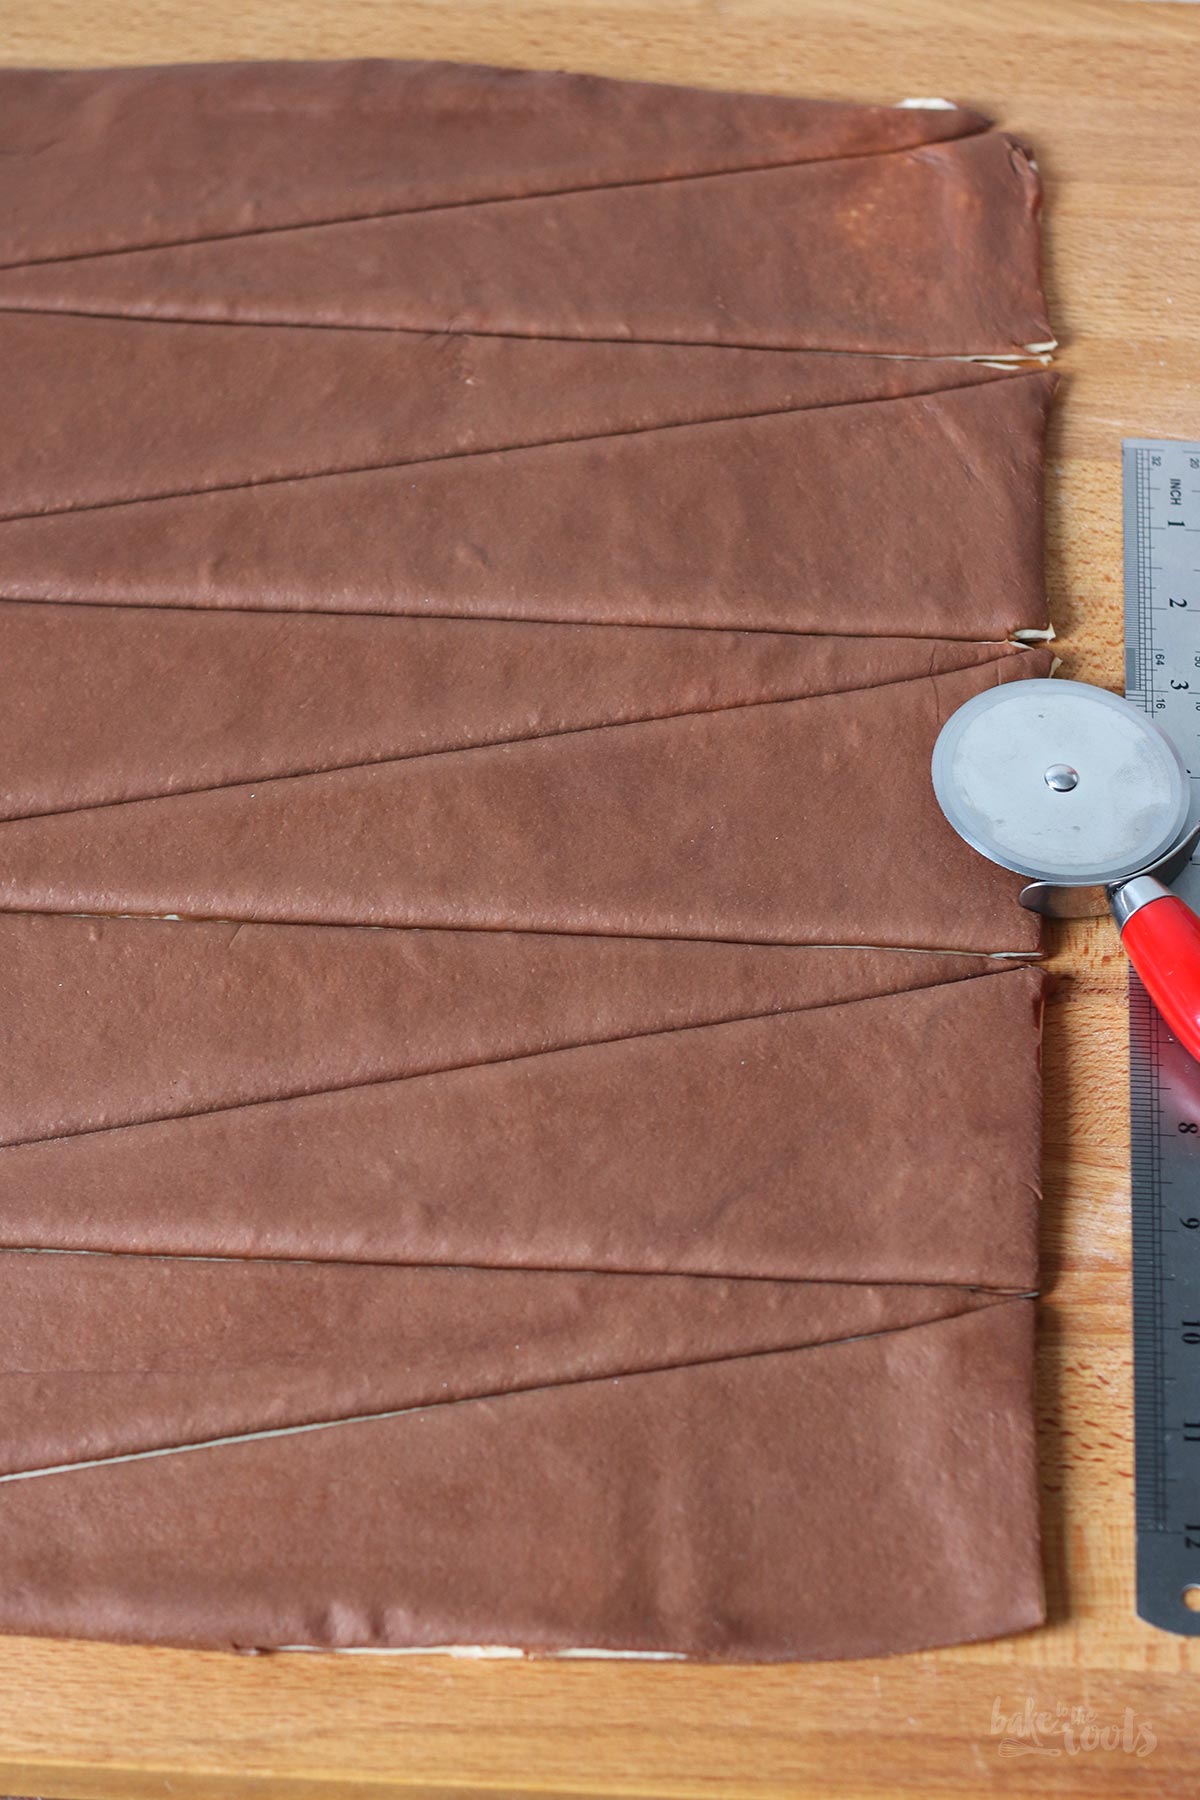
6. Roll out the chocolate dough on a floured surface to the same size as the dough package you created earlier with the other dough. Remove any flour with a brush and place the layer on the package and press together. Roll out to a rectangle with roughly 14×17.7 inches (35x45cm). Cut the rectangle into 14×3.5 inches (35x9cm) long strips and these strips diagonally into triangles. Flip the triangles so the chocolate side is facing down and roll them up from the wider side into a croissant. Place with a lot of space in between on two baking sheets, cover with plastic wrap and let rise another 45-60 minutes.
7. While the croissants are rising preheat the oven to 350°F (180°C). When ready place in the oven and bake for 18-20 minutes – switch the baking sheets halfway through. The croissants should have puffed up nicely and have a golden color. Take out of the oven and let cool down on a wire rack.
1. Die lauwarme Milch mit der Trockenhefe verrühren und ca. 8-10 Minuten stehen lassen, damit sie ein wenig aufgehen kann.
2. Das Mehl mit Zucker und Salz in einer großen Schüssel vermischen. Hefemilch, Wasser und Butter zur Schüssel dazugeben und alles für 5-6 Minuten verkneten, bis ein glatter Teig entsteht, der sich vom Schüsselrand löst. Etwa 180g vom Teig abtrennen, den Rest sehr locker in Klarsichtfolie einschlagen, in eine große Schüssel legen und in den Kühlschrank stellen. Kakao und Wasser zu einer dicken Paste verrühren und dann mit dem abgetrennten Teigstück verarbeiten/verkneten – der Teig sollte gleichmäßig durchgefärbt braun sein. Ebenfalls locker in Folie einwickeln und zum restlichen Teig in den Kühlschrank legen. Für mindestens 4 Stunden (oder über Nacht) in den Kühlschrank legen.
3. Für die Butterschicht jetzt ein Quadrat mit 17x17cm (6.7×6.7 inches) auf ein großes Stück Backpapier zeichnen. Das Papier umdrehen (das Quadrat sollte man durch das Papier erkennen können) und dann die Butter innerhalb dieses Quadrats verstreichen. Das Papier an den eingezeichneten Kanten zu einem Paket über die Butter falten und die Butter z.B. mit einem Nudelholz bis in die Ecken drücken/streichen, damit eine gleichmäßige Butterschicht entsteht. Zusammen mit dem Teig in den Kühlschrank legen.
4. Den hellen Teig aus dem Kühlschrank holen und auf einer leicht bemehlten Fläche etwa doppelt so groß wie das Butterquadrat ausrollen – etwa etwa 35×18 cm (14×7 inches). Mehl vom Teig mit deinem Pinsel entfernen, die Butter (ohne das Papier) in die Mitte des Teig-Rechtecks setzen und dann mit dem Teig einschlagen, wie ein Geschenk. Die Butter sollte komplett eingeschlossen sein, den Teig an den Rändern also gut zusammendrücken. Das entstandene Teig-Butter-Paket mit einem Nudelholz zu einem Rechteck mit 50x20cm (20×8 inches) ausrollen. Mehl ggf. wieder entfernen und dann von der langen Seite her die Enden zur Mitte falten und dann das Ganze noch einmal in der gleichen Richtung mittig falten, damit ein Paket mit vier Lagen entsteht – das nennt sich “doppelte Tour”. Das Paket locker in Klarsichtfolie einschlagen und für etwa 1 Stunde in den Kühlschrank legen.
5. In einer zweiten Runde den Teig erneut ausrollen. Diesmal das Paket so vor sich hinlegen, dass die lange Seite von einem weg zeigt – die vier Schichten sollten direkt vor einem sichtbar sein. Den Teig zu einem Rechteck von etwa 50x25cm (20×10 inches) ausrollen, Mehl ggf. wieder entfernen und dann wieder die Enden des Teig-Rechtecks zur Mitte falten – diesmal allerdings die eine Seite etwa 1/3 zur Mitte und das andere Ende darüber. Dieses Paket hat diesmal nur drei Schichten – das ist eine “einfache Tour”. Wieder locker in Folie einschlagen und diesmal für etwa 1 1/2 Stunden in den Kühlschrank legen.
6. Den Schokoladenteig auf einer leicht bemehlten Fläche auf die Größe des zusammengefalteten Teigpakets ausrollen, Mehl auf dem Teig entfernen und dann auf das Teigpaket legen. Leicht zusammendrücken und dann alles zu einem Rechteck von etwa 35x45cm (14×17.7 inches) ausrollen. Dieses Rechteck dann in 35x9cm (14×3.5 inches) lange Streifen schneiden und diese Streifen dann diagonal in lange Dreiecke. Diese Dreiecke dann umdrehen, damit die Schokoseite unten ist und von der kurzen Seite her zu Croissants aufrollen. Mit viel Abstand zueinander auf zwei mit Backpapier ausgelegte Backbleche setzen, mit Klarsichtfolie abdecken und weitere 45-60 Minuten gehen lassen.
7. Während die Croissants aufgehen, den Ofen auf 180°C (350°F) vorheizen. Die gegangenen Croissants etwa 18-20 Minuten backen – nach der Hälfte der Backzeit die Position Backbleche wechseln. Die Croissants sollten schön aufgegangen sein und eine goldene Farbe haben. Aus dem Ofen holen und auf einem Kuchengitter abkühlen lassen.
Craving more? Keep in touch on Facebook, Twitter, Instagram and Pinterest for new post updates and more. You can also contact me with any questions or inquiries!
Here is a version of the recipe you can print easily.
Print
Chocolate Croissants
- Prep Time: 01:00
- Cook Time: 00:20
- Total Time: 09:00
- Yield: 10 1x
- Category: Pastry
- Cuisine: France
Description
French pastry at its best: Homemade Chocolate Croissants. As good as the ones from the bakery… maybe even better because they are made with love ;)
Ingredients
For the dough:
5 oz. (140g) lukewarm milk
0.4 oz. (12g) active dried yeast
17.3 oz. (490g) all-purpose flour
1.8 oz. (50g) sugar
0.35 oz. (10g) salt
4.2 oz. (120g) water, at room temperature
4.2 oz. (120g) butter, at room temperature
For the chocolate layer:
6.4 oz. (180g) of the dough
2 tbsp. cocoa
2–3 tbsp. water
For the butter layer:
6.4 oz. (180g) butter, at room temperature
Instructions
1. Mix the lukewarm milk with the dried yeast and let sit for about 8-10 minutes so it can bubble up a bit.
2. Mix the flour with sugar, and salt in a large bowl. Add the yeast milk, water, and butter and knead for about 5-6 minutes until you get a nice smooth dough that is coming off the sides of the bowl. Cut off about 6.3 oz. (180g) of the dough. Wrap the rest of the dough very loosely into plastic wrap and place in a large bowl in the fridge. Mix the cocoa powder and water for the chocolate layer until you get a very thick chocolate paste – do not add too much water. Mix that chocolate paste with the dough piece you cut off and knead until you get a dough that is evenly brown due to the chocolate paste. Wrap loosely into plastic wrap and place in the fridge as well. Let both dough portions rest in the fridge for at least 4 hours (or overnight).
3. Draw a 6.7×6.7 inches (17x17cm) square on a large piece of baking parchment, flip the paper and place the butter inside that drawn square (you should be able to still see it through the paper). Fold the paper over the butter along the sides of the square to create a package that seals in the butter completely. Use a rolling pin to press and roll out the butter into that square shape to get one even layer. Place in the fridge along with the dough.
4. Take out the large piece of dough and roll out on a lightly floured surface to a rectangle that is roughly double the size of the butter layer – about 14×7 inches (35x18cm). Remove any flour on the surface with a brush, then place the butter layer (without the paper) on top of the dough in the center of the rectangle and fold the dough on the longer sides over the butter. Pinch the edges together to seal in the butter completely. Gently press and roll out the dough-butter-package to a rectangle of roughly 20×8 inches (50x20cm). Once again remove flour with a brush. Fold the sides of the rectangle towards the center to create an (almost square) package and then fold once more in the same direction to create a package that has four layers – this is called a “double turn”. Wrap loosely into plastic wrap and place in the fridge for 1 hour.
5. Roll out the dough once more on a floured surface – this time place the package in front of you, the longer sides should be facing away from you and you should be able to see the four layers of the package in front of you. Roll out to create a rectangle with a size of about 20×10 inches (50x25cm). Remove flour with a brush and fold the longer sides towards the center, but this time you will do a “single turn” by folding about 1/3 on one side towards the center and then folding 1/3 from the opposite side towards the center as well (almost like wrapping a gift box) – you will create a new package with three layers this time. Wrap loosely into plastic wrap and place in the fridge for 1 1/2 hours this time.
6. Roll out the chocolate dough on a floured surface to the same size as the dough package you created earlier with the other dough. Remove any flour with a brush and place the layer on the package and press together. Roll out to a rectangle with roughly 14×17.7 inches (35x45cm). Cut the rectangle into 14×3.5 inches (35x9cm) long strips and these strips diagonally into triangles. Flip the triangles so the chocolate side is facing down and roll them up from the wider side into a croissant. Place with a lot of space in between on two baking sheets, cover with plastic wrap and let rise another 45-60 minutes.
7. While the croissants are rising preheat the oven to 350°F (180°C). When ready place in the oven and bake for 18-20 minutes – switch the baking sheets halfway through. The croissants should have puffed up nicely and have a golden color. Take out of the oven and let cool down on a wire rack.
Notes
Enjoy baking!
Links marked with an asterisk (*) are affiliate links (advertising/Werbung) to Amazon Germany. If you click on one of those links and buy something via this link, I will get a commission for that sale. The price of whatever you buy is not affected in any way by this.






 I love my job, but in between I love to bake and try new things in the kitchen. A lot of my friends and colleagues encourage me to bake - for a very simple reason: they get the leftovers - and it seems they like it most of the time ;)