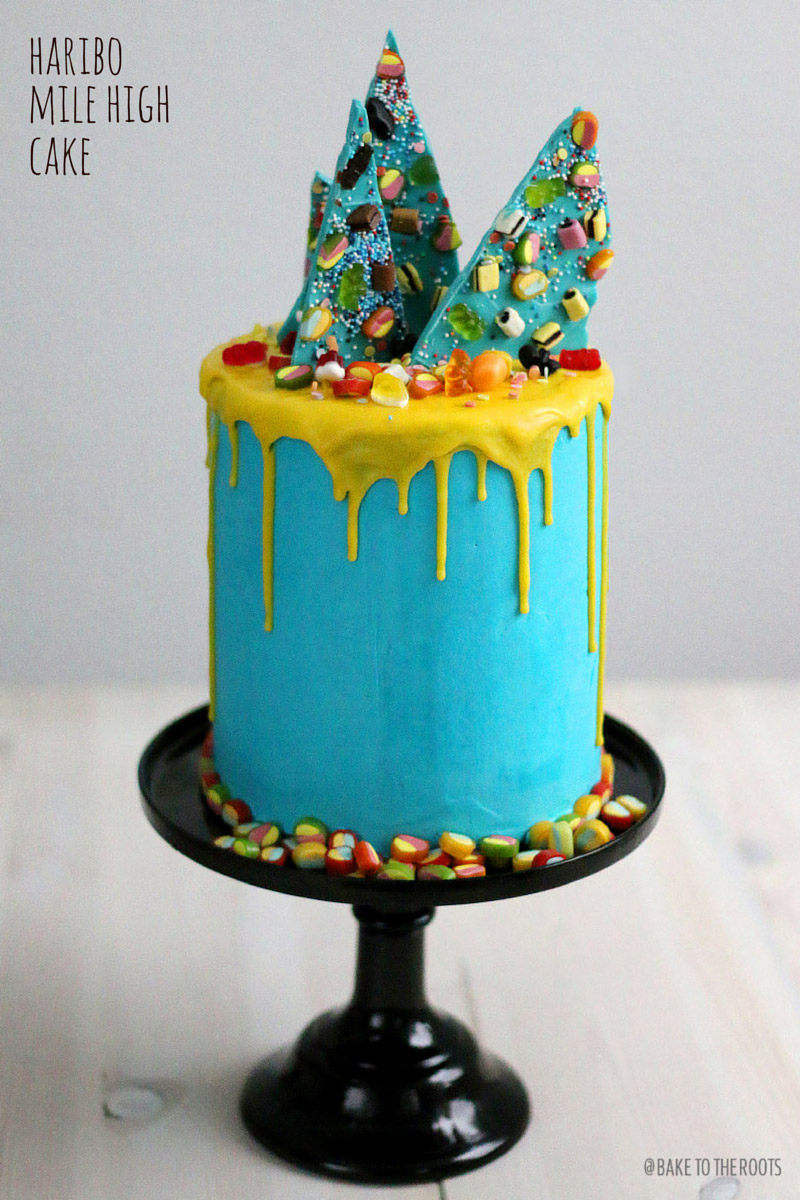
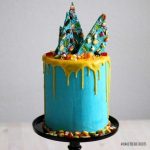
(English below) OK – Ich muss zugeben – diese Torte hat es in sich (und wird wohl eine Ausnahme bleiben)…. ;P
Ich liebe die Torten von Katherine Sabbath (wer sie noch nicht kennt, sollte sie mal googeln oder auf Instagram nach ihr schauen) – so toll bunt und einfach umwerfend. Seit ich ihre Werke auf Instagram das erste mal gesehen hab, war mir klar, dass ich sowas auch unbedingt versuchen muss :)
Jetzt war es endlich so weit – ich hab mich getraut so eine Torte zu basteln! Nicht ohne Grund natürlich ;) Heimgourmet hat Bäcker/Köche aufgerufen an einem Wettbewerb teilzunehmen – Voraussetzung man verarbeitet Haribo Leckereien in irgendeiner Weise in einem Rezept… da konnte ich natürlich nicht widerstehen und so ein bunter Kuchen passt da natürlich perfekt dachte ich mir :)
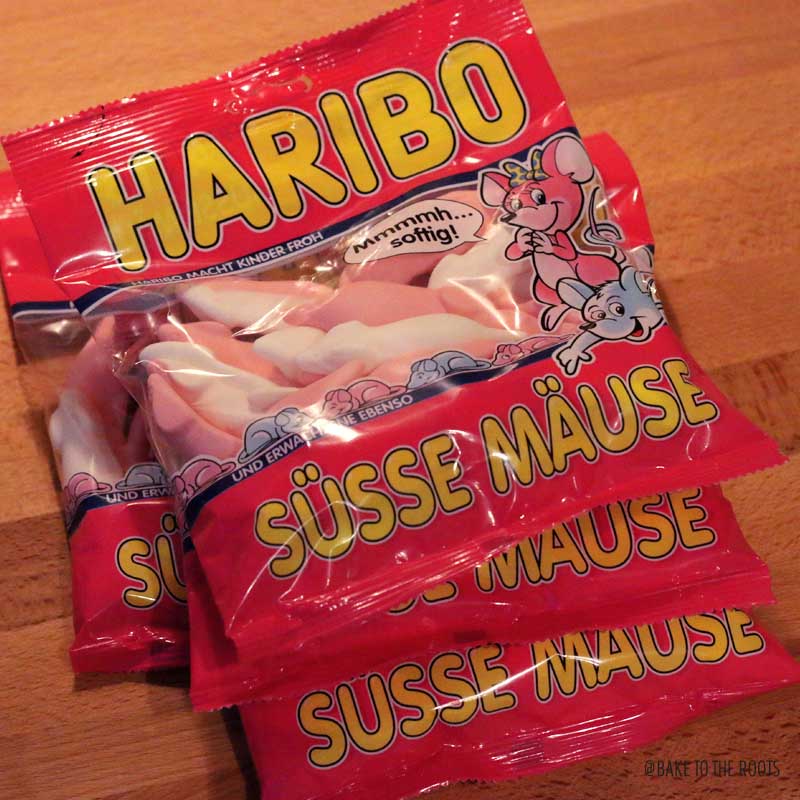
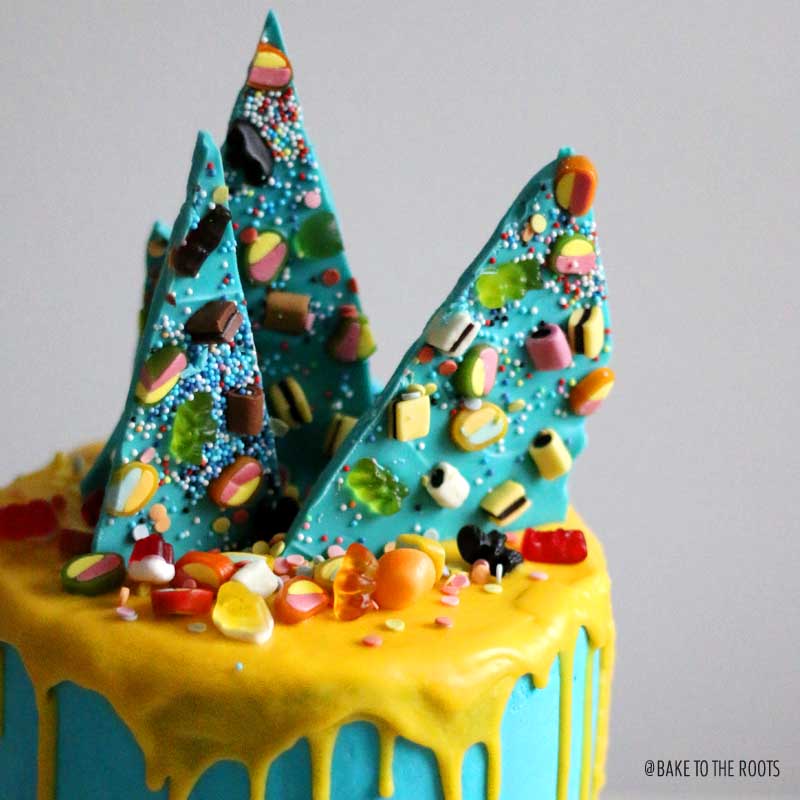
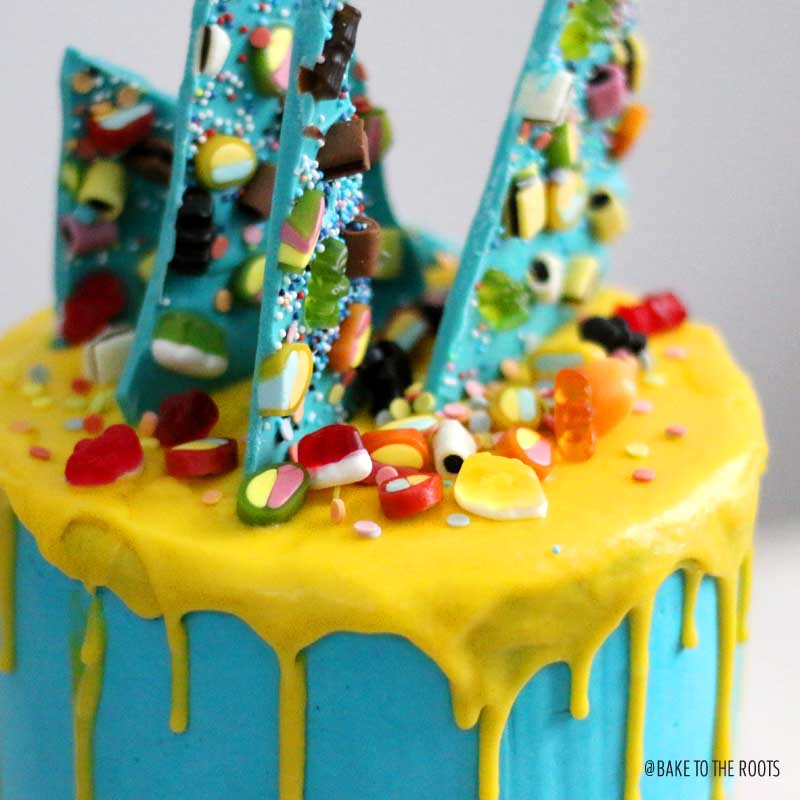
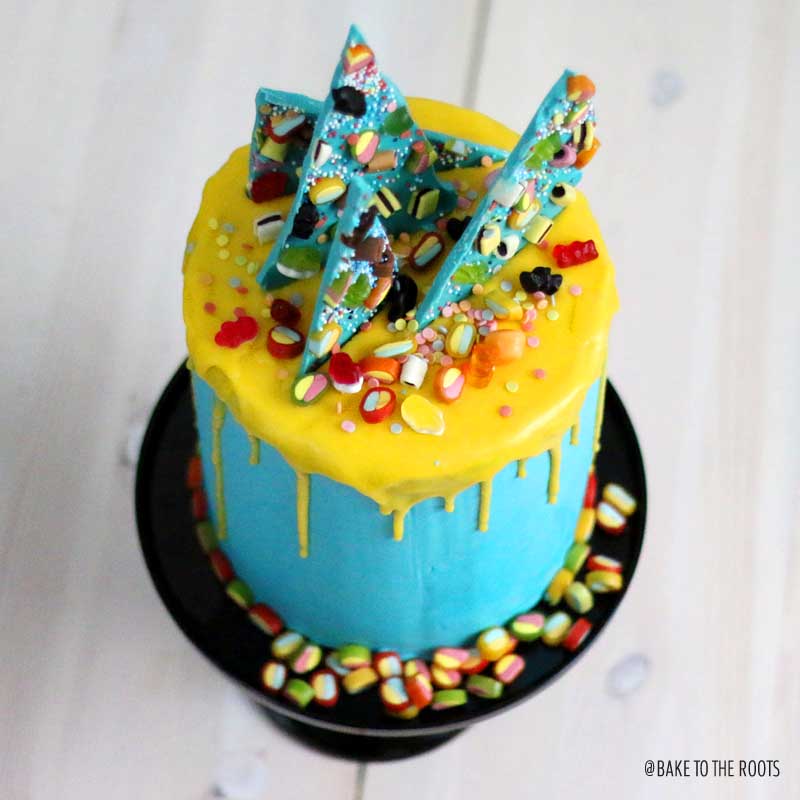
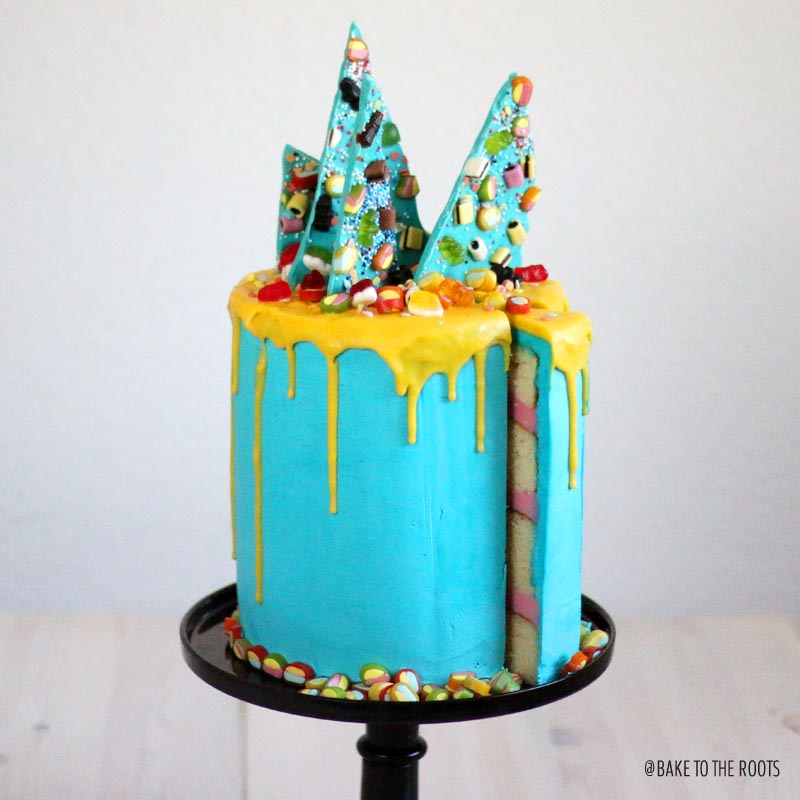
Wer sich das Rezept durchliest wird sehen, dass hier einiges an Haribo drin ist – die Füllung sind Süße Mäuse (schmeckt lecker nach Erdbeere) und oben drauf ist dann nochmal eine Menge Pico Balla und Colorado drauf – man sollte sich also vielleicht nur ein kleines Stück der Torte gönnen ;)
Ich war lange am überlegen, wie ich Haribo in die Torte bringen könnte – ich hab Gummibärchen geschmolzen, Schlümpfe geköpft und (leider) geröstet, weil sie nicht schmelzen wollten… es sind also leider einige Opfer zu verzeichnen – aber alles für den guten Zweck! Das Ergebnis kann sich meiner Meinung nach sehen lassen – und lecker isses noch dazu!
Do you know Katherine Sabbath? She is from Australia and makes these incredible gorgeous cakes that look like mine here. If you google her, you will find a lot of great pictures of mouthwatering cakes :)
I always wanted to make a cake that looks like one of hers – when I saw a baking contest online where you should bake with Haribo sweets, I knew I had to make a cake like that. These sweets and this kind of cakes are just a perfect match ;)
You will see there is a lot of Haribo sweets in the cake and used for decoration – the filling is made with marshmallow-like sweet mouses and the decoration is called “Pico Balla” and “Mini Colorado” – dunno if they have different names outside of Germany – probably ;) Anyways – as you can see it worked well for the presentation :)
In the process of making this cake there were some fatalities to be honest and I am sorry for that – I beheaded some Smurfs and grilled them in the oven – unfortunately with no good result – so R.I.P. Smurfs!
INGREDIENTS / ZUTATEN
For the cake*:
1/2 cup (120g) butter, room temperature
1 1/2 cups (300g) sugar
3 large eggs, room temperature
2 cups (260g) all-purpose flour
1 tbsp. baking powder
1/2 tsp. salt
1 cup (240ml) milk
1 tsp. vanilla extract
*Note: This ingredients are only good for two layers, but you will need the double amount for this high cake – so make it all at once or in two steps. For my Kitchen Aid it would have beet too much to do it all at once.
For the filling:
14 oz. (400g) Haribo Mouses (or Marshmallows)
1 cup (240ml) milk
1 1/3 cups (300g) butter
For the buttercream:
5 egg whites
1 1/2 cups (300g) sugar
2 cups (460g) butter, softened
1 tsp. vanilla extract
food color (blue or turqoise)
For the chocolate shards:
7 oz. (200g) white chocolate, chopped
food color for candy melts (blue or turqoise)
various Haribo sweets
colored sprinkles
For the ganache:
7 oz. (200g) white chocolate
3 oz. (100g) heavy cream
food color (e.g pink)
Für den Kuchen*:
120g weiche Butter
300g Zucker
3 große Eier, Zimmertemperatur
260g Mehl (Type 405)
1 EL Backpulver
1/2 TL Salz
240ml Milch
1 TL Vanille Extrakt
*Hinweis: Die Zutaten reichen nur für zwei Böden – für die komplette Torte wird aber die doppelte Menge benötigt – man kann das in einem Schritt machen oder nacheinander. Für meine Küchenmaschine wäre alles zusammen zu viel gewesen.
Für die Füllung:
400g Haribo Mäuse oder Marshmallows
240ml Milch
300g weiche Butter
Für die Buttercreme:
5 Eiweiß
300g Zucker
460g weiche Butter
1 TL Vanille Extrakt
Lebensmittelfarbe (blau oder türkis)
Für die Schokoladenscherben:
200g weiße Schokolade, gehackt
Lebensmittelfarbe für Schokolade (blau oder türkis)
Haribo Gummibärchen etc.
Bunte Zuckerperlen
Für die Ganache:
200g weiße Schokolade
100g Sahne
Lebensmittelfarbe (zB. Pink)
DIRECTIONS / ZUBEREITUNG
1. Preheat the oven to 350˚F (175°C). Line two (or four) 7 inch (18cm) springform tins with baking parchment, grease and dust with flour. Set aside (you can also the cakes one after another – just takes much more time).
2. In a large bowl beat the butter on high speed until light and fluffy. Add the sugar and mix until well combined. Add the eggs one by one and mix until well incorporated. Mix flour with baking powder and salt. Mix milk with vanilla extract. Add half of the flour mix and half of the milk to the batter and mix until just combined. Add the remaining flour and milk and mix until just combined. Do not overmix.
3. Divide batter evenly between prepared tins and even out the surface of each. Bake until the top is golden for 35 minutes or until toothpick inserted in center comes out clean. Let cool down for 10 minutes on a wire rack still inside the tins. Remove from the tins and let cool completely on the wire rack. Repeat step 1-3 to make two more cake layers if you do it in two portions.
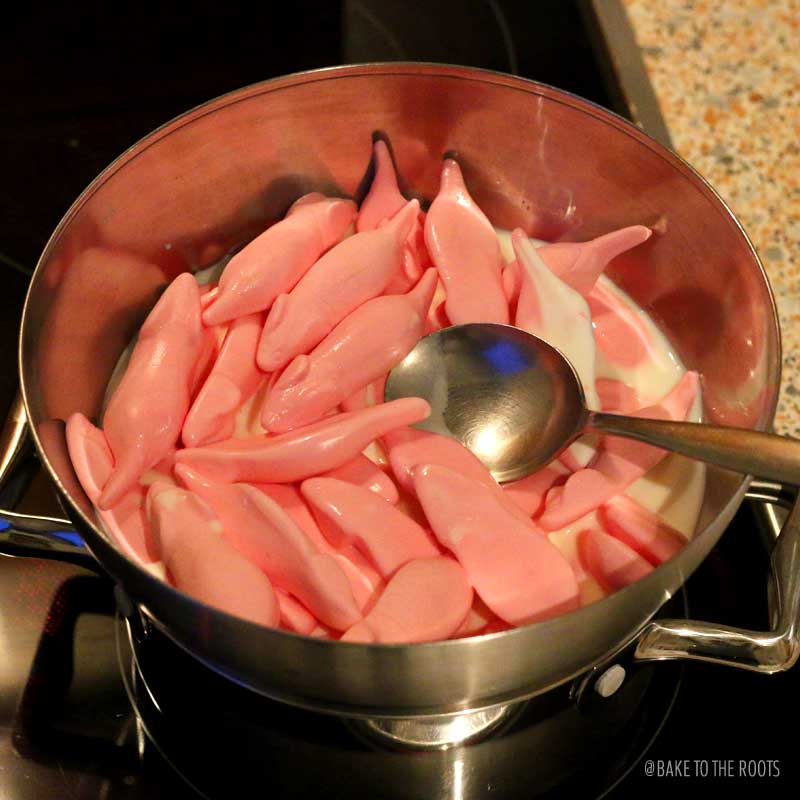
4. For the filling add the mouses (or marshmallows) to a heatproof bowl and place over a pot with simmering water. Add the milk and let the mouses melt into the milk by stirring constantly. Remove from heat and let cool down to room temperature – whisk the mixture from time to time – it will get thicker with time.
5. Add the butter to a large bowl and mix on high speed until light and fluffy. Add the cooled mouse/marshmallow mixture and mix until well combined.
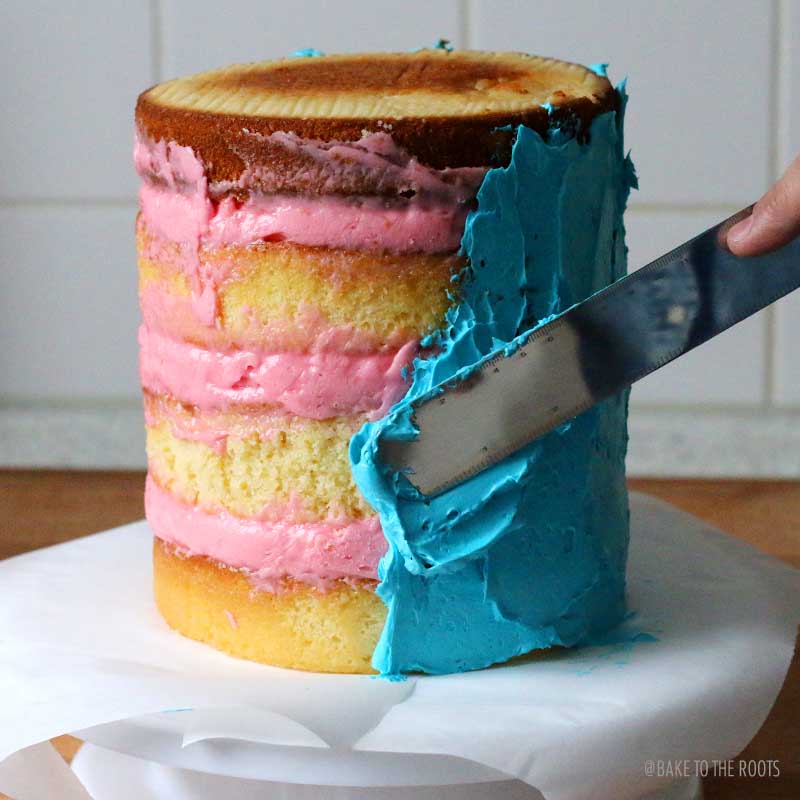
6. Once the filling is done, place the first cake layer on a plate and place 1/3 of the filling on top and spread to the edges. Place the second cake layer on top and press gently into the filling. Add half of the remaining filling on top and proceed in the same way you did with the first cake layer. Do the same with the last cake layers and filling. Make sure you get an even surface with cake and filling along the sides of the cake. The filling hardens pretty quick – if you mix right before you add it on a cake layer, it will be soft enough to spread. Wrap the cake in plastic wrap and place in the fridge over night.
7. For the buttercream add the egg whites and sugar to a heatproof bowl over a saucepan with simmering water. Bring the mixture to 160°F (71°C) while whisking constantly. Transfer to stand mixer bowl and beat on medium-high speed until mixture doubles in volume and forms stiff peaks – the bowl should be cool now (takes about 10 minutes). Add the butter in small pieces – one at a time and mix until incorporated before you add another piece. Beat on high speed until light and fluffy. Add vanilla extract and beat another minute. Add food color (drop by drop) and beat until you get the color desired.
8. Take the cake out of the fridge, unwrap and place on a cake stand. Cover the cake with a thin crumb coat and put back in the fridge for 30 minutes. Add more frosting and smooth out sides and top. Put back in the fridge and let cool for 2-3 hours.
9. While the cake is cooling, prepare the chocolate shards by melting the chopped white chocolate in a heatproof bowl over a saucepan with simmering water. As soon as the chocolate is melted, add some food color and mix – add only drop by drop, the color can change rapidly. When the chocolate has the color you want, pour on a baking sheed you prepared with baking parchment or plastic wrap. Spread the chocolate to get an even layer (don’t make it too thin). Sprinkle with Haribos and colored sprinkles and let harden in the fridge.
10. For the ganache chop the white chocolate and place in a bowl. Heat the heavy cream in a saucepan until bubbles appear on the surface. Pour the heavy cream over the chopped chocolate and let rest vor 2-3 minutes. The chocolate should be melted now. Add food color drop by drop and mix until you get a nice, smooth ganache and the desired color. Set aside and let cool and get thicker for about 30-60 minutes (depends how hot the heavy cream was and what chocolate you used).
11. Take the cake out of the fridge. As soon as the ganache is thick enough, pour over the top of the cake – just enough so it goes to the edges but not over it. Use a spatula and push the ganache on several spots over the edge to get that “overflow effect”. Pour more ganache on top if needed. Break the chocolate block with the Haribos into shards and decorate the top of the cake – add some more Haribos on top and the sides for decoration.
1. Den Ofen auf 175°C (350°F) vorheizen. Zwei (oder vier) 18cm (7 inch) Springform Backformen mit Backpapier auslegen, einfetten und mit Mehl ausstäuben. Zur Seite stellen (man kann die Kuchen auch nacheinander backen, dauert dann nur länger).
2. In einer großen Schüssel die Butter aufschlagen, bis sie hell und luftig ist. Zucker zugeben und gut verrühren. Eier nacheinander zugeben und jeweils gut unterrühren. Mehl mit Backpulver und Salz vermischen. Milch mit dem Vanille Extrakt verrühren. Die Hälfte des Mehls und der Milch in die Schüssel zugeben und verrühren. Den Rest zugeben und alles nur so weit verrühren, dass es sich gerade so verbunden hat. Nicht zu viel rühren.
3. Den Teig gleichmässig auf die zwei Springform Backformen aufteilen und jeweils die Oberfläche etwas glätten. Im Backofen für 35 Minuten Backen – die Oberfläche sollte goldbraun sein – mit einem Zahnstocher testen, ob noch Teig kleben bleibt und erst herausnehmen, wenn der Zahnstocher sauber herauskommt. In den Formen etwa 10 Minuten abkühlen lassen und dann herausnehmen und auf einem Kuchengitter komplett auskühlen lassen. Schritt 1-3 wiederholen, wenn der Teig für die Kuchenböden auf zwei Portionen aufgeteilt wurde.
4. Für die Füllung die Haribo Mäuse (oder Marshmallows) in eine hitzebeständige Schüssel geben und auf einen Topf mit köchelndem Wasser stellen. Milch zugeben und alles unter Rühren zu einer homogenen Masse schmelzen lassen. Vom Herd nehmen und auf Zimmertemperatur abkühlen lassen – immer wieder mal umrühren dabei – mit der Zeit wird die Masse andicken.
5. Die Butter in eine große Schüssel geben und auf höchster Stufe aufschlagen, bis sie hell und luftig ist. Die Abgekühlte Mäuse/Marshmallow Masse zugeben und unterrühren.
6. Sobald die Füllung fertig ist, den ersten Kuchenboden auf eine Platte legen und etwa 1/3 der Füllung darauf verteilen. Die Füllung sollte bis zum Rand gehen. Den zweiten Kuchenboden darauflegen und etwas andrücken. Die Hälfte der verbliebenen Füllung daraufgeben und wieder verteilen wie beim ersten Boden. Mit den restlichen Böden und Füllung so weitermachen. Der Rand der Torte sollte möglichst glatt und ohne Lücken sein. Die Füllung wird sehr schnell fest – wenn man sie noch mal mixt bevor man sie auf den Kuchen aufträgt, dann ist sie weich genug zum verstreichen. Torte in Plastikfolie einwickeln und über Nacht in den Kühlschrank stellen.
7. Für die Buttercreme Eiweiß und Zucker in eine hitzebeständige Schüssel geben und über einem Topf mit köchelndem Wasser unter ständigem rühren erhitzen. Sobald die Mischung eine Temperatur von 71°C (160°F) erreicht hat in die Schüssel einer Küchenmaschine umfüllen und auf mittlerer bis hoher Geschwindigkeit aufschlagen, bis sich das Volumen etwa verdoppelt hat und sich Spitzen bilden, wenn man den Quirl herausnimmt – die Schüssel sollte nur noch handwarm sein (dauert etwa 10 Minuten). Butter einzeln in kleinen Stücken zugeben und jedes mal gut unterrühren. Auf höchster Stufe aufschlagen, bis alles hell und luftig ist. Vanille Extrakt zugeben und eine weitere Minute aufschlagen. Lebensmittelfabe tröpfchenweise zugeben und weiterrühren, bis die Buttercreme die gewünschte Farbe hat.
8. Torte aus dem Kühlschrank nehmen, auswickeln und auf eine Tortenplatte stellen. Torte mit einem dünnen “crumb coat” überziehen und für 30 Minuten zurück in den Kühlschrank stellen. Herausnehmen und mehr Frosting auftragen und die Seiten und Oberseite glattstreichen. Für 2-3 Stunden in den Kühlschrank stellen.
9. Während die Torte kühlt, die Schokoladenscherben vorbereiten. Dazu die weiße Schokolade über heißem Wasserbad schmelzen und mit Lebensmittelfarbe einfärben – auch hier wieder tröpfchenweise arbeiten, weil sich die Farbe schnell verändern kann. Sobald die Schokolade die gewünschte Farbe hat, auf ein mit Backpapier oder Plastikfolie ausgelegtes Backblech schütten und glattstreichen (nicht zu dünn!). Haribos darauf verteilen und mit Zuckerperlen bestreuen. Im Kühlschrank aushärten lassen.
10. Für die Ganache die weiße Schokolade hacken und in eine Schüssel geben. Die Sahne in einem Topf erhitzen, bis sich kleine Bläschen an der Oberfläche bilden. Die heiße Sahne über die Schokolade schütten und für 2-3 Minuten stehen lassen. Die Schokolade sollte dabei schmelzen. Lebensmittelfarbe tröpfchenweise zugeben und rühren, bis eine glatte Masse entstanden und die gewünschte Farbe erreicht ist. Zur Seite stellen und abkühlen und andicken lassen für etwa 30-60 Minuten (hängt davon ab wie warm die Sahne war und welche Schokolade verwendet wurde)
11. Die Torte aus dem Kühlschrank nehmen. Sobald die Ganache dickflüssig genug ist, auf die Oberseite der Torte schütten – erstmal nur so viel, dass es bis zum Rand reicht. Mit einem Spatel dann an mehreren Stellen die Ganache zum Überlaufen bringen – ggf. noch etwas mehr Ganache nachschütten. Die Schokolade mit den Haribos grob in Scherben zerbrechen und damit die Torte verzieren – zusätzlich noch Haribos auf und um die Torte legen zur Dekoration.
Craving more? Keep in touch on Facebook, Twitter, Instagram and Pinterest for new post updates and more. You can also contact me with any questions or inquiries!
Haribo “Mile High” Cake
- Prep Time: 120
- Cook Time: 35
- Total Time: 1440
Ingredients
For the cake*
- 1/2 cup (120g) butter, room temperature
- 1 1/2 cups (300g) sugar
- 3 large eggs, room temperature
- 2 cups (260g) all-purpose flour
- 1 tbsp. baking powder
- 1/2 tsp. salt
- 1 cup (240ml) milk
- 1 tsp. vanilla extract
- *Note: This ingredients are only good for two layers, but you will need the double amount for this high cake – so make it all at once or in two steps. For my Kitchen Aid it would have beet too much to do it all at once.
For the filling
- 14 oz. (400g) Haribo Mouses (or Marshmallows)
- 1 cup (240ml) milk
- 1 1/3 cups (300g) butter
For the buttercream
- 5 egg whites
- 1 1/2 cups (300g) sugar
- 2 cups (460g) butter, softened
- 1 tsp. vanilla extract
- food color (blue or turqoise)
For the chocolate shards
- 7 oz. (200g) white chocolate, chopped
- food color for candy melts (blue or turqoise)
- various Haribo sweets
- colored sprinkles
For the ganache
- 7 oz. (200g) white chocolate
- 3 oz. (100g) heavy cream
- food color (e.g pink)
Instructions
- Preheat the oven to 350˚F (175°C). Line two (or four) 7 inch (18cm) springform tins with baking parchment, grease and dust with flour. Set aside (you can also the cakes one after another – just takes much more time).
- In a large bowl beat the butter on high speed until light and fluffy. Add the sugar and mix until well combined. Add the eggs one by one and mix until well incorporated. Mix flour with baking powder and salt. Mix milk with vanilla extract. Add half of the flour mix and half of the milk to the batter and mix until just combined. Add the remaining flour and milk and mix until just combined. Do not overmix.
- Divide batter evenly between prepared tins and even out the surface of each. Bake until the top is golden for 35 minutes or until toothpick inserted in center comes out clean. Let cool down for 10 minutes on a wire rack still inside the tins. Remove from the tins and let cool completely on the wire rack. Repeat step 1-3 to make two more cake layers if you do it in two portions.
- For the filling add the mouses (or marshmallows) to a heatproof bowl and place over a pot with simmering water. Add the milk and let the mouses melt into the milk by stirring constantly. Remove from heat and let cool down to room temperature – whisk the mixture from time to time – it will get thicker with time.
- Add the butter to a large bowl and mix on high speed until light and fluffy. Add the cooled mouse/marshmallow mixture and mix until well combined.
- Once the filling is done, place the first cake layer on a plate and place 1/3 of the filling on top and spread to the edges. Place the second cake layer on top and press gently into the filling. Add half of the remaining filling on top and proceed in the same way you did with the first cake layer. Do the same with the last cake layers and filling. Make sure you get an even surface with cake and filling along the sides of the cake. The filling hardens pretty quick – if you mix right before you add it on a cake layer, it will be soft enough to spread. Wrap the cake in plastic wrap and place in the fridge over night.
- For the buttercream add the egg whites and sugar to a heatproof bowl over a saucepan with simmering water. Bring the mixture to 160°F (71°C) while whisking constantly. Transfer to stand mixer bowl and beat on medium-high speed until mixture doubles in volume and forms stiff peaks – the bowl should be cool now (takes about 10 minutes). Add the butter in small pieces – one at a time and mix until incorporated before you add another piece. Beat on high speed until light and fluffy. Add vanilla extract and beat another minute. Add food color (drop by drop) and beat until you get the color desired.
- Take the cake out of the fridge, unwrap and place on a cake stand. Cover the cake with a thin crumb coat and put back in the fridge for 30 minutes. Add more frosting and smooth out sides and top. Put back in the fridge and let cool for 2-3 hours.
- While the cake is cooling, prepare the chocolate shards by melting the chopped white chocolate in a heatproof bowl over a saucepan with simmering water. As soon as the chocolate is melted, add some food color and mix – add only drop by drop, the color can change rapidly. When the chocolate has the color you want, pour on a baking sheed you prepared with baking parchment or plastic wrap. Spread the chocolate to get an even layer (don’t make it too thin). Sprinkle with Haribos and colored sprinkles and let harden in the fridge.
- For the ganache chop the white chocolate and place in a bowl. Heat the heavy cream in a saucepan until bubbles appear on the surface. Pour the heavy cream over the chopped chocolate and let rest vor 2-3 minutes. The chocolate should be melted now. Add food color drop by drop and mix until you get a nice, smooth ganache and the desired color. Set aside and let cool and get thicker for about 30-60 minutes (depends how hot the heavy cream was and what chocolate you used).
- Take the cake out of the fridge. As soon as the ganache is thick enough, pour over the top of the cake – just enough so it goes to the edges but not over it. Use a spatula and push the ganache on several spots over the edge to get that “overflow effect”. Pour more ganache on top if needed. Break the chocolate block with the Haribos into shards and decorate the top of the cake – add some more Haribos on top and the sides for decoration.
Notes
- Enjoy baking!
Nutrition
- Serving Size: 18

 I love my job, but in between I love to bake and try new things in the kitchen. A lot of my friends and colleagues encourage me to bake - for a very simple reason: they get the leftovers - and it seems they like it most of the time ;)




WOW! Der sieht richtig super aus, wobei man die Süße förmlich durch den Bildschirm schmecken kann ;o)
Wünsche dir ganz viel Erfolg beim Gewinnspiel – hatte auch überlegt mitzumachen, aber gegen so eine Torte komme ich definitiv nicht an ;o)
Viele Grüße,
Daniela
Danke Dir! Die ist gar nicht sooooo süß ;) Nur ein bisschen. Schmeckt auf jeden Fall lecker – hätte nicht gedacht, dass man mit diesen Mäusen so ne tolle Füllung hinbekommt!
Aber warum nicht mitmachen? Wenn man sich was ausgefallenes überlegt hat das glaub immer Chancen! :)
LG
Marc