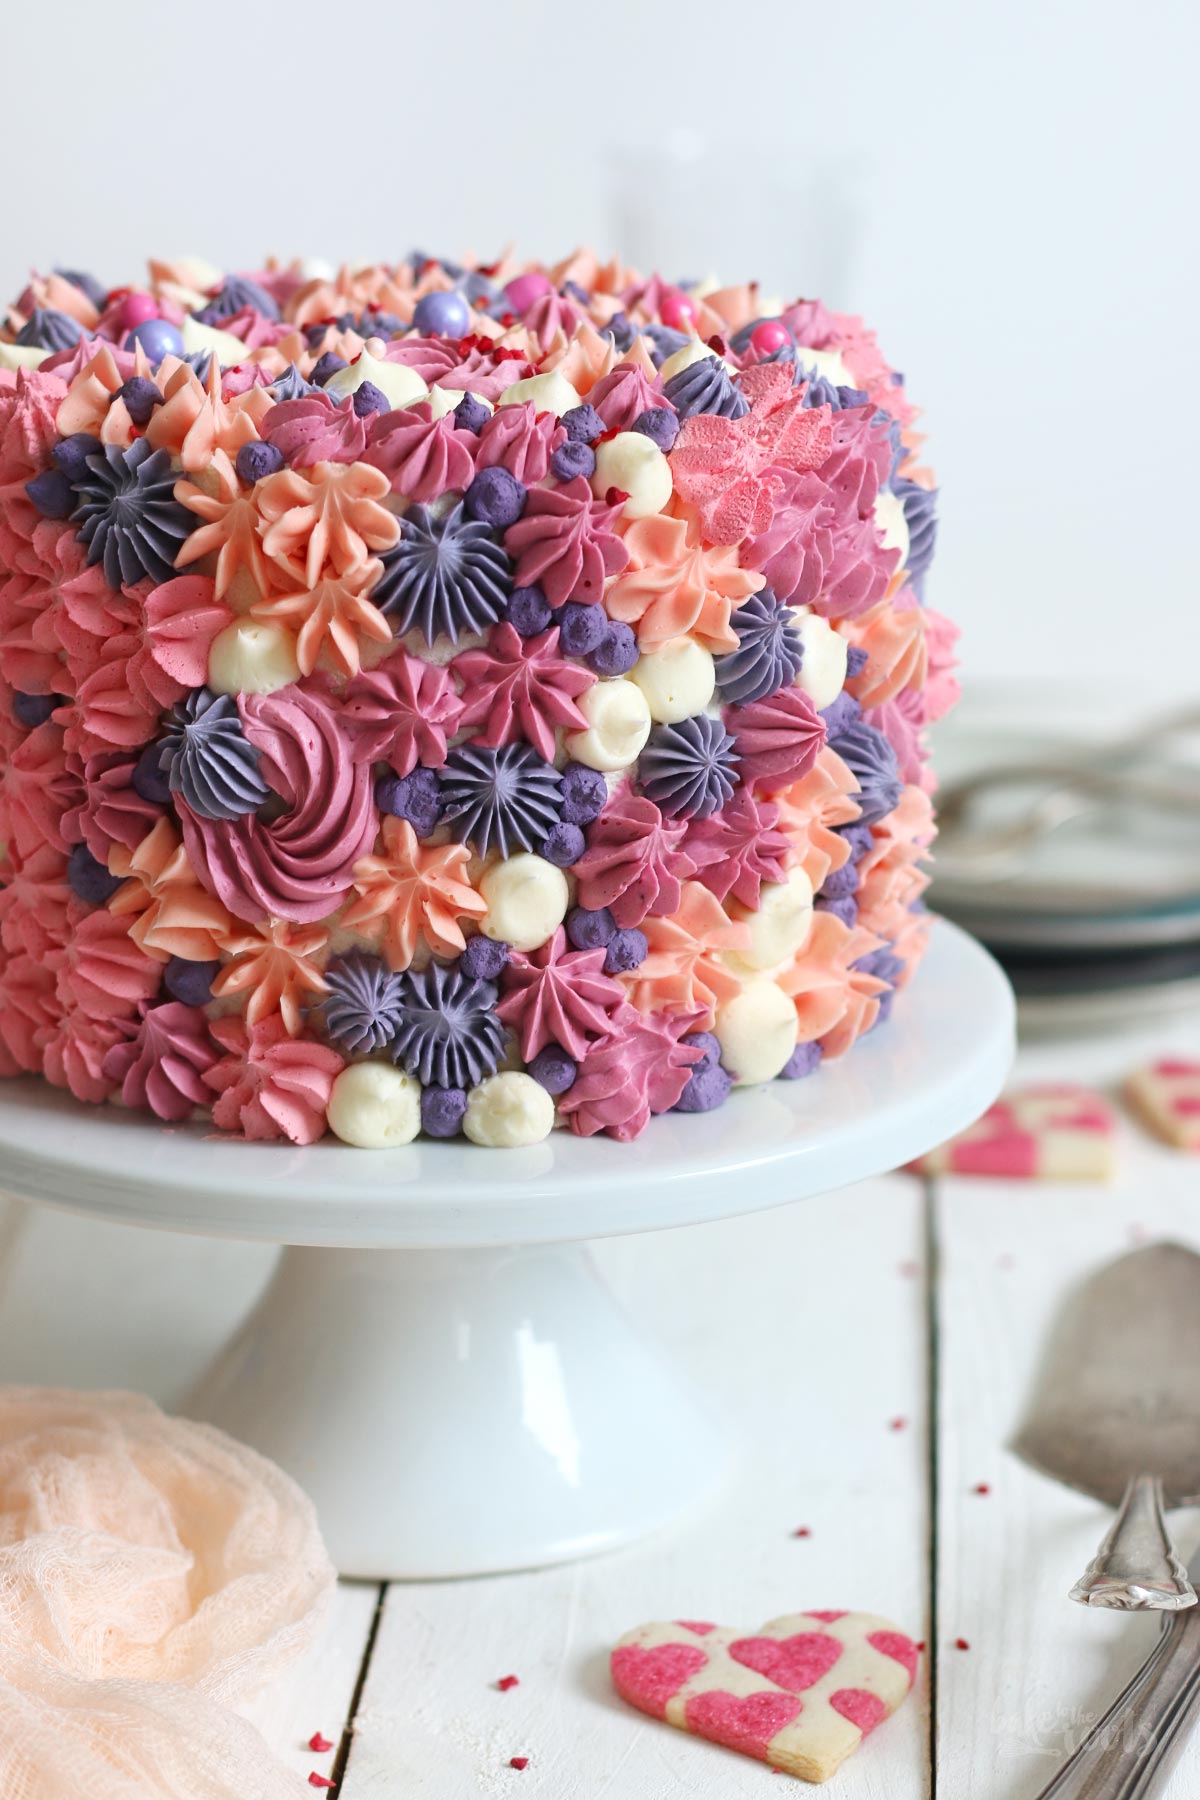
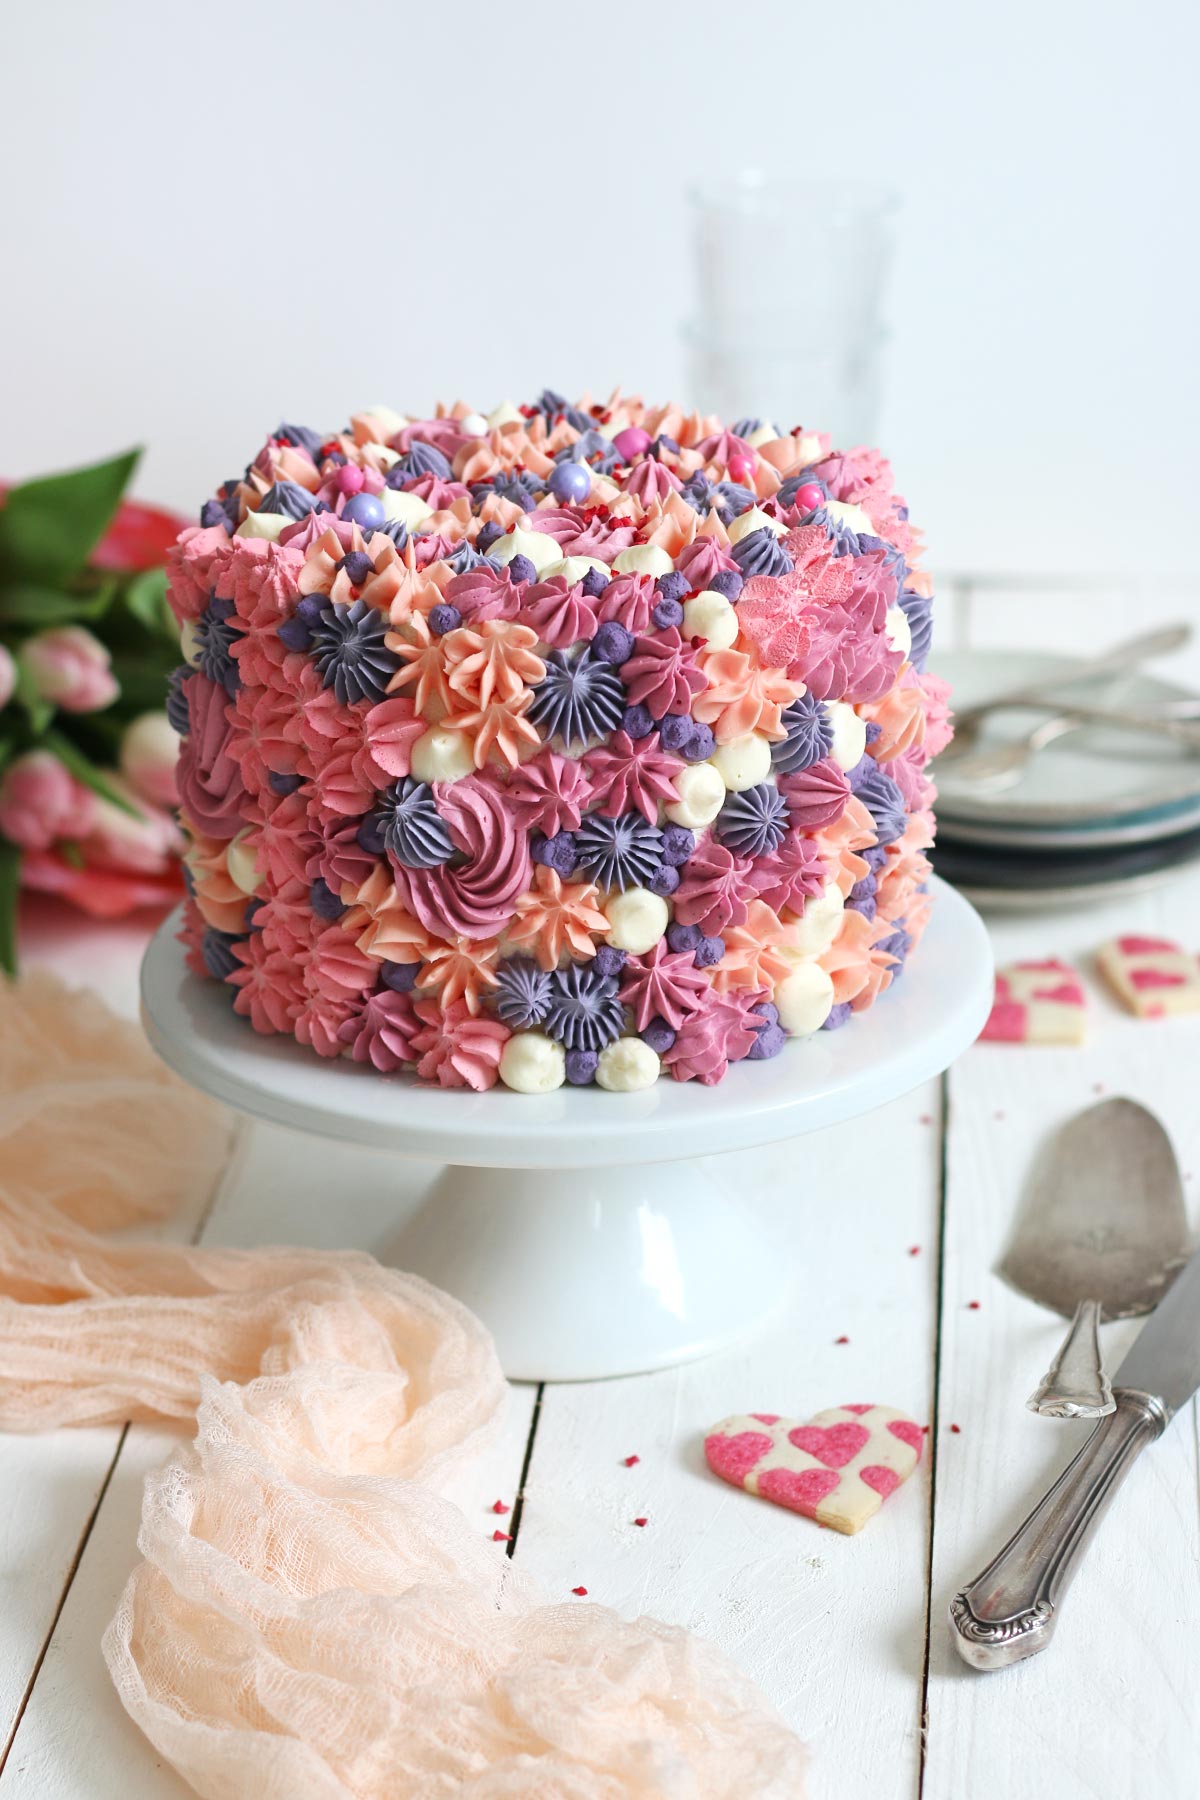
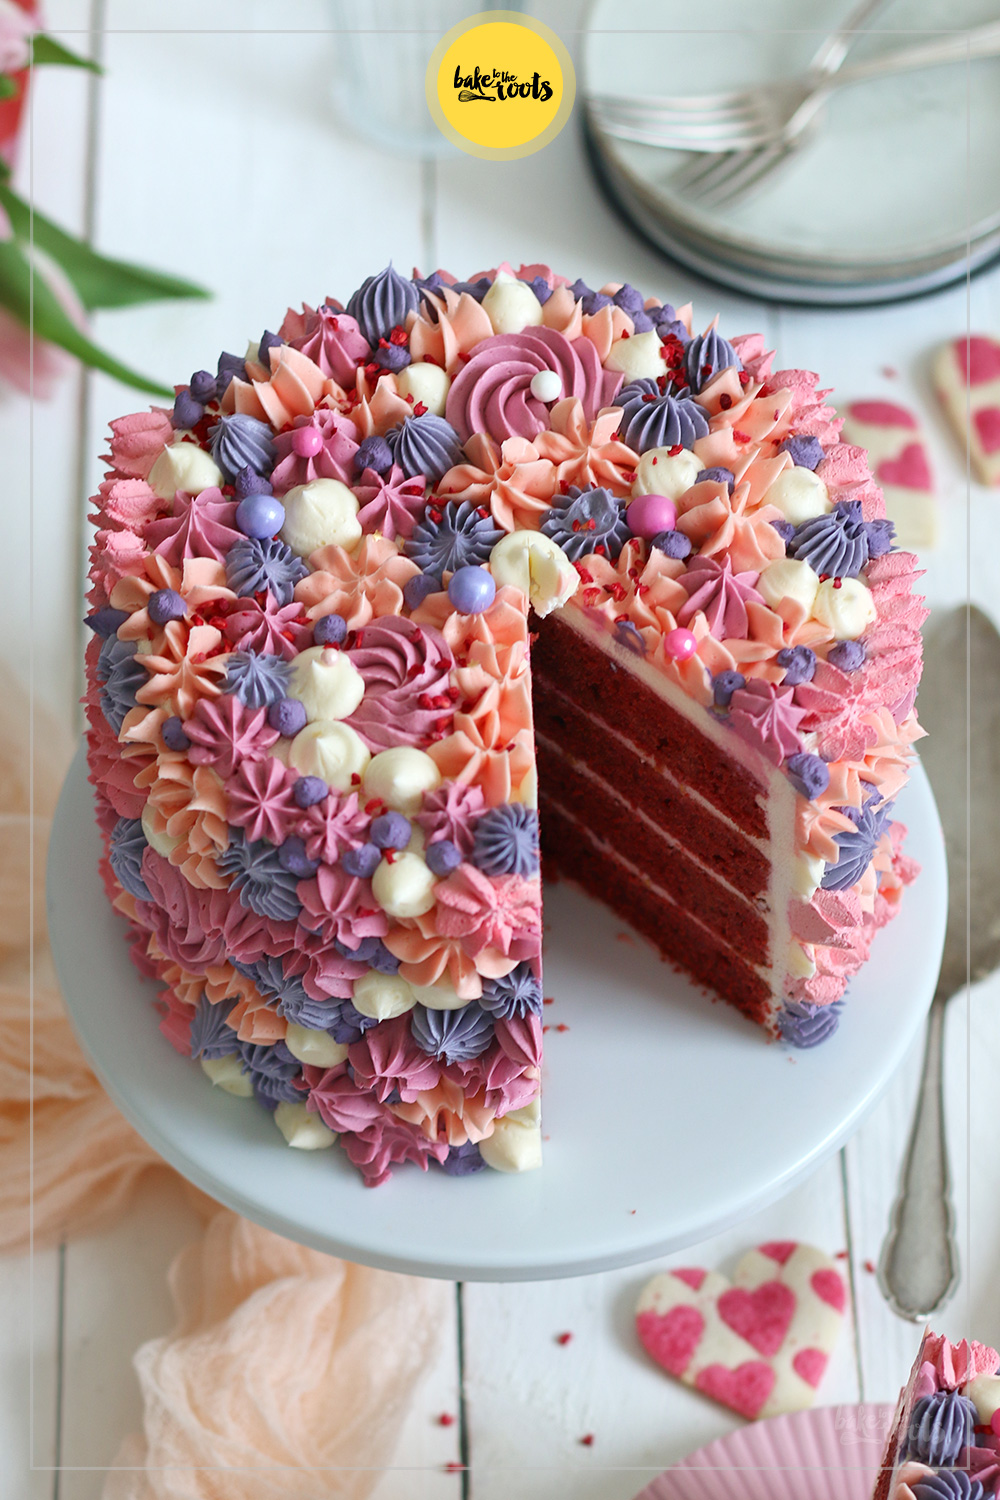
Mother’s Day is coming up soon again – as a good son or daughter you want to make this day special for your mom. Maybe even make her happy for once ;P A gift mothers often get on this day is flowers. I prefer baking something, to be honest. Something like this Pink (Red Velvet) Mother’s Day Cake. I did not make this one here for my mom (she lives far away), but I am pretty sure she would have liked it… even though it’s pink ;P
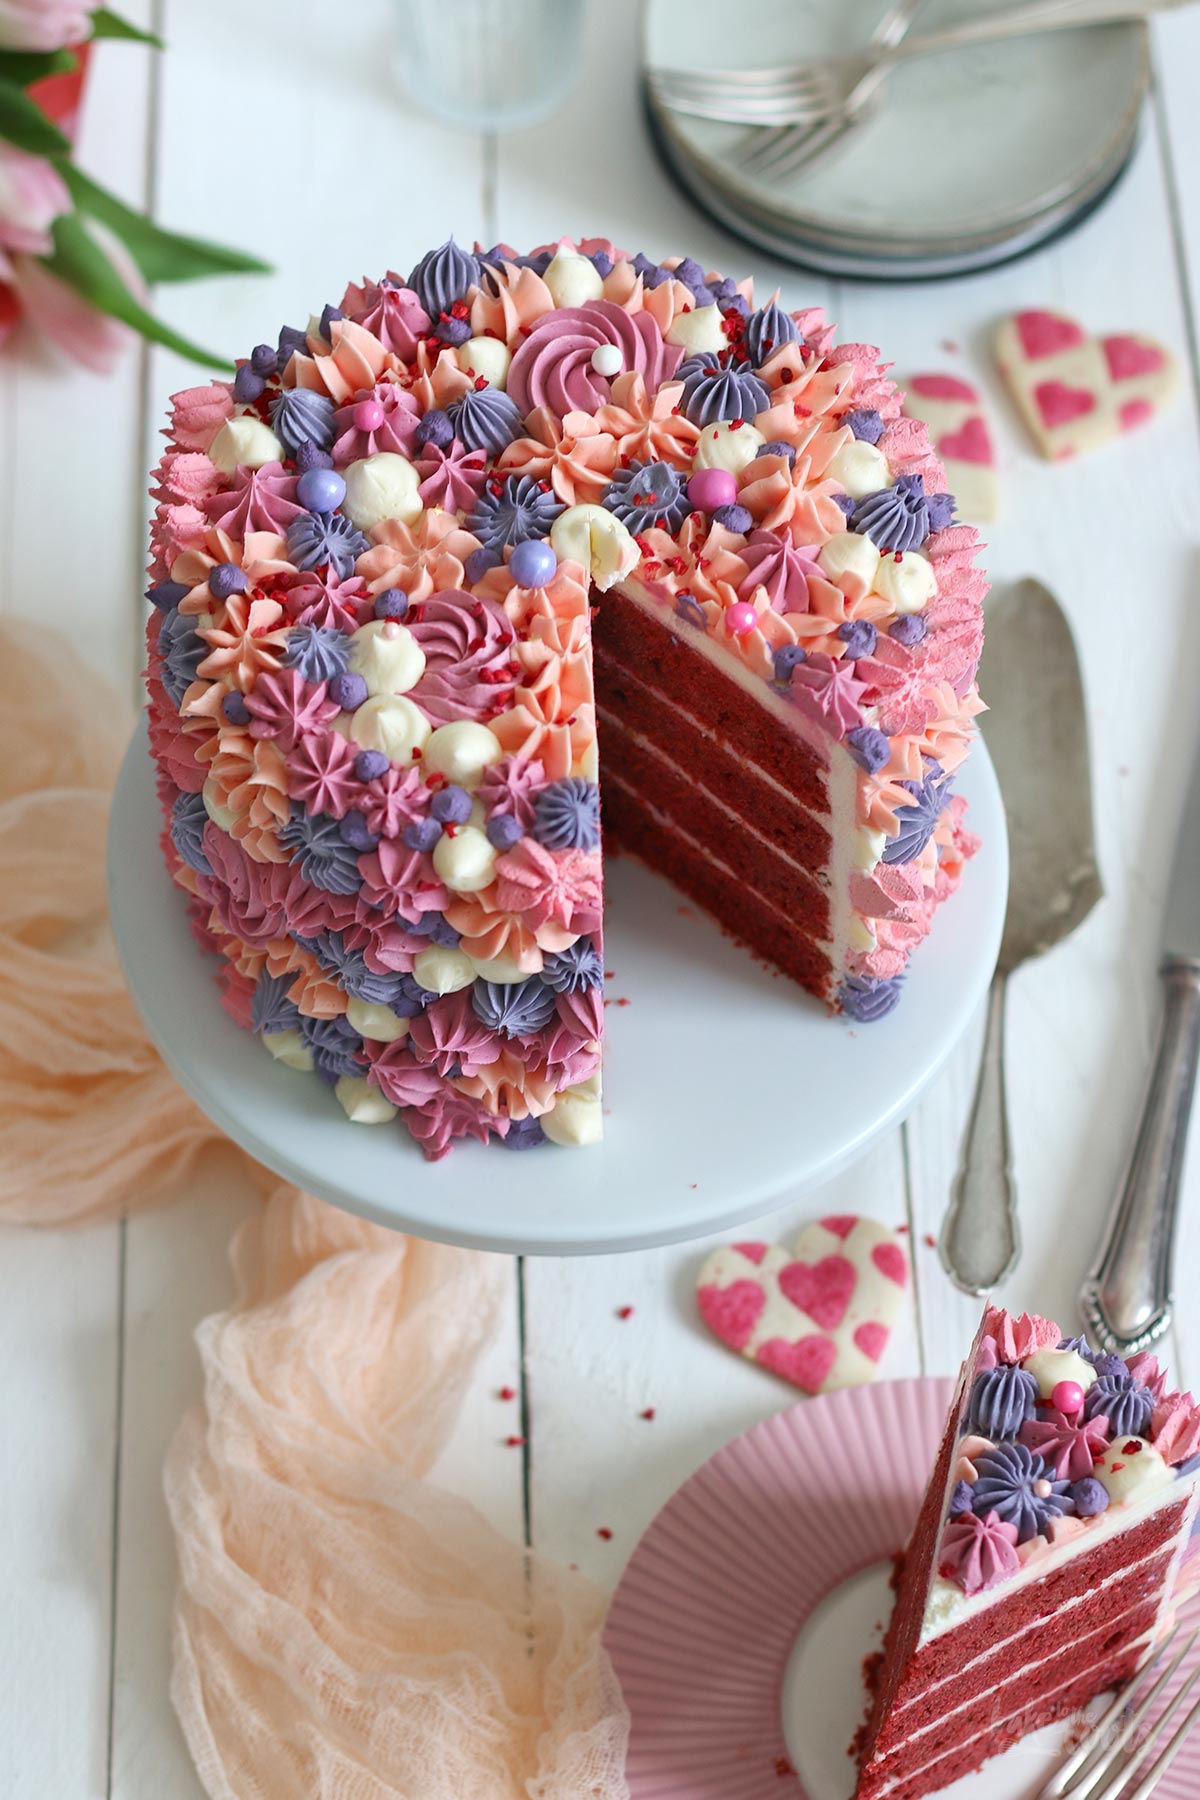
When it comes to gifts for Mother’s Day I think something baked is always better than flowers. Unlike flowers, a cake (when made with loads of sugar and fat) is something you will remember much longer… as little rolls on your hips ;P Flowers wilt after a few days but this cake will make your hips big and fluffy. Something to remember for a long time…
Just kidding. No mother is forced to eat the whole cake alone. A small piece is enough and the rest can be given to friends and family. So they can also get fat ;P
I would have liked to make the cake a little less sugar-heavy, but when you want to create decorations with buttercream as I did you also want to make sure everything works 100%… and a Swiss meringue buttercream (with loads of sugar) is a safe bet. I could have made a “lighter” German buttercream that only needs a fraction of the sugar – but that type of buttercream can be bitchy sometimes. If the custard is not perfectly mixed with the butter the chances are good the cream does not look perfect when colored. It would still taste great but probably not look great. Swiss meringue buttercream never creates any problems – and for your Mother’s Day cake you want everything to go perfect, right?! ;)
Anyway. This cake is a collaboration with my blogger bestie Andrea from Zimtkeks & Apfeltarte. Once a month (on the last Sunday of the month) we do our little “Bake Together – The Baking Surprise” where we decide on a topic and then bake together. Well, almost together. We actually live far away from each other. “Baking together” is more virtual or spiritual ;P But the surprise is real because we do not know what the other one is baking. Surprise! ;)
Well. This time we agreed on baking something for Mother’s Day in red or pink. I could not really decide what color to use so I used them all. I wonder what Andrea made today. I know she is not the biggest fan of cakes like this… but I am sure she will come up with something stunning ;)
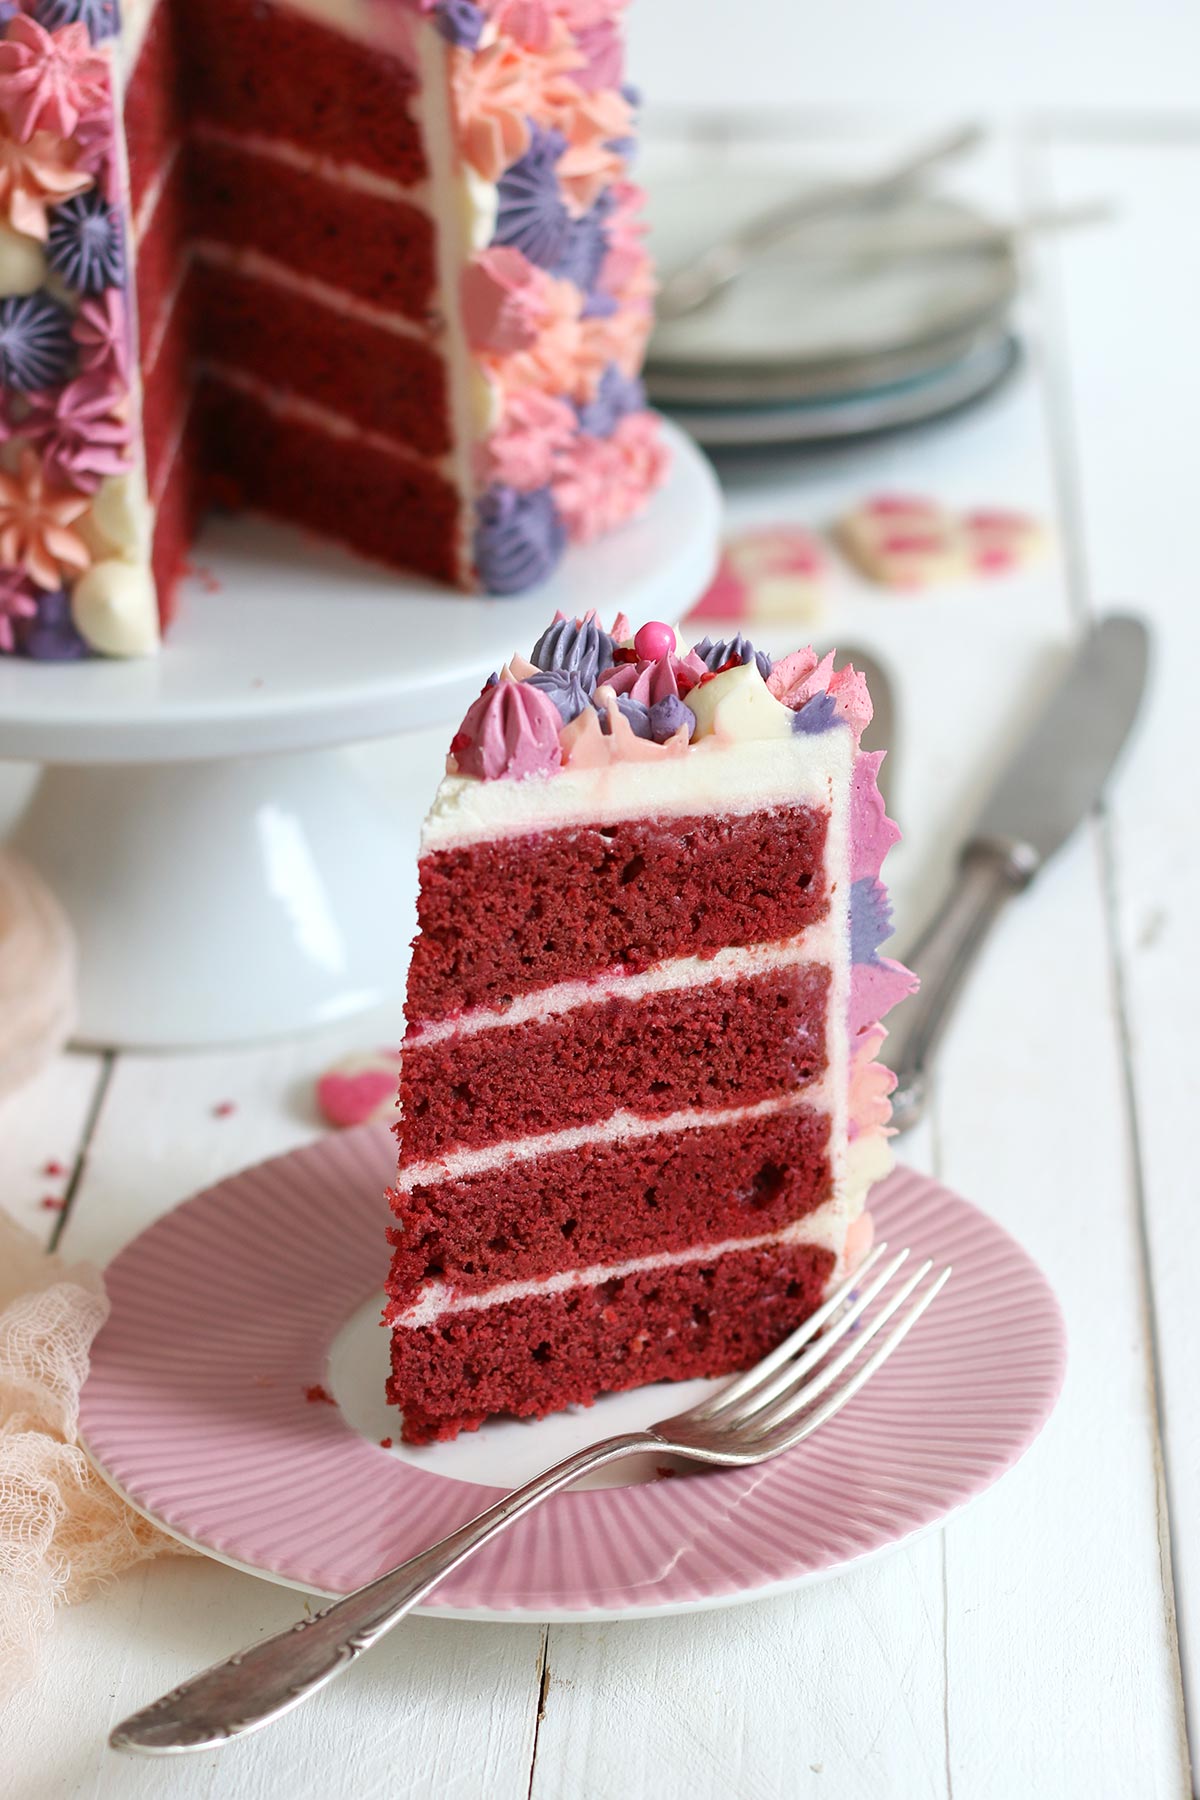
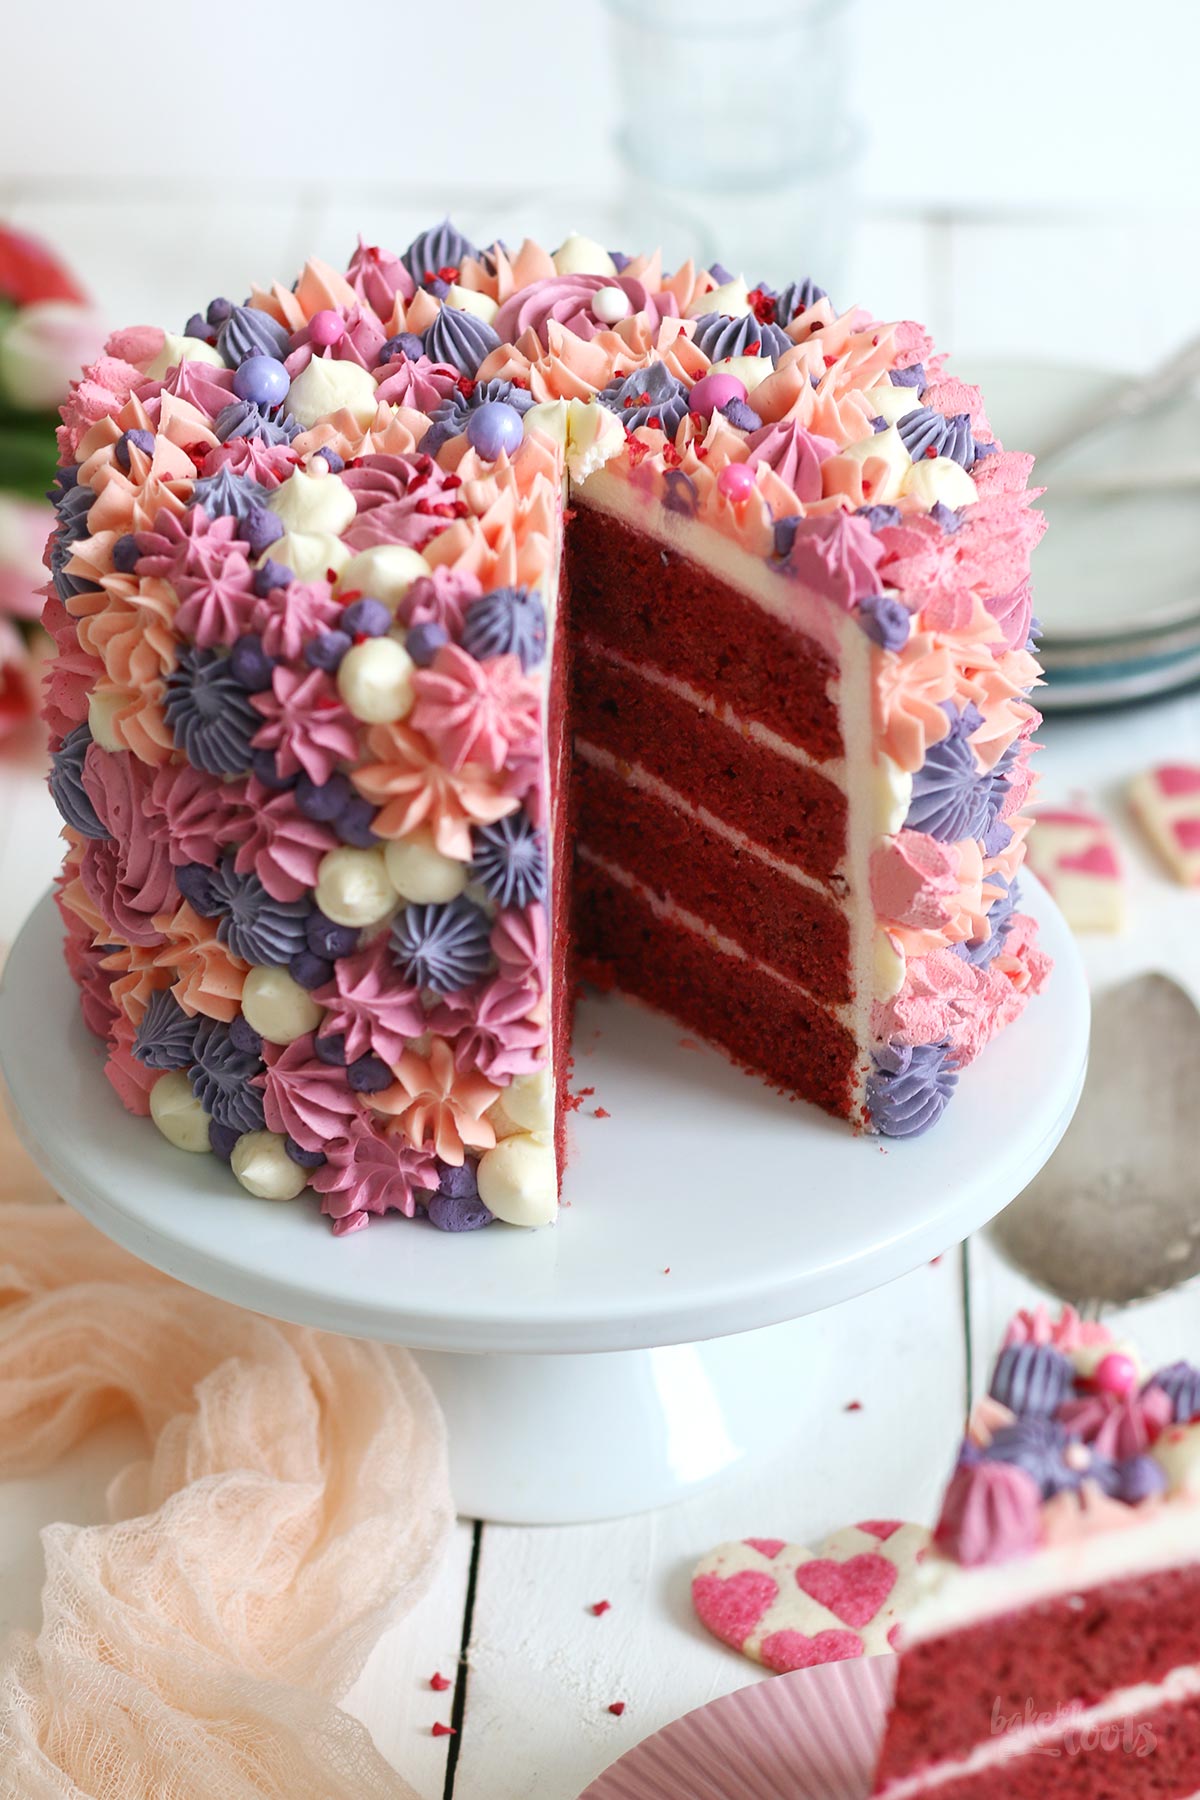
The cake – as mentioned in the title – is actually a red velvet cake. Something that is a bit harder to find here in bakeries and coffee shops. I guess many people have a bit of a problem with all the food color you need to add to get a bright red… well, not me. As you can see I used a lot of food colors. For the cake and for the buttercream ;P Besides that – great cake! Even after several days not dry – that’s why I actually like red velvet cake.

INGREDIENTS / ZUTATEN
3 cups (390g) spelt flour
1 cup (200g) sugar
2 tbsp. cocoa powder
1 tsp. baking soda
1/2 tsp. salt
2 large eggs, at room temperature
1 cup (240ml) buttermilk, at room temperature
3/4 cup (170g) butter, melted & cooled
1/2 cup (120ml) vegetable oil
1 tbsp. white vinegar
1 tsp. vanilla extract
red food color (gel or powder)
For the buttercream:
6 large egg whites
1 1/2 cup (300g) sugar
1/4 tsp. salt
15.8 oz. (450g) butter, at room temperature
1 1/2 tsp. vanilla extract
1 1/2 cups (200g) confectioners’ sugar
some red, pink & purple food color (gel or powder)
some raspberry jam (optional)
some freeze-dried raspberries*, crumbled
some red/pink/purple sprinkles
390g Dinkelmehl (Type 630)
200g Zucker
2 EL Kakaopulver
1 TL Natron
1/2 TL Salz
2 Eier (L), Zimmertemperatur
240ml Buttermilch, Zimmertemperatur
170g Butter, geschmolzen & abgekühlt
120ml Pflanzenöl
1 EL Weißweinessig
1 TL Vanille Extrakt
rote Lebensmittelfarbe (Gel oder Pulver)
Für die Buttercreme:
6 Eiweiß (L)
300g Zucker
1/4 TL Salz
450g weiche Butter
1 1/2 TL Vanille Extrakt
200g Puderzucker
etwas rote, pinke & lila Lebensmittelfarbe (Gel oder Pulver)
etwas Marmelade (optional)
einige gefriergetrocknete Himbeeren*, zerbröselt
rote/pinke/lila Zuckerstreusel
DIRECTIONS / ZUBEREITUNG
2. Add the spelt flour, sugar, cocoa powder, baking soda, and salt to a large bowl and mix until well combined. In a second bowl mix the eggs with buttermilk, melted butter, oil, vinegar, and vanilla extract until well combined. Add the red food color (gel or powder) and mix in – you want a nice red cake but it should not glow ;) Add the wet ingredients to the bowl with dry ingredients and mix until well combined. Divide the batter between the prepared baking tins, smooth out the top, and bake for about 27-30 minutes or until a toothpick inserted into the center of the cakes comes out clean. Take out of the oven and remove the cakes immediately from the tins and let cool down on a wire rack. If you bake the cakes a day in advance wrap them in some plastic wrap so they do not dry out.
3. For the buttercream add the egg whites, sugar, and salt to a large bowl and place it on a pot with simmering water – the water should not touch the bowl! Mix until the sugar has dissolved completely and the mixture has reached a temperature of 160°F (71°C). It’s best to use a kitchen thermometer* here. Transfer the mixture to the bowl of a stand mixer. Whisk on high for about 5 minutes until stiff peaks form and the mixture has cooled down to room temperature, more or less.
4. Gradually add the soft butter (about a tablespoon at a time) and mix well – only add more butter when the butter you just added has disappeared. Add the confectioners’ sugar and vanilla extract and mix in slowly, then mix on high for another 5-6 minutes until you got a very soft and silky buttercream. If the buttercream is very soft, place it in the fridge for about 30 minutes and then mix again.
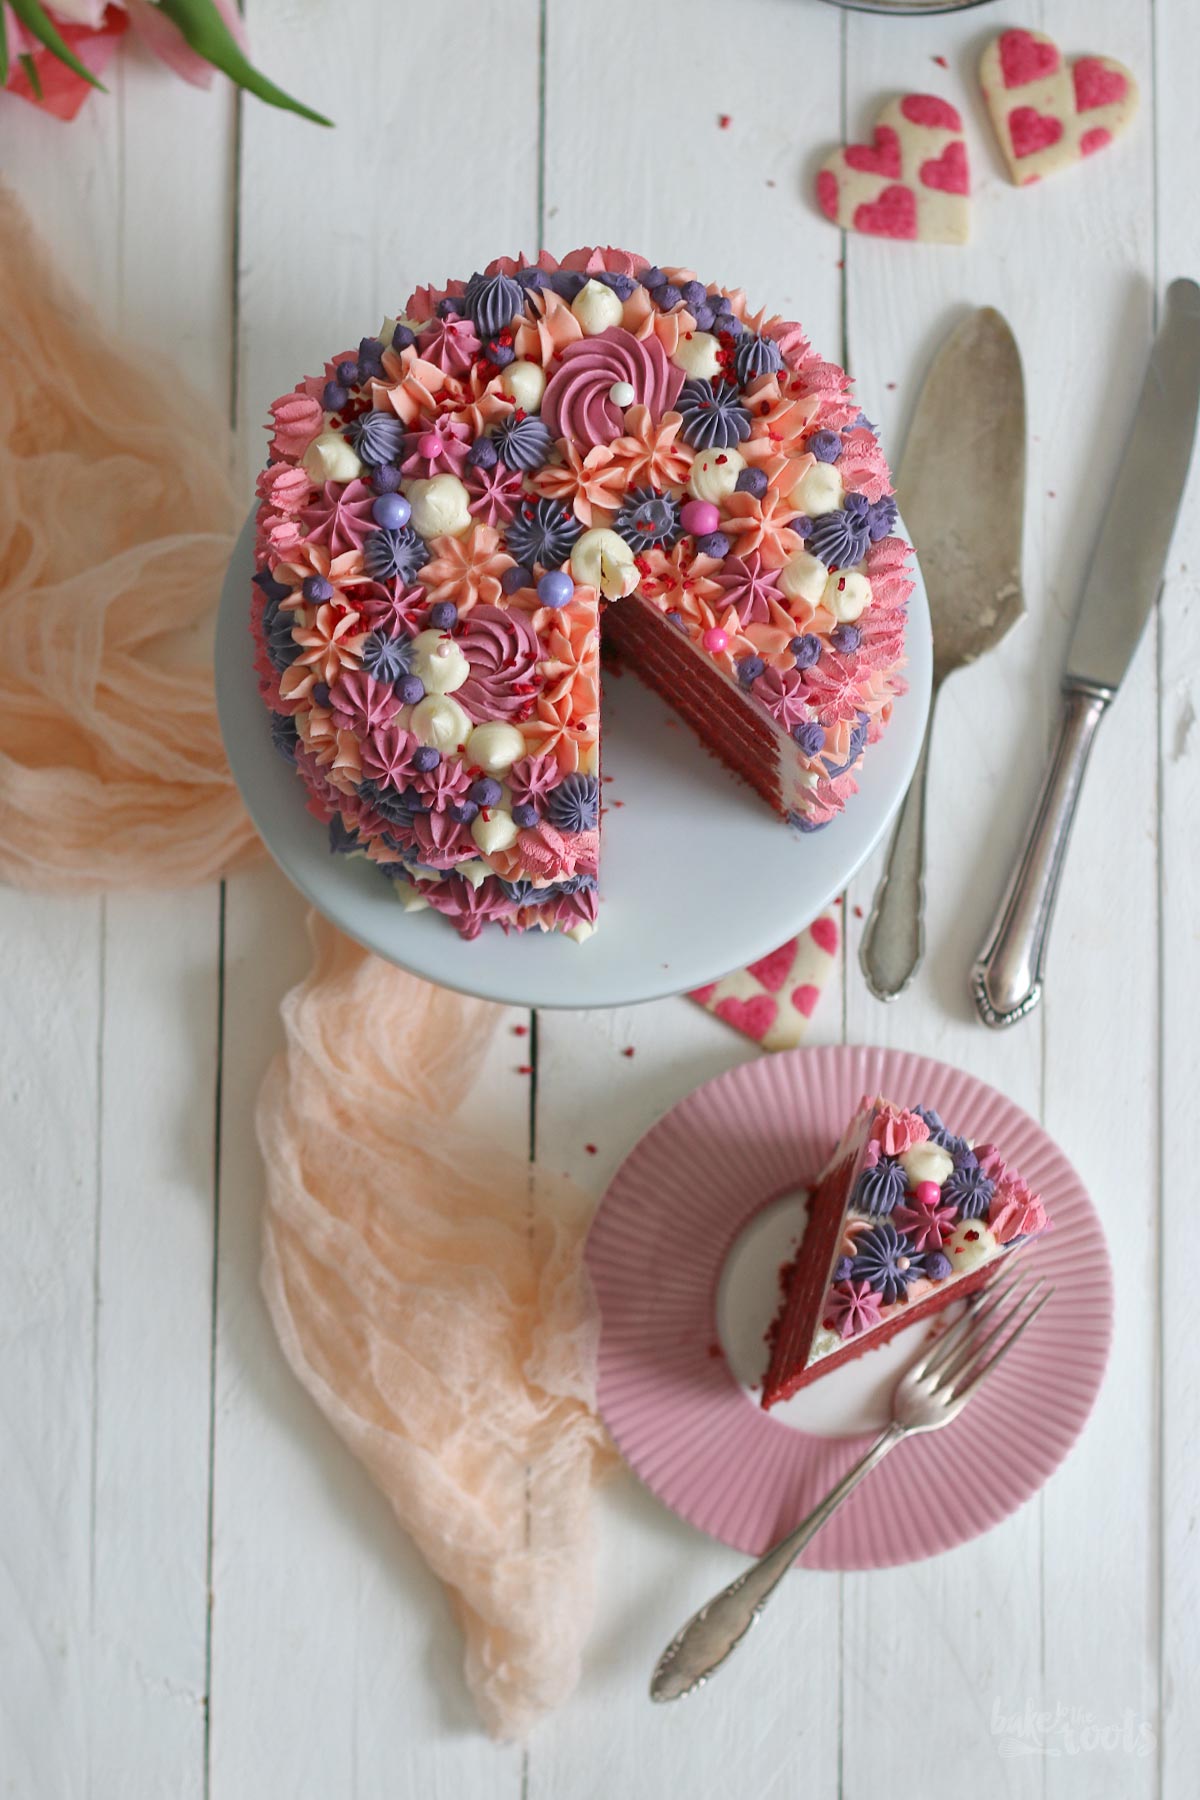
5. To assemble the cake place a cake layer on a serving plate – flatten the cakes first if they domed a lot. Spread some raspberry jam on the cake (optional), then top with some buttercream, spread evenly, and sprinkle with crumbled freeze-dried raspberries. Place the next cake layer on top and repeat the process until you got all four cake layers with buttercream in between. Cover the whole cake with a thin layer of buttercream (it does not have to look super clean) and place it in the fridge for about 20-30 minutes.
6. Color the rest of the buttercream in different shades of red, pink, and purple (keep some white as well) and fill into piping bags with round and start tips. Pipe swirls and dots all over the cake. Decorate with some sprinkles and/or freeze-dried raspberries. Keep in the fridge until serving.
2. Das Mehl, Zucker, Kakaopulver, Backpulver und Salz in eine große Schüssel geben und vermischen. In einer zweiten Schüssel die Eier mit Buttermilch, geschmolzener Butter, Öl, Essig und Vanille Extrakt verrühren, bis alles gut vermischt ist. Die rote Lebensmittelfarbe (Gel oder Pulver) hinzufügen und unterrühren – der Kuchen soll schön rot werden, aber nicht in der Nacht leuchten ;) Diese Mischung in die Schüssel mit den trockenen Zutaten geben und gut verrühren. Den Teig auf die vorbereiteten Backformen verteilen und glatt streichen. Für etwa 27-30 Minuten backen – mit einem Zahnstocher testen, ob noch Teig kleben bleibt und die Kuchen erst herausholen, wenn dieser sauber herauskommt. Aus dem Ofen nehmen, sofort aus den Formen lösen und auf einem Kuchengitter abkühlen lassen. Man kann die Kuchen einen Tag vorab backen und dann in Klarsichtfolie einschlagen, damit sie nicht austrocknen.
3. Für die Buttercreme das Eiweiß, Zucker und Salz in eine große Schüssel geben und über einem Topf mit köchelndem Wasser verrühren – die Schüssel sollte das Wasser nicht berühren! Die Masse so lange rühren, bis sie eine Temperatur von 71°C (160°F) erreicht hat und sich der Zucker aufgelöst hat. Sobald die Temperatur erreicht wurde (hier empfiehlt sich ein Küchenthermometer*), vom Herd nehmen und die Mischung mit der Küchenmaschine oder einem Handmixer für etwa 5 Minuten aufschlagen, bis das Eiweiß steif ist und in etwa Raumtemperatur erreicht hat.
4. Die weiche Butter nach und nach hinzufügen (jeweils etwa einen Esslöffel) und gut unterrühren. Puderzucker und Vanille Extrakt dazugeben und erst langsam, dann auf höchster Stufe weitere 5-6 Minuten aufschlagen, bis eine helle und cremige Masse entstanden ist. Sollte die Buttercreme zu weich wirken, einfach für etwa 30 Minuten in den Kühlschrank stellen und dann noch einmal aufschlagen.
5. Für den Zusammenbau der Torte einen ersten Tortenboden auf eine Servierplatte legen. Falls die Kuchen gewölbt sind, mit einem Messer begradigen. Die Kuchenschicht nach Belieben mit Himbeermarmelade bestreichen (optional), dann etwas Buttercreme darauf verteilen und mit zerbröselten gefriergetrockneten Himbeeren bestreuen. Den nächsten Tortenboden auflegen und den Vorgang wiederholen, bis alle Böden verarbeitet sind. Die komplette Torte mit einer dünnen Schicht Buttercreme einstreichen (muss nicht super sauber aussehen). Für etwa 20-30 Minuten in den Kühlschrank stellen.
6. Die restliche Buttercreme mit roter, pinker und lila Lebensmittelfarbe einfärben (einen kleinen Teil weiß lassen) und in Spritzbeutel mit runden Tüllen und Sterntüllen füllen. Kleine Rosen, Tupfen etc. auf die Torte aufspritzen. Mit ein paar bunten Streuseln und/oder gefriergetrockneten Himbeeren dekorieren. Bis zum Servieren im Kühlschrank aufbewahren.
Craving more? Keep in touch on Facebook, Twitter, Instagram and Pinterest for new post updates and more. You can also contact me with any questions or inquiries!
Here is a version of the recipe you can print easily.
Print
Pink Mother’s Day (Red Velvet) Cake
- Prep Time: 00:45
- Cook Time: 00:30
- Total Time: 04:00
- Yield: 1 1x
- Category: Cakes
- Cuisine: America
- Diet: Vegetarian
Description
If you want to do something nice for your mother on Mother’s Day… how about a nice pink layer cake? Almost too cute to eat. Available in other colors too ;P
Ingredients
For the cake layers:
3 cups (390g) spelt flour
1 cup (200g) sugar
2 tbsp. cocoa powder
1 tsp. baking soda
1/2 tsp. salt
2 large eggs, at room temperature
1 cup (240ml) buttermilk, at room temperature
3/4 cup (170g) butter, melted & cooled
1/2 cup (120ml) vegetable oil
1 tbsp. white vinegar
1 tsp. vanilla extract
red food color (gel or powder)
For the buttercream:
6 large egg whites
1 1/2 cup (300g) sugar
1/4 tsp. salt
15.8 oz. (450g) butter, at room temperature
1 1/2 tsp. vanilla extract
1 1/2 cups (200g) confectioners’ sugar
some red, pink & purple food color (gel or powder)
some raspberry jam (optional)
some freeze-dried raspberries*, crumbled
some red/pink/purple sprinkles
Instructions
1. Preheat the oven to 350°F (180°C). Grease four 6 inches (15cm) baking tins (I used silicone molds*) and set aside. Make sure your ingredients are all at room temperature. Melt the butter and let cool down again.
2. Add the spelt flour, sugar, cocoa powder, baking soda, and salt to a large bowl and mix until well combined. In a second bowl mix the eggs with buttermilk, melted butter, oil, vinegar, and vanilla extract until well combined. Add the red food color (gel or powder) and mix in – you want a nice red cake but it should not glow ;) Add the wet ingredients to the bowl with dry ingredients and mix until well combined. Divide the batter between the prepared baking tins, smooth out the top, and bake for about 27-30 minutes or until a toothpick inserted into the center of the cakes comes out clean. Take out of the oven and remove the cakes immediately from the tins and let cool down on a wire rack. If you bake the cakes a day in advance wrap them in some plastic wrap so they do not dry out.
3. For the buttercream add the egg whites, sugar, and salt to a large bowl and place it on a pot with simmering water – the water should not touch the bowl! Mix until the sugar has dissolved completely and the mixture has reached a temperature of 160°F (71°C). It’s best to use a kitchen thermometer* here. Transfer the mixture to the bowl of a stand mixer. Whisk on high for about 5 minutes until stiff peaks form and the mixture has cooled down to room temperature, more or less.
4. Gradually add the soft butter (about a tablespoon at a time) and mix well – only add more butter when the butter you just added has disappeared. Add the confectioners’ sugar and vanilla extract and mix in slowly, then mix on high for another 5-6 minutes until you got a very soft and silky buttercream. If the buttercream is very soft, place it in the fridge for about 30 minutes and then mix again.
5. To assemble the cake place a cake layer on a serving plate – flatten the cakes first if they domed a lot. Spread some raspberry jam on the cake (optional), then top with some buttercream, spread evenly, and sprinkle with crumbled freeze-dried raspberries. Place the next cake layer on top and repeat the process until you got all four cake layers with buttercream in between. Cover the whole cake with a thin layer of buttercream (it does not have to look super clean) and place it in the fridge for about 20-30 minutes.
6. Color the rest of the buttercream in different shades of red, pink, and purple (keep some white as well) and fill into piping bags with round and start tips. Pipe swirls and dots all over the cake. Decorate with some sprinkles and/or freeze-dried raspberries. Keep in the fridge until serving.
Notes
Enjoy baking!
Links marked with an asterisk (*) are affiliate links (advertising/Werbung) to Amazon Germany. If you click on one of those links and buy something via this link, I will get a commission for that sale. The price of whatever you buy is not affected in any way by this.

 I love my job, but in between I love to bake and try new things in the kitchen. A lot of my friends and colleagues encourage me to bake - for a very simple reason: they get the leftovers - and it seems they like it most of the time ;)