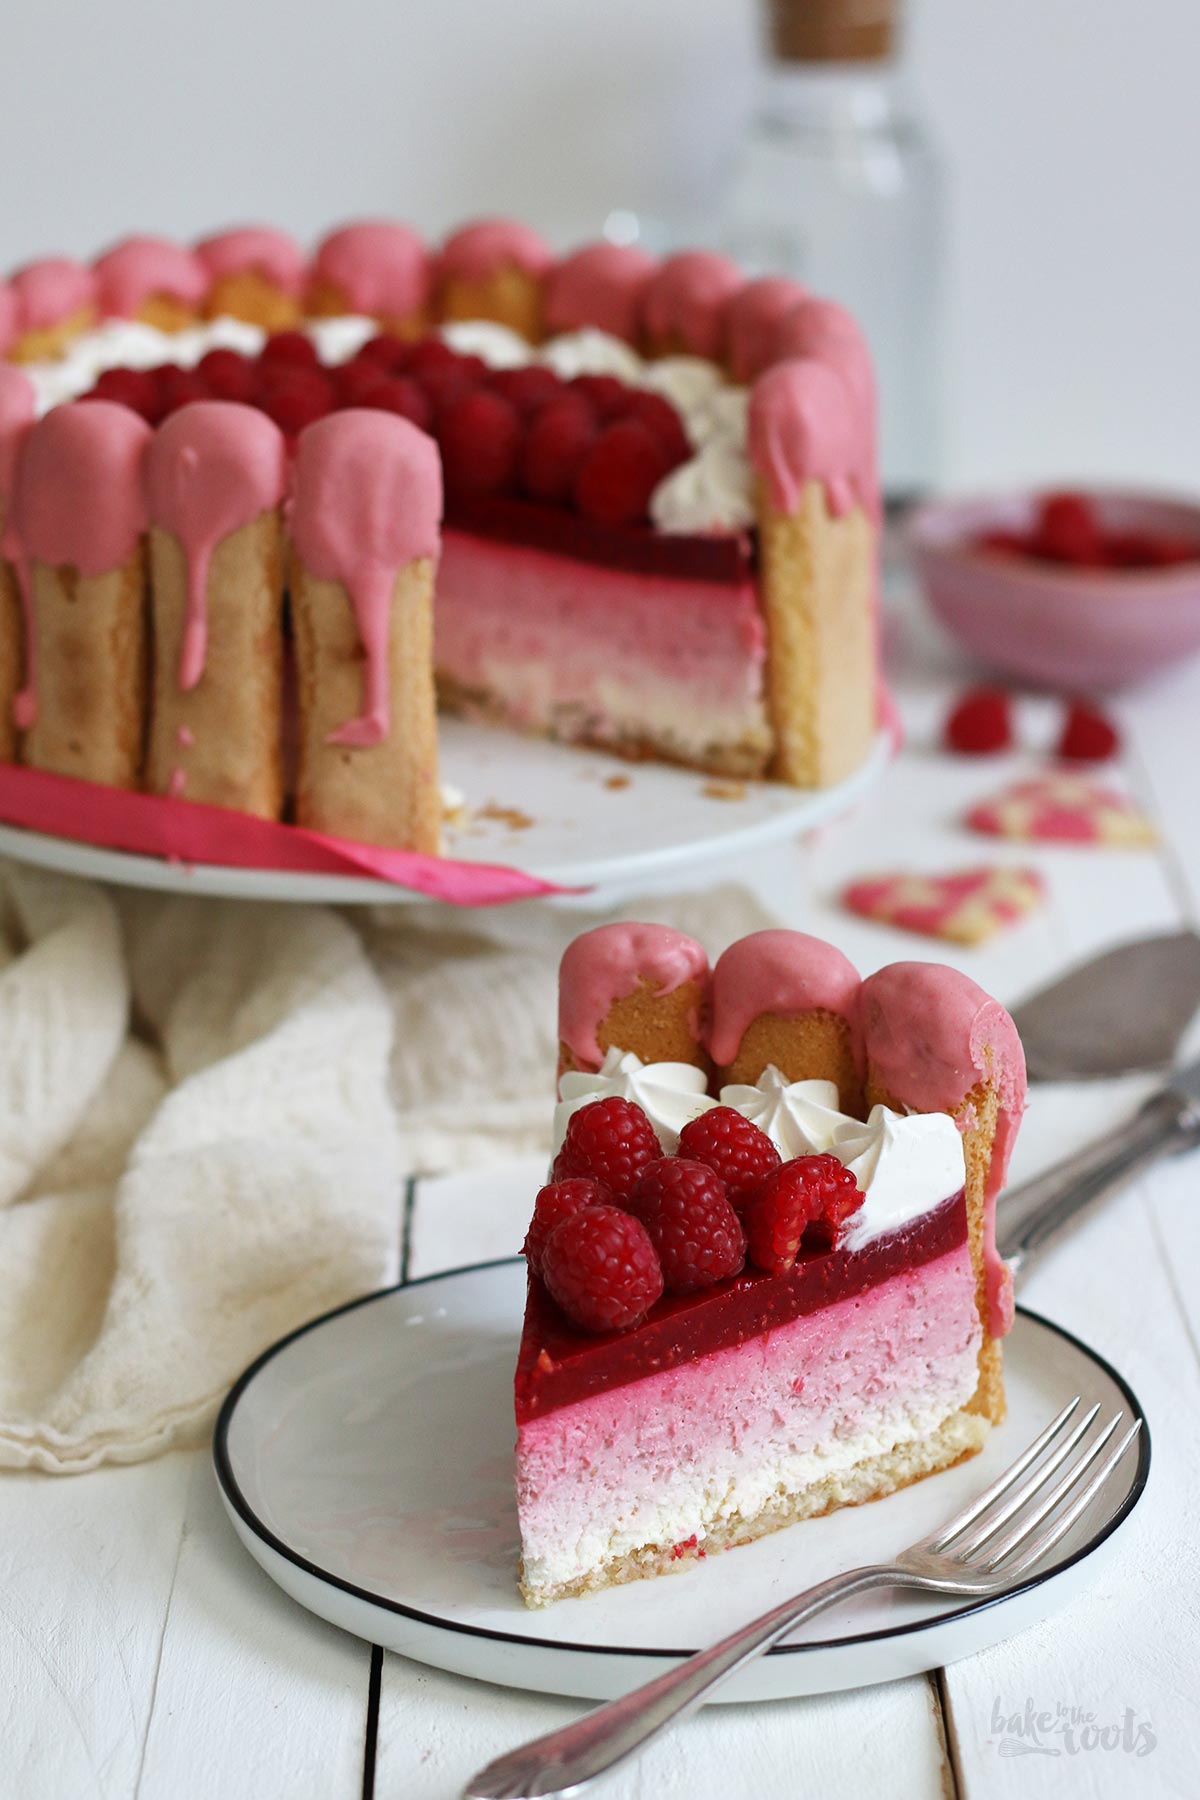
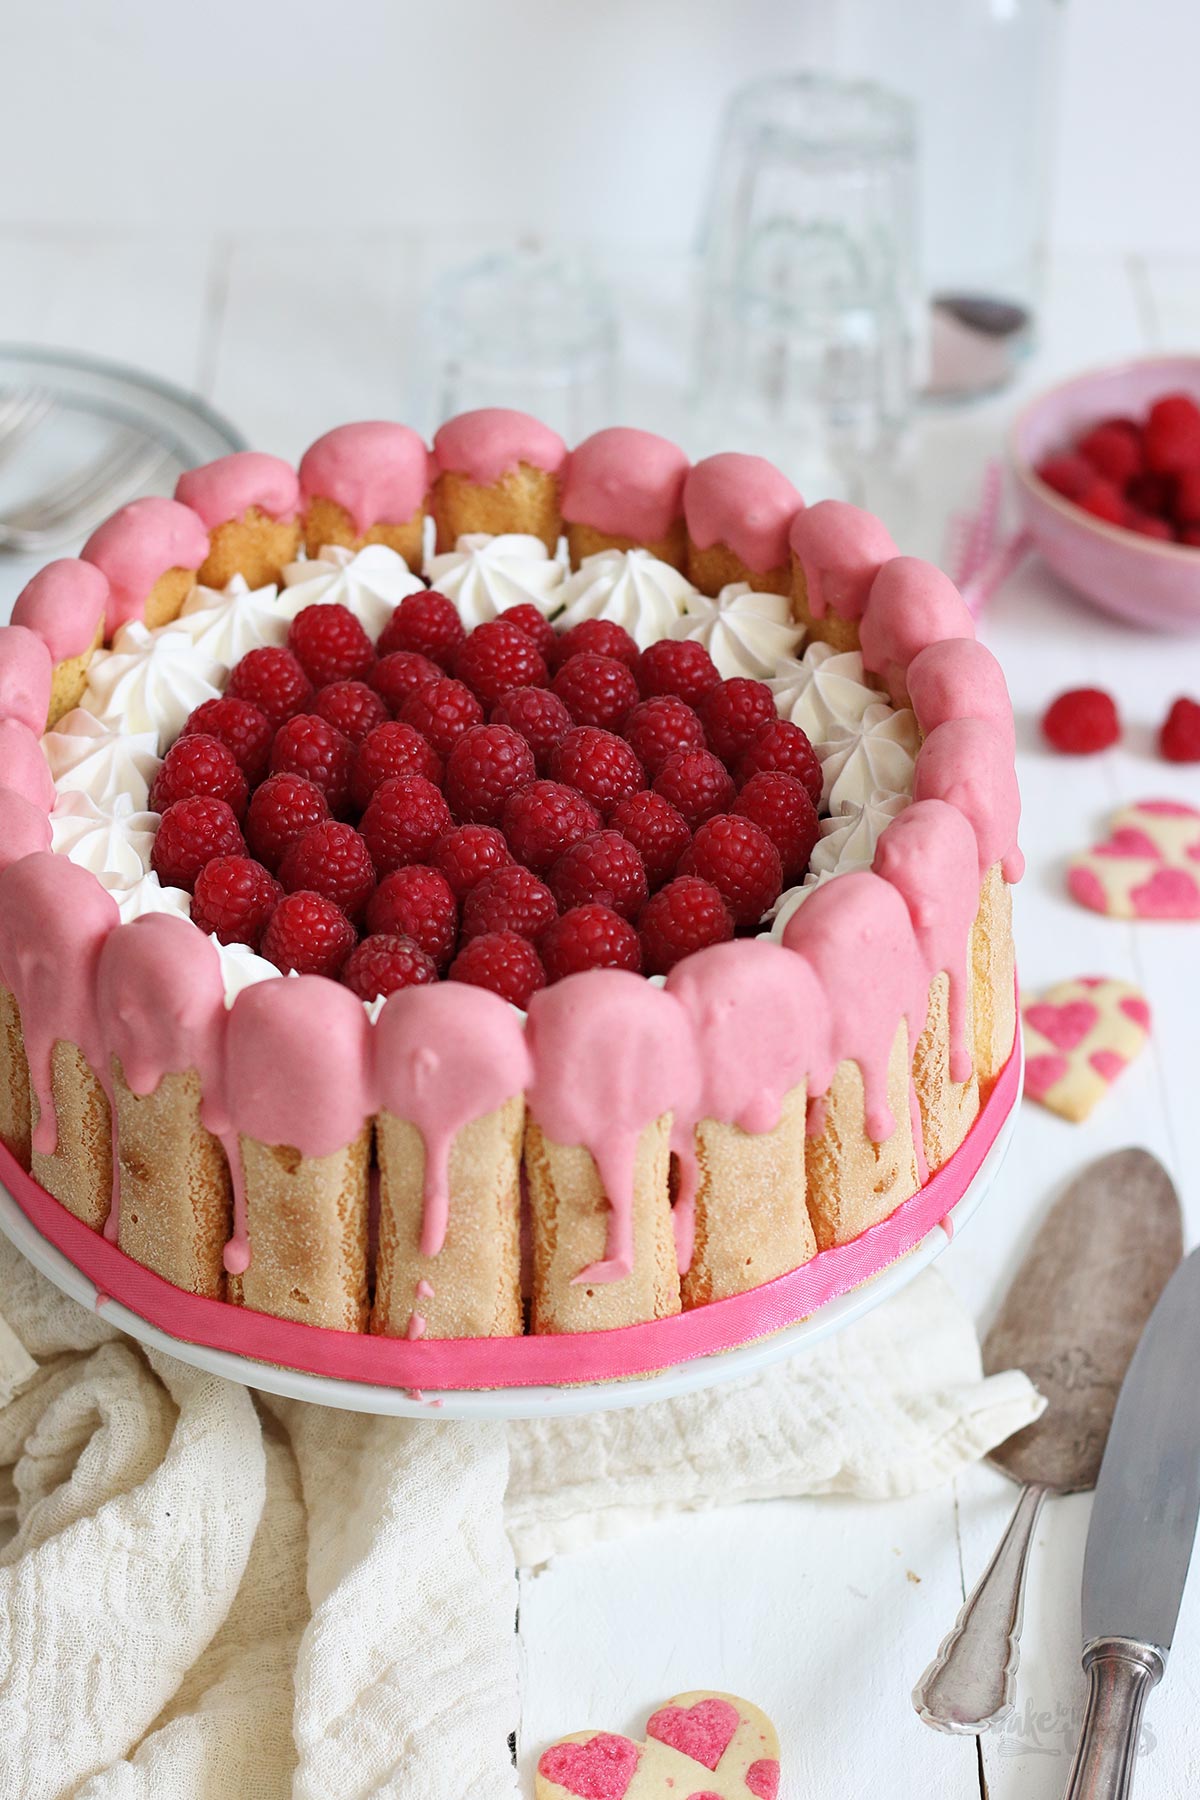
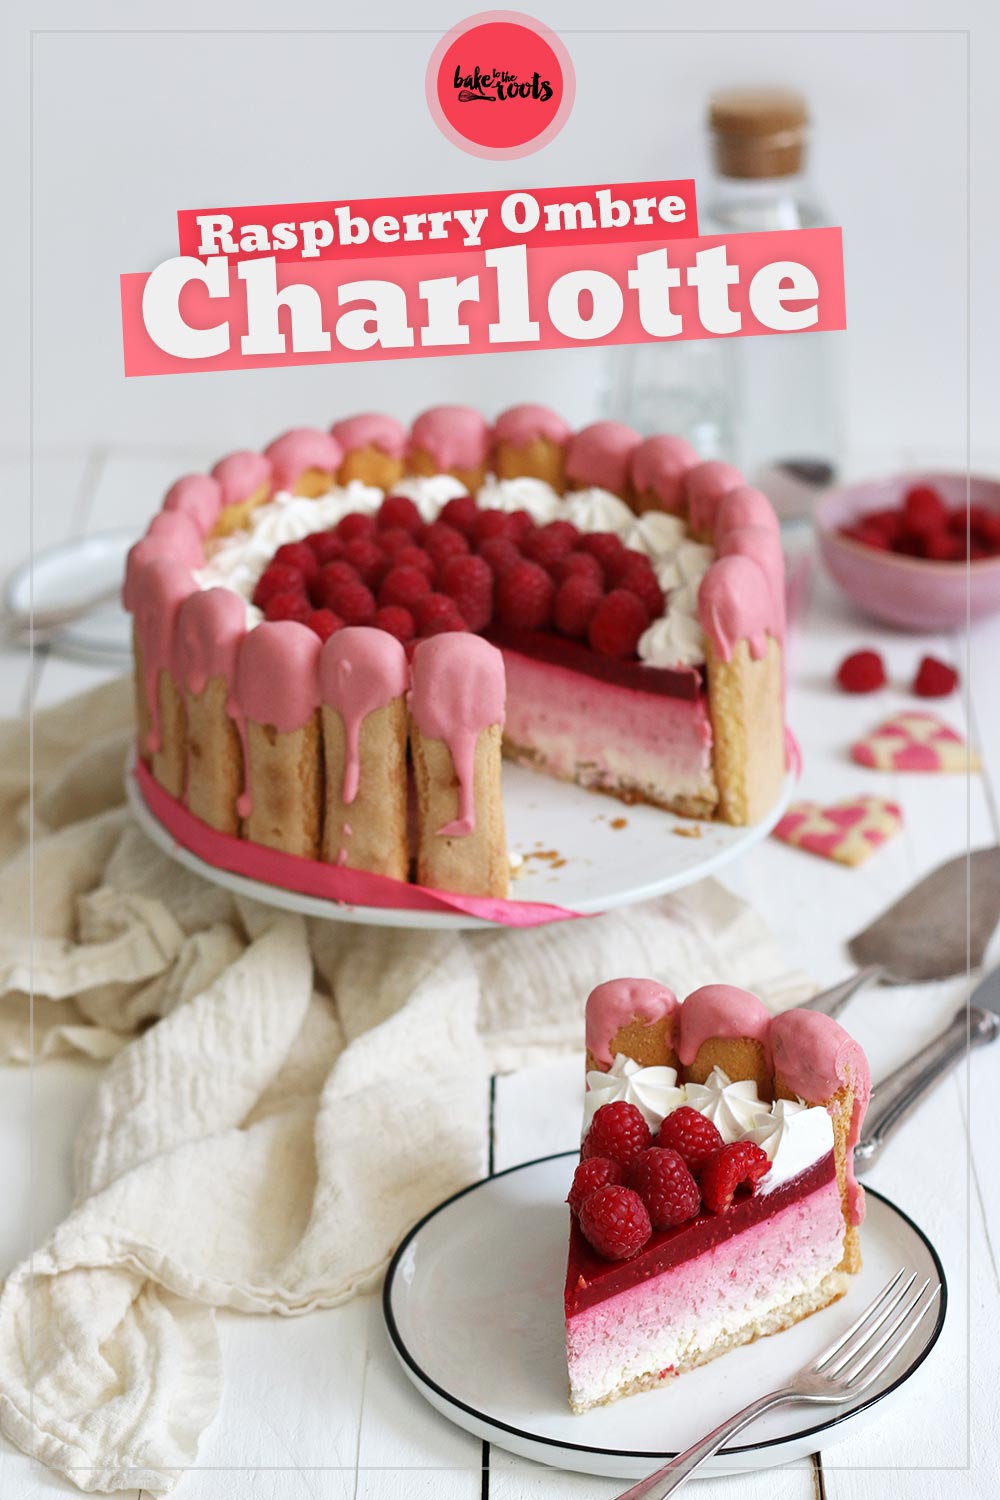
Mother’s Day is coming up soon – I hope you all out there have the opportunity to see your mothers this year. Times are tough right now. In case you are able to see your family and mom on Mother’s Day, I recommend baking something for your mom instead of buying flowers. This is a baking blog here – of course – I will always recommend baking something like cakes or cupcakes ;P Flowers are much nicer to look at in the garden anyway instead of being cut off on a table… So who can I offer the first slice of this Raspberry Ombre Cheesecake Charlotte? ;)
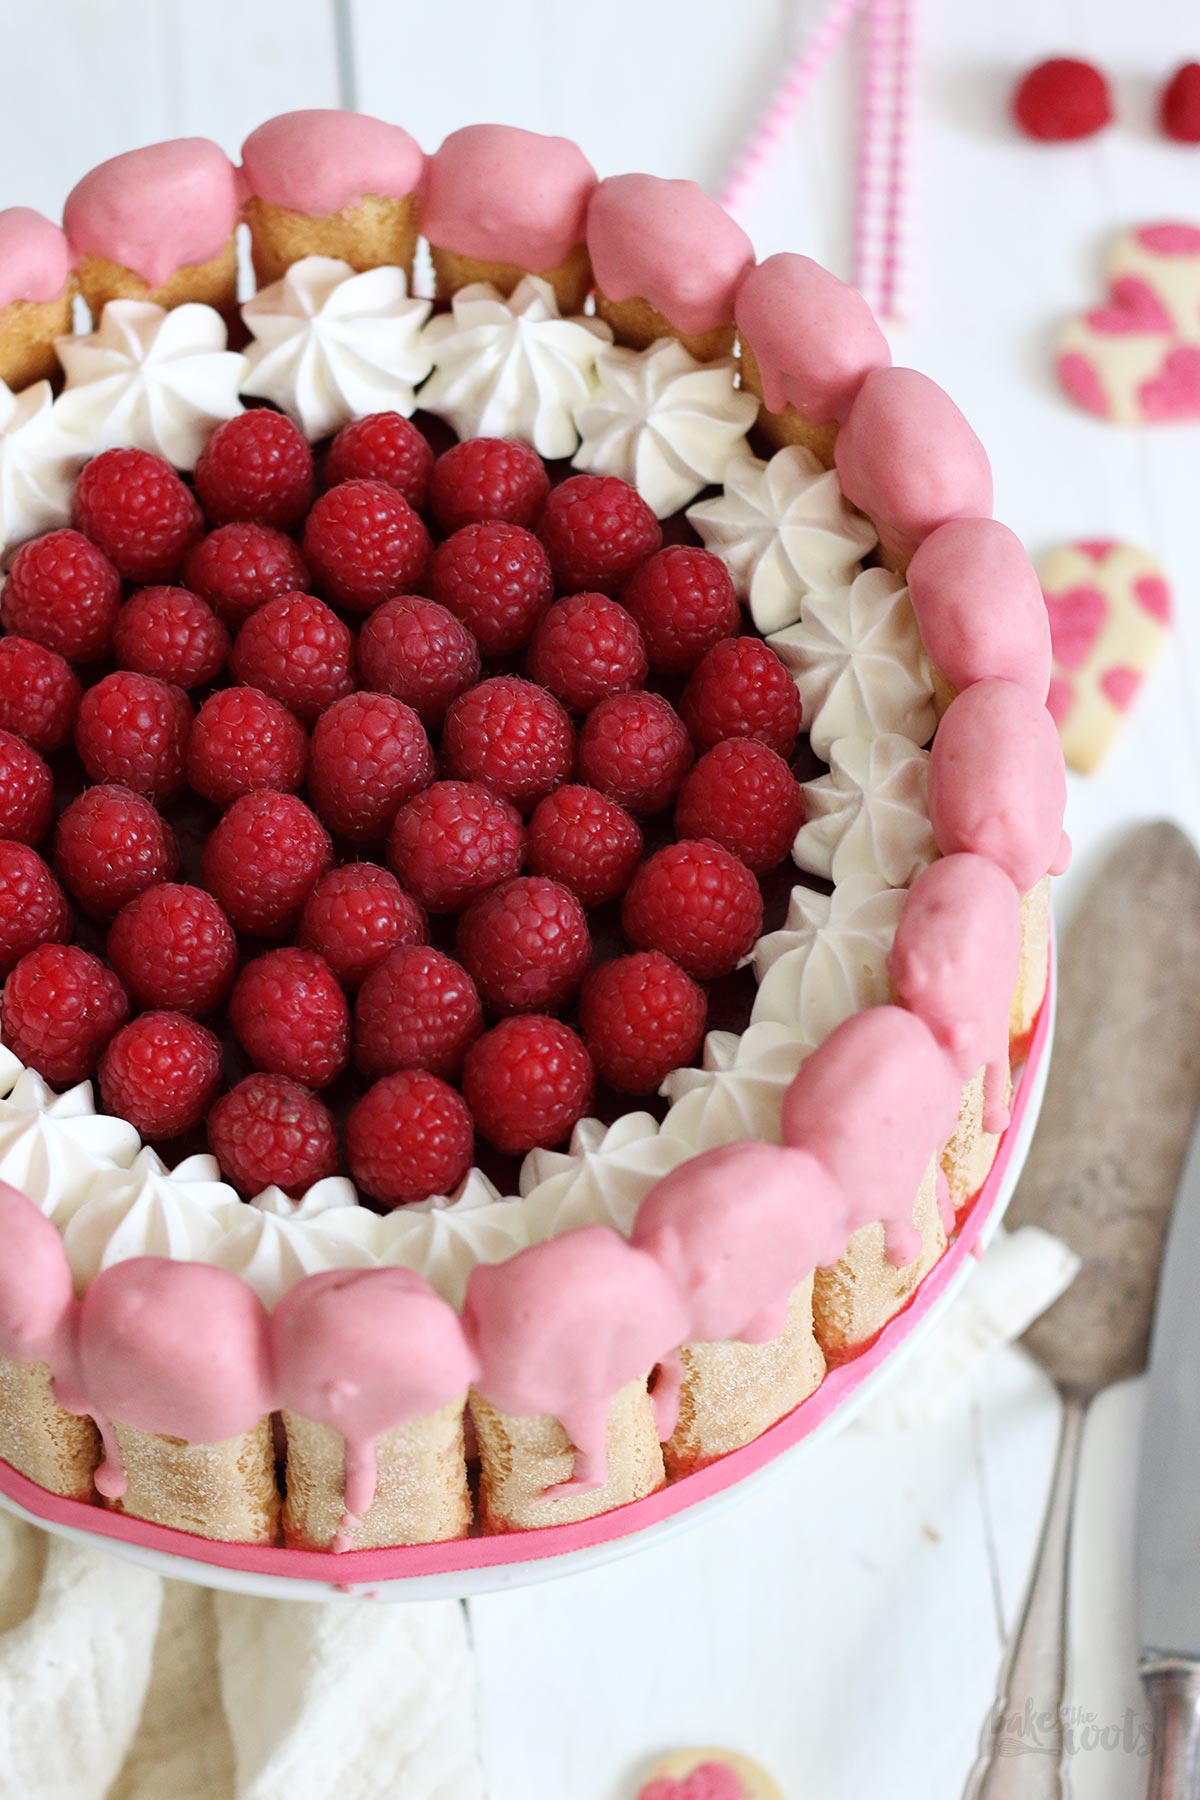
As children, most of us were probably doing some DIY stuff to make mom happy for Mother’s Day. Something made out of clay or maybe a nice colorful picture. Most of the time stuff that only a mother would consider beautiful ;P Though I am not doing the crafting stuff anymore, I still think it’s a nice gesture to create something to show some love instead of just buying flowers or some fancy chocolates. A nicely decorated cake or maybe some cupcakes with fruits or berries your mother likes a lot – always a winner! ;)
This pinky pink Raspberry Ombre Cheesecake Charlott is definitely a slightly more difficult Mother’s Day project – or a project for any other day of the year when you’re craving some raspberries and cheesecake. It takes some time, but I think it’s absolutely worth the effort. Because it looks so nice, I think, and of course, because your mother deserves a cake like that! ;P
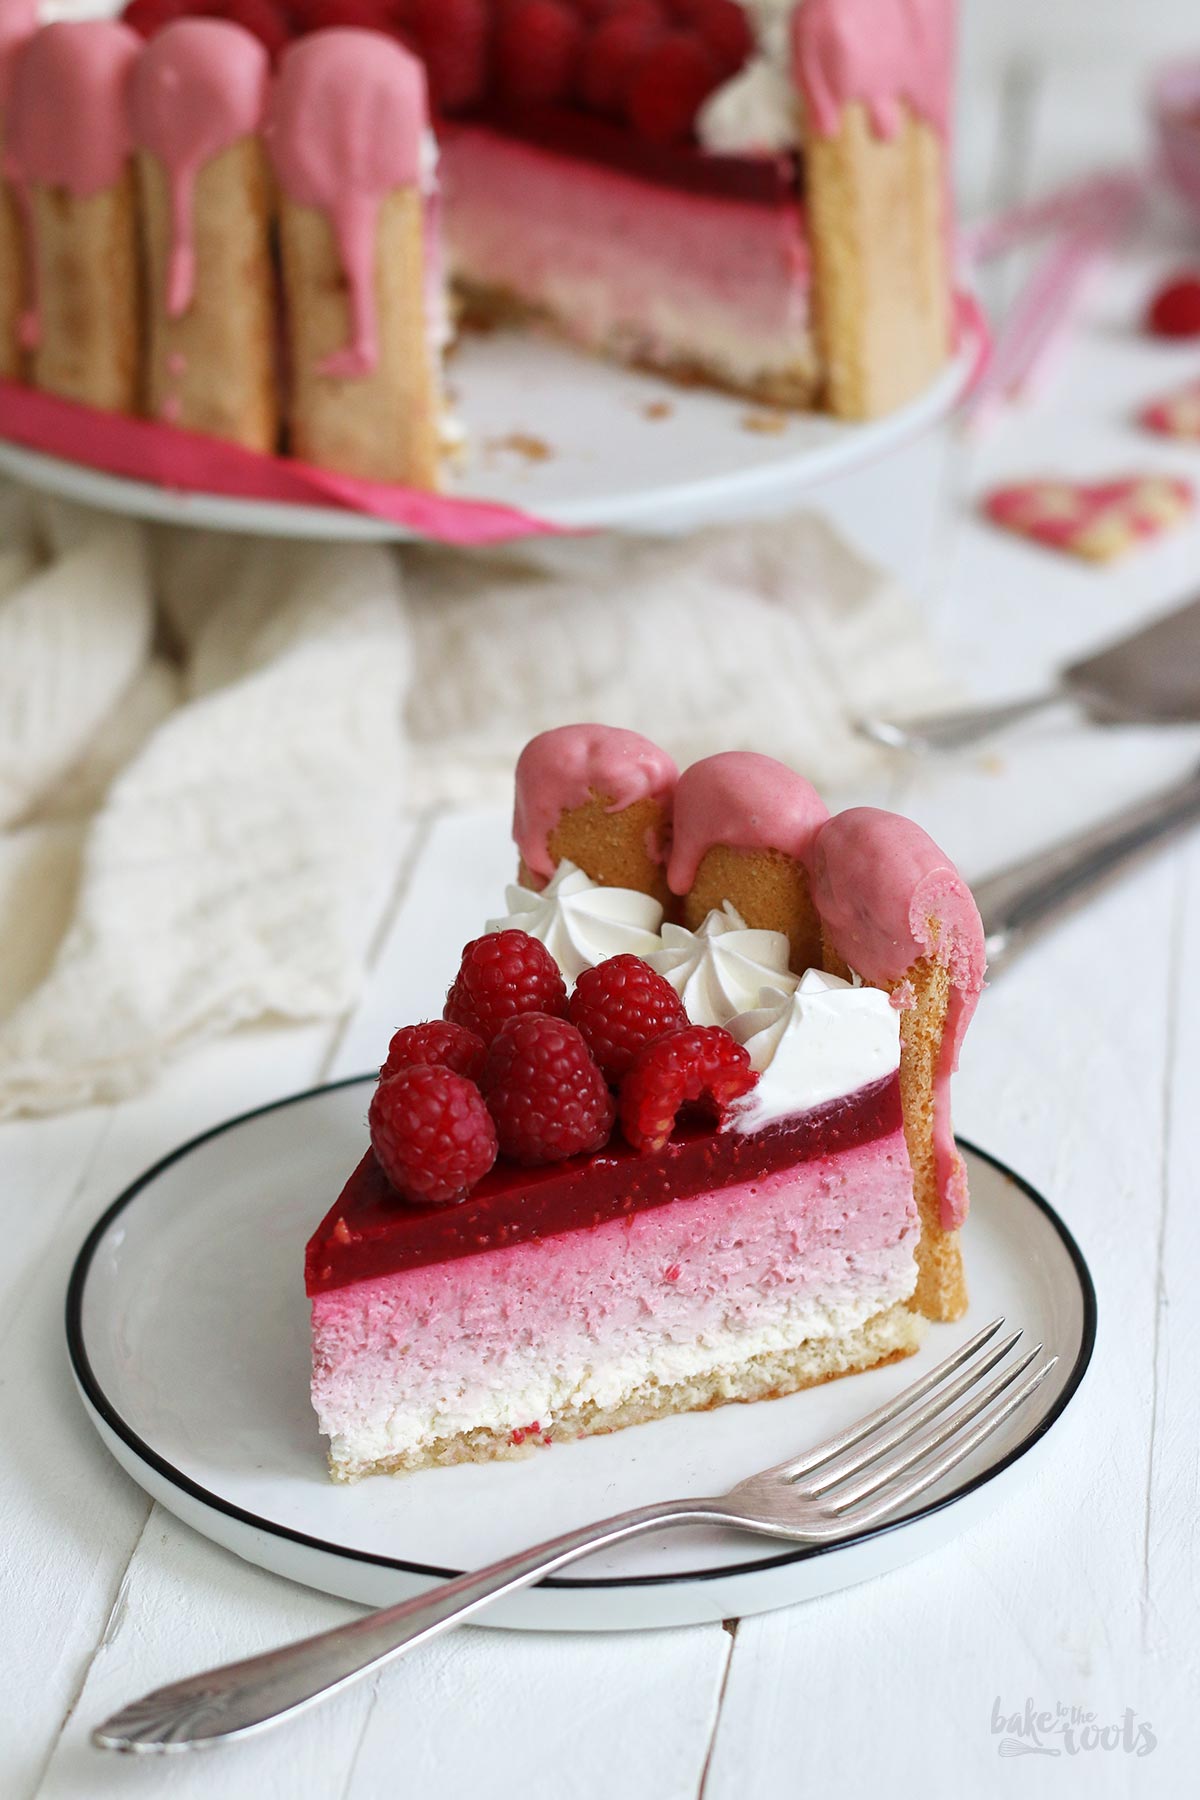
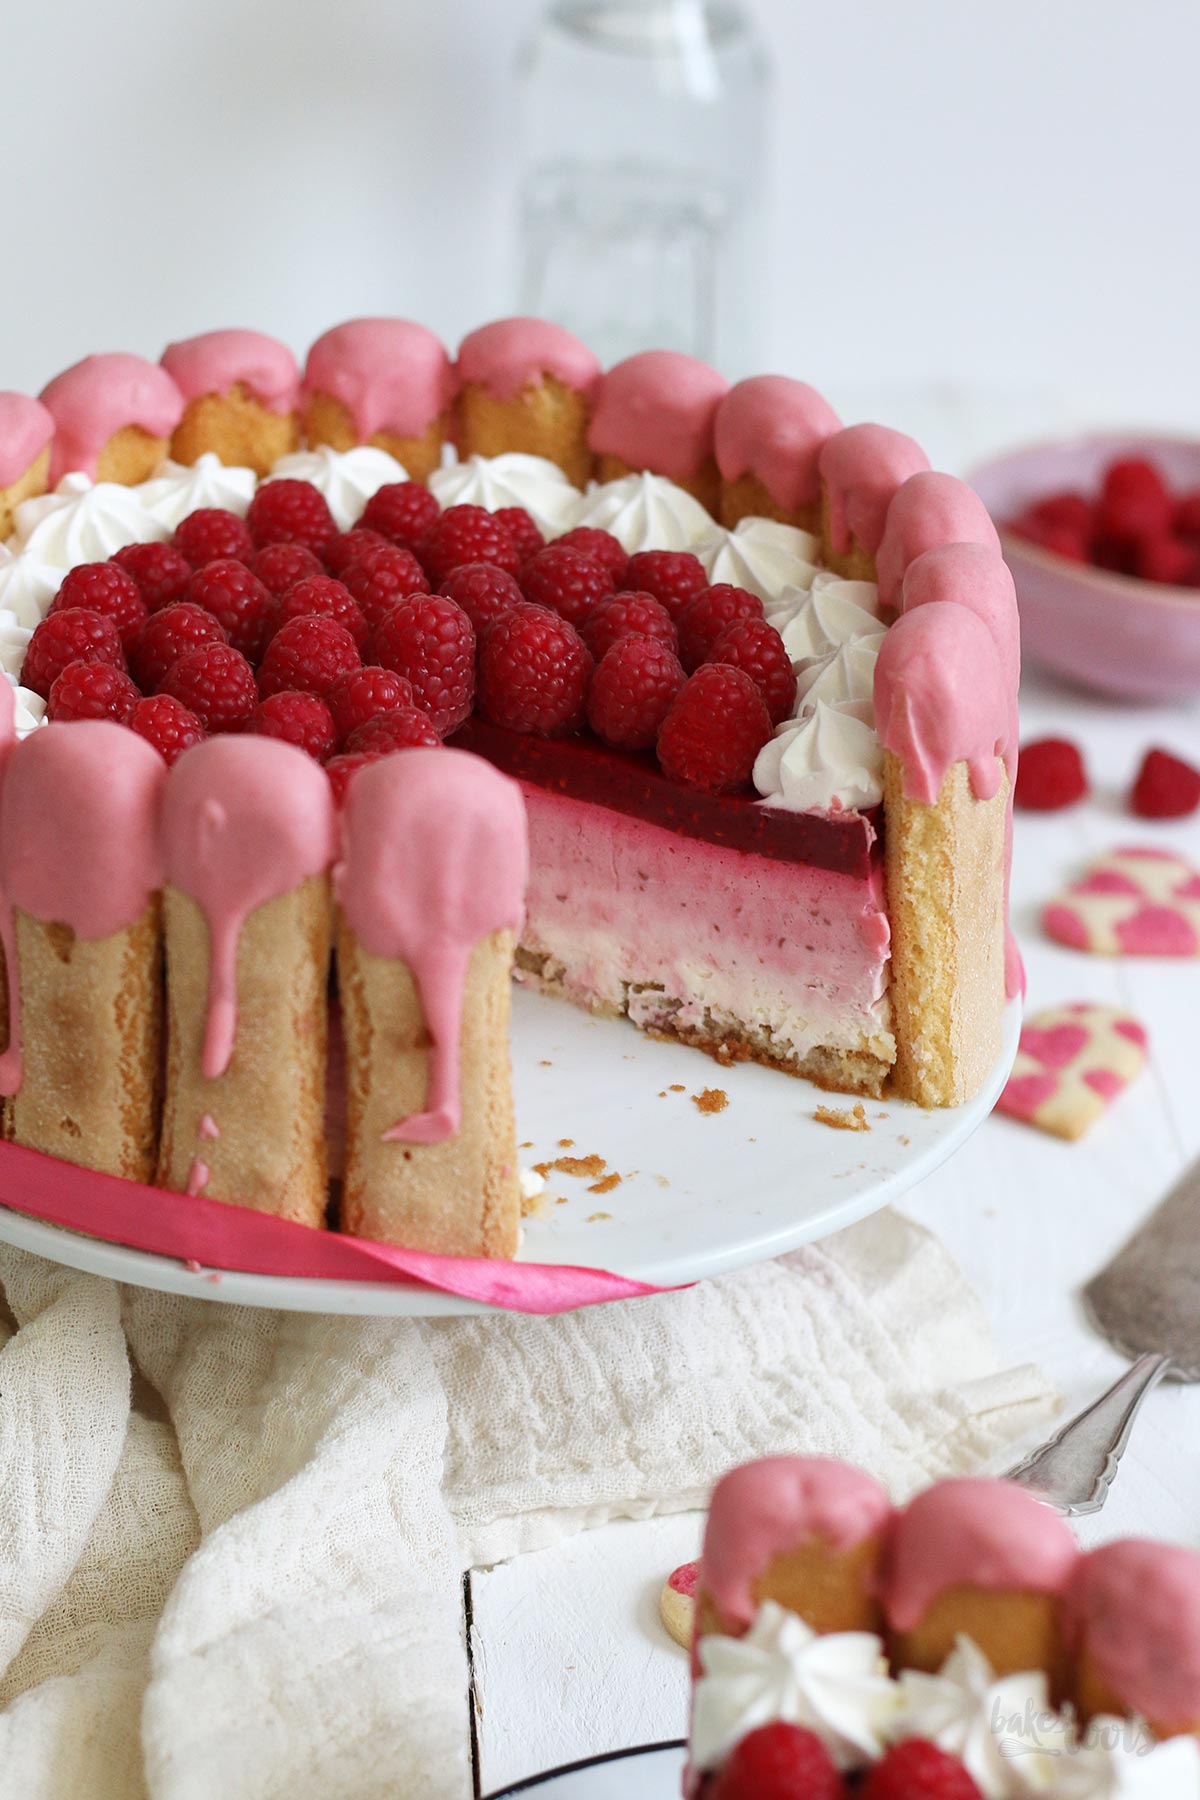
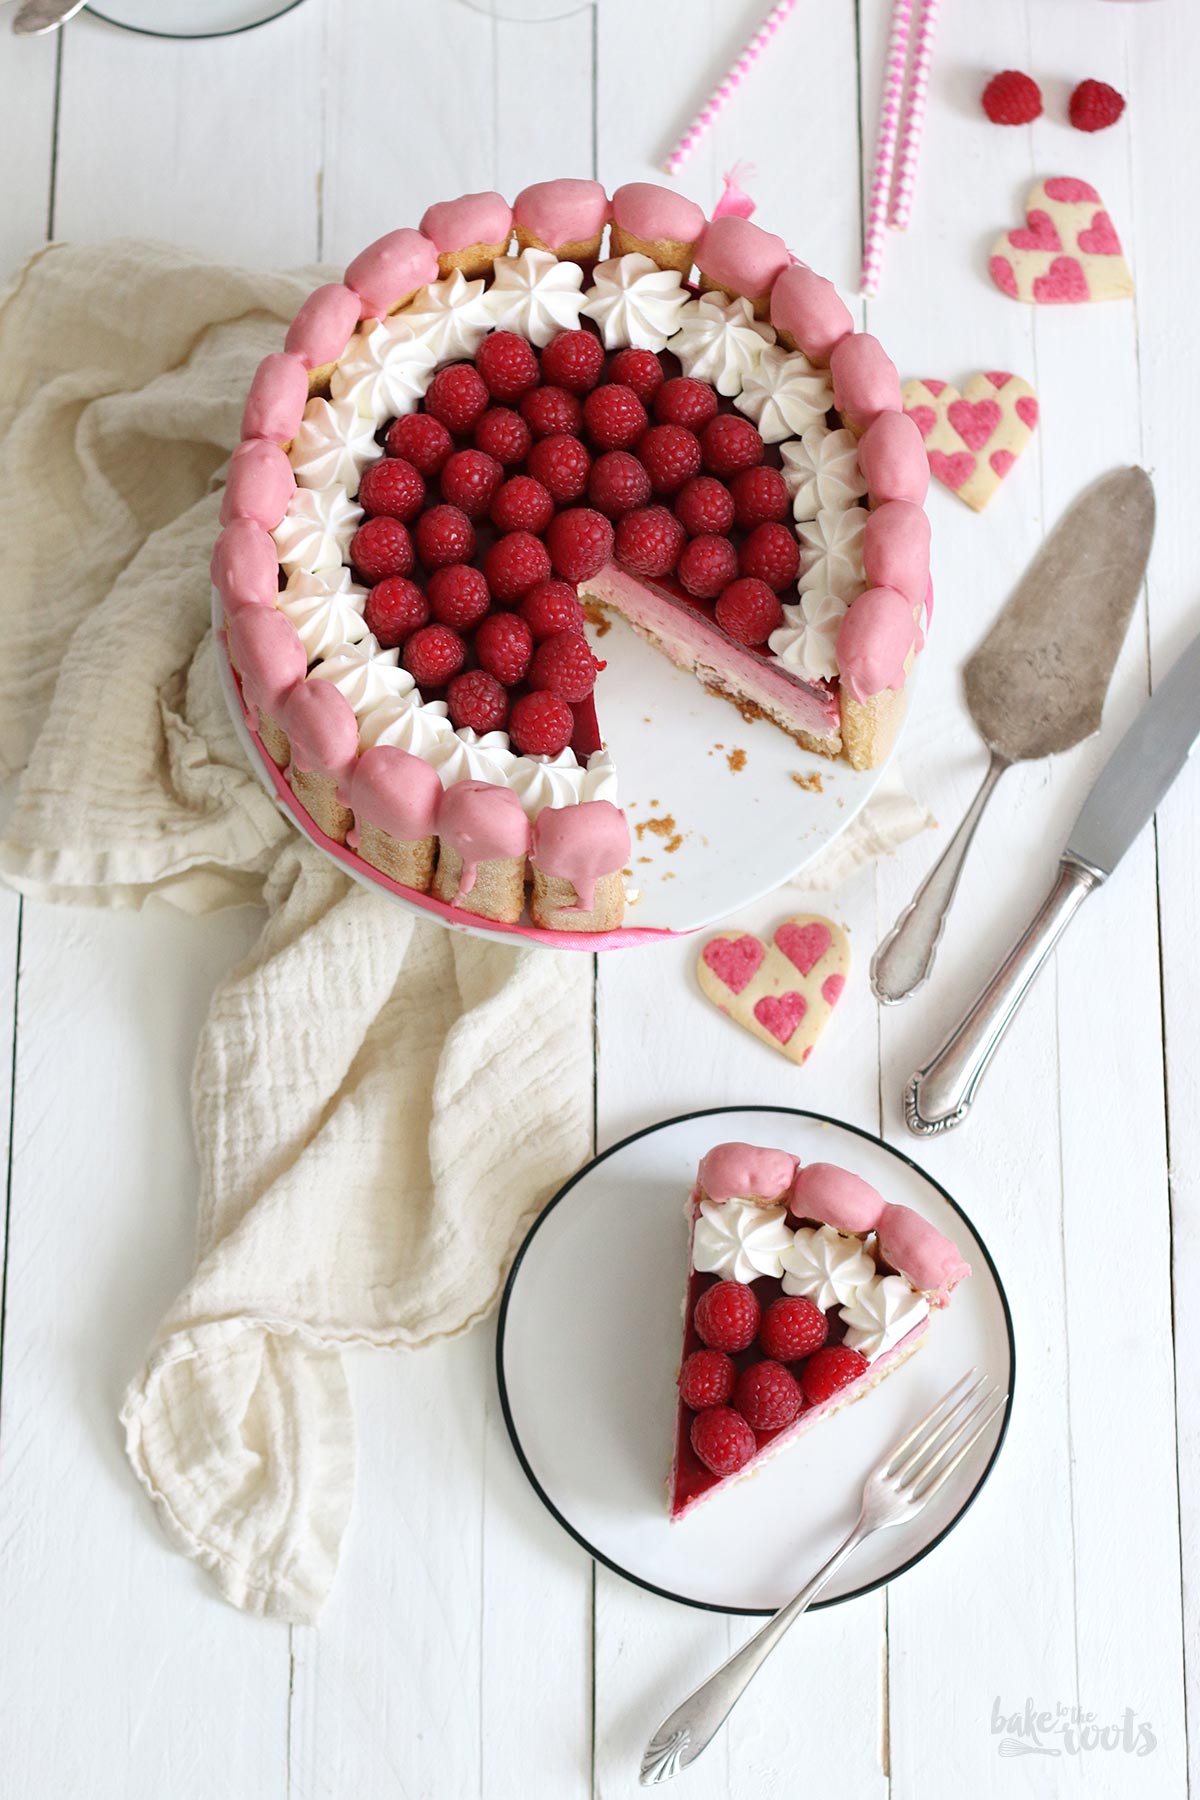
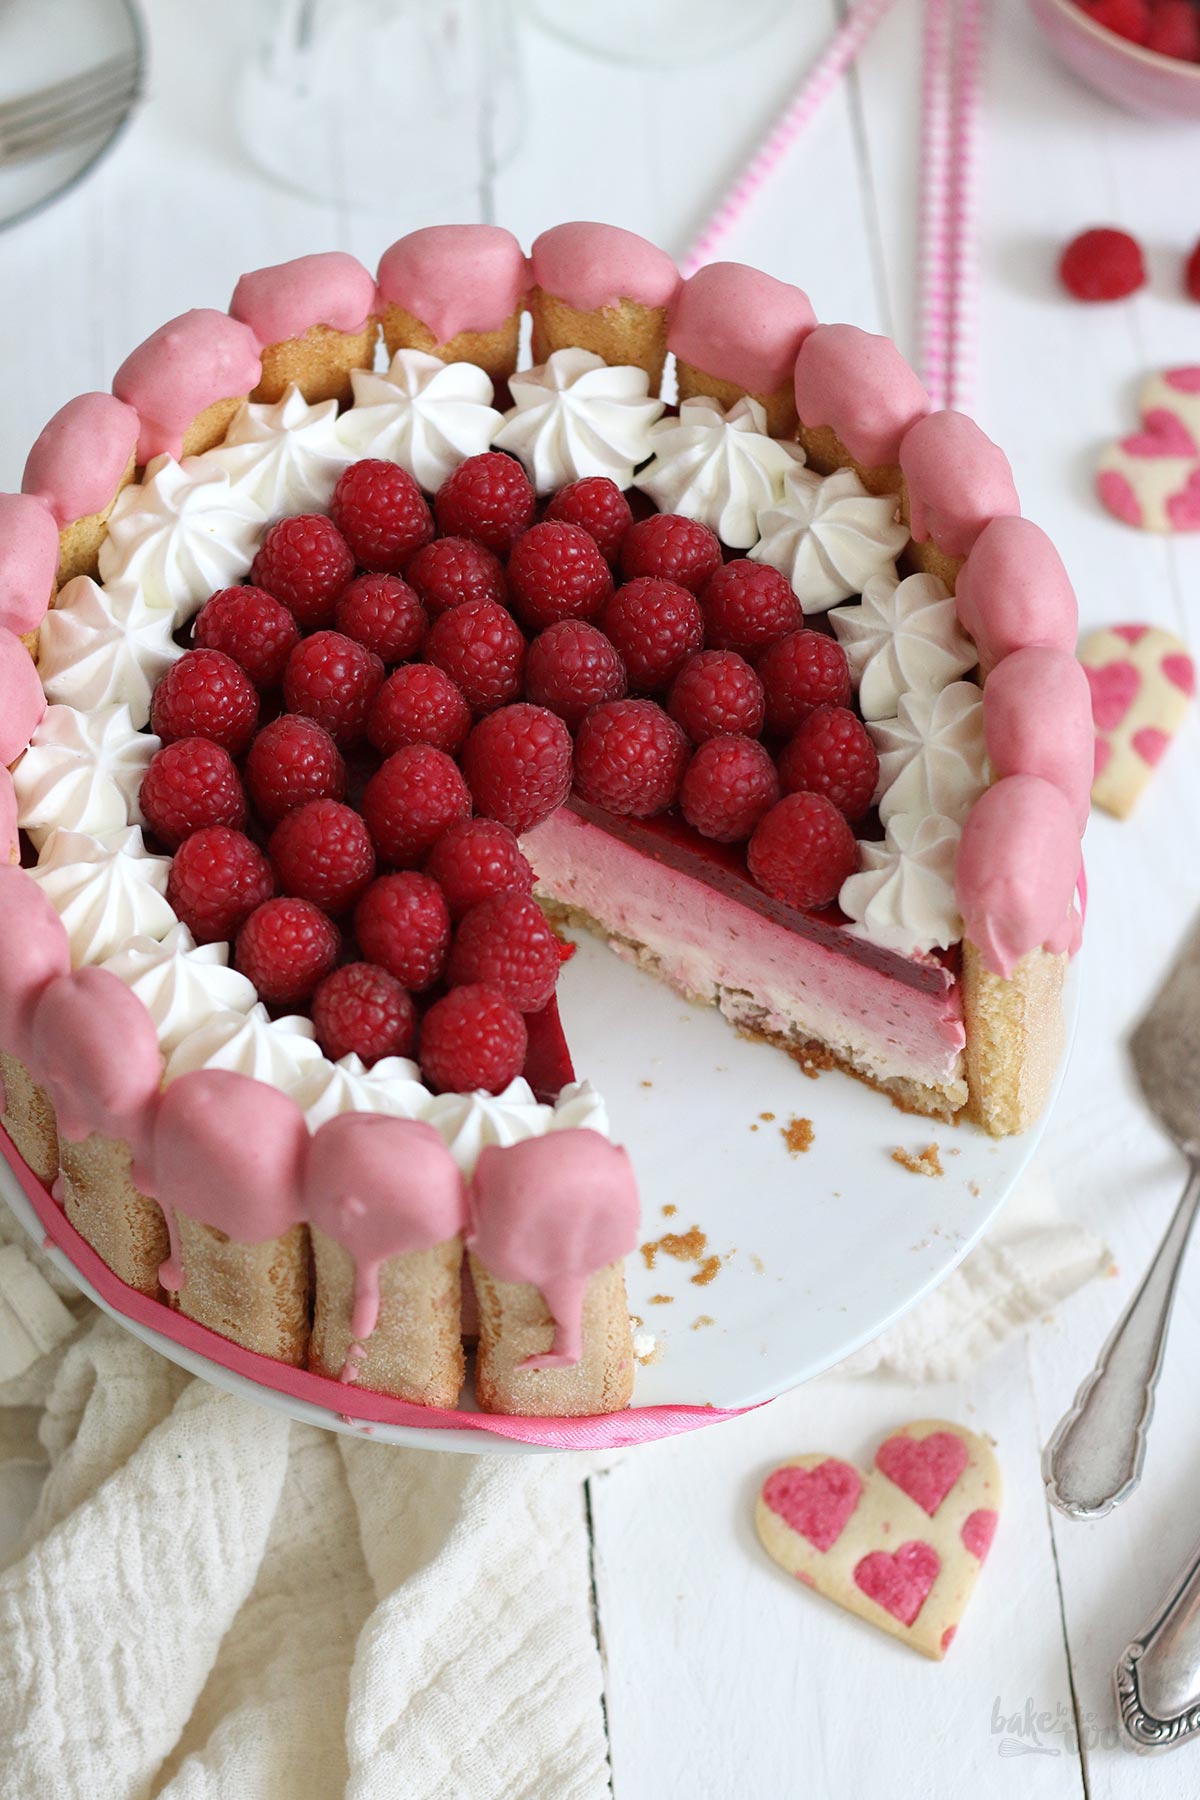
To create the ombre effect you have to handle quite a few bowls to create the different colors for the filling. When layering the cheesecake with the different colors, the layers will be clearly separated at the beginning, but over time when you give the charlotte time to set and cool, the layers will start to fuze and you will get that nice gradient from white to pink. I think it looks really nice. Especially with the fruity layer on top. So delicious!
Well… let’s cut that charlotte to get more slices. First come, first serve ;)
If you like it less complicated, but still want a showstopper for mom, you could also try this Chocolate Heart Cake with Buttercream Decoration. The heart cake was initially made for Valentine’s Day, but it’s also a really good fit for Mother’s Day I think ;)
Happy Mother’s Day to all you moms out there!
INGREDIENTS / ZUTATEN
2 medium eggs, separated
a pinch of salt
3 tbsp. sugar, divided
1/4 tsp. vanilla extract
1.8 oz. (50g) all-purpose flour
For the fruit layer/filling:
17.6 oz. (500g) frozen raspberries, thawed
2 tbsp. sugar
1 tbsp. lemon juice
0.5 oz (15g) agar-agar
For the filling:
14 oz. (400g) cold heavy cream
9 tsp. cream stiffener, divided
17.6 oz. (500g) low-fat quark (curd)
1/4 cup (30g) confectioners’ sugar
1/2 tsp. vanilla extract
zest of 1 organic lemon
1 tbsp. lemon juice
For the decoration:
7 oz. (200g) ladyfingers
3.5 oz. (100g) white chocolate
1-2 tsp. coconut oil
food coloring for chocolate (pink)**
some whipped cream (optional)
fresh raspberries (optional)
2 Eier (M), getrennt
1 Prise Salz
3 EL Zucker, aufgeteilt
1/4 TL Vanille Extrakt
50g Mehl (Type 550)
Für die Fruchtschicht/Füllung:
500g Himbeeren (TK Ware), aufgetaut
2 EL Zucker
1 EL Zitronensaft
15g Agar-Agar
Für die Füllung:
400g kalte Sahne
9 TL Sahnesteif, aufgeteilt
500g Magerquark
30g Puderzucker
1/2 TL Vanille Extrakt
Abrieb von 1 Bio-Zitrone
1 EL Zitronensaft
Für die Dekoration:
200g Löffelbiskuit
100g weiße Schokolade
1-2 TL Kokosfett
Lebensmittelfarbe für Schokolade (Pink)**
etwas Schlagsahne (optional)
frische Himbeeren (optional)
DIRECTIONS / ZUBEREITUNG
2. Separate the eggs. Whisk the egg whites with a pinch of salt. Once the egg whites are foamy, gradually add 2 tablespoons of the sugar and whisk until stiff peaks form. Set aside. In a large bowl, whisk the egg yolks with the remaining tablespoon of sugar and vanilla extract for 3-4 minutes until very light and fluffy. Sift the flour in two batches over the mix and gently fold in. Add the stiff egg whites, also in two batches, and gently fold in. Pour the batter into the prepared springform tin, smooth out the top and bake for about 14-15 minutes. The sponge should have risen nicely and got a nice golden brown color. Remove from the oven and let cool down completely.
3. For the fruit layer/filling, add the thawed raspberries to a small saucepan and puree with an immersion blender. If you don’t like the seeds, you’ll need a few more raspberries and you’ll have to strain the raspberry puree after pureeing. Add the sugar, lemon juice, and agar-agar and stir in. Bring to a boil, stirring constantly, and let bubble for at least 2 minutes (otherwise the agar-agar won’t bind). Remove from heat and let cool until almost room temperature, stirring once in a while.
4. Whisk the cold heavy cream with 4 teaspoons of the cream stiffener until stiff peaks form. Set aside. In a large bowl, mix the quark with the remaining 5 teaspoons of the cream stiffener, confectioners’ sugar, vanilla extract, lemon zest, and lemon juice until well combined. Gently fold in the whipped cream in several batches until well combined.
5. Remove the sponge cake from the tin and place it on a serving plate. Level the top if there are any bumps or if the cake has collapsed a bit. Place a cake ring tightly around the cake, then spread about 1/3 of the cream filling on top. Place in the fridge until needed again. Add about 1-2 tablespoons of the pureed raspberries to a bowl and mix with 1 tablespoon of the cream filling – this will make sure that everything has the same temperature and you avoid that the agar-agar is cooling down too quickly which would lead to clumps in the filling. Gradually add more cream and mix gently until another 1/3 of the cream has been incorporated. This mixture should have a light pink color. You can intensify the color by mixing some more raspberry puree in a separate bowl with some of the already colored cream filling, and then combining that again with the rest to intensify the pink. Take the cake out of the fridge and carefully spread the pink cream on top of the light cream layer and smooth it out. Put it back in the fridge. Color the remaining cream filling the same way but with a bit more raspberry puree than you did for the second layer – the cream should be a tad darker now. Make sure there is enough raspberry puree left for the fruit layer at the end. Carefully spread the cream again on top of the previous layer and smooth out – place in the fridge for about 20 minutes.
6. Take the cake out of the fridge and pour the remaining raspberry puree on top. If the puree has already thickened or is partially solid, simply warm it up again very briefly until the puree softens again. Place in the fridge for at least 4 hours or overnight.
7. To decorate the charlotte cut off the tips of the ladyfingers on one side so they can sit flush on the serving plate. Remove the cake ring around the cake and place the ladyfingers close to each other around the cake. You may need to trim the ladyfingers a bit more so they sit really close to each other.
8. Chop the white chocolate and gently melt it with about 1 tsp. of the coconut oil. Add the food coloring (sparingly) and color the chocolate pink. The chocolate sauce should flow nicely if you want a “drip effect”, so you may need to add some more coconut oil until the consistency is right. Remove ladyfingers – one at a time – from the charlotte, dip them into the pink chocolate sauce, and return them to their position on the side of the cake. If the chocolate doesn’t drip down on its own, you can drizzle some additional chocolate sauce on top of the ladyfingers. When all ladyfingers are dipped in chocolate and back in their place the charlotte should hold its shape without any problems. If you want to be super safe or have to transport the charlotte, I recommend placing a ribbon around it, which will hold everything together. If you like, you can decorate the charlotte with some whipped cream and fresh raspberries as well (optional).
**Note: If you don’t have food color for chocolate specifically, you can use regular food color too. All you have to do is mix it with 1/2 tsp. of heavy cream and then add that to the chocolate and coconut oil when melting it.
2. Die Eier trennen. Das Eiweiß mit der Prise Salz aufschlagen. Sobald das Eiweiß schaumig wird, vom Zucker 2 EL langsam einrieseln lassen und so lange aufschlagen, bis das Eiweiß steif ist. Das Eigelb in einer großen Schüssel mit dem verbliebenen EL Zucker und Vanille Extrakt für 3-4 Minuten hell schaumig aufschlagen. Das Mehl in zwei Portionen über die Eigelbmasse sieben und vorsichtig unterheben, dann den Eischnee ebenfalls in zwei Portionen dazugeben und vorsichtig unterheben. Die Masse in die vorbereitete Springform füllen, glatt streichen und für etwa 14-15 Minuten backen – der Biskuit sollte schön aufgegangen sein und eine goldbraune Farbe bekommen haben. Aus dem Ofen holen und komplett abkühlen lassen.
3. Für die Fruchtschicht/Füllung die aufgetauten Himbeeren in einen kleinen Topf geben und pürieren. Wer die Kerne nicht mag, braucht ein paar Himbeeren mehr und muss das Himbeermus nach dem Pürieren erst noch durch ein Sieb streichen. Zucker, Zitronensaft und Agar-Agar dazugeben und unterrühren. Das Himbeermus dann einmal unter ständigem Rühren aufkochen und mindestens 2 Minuten blubbernd kochen lassen (sonst bindet das Agar-Agar nicht). Vom Herd ziehen und auf etwa Handwärme abkühlen lassen, dabei immer wieder einmal umrühren.
4. Die kalte Sahne mit 4 TL des Sahnesteifpulver aufschlagen, bis die Sahne steif ist. Zur Seite stellen. Quark mit den restlichen 5 TL Sahnesteif, Puderzucker, Vanille Extrakt, Zitronenschale und Zitronensaft in einer großen Schüssel gut verrühren. Die Sahne in mehreren Portionen sehr vorsichtig unterheben.
5. Den Biskuit auf eine Servierplatte setzen und begradigen, falls die Oberfläche eingefallen ist, oder sich nach oben wölbt. Einen Tortenring eng um den Biskuit legen und dann etwa 1/3 der Quark-Sahne-Creme auf dem Boden verstreichen. Im Kühlschrank zwischenparken. Etwa 1-2 EL von den pürierten Himbeeren in eine Schüssel geben und mit 1 EL von der Quark-Creme verrühren – damit gleicht ihr die Temperaturen von den Himbeeren und der Creme an, damit das Agar-Agar nicht zu schnell fest wird und klumpt. Nach und nach mehr Quark-Creme dazugeben und vorsichtig verrühren, bis wieder etwa 1/3 der Creme verarbeitet wurde – diese Mischung sollte eine leicht rosa Farbe haben. Ihr könnt “nachfärben” indem ihr in einer separaten Schüssel nochmal etwas Himbeermus mit etwas bereits eingefärbter Quark-Creme verrührt und das dann wieder mit dem Rest kombiniert und so das Rosa intensiviert. Den Boden mit der hellen Creme aus dem Kühlschrank holen und die rosa Creme vorsichtig darauf verteilen und glatt streichen. Zurück in den Kühlschrank stellen. Die restliche Quark-Creme mit etwas mehr Himbeermus als bei der zweiten Schicht einfärben (auch hier vorab wieder temperieren) – diesmal sollte die Creme noch etwas einen Tick dunkler werden. Achtet nur darauf, dass noch genügend Himbeermus für die Fruchtschicht übrig bleibt. Die Creme wieder auf die vorherige Schicht vorsichtig auftragen und glatt streichen – für etwa 20 Minuten in den Kühlschrank stellen.
6. Den Biskuit mit den Quarkschichten aus dem Kühlschrank holen und dann das verbliebene Himbeermus darüber schütten. Sollte das Mus bereits angedickt haben oder teilweise fest sein, dann einfach noch einmal ganz kurz aufwärmen (max. handwarm), bis das Mus wieder fließt und dann erst auf die Quarkschicht schütten. Für mindestens 4 Stunden, oder über Nacht in den Kühlschrank stellen.
7. Für die Dekoration die Löffelbiskuits an einer Seite begradigen. Löst den Tortenring mit einem scharfen Messer und setzt einmal die Löffelbiskuits rund um den Biskuitboden mit den Quarkschichten – ihr müsst ggf. einen der Löffelbiskuits etwas zuschneiden, damit sich der Kreis schließt und alles gut zusammenhält.
8. Die weiße Schokolade grob hacken und mit etwa 1 TL vom Kokosfett vorsichtig schmelzen. Die Lebensmittelfarbe (sparsam) dazugeben und die Schokolade damit rosa einfärben. Die Schokoladensoße sollte schön fließen für einen “Drip-Effekt” – ggf. braucht ihr also etwas mehr Kokosfett, bis die Konsistenz passt. Die zugeschnittenen Löffelbiskuits einzeln von der Charlotte entfernen, in die rosa Schokoladensoße tauchen und wieder zurück an ihre Position setzen. Sollte die Schokolade nicht von selbst runterlaufen, kann man etwas nachhelfen, indem man etwas Schokoladensoße zusätzlich über den Löffelbiskuit träufelt. Wenn ihr alles schön eng aneinander gesetzt habt, sollten die Löffelbiskuits ohne Probleme halten – wer 100% sicher gehen möchte, packt noch ein Band um die Charlotte, das dann alles zusammenhält. Wer mag, kann die Charlotte dann noch mit etwas Schlagsahne und frischen Himbeeren dekorieren (optional).
**Hinweis: Wenn ihr keine Lebensmittelfarbe für Schokolade habt, könnt ihr auch jede andere Lebensmittelfarbe verwenden, wenn ihr sie vorab in 1/2 TL Sahne verrührt und dann zusammen mit der Schokolade und den Kokosfett erwärmt.
Craving more? Keep in touch on Facebook, Twitter, Instagram and Pinterest for new post updates and more. You can also contact me with any questions or inquiries!
Here is a version of the recipe you can print easily.
Print
Raspberry Ombre Cheesecake Charlotte
- Prep Time: 00:40
- Cook Time: 00:15
- Total Time: 06:00
- Yield: 1 1x
- Category: Cakes
- Cuisine: International
Description
This is the perfect treat for your mom on Mother’s Day: a delicious and stunning-looking Raspberry Ombre Cheesecake Charlotte.
Ingredients
For the sponge cake:
2 medium eggs, separated
a pinch of salt
3 tbsp. sugar, divided
1/4 tsp. vanilla extract
1.8 oz. (50g) all-purpose flour
For the fruit layer/filling:
17.6 oz. (500g) frozen raspberries, thawed
2 tbsp. sugar
1 tbsp. lemon juice
0.5 oz (15g) agar-agar
For the filling:
14 oz. (400g) cold heavy cream
9 tsp. cream stiffener, divided
17.6 oz. (500g) low-fat quark (curd)
1/4 cup (30g) confectioners’ sugar
1/2 tsp. vanilla extract
zest of 1 organic lemon
1 tbsp. lemon juice
For the decoration:
7 oz. (200g) ladyfingers
3.5 oz. (100g) white chocolate
1–2 tsp. coconut oil
food coloring for chocolate (pink)**
some whipped cream (optional)
fresh raspberries (optional)
Instructions
1. Preheat the oven to 375°F (190°C). Line an 8 inch (20cm) springform tin with baking parchment and set aside. Thaw the raspberries.
2. Separate the eggs. Whisk the egg whites with a pinch of salt. Once the egg whites are foamy, gradually add 2 tablespoons of the sugar and whisk until stiff peaks form. Set aside. In a large bowl, whisk the egg yolks with the remaining tablespoon of sugar and vanilla extract for 3-4 minutes until very light and fluffy. Sift the flour in two batches over the mix and gently fold in. Add the stiff egg whites, also in two batches, and gently fold in. Pour the batter into the prepared springform tin, smooth out the top and bake for about 14-15 minutes. The sponge should have risen nicely and got a nice golden brown color. Remove from the oven and let cool down completely.
3. For the fruit layer/filling, add the thawed raspberries to a small saucepan and puree with an immersion blender. If you don’t like the seeds, you’ll need a few more raspberries and you’ll have to strain the raspberry puree after pureeing. Add the sugar, lemon juice, and agar-agar and stir in. Bring to a boil, stirring constantly, and let bubble for at least 2 minutes (otherwise the agar-agar won’t bind). Remove from heat and let cool until almost room temperature, stirring once in a while.
4. Whisk the cold heavy cream with 4 teaspoons of the cream stiffener until stiff peaks form. Set aside. In a large bowl, mix the quark with the remaining 5 teaspoons of the cream stiffener, confectioners’ sugar, vanilla extract, lemon zest, and lemon juice until well combined. Gently fold in the whipped cream in several batches until well combined.
5. Remove the sponge cake from the tin and place it on a serving plate. Level the top if there are any bumps or if the cake has collapsed a bit. Place a cake ring tightly around the cake, then spread about 1/3 of the cream filling on top. Place in the fridge until needed again. Add about 1-2 tablespoons of the pureed raspberries to a bowl and mix with 1 tablespoon of the cream filling – this will make sure that everything has the same temperature and you avoid that the agar-agar is cooling down too quickly which would lead to clumps in the filling. Gradually add more cream and mix gently until another 1/3 of the cream has been incorporated. This mixture should have a light pink color. You can intensify the color by mixing some more raspberry puree in a separate bowl with some of the already colored cream filling, and then combining that again with the rest to intensify the pink. Take the cake out of the fridge and carefully spread the pink cream on top of the light cream layer and smooth it out. Put it back in the fridge. Color the remaining cream filling the same way but with a bit more raspberry puree than you did for the second layer – the cream should be a tad darker now. Make sure there is enough raspberry puree left for the fruit layer at the end. Carefully spread the cream again on top of the previous layer and smooth out – place in the fridge for about 20 minutes.
6. Take the cake out of the fridge and pour the remaining raspberry puree on top. If the puree has already thickened or is partially solid, simply warm it up again very briefly until the puree softens again. Place in the fridge for at least 4 hours or overnight.
7. To decorate the charlotte cut off the tips of the ladyfingers on one side so they can sit flush on the serving plate. Remove the cake ring around the cake and place the ladyfingers close to each other around the cake. You may need to trim the ladyfingers a bit more so they sit really close to each other.
8. Chop the white chocolate and gently melt it with about 1 tsp. of the coconut oil. Add the food coloring (sparingly) and color the chocolate pink. The chocolate sauce should flow nicely if you want a “drip effect”, so you may need to add some more coconut oil until the consistency is right. Remove ladyfingers – one at a time – from the charlotte, dip them into the pink chocolate sauce, and return them to their position on the side of the cake. If the chocolate doesn’t drip down on its own, you can drizzle some additional chocolate sauce on top of the ladyfingers. When all ladyfingers are dipped in chocolate and back in their place the charlotte should hold its shape without any problems. If you want to be super safe or have to transport the charlotte, I recommend placing a ribbon around it, which will hold everything together. If you like, you can decorate the charlotte with some whipped cream and fresh raspberries as well (optional).
Notes
**If you don’t have food color for chocolate specifically, you can use regular food color too. All you have to do is mix it with 1/2 tsp. of heavy cream and then add that to the chocolate and coconut oil when melting it.

 I love my job, but in between I love to bake and try new things in the kitchen. A lot of my friends and colleagues encourage me to bake - for a very simple reason: they get the leftovers - and it seems they like it most of the time ;)