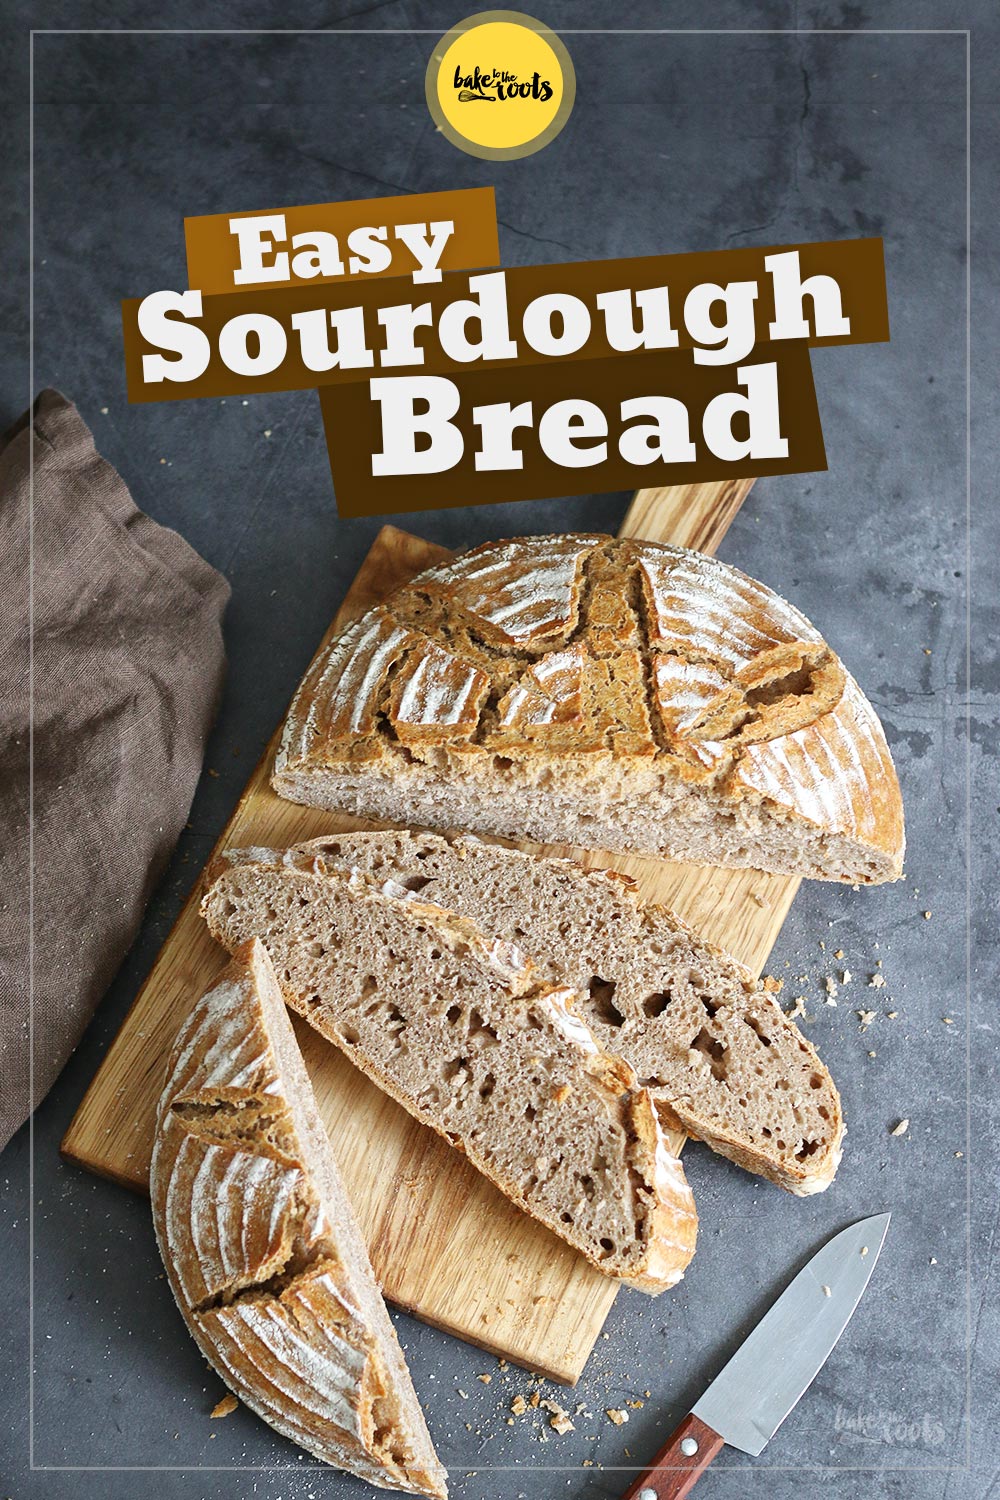
The nationwide lockdown has been extended – once again. Because of this, the theme song from “The NeverEnding Story” is playing in the back of my mind right now ;) Well… I guess we have to live with it for several more weeks or so. In order not to go completely crazy, it is time to do something with the time we have at home. Baking bread at home is a trend that started several months ago – I guess I am a bit late to join the “sourdough party” but who cares… I made a nice and easy Sourdough Bread that is perfect for beginners and I am sharing the recipe now with you ;P
It all started during the first lockdown when suddenly everyone started to make their own sourdough from scratch at home. All the extra time we had to spend at home needed to be filled with some purpose besides all those zoom calls and boxed red wine ;P I did not make my own sourdough back then and I do not have one in my fridge right now. I had one several years ago but that bit**ch committed suicide. After taking care of it for many many years I opened the fridge one day and that ungrateful brat decided to jump out of the fridge and took a dive towards the kitchen floor – including the glass jar it was living in all those years. There was nothing to save and I decided to not make a new one… the pain, that “accident” caused, was too deep…
Well well. That was the story of my sourdough ;P
Luckily there is no need to take care of a bubbly and stinky mess for years if you don’t want to. Sourdough is available in almost every supermarket in Germany and the one you can get there does the job just as well as the one you are/were taking care of for years in your fridge ;) I know – the one from the supermarket is not made from a 100-year-old sourdough that your ancestors may have used already, but as I said – that one is as good as every sourdough if you want to bake some nice sourdough bread.
If you are not a fan of sourdough gases in your fridge or if you tend to forget to feed a sourdough, the one from the supermarket is a great alternative. That one will not go bad, dry out, get moldy, or whatever. You get one from the store whenever you feel like baking bread and you are good to go. The shelflife of a packaged sourdough is actually quite long, so you can buy several packages and are always ready to bake something. A great option for beginners. If you really want to bake sourdough bread on a regular basis, you can of course consider cultivating your own sourdough in the fridge. Nobody wants to keep you from doing that extra step ;P
INGREDIENTS / ZUTATEN
7 oz. (200g) wholemeal wheat flour
0.35 oz. (10g) salt
0.12 oz. (3,5g) active dry yeast
11.3 oz. (320g) water
5.3 oz. (150g) sourdough
200g Weizenvollkornmehl
10g Salz
1/2 Pkg. (3,5g) Trockenhefe
320g Wasser
150g Sauerteig
DIRECTIONS / ZUBEREITUNG
2. The next day, place the dough on a well-floured work surface. Pull the edges of the dough in 4-5 spots up and fold to the center – this should create a round piece of dough that keeps its shape. Place the dough (smooth side down) in a well-floured round proofing basket*. Dust with some flour and cover with a damp kitchen towel. Let rise for another 60 minutes.
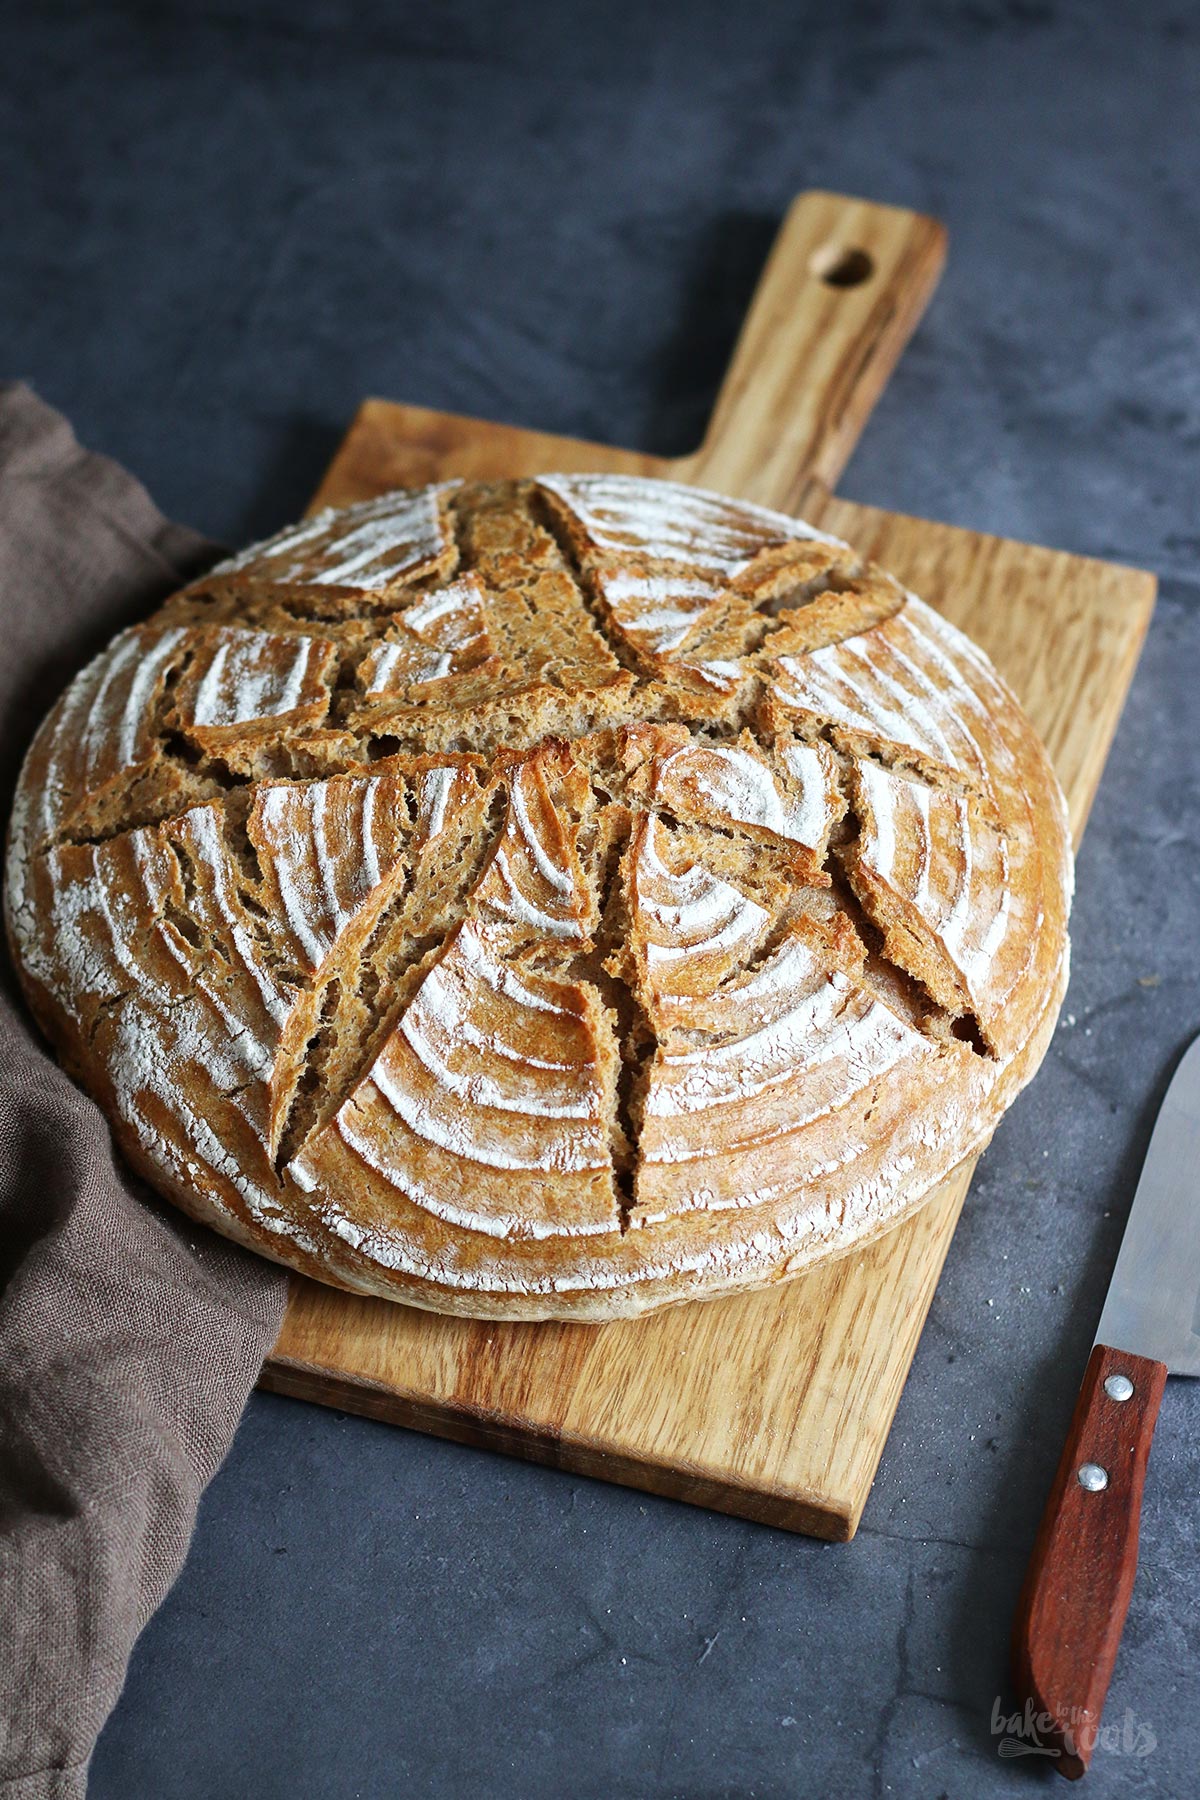
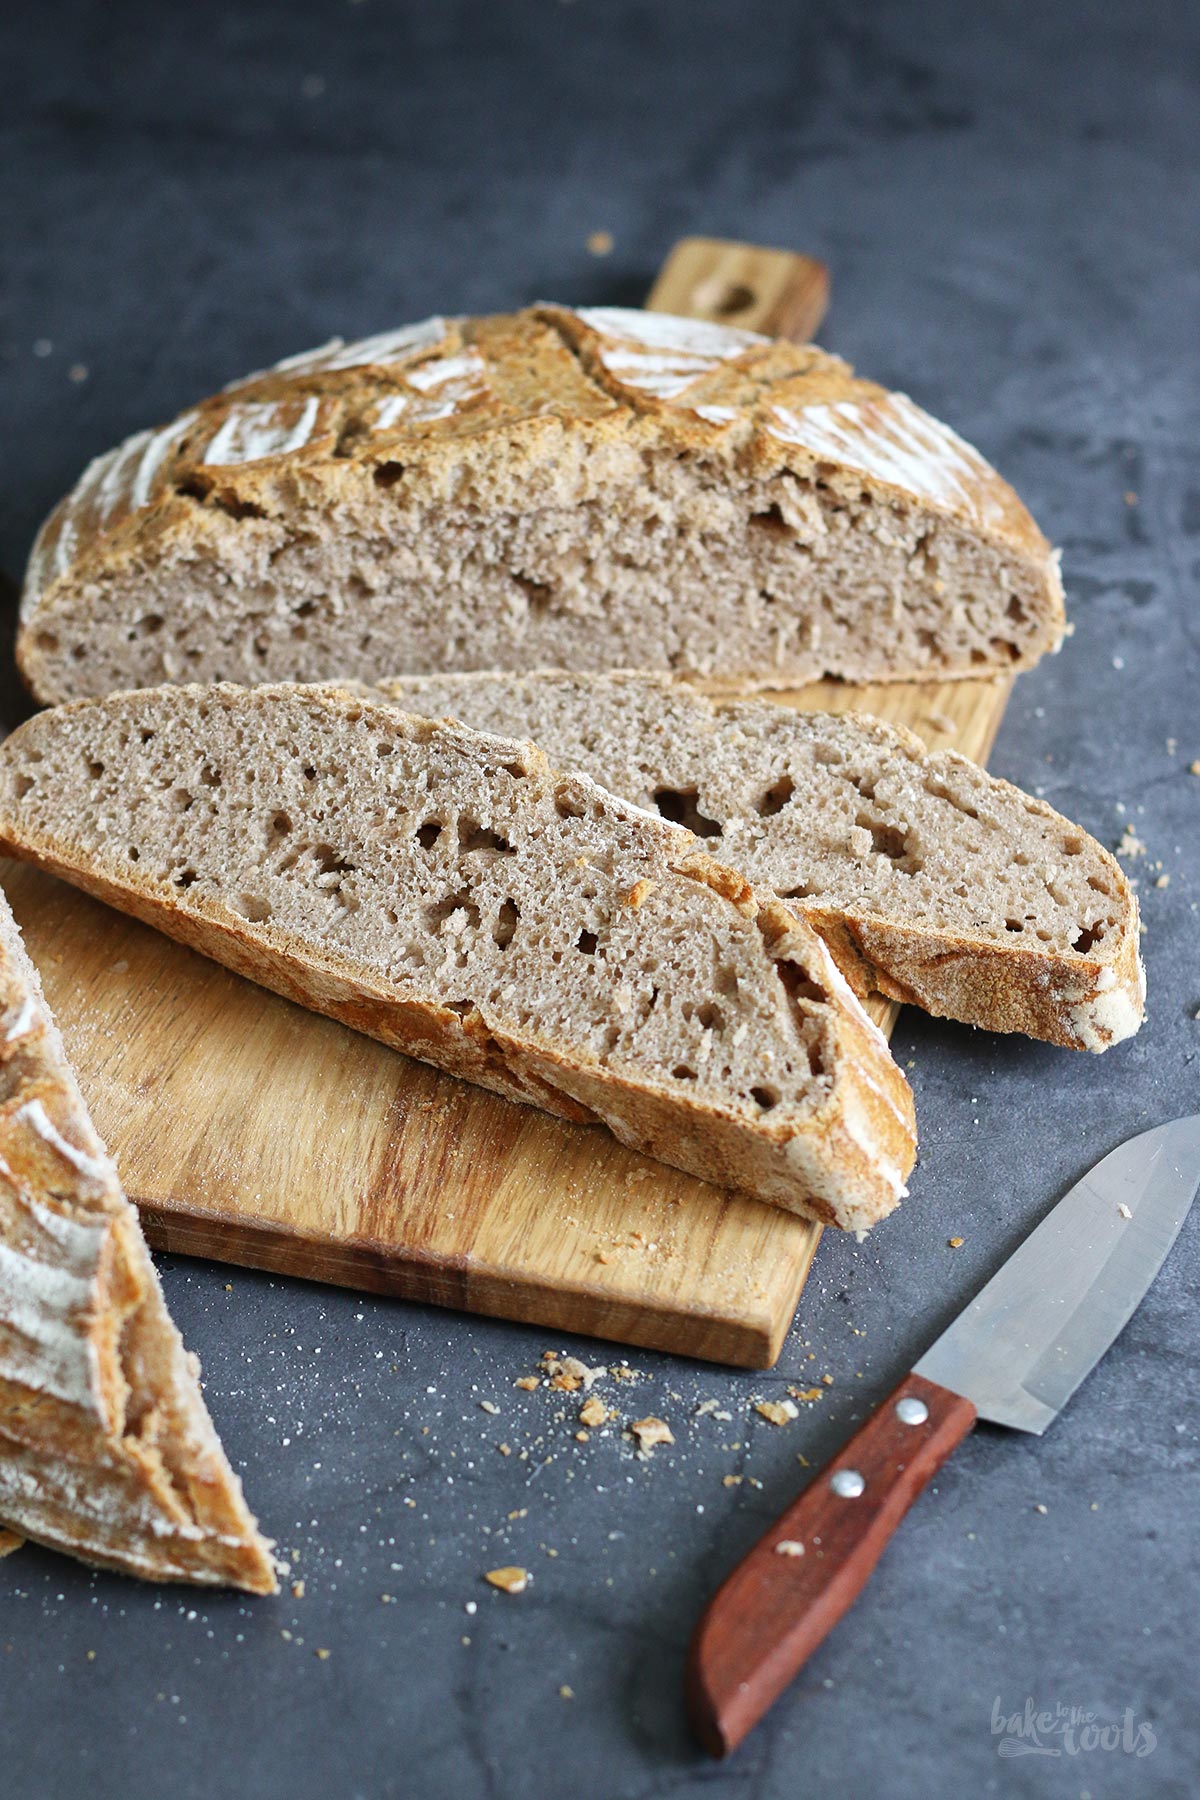
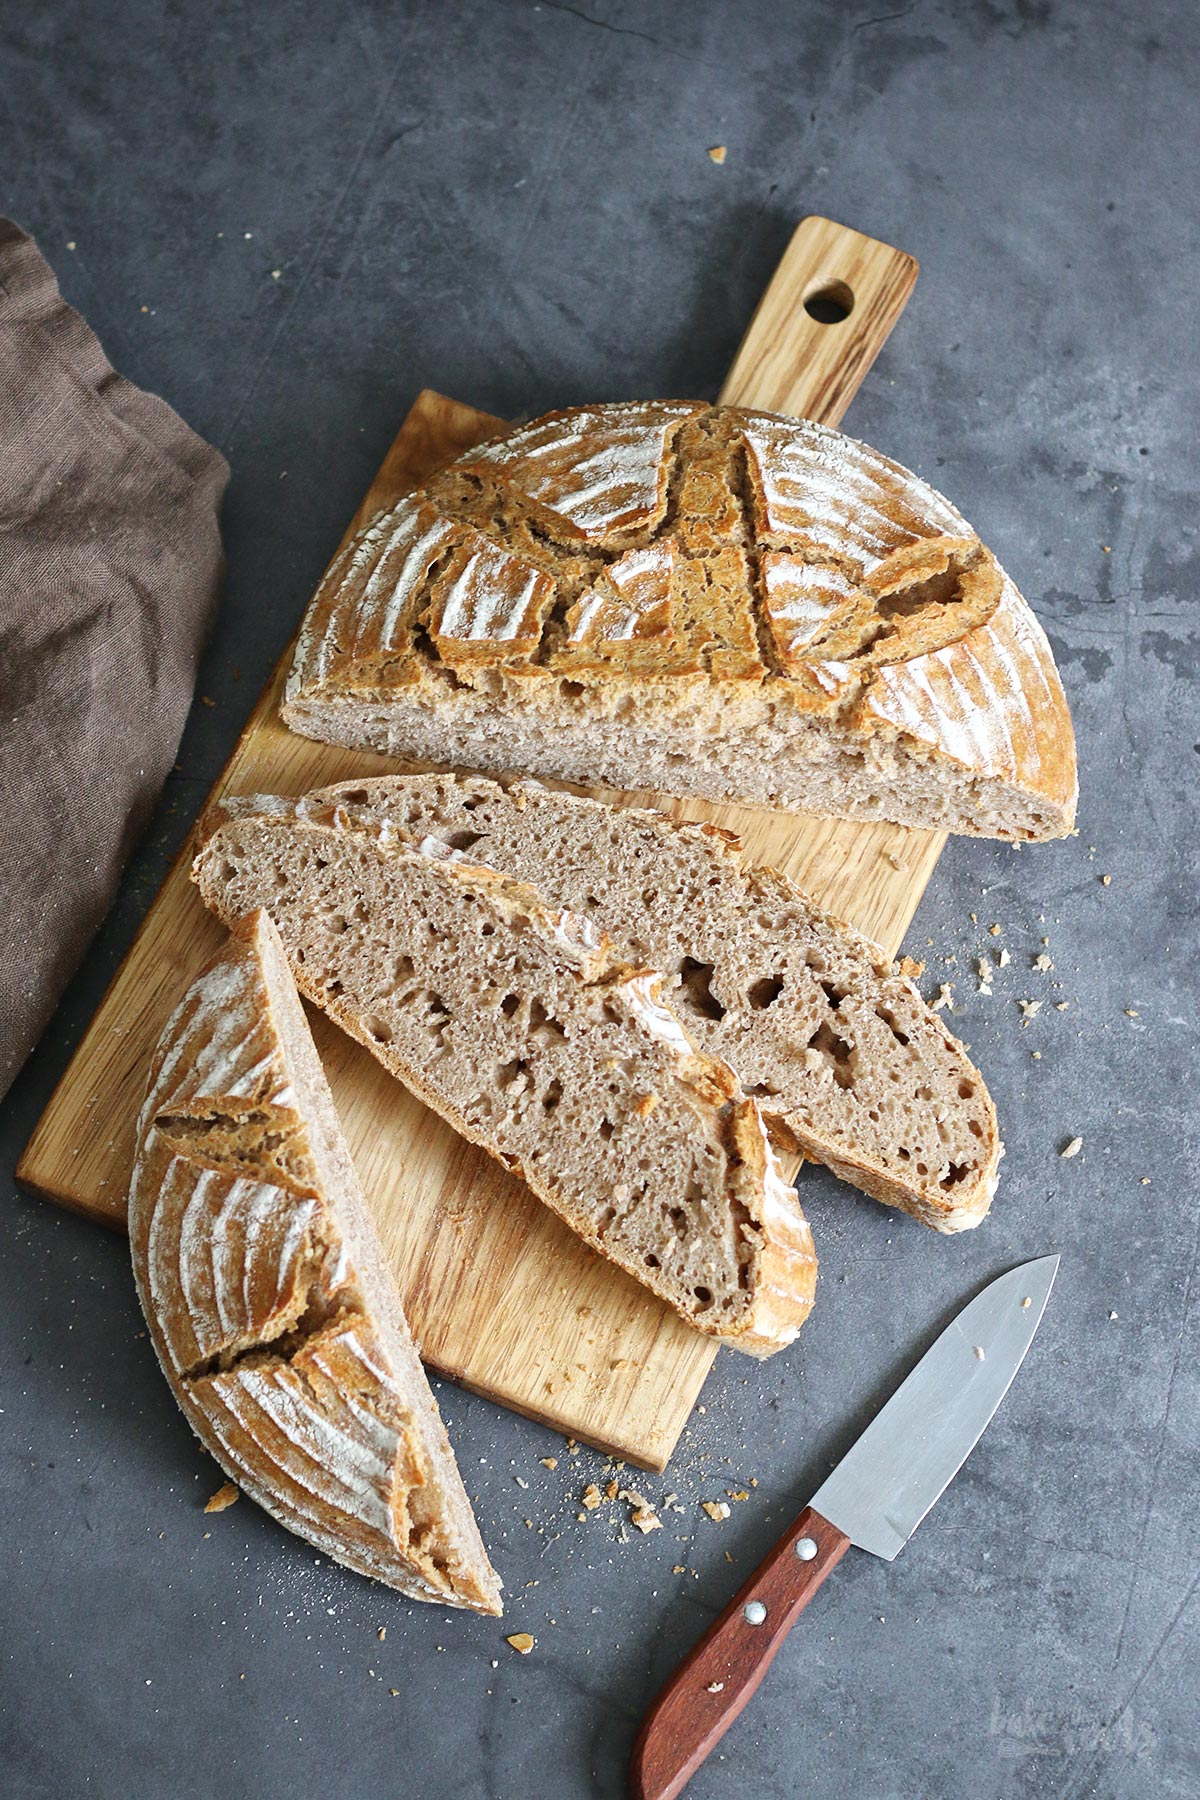
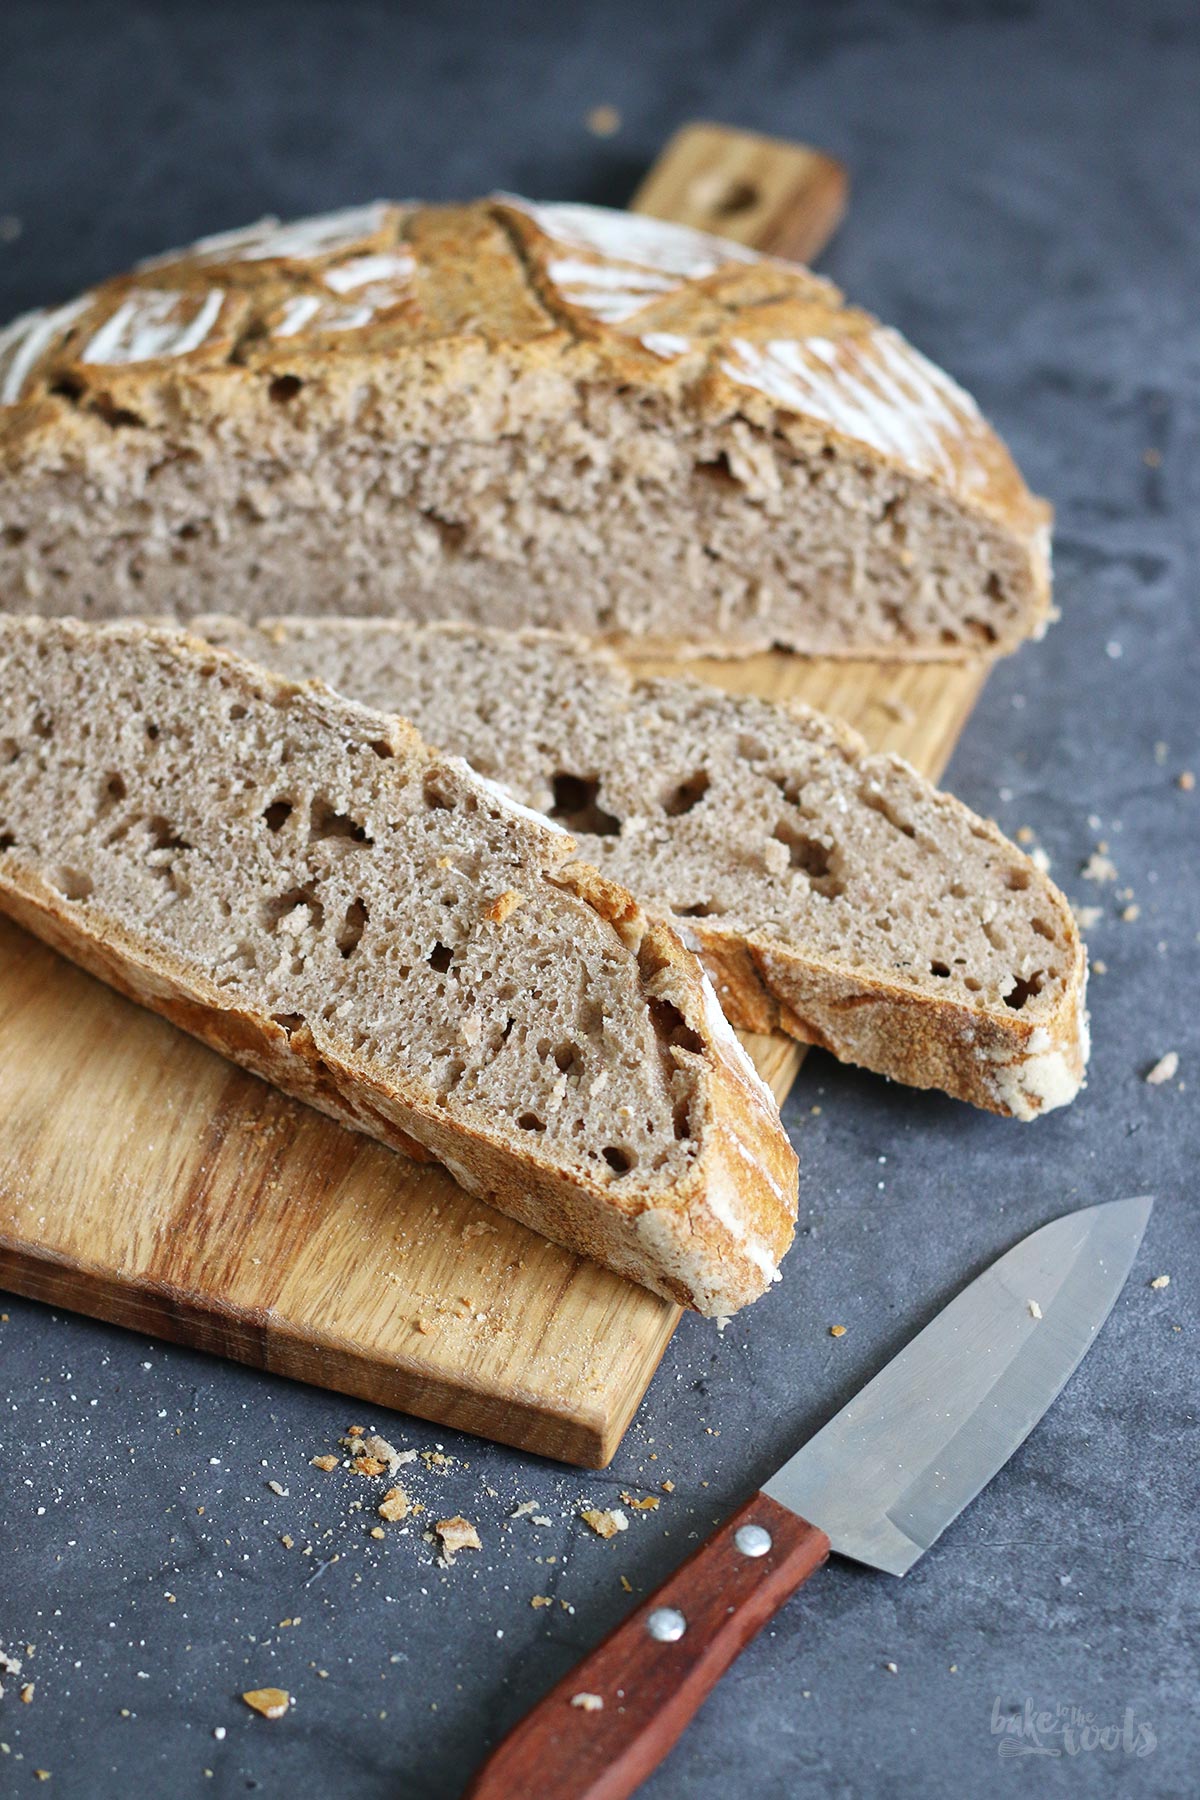
3. While the dough is rising, preheat the oven along with a Dutch oven (large cast iron pot with a lid*) to 465°F (240°C) – the oven and pot should have at least 45 minutes to heat up well. As soon as the dough has risen enough, remove the Dutch oven from the oven (be careful, it’s very hot!), place on a wire rack or something similar and remove the lid (again – be very careful!). Lift the dough out of the proofing basket and place it inside the Dutch oven with the smooth side up – try not to let the dough slip or fall, but at the same time be careful not to burn your hands on the sides of the Dutch oven. Use a baker’s knife* and cut several times into the surface of the bread, then let about 2 tablespoons of water run down the sides inside the Dutch oven and close the lid immediately. This should create some steam to help the bread rise well. Return back to the oven and bake for 20 minutes, then reduce the oven temperature to 430°F (220°C), remove the lid from the Dutch oven/pot and bake without the lid for another 20 minutes to create a nice crust. The bread is done when you knock on the bottom of the bread and the sound it makes is hollow. Transfer the bread to a wire rack and let cool down completely.
2. Den Teig auf eine gut bemehlte Arbeitsfläche legen. Die Ränder des Teiges an 4-5 Stellen erst etwas nach oben und dann zur Mitte ziehen bzw. falten – dadurch sollte ein runder Teigling entstehen. Den Teigling mit der glatten Unterseite nach Unten in ein bemehltes Gärkörbchen* (was ihr nach Oben gezogen habt, ist weiterhin oben). Mit etwas Mehl bestäuben und dann mit einem feuchten Küchentuch abdecken und noch einmal 60 Minuten gehen lassen.
3. In der Zwischenzeit den Ofen zusammen mit einem Dutch Oven (gusseisener Bräter mit Deckel*) auf 240°C (465°F) vorheizen – der Ofen sollte mindestens 45 Minuten Zeit haben zum Vorheizen. Wenn der Teigling genug gegangen ist, den Dutch Oven/Bräter aus dem Ofen holen (Vorsicht! Sehr heiß!), auf Kuchengitter o.ä. stellen und den Deckel entfernen (auch hier sehr vorsichtig sein!) Den Teigling aus dem Gärkörbchen heben und mit der glatten Unterseite nach Oben in den Topf setzen – versucht den Teigling nicht reinfallen zu lassen, passt aber gleichzeitig darauf auf, euch am Topf nicht die Hände zu verbrennen. Mit einem Bäckermesser* die Oberfläche des Brotes mehrfach einschneiden, dann etwa 2 EL Wasser an den Innenseiten des Dutch Ovens/Bräters in den Topf laufen lassen und sofort den Deckel wieder aufsetzen, damit sich im Topf Dampf entwickeln kann. Zurück in den Ofen stellen und etwa 20 Minuten backen, dann die Temperatur des Ofens auf 220°C (430°F) reduzieren, den Deckel des Dutch Ovens/Bräters entfernen und ohne Deckel weitere 20 Minuten backen, damit sich eine schöne Kruste entwickeln kann. Das Brot ist fertig, wenn es hohl klingt, wenn man auf die Unterseite klopft. Das Brot aus dem Topf herausheben und auf einem Kuchengitter abkühlen lassen.
Craving more? Keep in touch on Facebook, Twitter, Instagram and Pinterest for new post updates and more. You can also contact me with any questions or inquiries!
Here is a version of the recipe you can print easily.
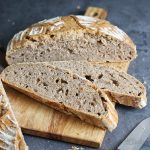
Easy Peasy Sourdough Bread
- Prep Time: 00:10
- Cook Time: 00:40
- Total Time: 12:00
- Yield: 1 1x
- Category: Bread
- Cuisine: Germany
Description
Baking sourdough bread does not have to be complicated…
Ingredients
10.6 oz. (300g) all-purpose wheat flour
7 oz. (200g) wholemeal wheat flour
0.35 oz. (10g) salt
0.12 oz. (3,5g) active dry yeast
11.3 oz. (320g) water
5.3 oz. (150g) sourdough
Instructions
1. Add the wheat flour, wholemeal wheat flour, salt, and dry yeast to a large bowl and mix do combine. Add the water and sourdough and let the kitchen machine knead for about 20 minutes on low speed until you get a smooth but very soft and sticky dough. Cover the bowl with a damp kitchen towel and let the dough rise at room temperature overnight.
2. The next day, place the dough on a well-floured work surface. Pull the edges of the dough in 4-5 spots up and fold to the center – this should create a round piece of dough that keeps its shape. Place the dough (smooth side down) in a well-floured round proofing basket*. Dust with some flour and cover with a damp kitchen towel. Let rise for another 60 minutes.
3. While the dough is rising, preheat the oven along with a Dutch oven (large cast iron pot with a lid*) to 465°F (240°C) – the oven and pot should have at least 45 minutes to heat up well. As soon as the dough has risen enough, remove the Dutch oven from the oven (be careful, it’s very hot!), place on a wire rack or something similar and remove the lid (again – be very careful!). Lift the dough out of the proofing basket and place it inside the Dutch oven with the smooth side up – try not to let the dough slip or fall, but at the same time be careful not to burn your hands on the sides of the Dutch oven. Use a baker’s knife* and cut several times into the surface of the bread, then let about 2 tablespoons of water run down the sides inside the Dutch oven and close the lid immediately. This should create some steam to help the bread rise well. Return back to the oven and bake for 20 minutes, then reduce the oven temperature to 430°F (220°C), remove the lid from the Dutch oven/pot and bake without the lid for another 20 minutes to create a nice crust. The bread is done when you knock on the bottom of the bread and the sound it makes is hollow. Transfer the bread to a wire rack and let cool down completely.
Notes
Enjoy baking!
Links marked with an asterisk (*) are affiliate links (advertising/Werbung) to Amazon Germany. If you click on one of those links and buy something via this link, I will get a commission for that sale. The price of whatever you buy is not affected in any way by this.