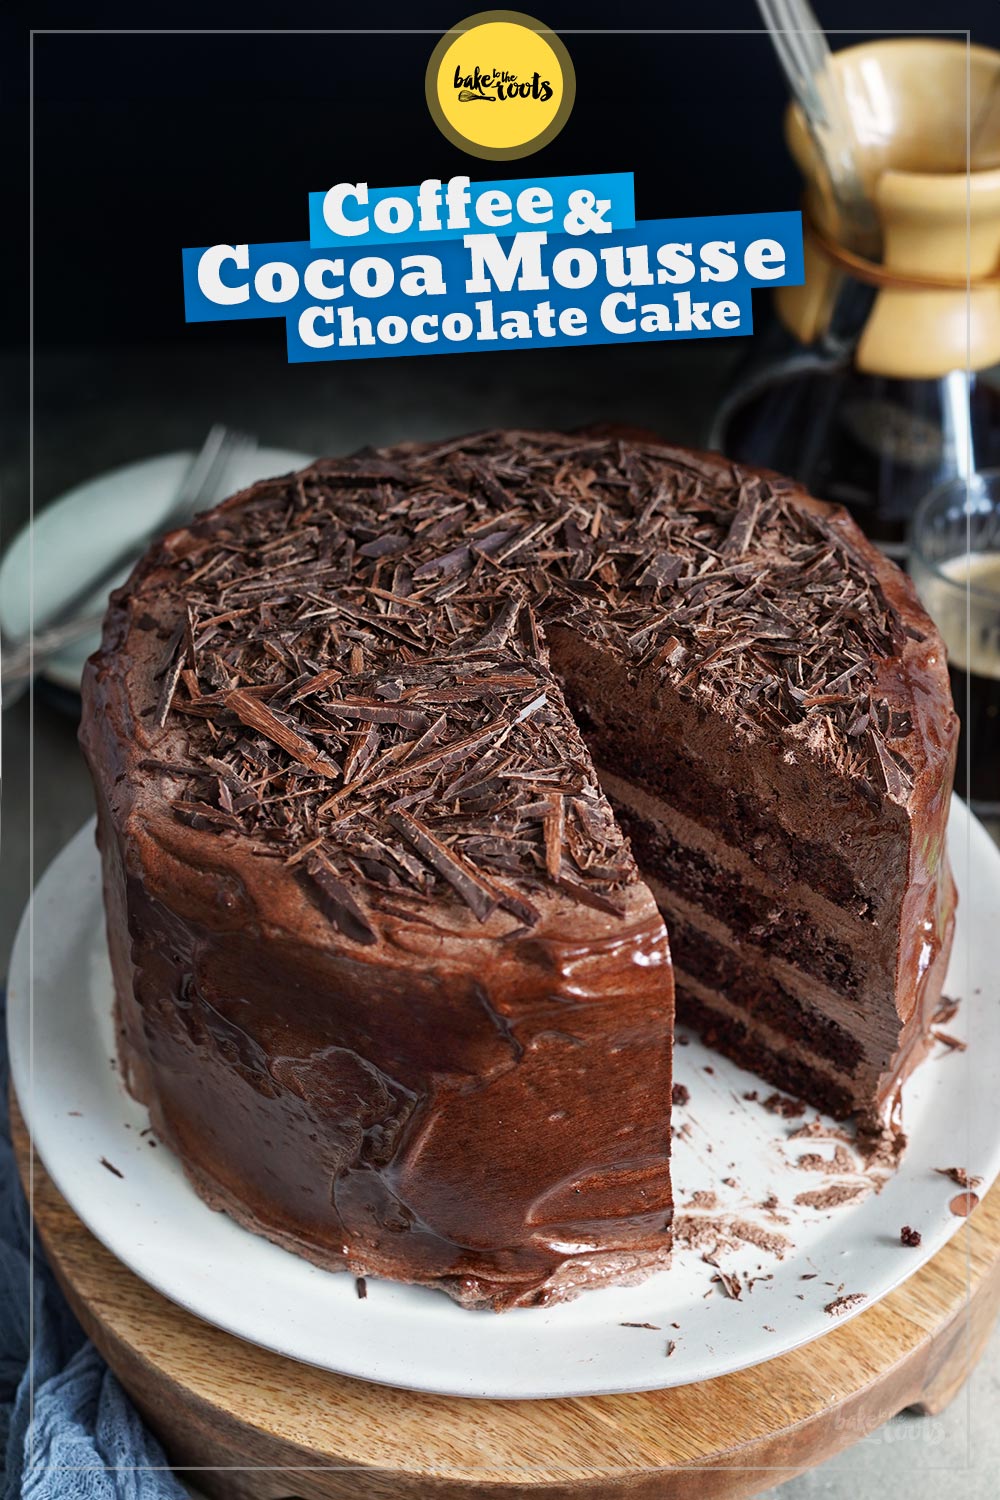
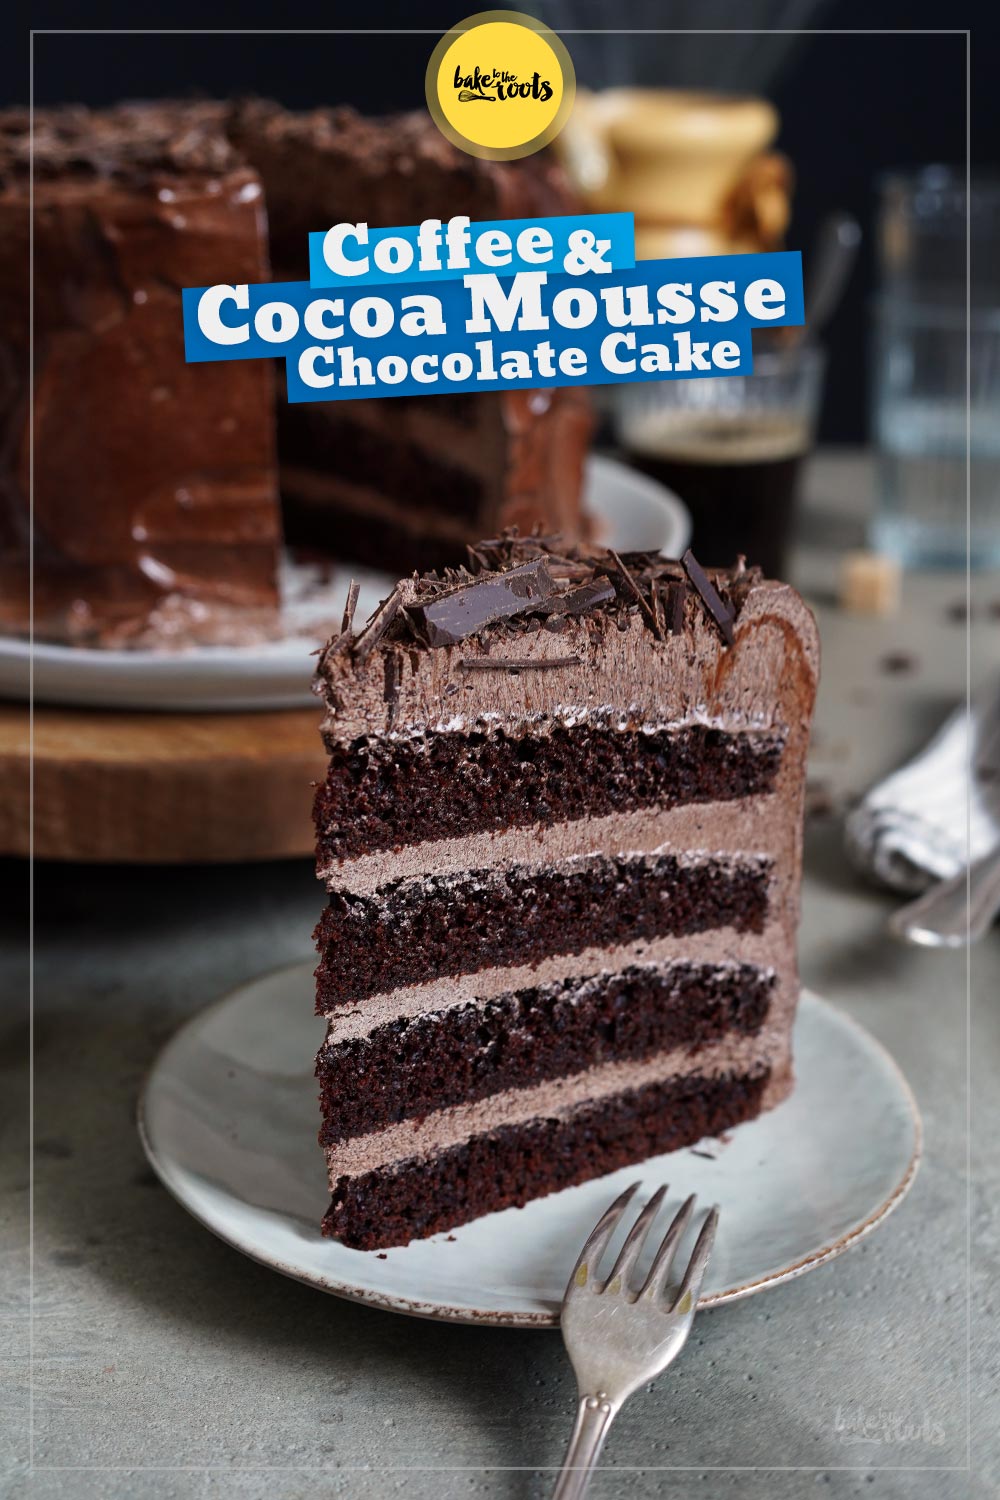
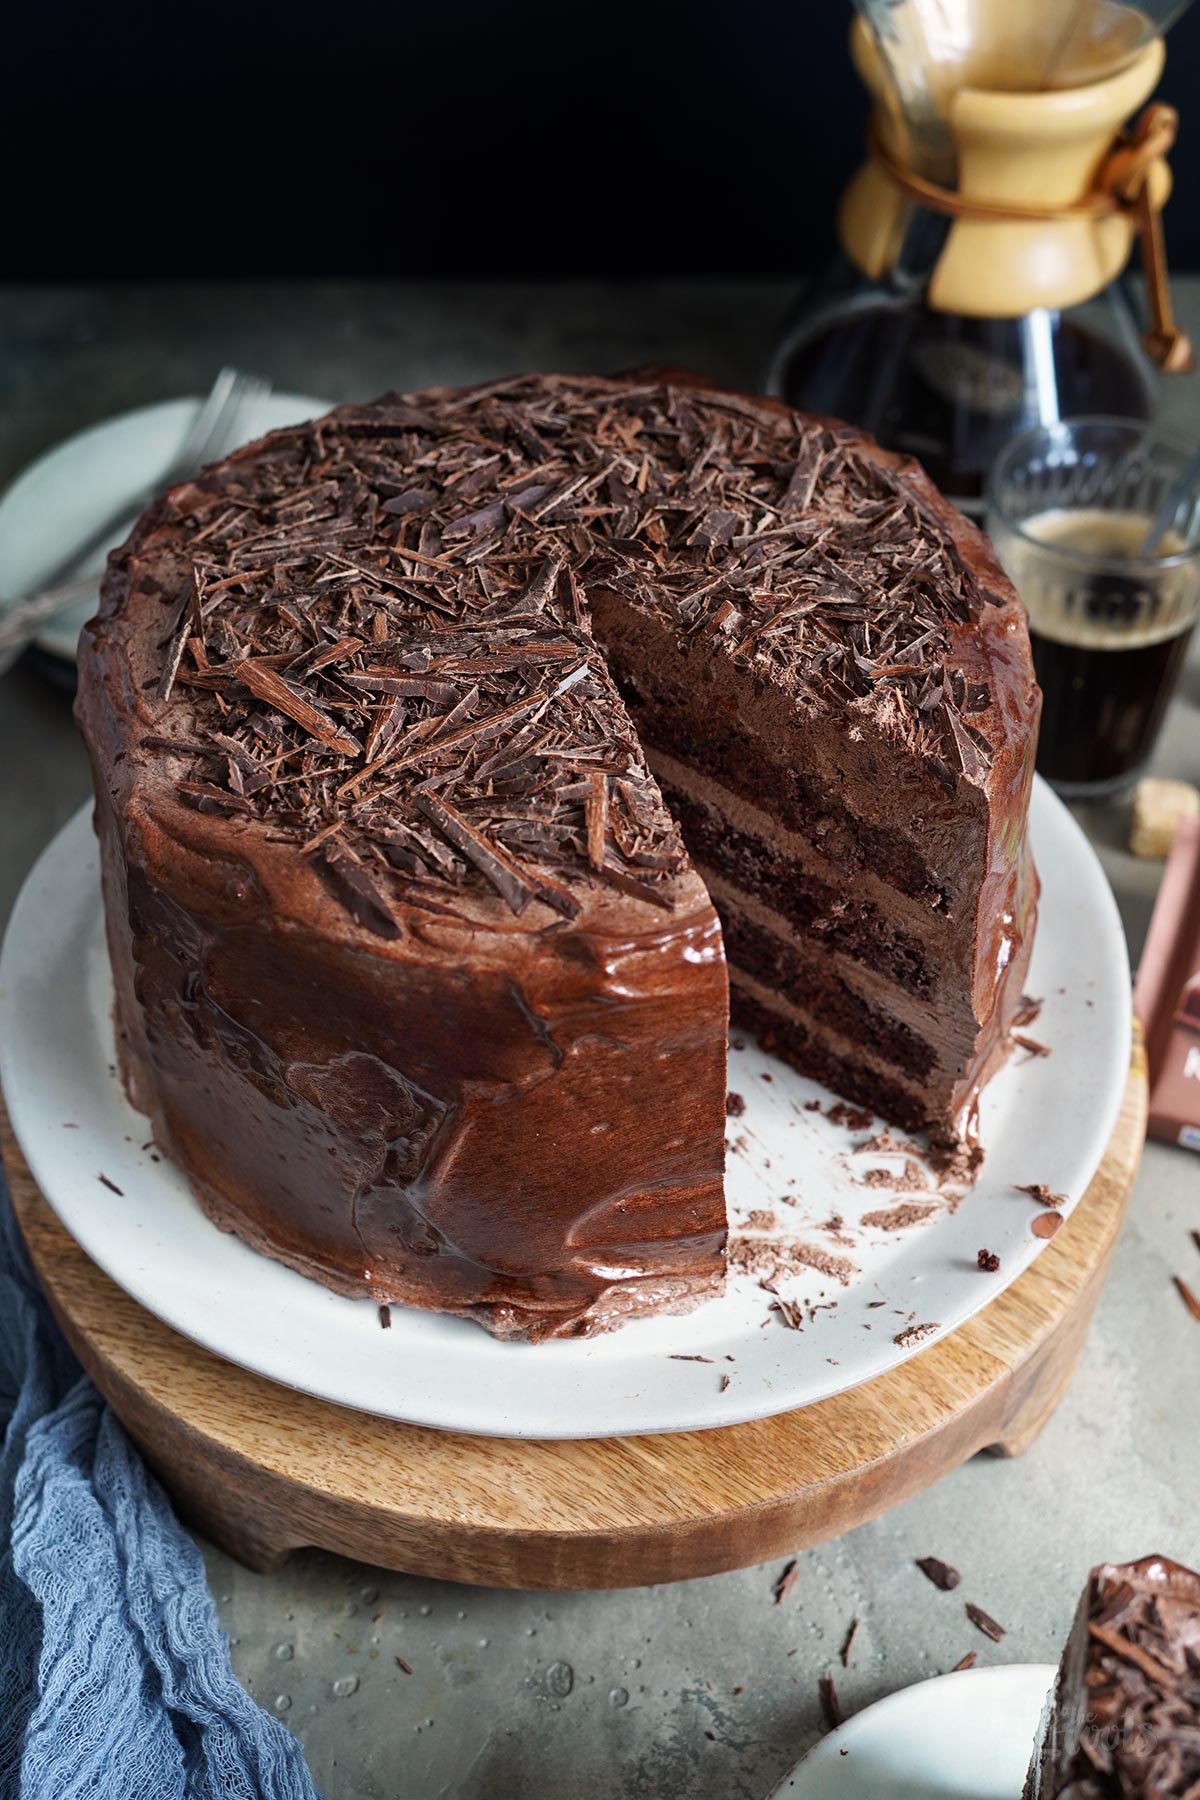
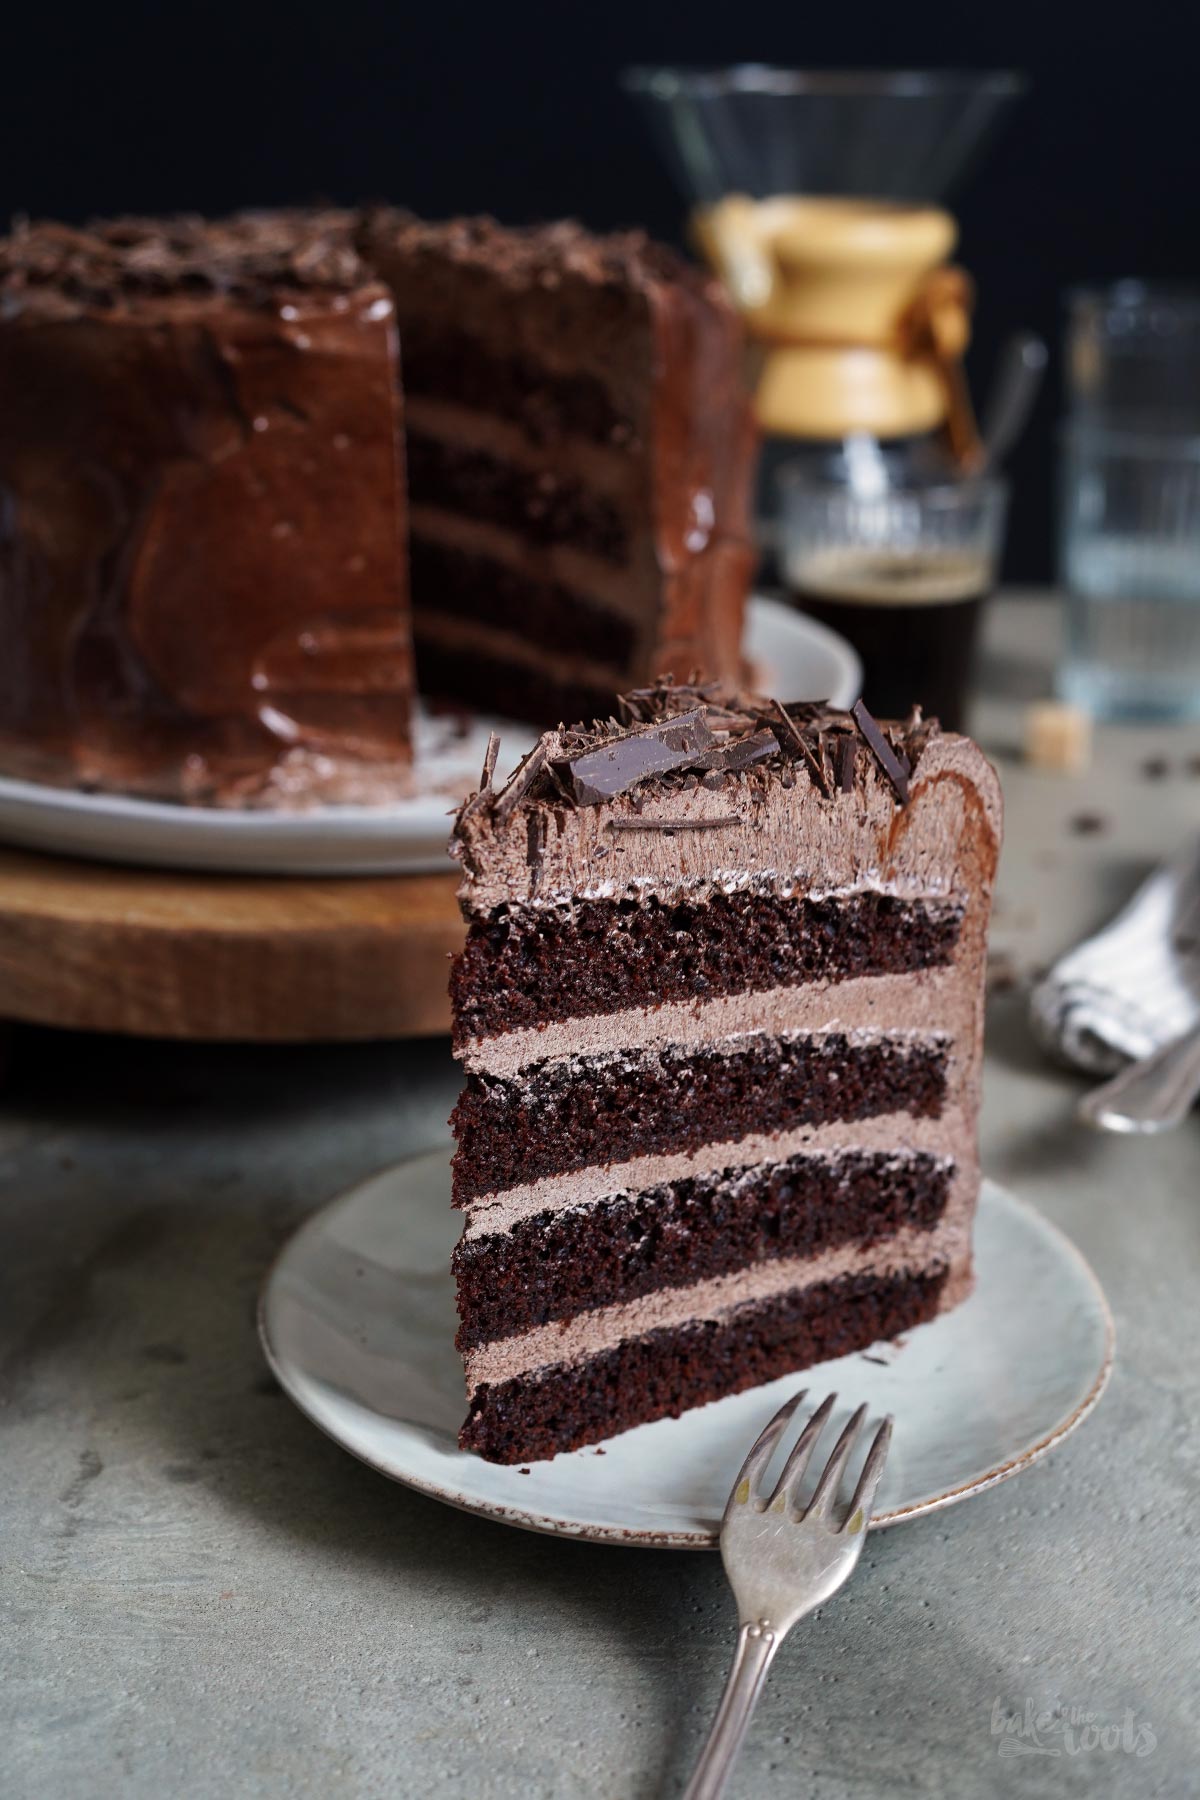
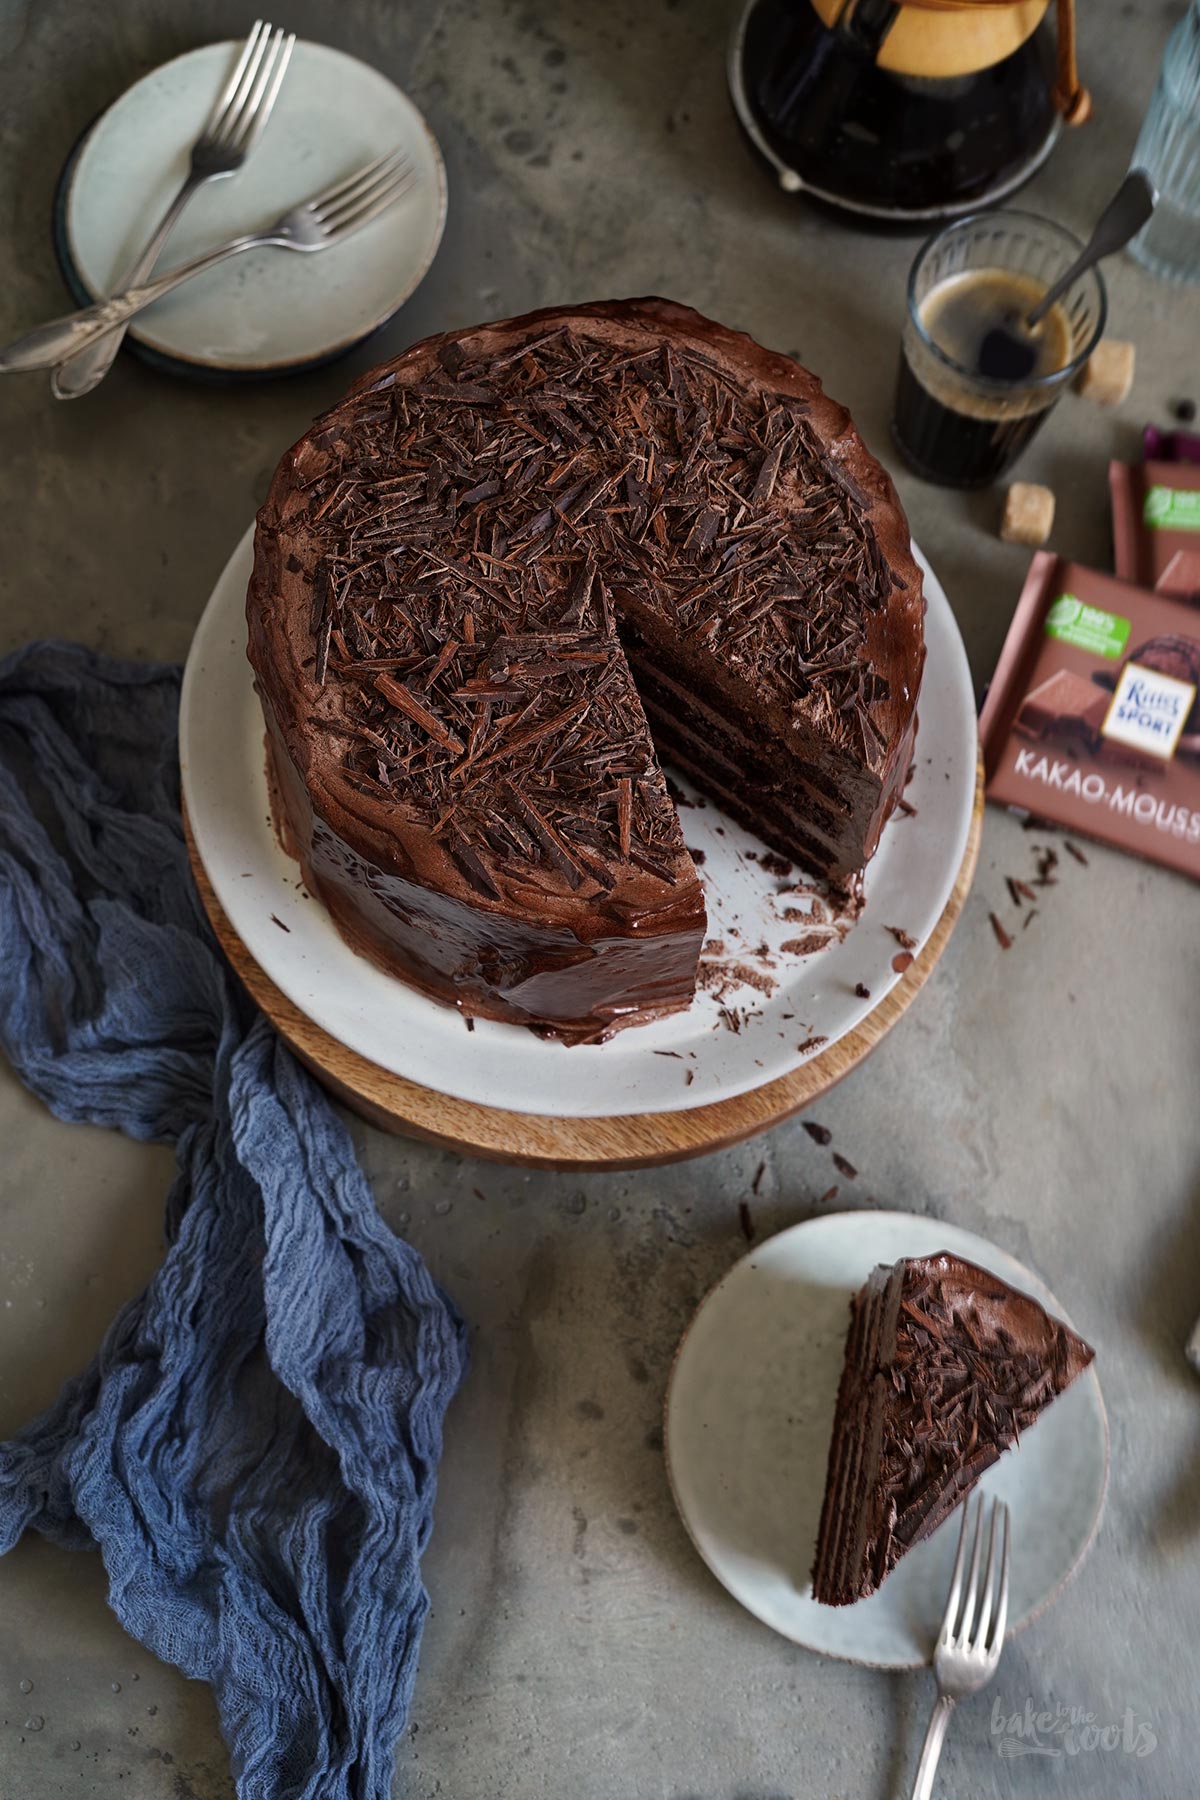
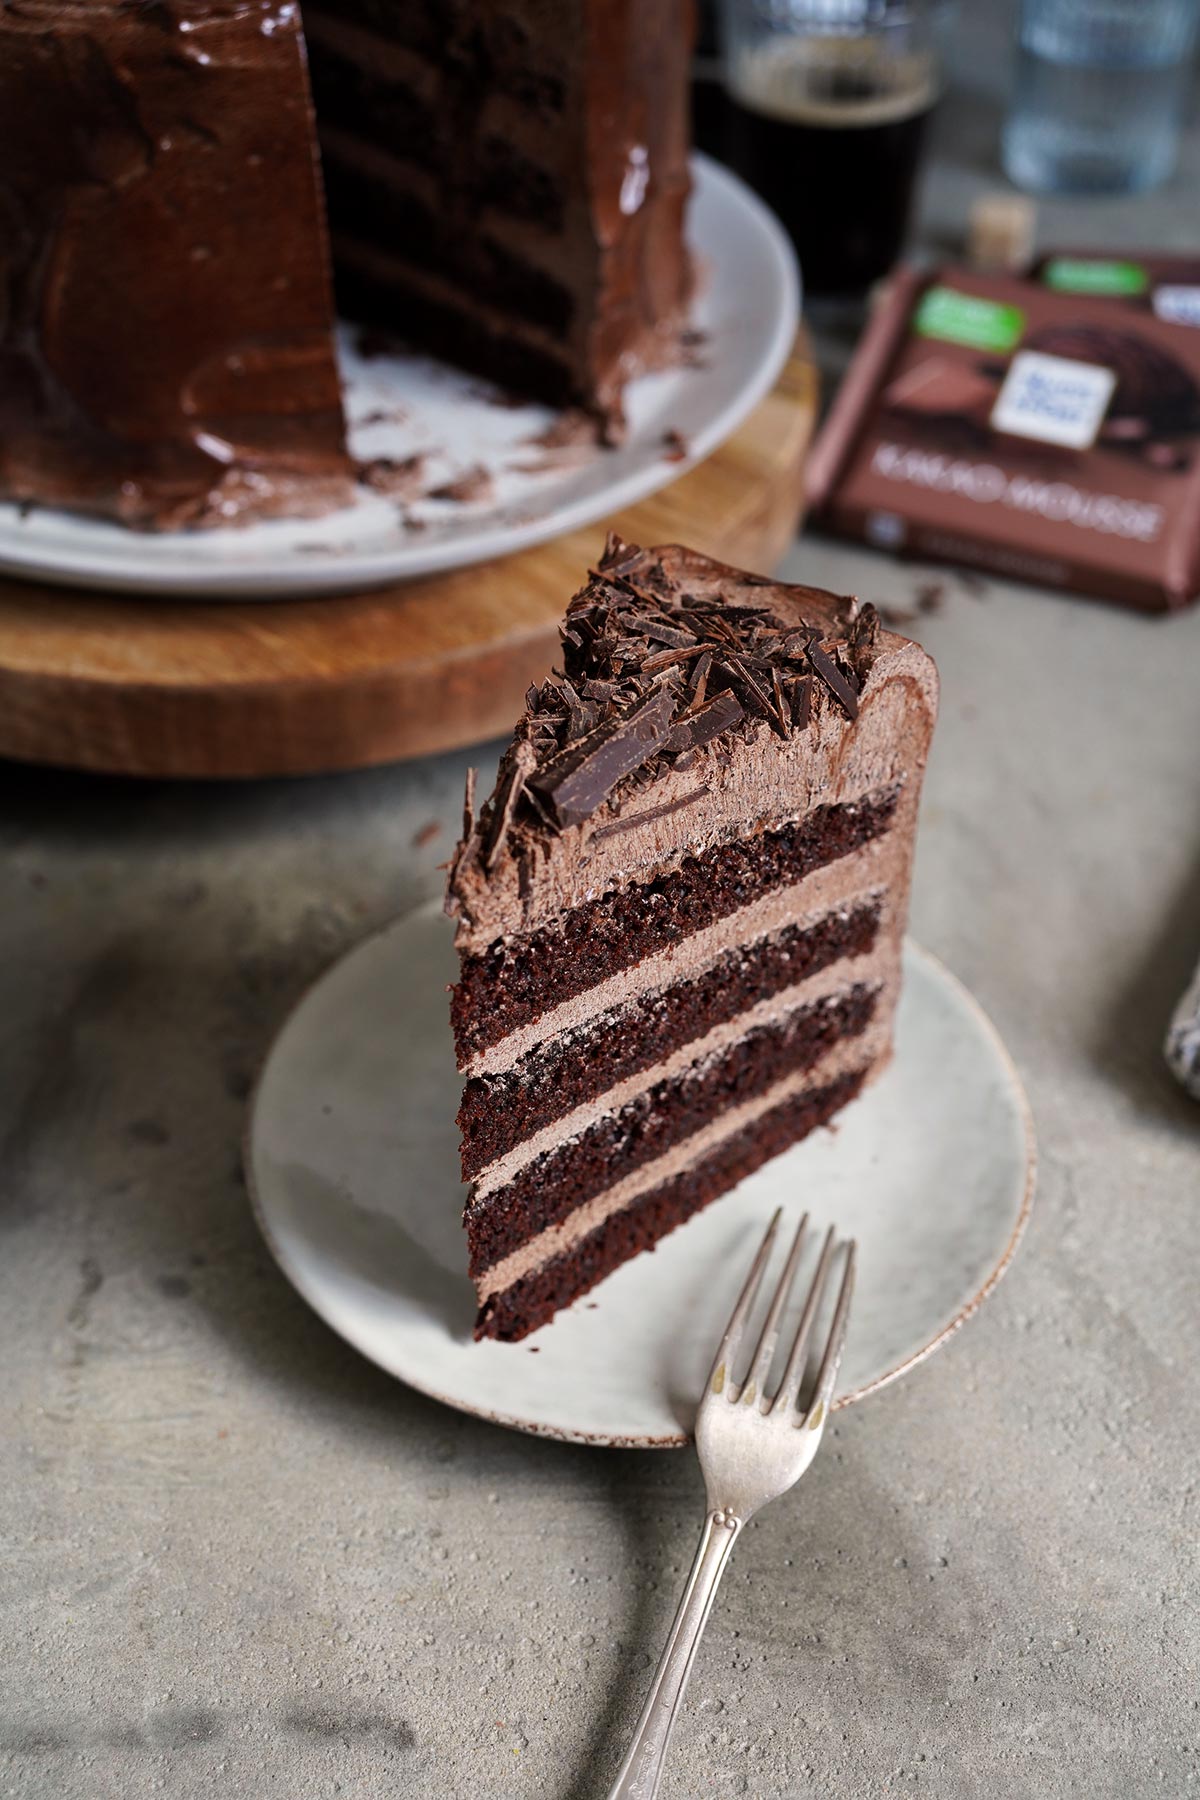
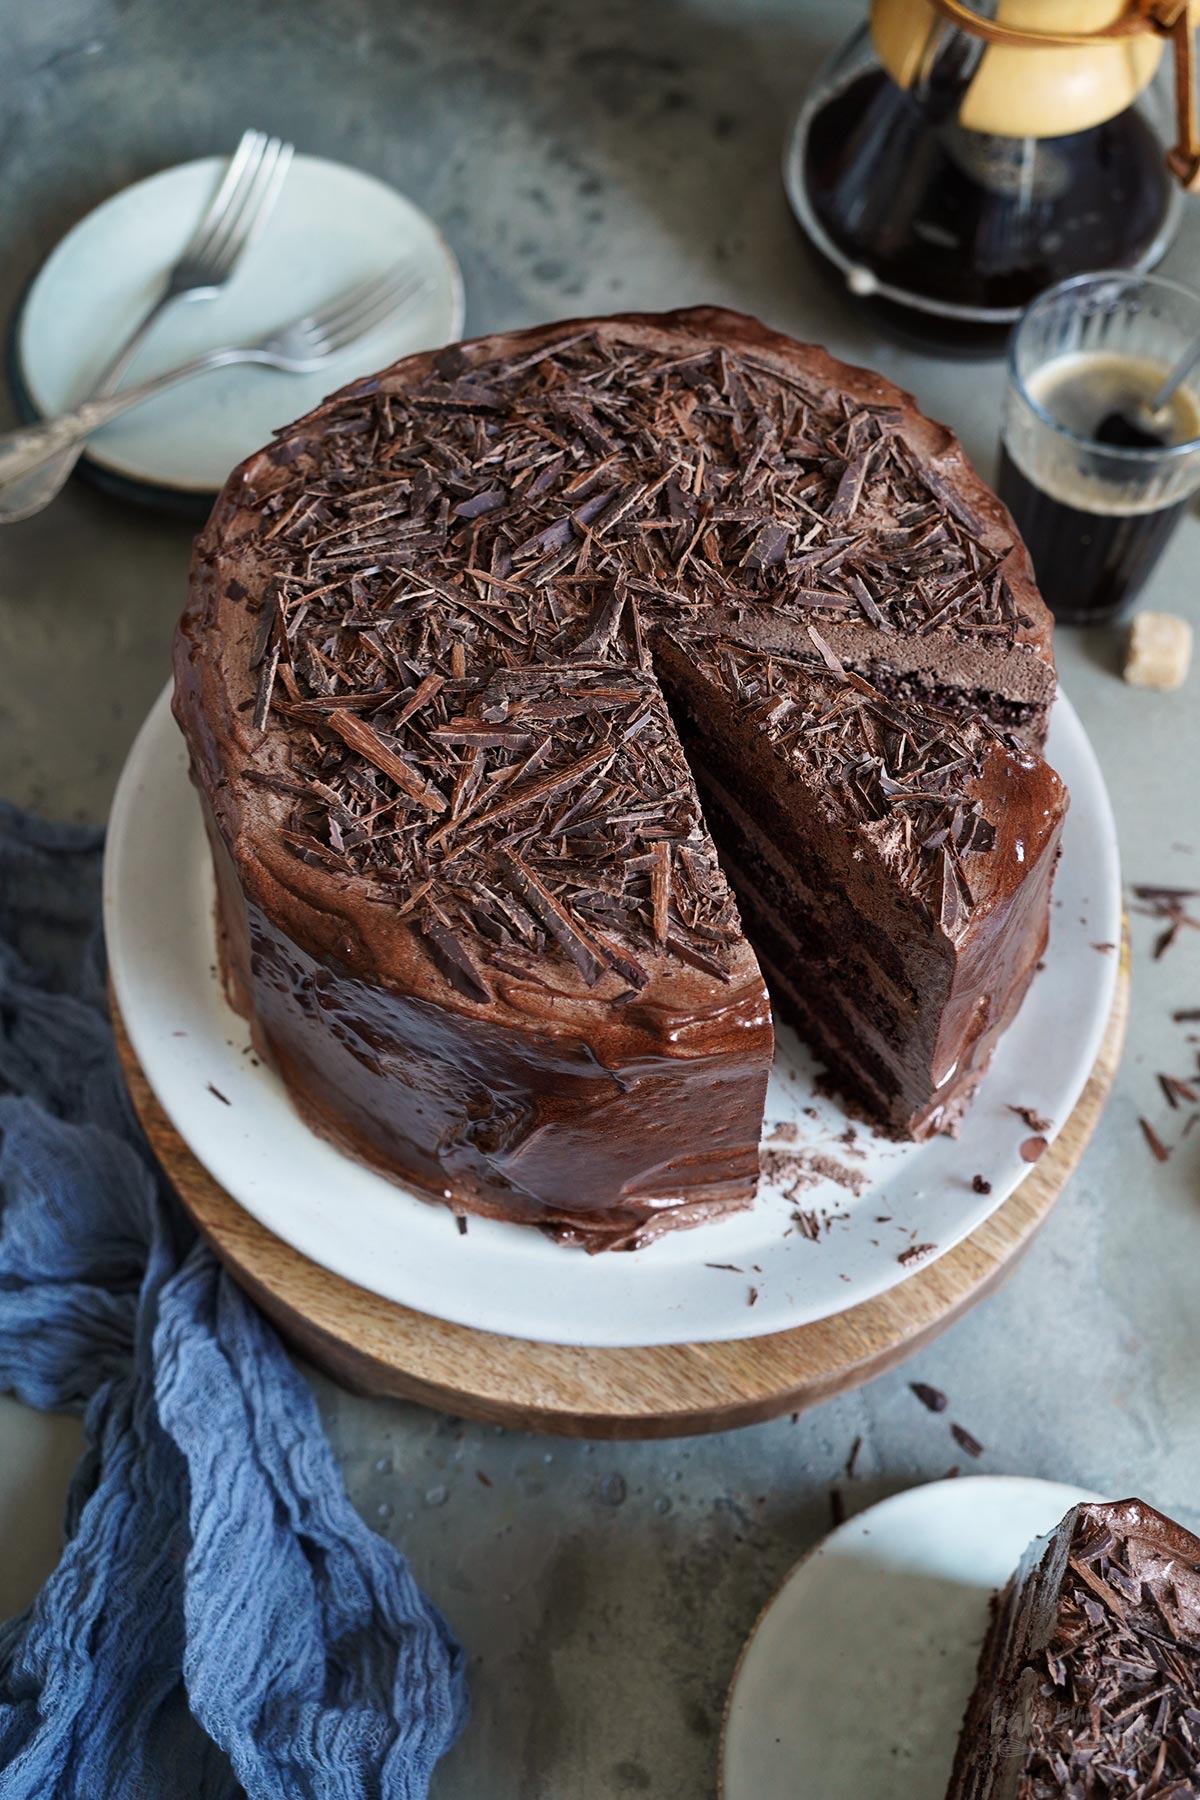
If you are a chocoholic, your heart might have just skipped a beat looking at this delicious Coffee Cocoa Mousse Chocolate Cake. At least that’s what happens to me every time a cake like that is right in front of me. It’s an absolute showstopper with loads of chocolate. Layers of scrumptious coffee chocolate cake and in between a rich and creamy coffee cocoa chocolate mousse. So good!
From experience, I can tell you… if you serve a chocolate cake like this one here you’ll have a lot of new »best buddies« all of a sudden. I guess that’s because chocolate is one of the most popular sweets out there. I’ve great somewhere that more than 50% of all sweets in the world are made with chocolate – I hope that source was legit, but it seems right if you look at all the sweets with chocolate you can buy in stores.
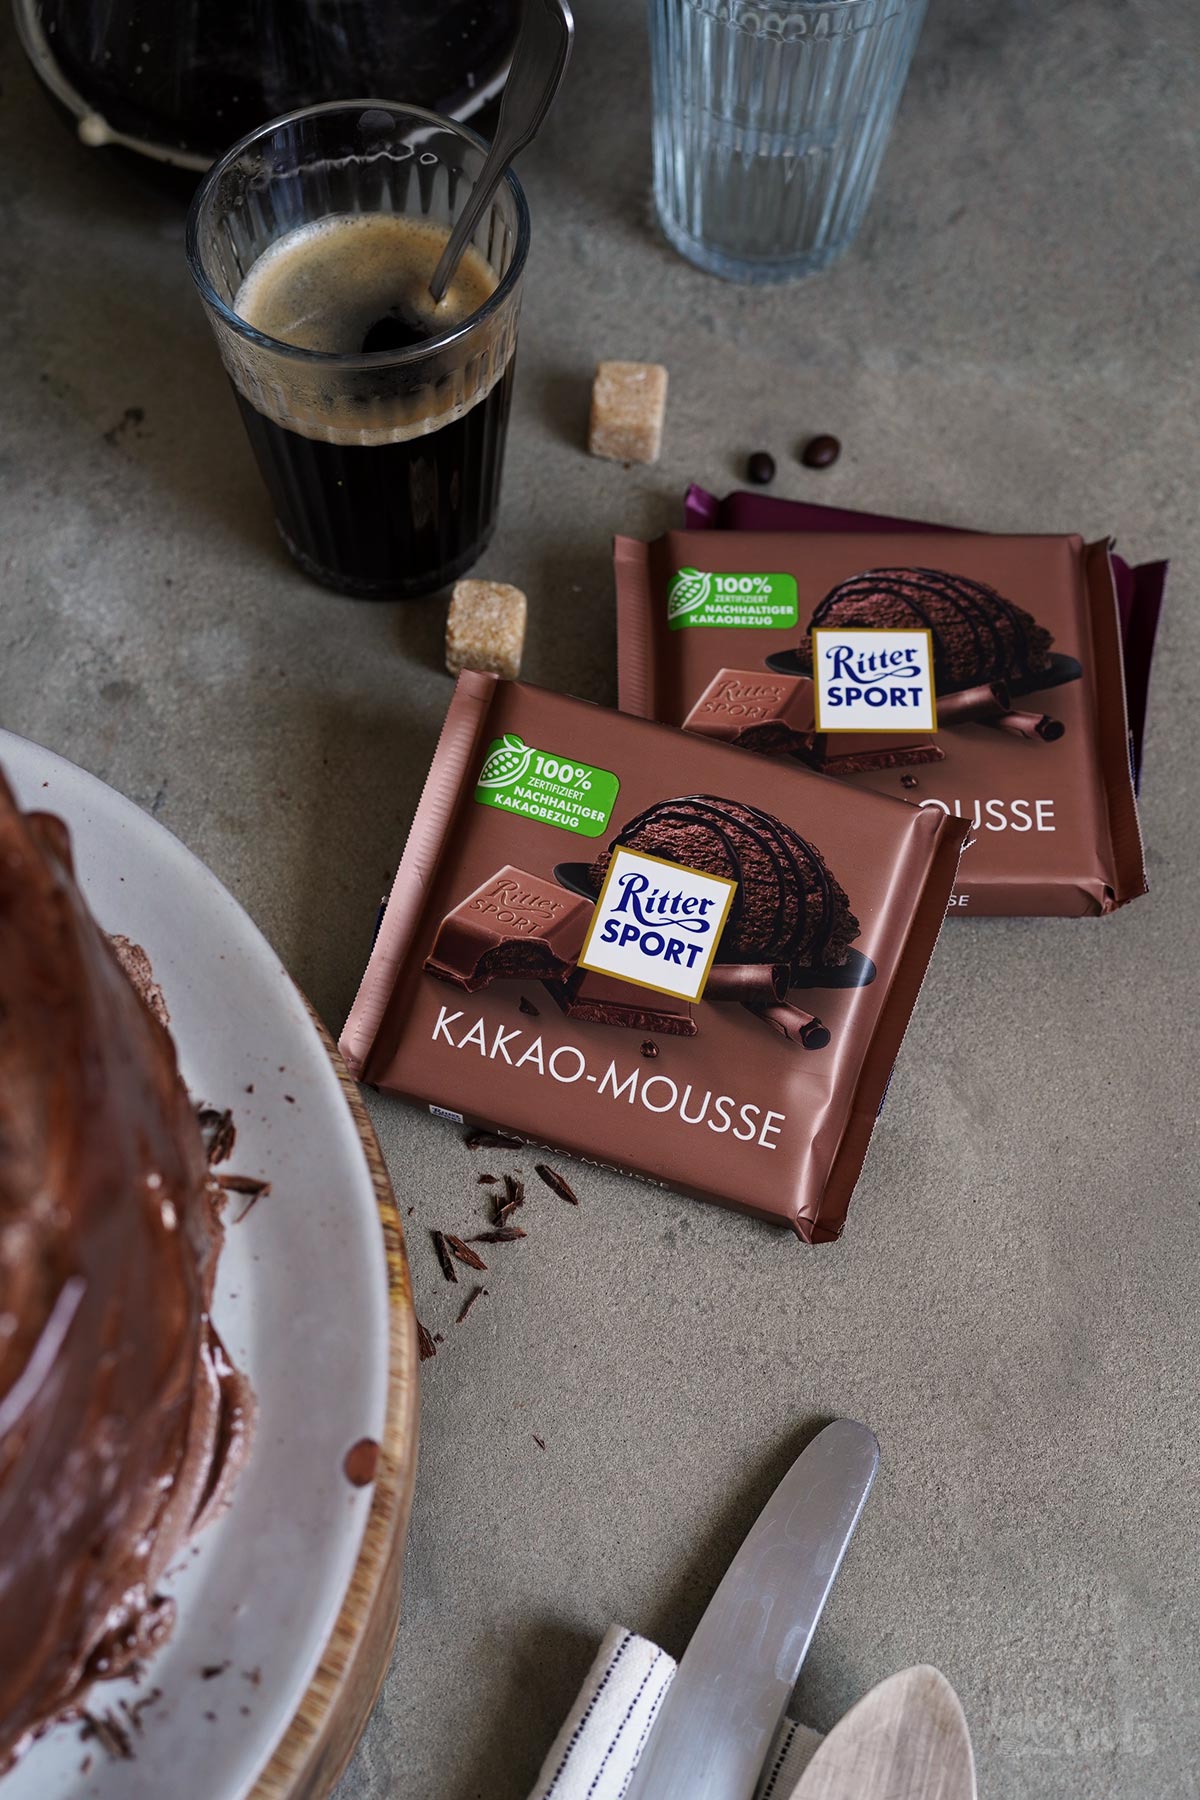
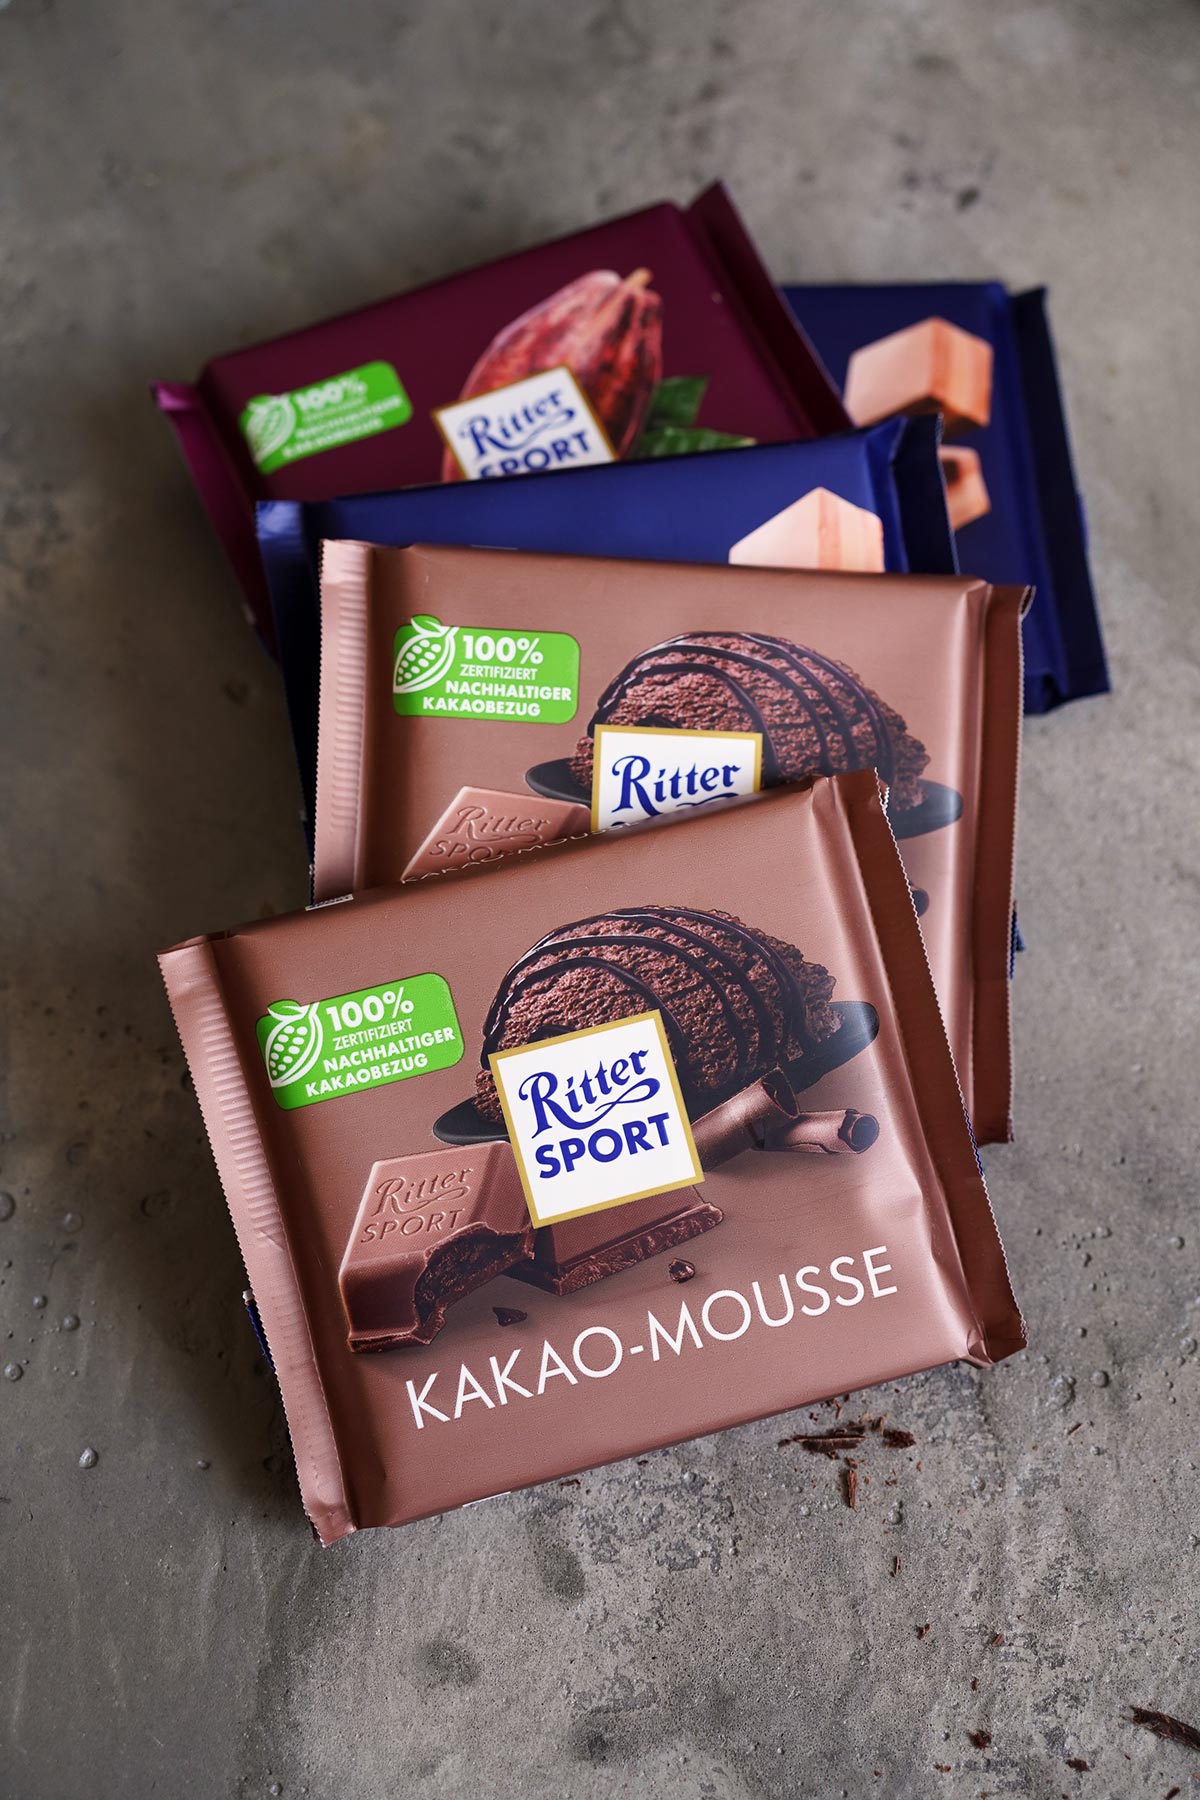
Some of you might know my long-time partner Ritter Sport** – one of the most popular chocolate brands in Germany. For more than 100 years, Ritter Sport has been turning cocoa beans into delicious chocolate – and a lot of that chocolate ended up in this cake here.
»Bunte Vielfalt aka. Colorful Variety«** is a collection of different chocolate varieties you can find in many supermarkets here in Germany. Chocolate with marzipan, chocolate nougat, alpine milk chocolate, and much more. The ones I used for this cake – Ritter Sport Cocoa Mousse and Dark Chocolate – are also included in this selection.
If you haven’t tried any of the chocolate varieties it’s about time… believe me. Especially the Cocoa Mousse is very delicious! I had a bit of a problem melting the chocolate for the frosting because I thought it would alter the taste… luckily it did not.
The cake might look like a lot of work, but it is actually quite easy to prepare. I know – I say that pretty much about every cake I have on the blog, but it’s really true. The batter for the cake layers is straightforward and easy to do. Same for filling/frosting. It’s a simple buttercream that has some chocolate added – nothing really complicated.
Decorating this cake is just as easy. Other layer cakes might require some decoration skills to get a cake with a perfectly smooth buttercream coating – not this one here. Just slap the frosting on top of the cake and onto the sides and make some swirls here and there… done. It’s really easy and looks quite nice in my opinion. I like the rustic and homemade look.
I really think you won’t have problems recreating this cake here – it’s a no-brainer. I got some notes at the end of the recipe that might help if you experience some difficulties. Feel free to comment if you need further help – I’ll try to answer every question. Happy Baking!
INGREDIENTS / ZUTATEN
For the chocolate cake:
1 3/4 cups (230g) all-purpose flour
1 oz. (30g) cornstarch
2.5 oz. (70g) cocoa powder
2 tsp. baking powder
1 tsp. baking soda
1/4 tsp. salt
3/4 cup (150g) sugar
3/4 cup (150g) brown sugar
1/2 cup (120ml) sunflower oil
7 oz. (200g) sour cream
3 medium eggs
1/2 cup (120ml) buttermilk
2 tsp. vanilla extract
1 cup (240ml) freshly brewed coffee
For the chocolate coffee frosting:
5 fl. oz. (150ml) freshly brewed coffee
3/4 cup (70g) cocoa powder
2 cups (460g) butter (or margarine), at room temperature
1 cup (130g) confectioners’ sugar
2 tbsp. maple syrup
1 tsp. vanilla extract
1 pinch of salt
7 oz. (200g) Ritter Sport Kakao-Mousse
3.5 oz. (100g) Ritter Sport Halbbitter
some chocolate shavings for decorations (optional)
Für den Schokoladenkuchen:
230g Mehl (Type 405)
30g Speisestärke
70g Kakao
2 TL Backpulver
1 TL Natron
1/4 TL Salz
150g Zucker
150g brauner Zucker
120ml Sonnenblumenöl
200g Schmand
3 Eier (M)
120ml Buttermilch
2 TL Vanille Extrakt
240ml frisch aufgebrühter Kaffee
Für das Schoko Kaffee Frosting:
150ml frisch aufgebrühter Kaffee
70g Kakao
460g Butter, Zimmertemperatur
130g Puderzucker
2 EL Ahornsirup
1 TL Vanille Extrakt
1 Prise Salz
200g Ritter Sport Kakao-Mousse
100g Ritter Sport Halbbitter
einige Schokoraspeln zur Dekoration (optional)
DIRECTIONS / ZUBEREITUNG
1. Preheat the oven to 350°F (180°C). Line four 8-inch cake pans with baking parchment and grease lightly. I prefer silicon molds* in most cases because they are easier to handle. Set everything aside.
2. Sift flour, cornstarch, cocoa powder, baking powder, baking soda, and salt into a bowl and mix to combine. In a second large bowl mix both sugars, oil, sour cream, eggs, buttermilk, and vanilla extract in a large bowl until well combined. Add about half of the dry ingredients and mix until well combined. Add the hot coffee and the rest of the dry ingredients and mix until just combined. Divide the batter between the cake pans and bake for about 25 minutes – or until a toothpick inserted into the centers of the cakes comes out clean. If your oven does not fit all cake pans at the same time you can bake, for example, in two batches with two cake pans at the same time. Take out of the oven and let cool down on a wire rack. You can prepare the cake layers a day in advance and store them well-wrapped until you are ready to continue with the frosting.
3. For the frosting brew some fresh coffee. Add together with the cocoa powder and mix until you get a smooth chocolate sauce. Set aside and let cool down.
4. In the bowl of a kitchen machine (with a whisk) mix the butter/margarine with confectioners’ sugar, maple syrup, vanilla extract, and salt. Whisk for 5-6 minutes on high until the mixture looks light and fluffy. Add the cooled chocolate sauce and mix for another 2-3 minutes until well incorporated.
5. While the kitchen machine is working, you can chop the chocolate coarsely and melt it (carefully) in the microwave (or in a bowl over a pot with simmering water). Let cool down a bit. When the chocolate sauce is well incorporated and the melted chocolate is a bit cooler, add it to the bowl and mix in. Mix everything for another 2-3 minutes – the frosting will be very soft. Place the bowl in the fridge for about 45-60 minutes to cool the frosting (check notes as well). Once the frosting has cooled for some time, stir it with a rubber spatula – if the frosting keeps its shape and does not collapse, you can continue with the cake.
6. Place the first cake layer on a serving plate or cake stand. Add some frosting on top and spread evenly. Repeat with the remaining cake layers and stack them on top of each other. Place the cake layers in the fridge for about 30 minutes to make sure everything stays where it should be. To finish the cake spread the remaining frosting on the sides and on top of the cake to cover everything – make swirls and waves, you don’t have to create a super smooth surface.
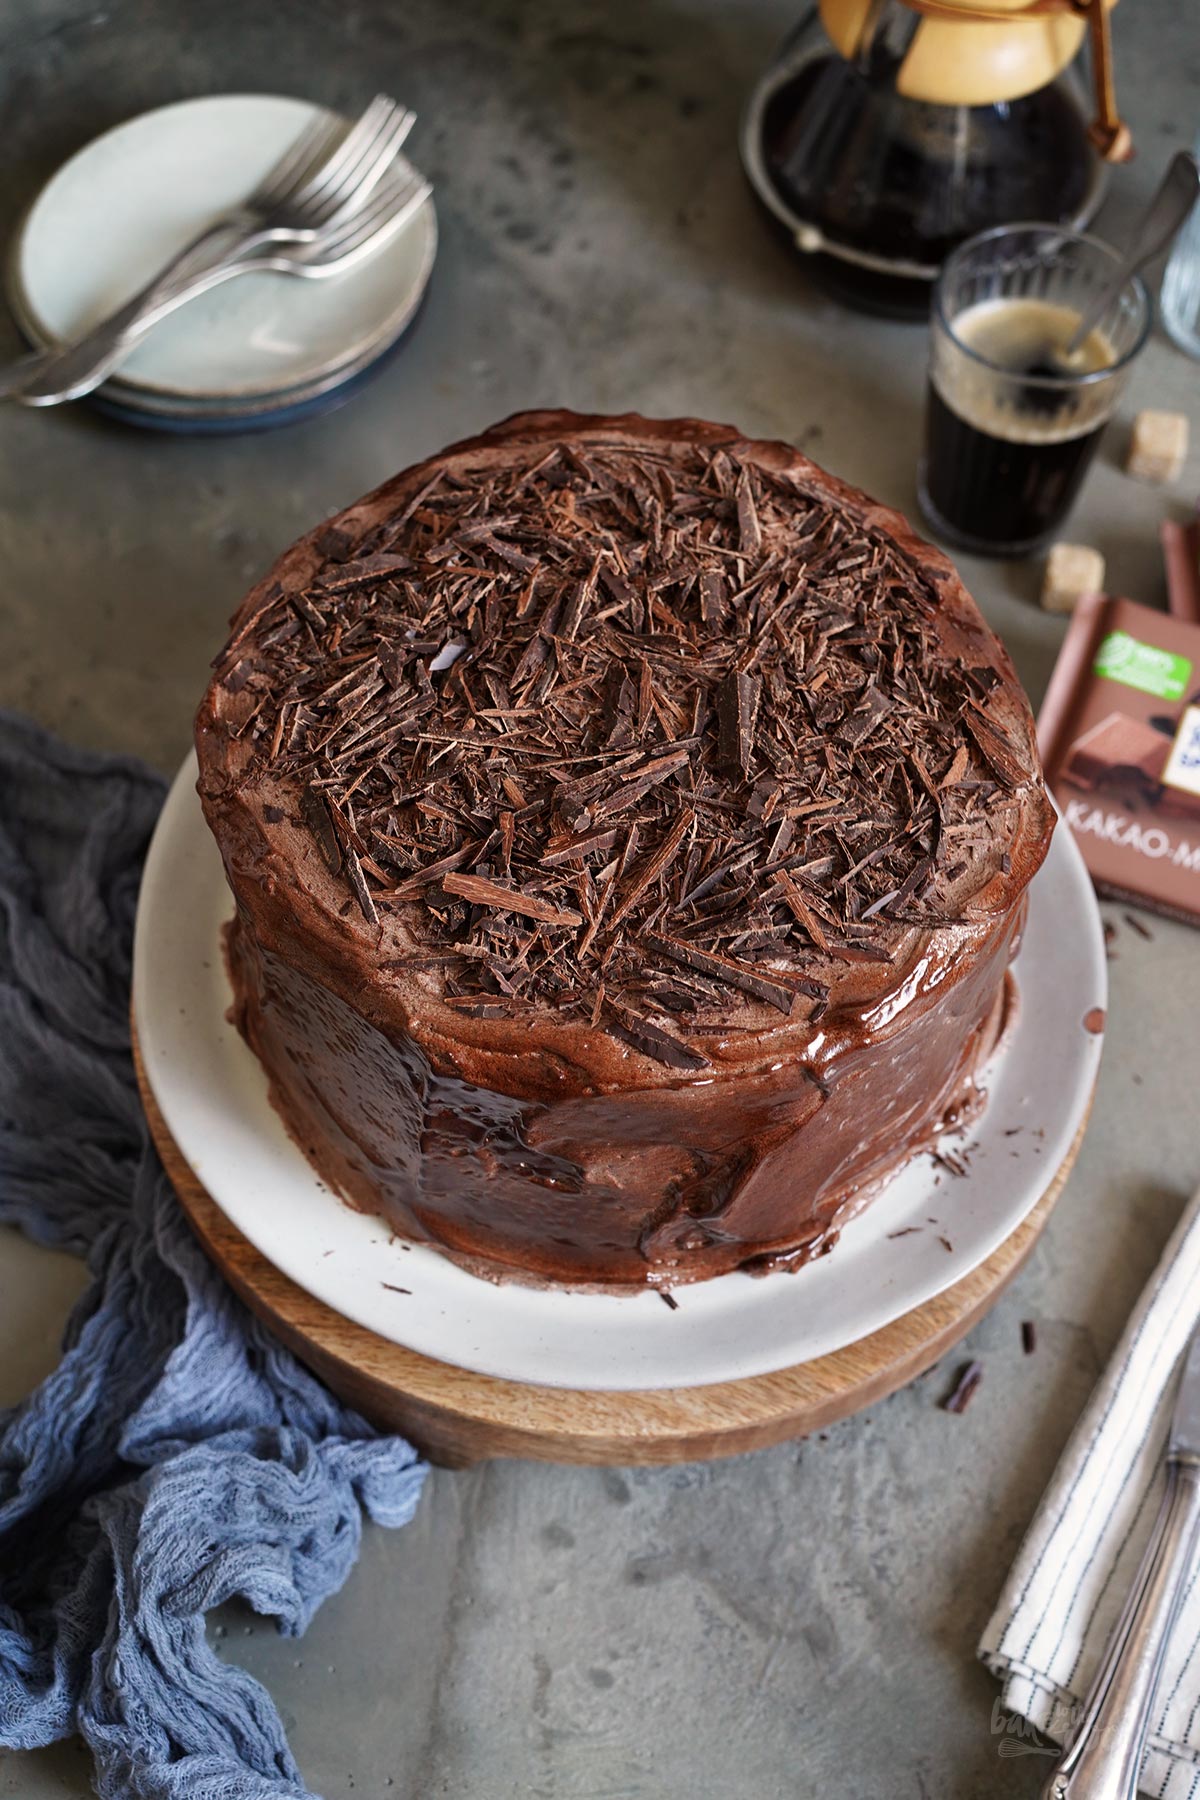
7. To decorate the cake sprinkle some chocolate shavings on top (optional).
Note 1: Depending on how warm the ingredients for the frosting are (chocolate sauce and melted chocolate), it may take a little longer to cool completely. One time it took me more than one hour longer because the melted chocolate had warmed everything a little too much.
Note 2: Leftovers should be stored in the fridge (up to 3 days are fine) – however, I recommend leaving the cake out for some time before serving again. The texture and flavors will be better when the cake is not too cold.
Note 3: The frosting will look dull when the cake has been in the fridge for a while – the frosting hardens in the cold and loses its shine. As you can see – my cake in the photos is shiny – that’s because I warmed the surface of the frosting slightly before taking the pictures. A kitchen torch is all you need here (a hair dryer also works if you have not yet decorated it with chocolate shavings). You don’t have to heat up the whole cake – a tiny bit of heat is all you need to give the cake a shiny exterior.
1. Den Ofen auf 180°C (350°F) Ober-/Unterhitze vorheizen. Vier 20cm Springformen mit Backpapier auslegen und leicht einfetten. Ich bevorzuge hier Silikonformen*, weil sie einfacher zu handhaben sind. Alles zur Seite stellen.
2. Mehl, Stärke, Kakao, Backpulver, Natron und Salz in eine Schüssel sieben und gut vermischen. In einer zweiten großen Schüssel beide Zuckersorten, Öl, Schmand, Eier, Buttermilch und Vanille Extrakt verrühren. Etwa die Hälfte der trockenen Zutaten zur Schüssel dazugeben und unterrühren. Den heißen Kaffee und die restlichen trockenen Zutaten dazugeben und alles gut vermengen (aber nicht zu viel rühren). Den Teig gleichmäßig auf die Backformen verteilen und dann etwa 25 Minuten im vorgeheizten Ofen backen – mit einem Zahnstocher testen, ob noch Teig kleben bleibt und die Kuchen erst herausholen, wenn dieser sauber herauskommt. Sollte der Ofen nicht groß genug sein, alle Kuchenschichten auf einmal zu backen, kann man auch in zwei Runden backen. Die Kuchen aus dem Ofen holen und auf einem Kuchengitter komplett abkühlen lassen. Die Kuchen können einen Tag vorab gebacken und dann gut verpackt gelagert werden, bis man den Kuchen zusammenbaut.
3. Für das Frosting den Kaffee frisch aufbrühen, dann mit dem Kakao verrühren, bis eine glatte Schokoladensoße entsteht. Zur Seite stellen und abkühlen lassen.
4. In der Schüssel einer Küchenmaschine (mit Schneebesen) die Butter mit dem Puderzucker, Ahornsirup, Vanille Extrakt und Salz vermischen. Mit dem Schneebesen etwa 5-6 Minuten auf höchster Stufe aufschlagen, bis die Mischung hell und luftig aussieht. Die abgekühlte Schokoladensauce hinzufügen und weitere 2-3 Minuten aufschlagen, bis sich alles gut verbunden hat.
5. Während die Küchenmaschine arbeitet, kann man die Schokolade grob hacken und (vorsichtig) in der Mikrowelle (oder in einer Schüssel über einem Topf mit köchelndem Wasser) schmelzen. Etwas abkühlen lassen. Wenn die Schokoladensauce gut eingearbeitet ist und die geschmolzene Schokolade abgekühlt ist, die Schokolade zur Schüssel dazugeben und für etwa 2-3 Minuten unterrühren. Das Frosting wird recht weich sein. Die Schüssel für etwa 45-60 Minuten in den Kühlschrank stellen, damit das Frosting etwas fester werden kann (s. auch Hinweise). Sobald das abgekühlte Frosting nicht mehr zusammenfällt, wenn man die Masse durch rührt, ist es bereit für den nächsten Schritt.
6. Eine erste Kuchenschicht auf eine Servierplatte oder Kuchenständer setzen. Etwas Frosting darauf verstreichen und dann die zweite Kuchenschicht aufsetzen. Diesen Vorgang wiederholen, bis alle Kuchenschichten aufeinander gestapelt sind. Den Stapel für etwa 30 Minuten in den Kühlschrank stellen, damit die Schichten gut zusammenhalten. Den Kuchen dann mit dem verbliebenen Frosting einstreichen. Man muss hier nicht super sauber arbeiten – eine super glatte Oberfläche ist nicht wirklich gewünscht.
7. Wer mag, kann den Kuchen noch mit etwas geraspelter Schokolade dekorieren (optional).
Hinweis 1: Je nachdem wie warm die Zutaten für das Frosting sind (Schokosoße und geschmolzene Schokolade), kann das Durchkühlen etwas länger dauern… ich musste schon einmal eine Stunde länger kühlen, weil die geschmolzene Schokolade alles etwas zu sehr erwärmt hat.
Hinweis 2: Reste sollten im Kühlschrank aufbewahrt werden (bis zu 3 Tage sind kein Problem) – ich empfehle jedoch, den Kuchen (bzw. Kuchenstücke) vor dem erneuten Servieren noch einmal einige Zeit bei Zimmertemperatur stehenzulassen. Die Textur und die Aromen kommen einfach besser raus, wenn der Kuchen Raumtemperatur hat.
Hinweis 3: Steht der Kuchen einige Zeit in der Kühlung, wird das Frosting recht matt aussehen. Mein Kuchen auf den Fotos glänzt, weil ich vor dem Fotografieren die Oberfläche der Buttercreme mit einem Küchenbrenner leicht abgeflammt und damit angeschmolzen habe. Das geht auch mit einem Föhn (wenn man noch nicht Schokoraspeln dekoriert hat) – es braucht nur kurz etwas Wärme, damit alles anfängt zu glänzen.

Craving more? Keep in touch on Facebook, Instagram and Pinterest for new post updates and more. You can also contact me with any questions or inquiries!
Here is a version of the recipe you can print easily.
Print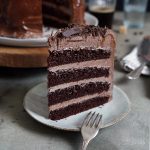
Coffee Cocoa Mousse Chocolate Cake
- Prep Time: 00:40
- Cook Time: 00:25
- Total Time: 04:00
- Yield: 1 1x
- Category: Cakes
- Cuisine: International
- Diet: Vegetarian
Description
The ultimate cake for chocoholics: a delicious Coffee Cocoa Mousse Chocolate Cake. Layers of scrumptious chocolate cake in combination with a chocolate cocoa mousse frosting. So good!
Ingredients
For the chocolate cake:
1 3/4 cups (230g) all-purpose flour
1 oz. (30g) cornstarch
2.5 oz. (70g) cocoa powder
2 tsp. baking powder
1 tsp. baking soda
1/4 tsp. salt
3/4 cup (150g) sugar
3/4 cup (150g) brown sugar
1/2 cup (120ml) sunflower oil
7 oz. (200g) sour cream
3 medium eggs
1/2 cup (120ml) buttermilk
2 tsp. vanilla extract
1 cup (240ml) freshly brewed coffee
For the chocolate coffee frosting:
5 fl. oz. (150ml) freshly brewed coffee
3/4 cup (70g) cocoa powder
2 cups (460g) butter (or margarine), at room temperature
1 cup (130g) confectioners’ sugar
2 tbsp. maple syrup
1 tsp. vanilla extract
1 pinch of salt
7 oz. (200g) Ritter Sport Kakao-Mousse
3.5 oz. (100g) Ritter Sport Halbbitter
some chocolate shavings for decorations (optional)
Instructions
1. Preheat the oven to 350°F (180°C). Line four 8-inch cake pans with baking parchment and grease lightly. I prefer silicon molds* in most cases because they are easier to handle. Set everything aside.
2. Sift flour, cornstarch, cocoa powder, baking powder, baking soda, and salt into a bowl and mix to combine. In a second large bowl mix both sugars, oil, sour cream, eggs, buttermilk, and vanilla extract in a large bowl until well combined. Add about half of the dry ingredients and mix until well combined. Add the hot coffee and the rest of the dry ingredients and mix until just combined. Divide the batter between the cake pans and bake for about 25 minutes – or until a toothpick inserted into the centers of the cakes comes out clean. If your oven does not fit all cake pans at the same time you can bake, for example, in two batches with two cake pans at the same time. Take out of the oven and let cool down on a wire rack. You can prepare the cake layers a day in advance and store them well-wrapped until you are ready to continue with the frosting.
3. For the frosting brew some fresh coffee. Add together with the cocoa powder and mix until you get a smooth chocolate sauce. Set aside and let cool down.
4. In the bowl of a kitchen machine (with a whisk) mix the butter/margarine with confectioners’ sugar, maple syrup, vanilla extract, and salt. Whisk for 5-6 minutes on high until the mixture looks light and fluffy. Add the cooled chocolate sauce and mix for another 2-3 minutes until well incorporated.
5. While the kitchen machine is working, you can chop the chocolate coarsely and melt it (carefully) in the microwave (or in a bowl over a pot with simmering water). Let cool down a bit. When the chocolate sauce is well incorporated and the melted chocolate is a bit cooler, add it to the bowl and mix in. Mix everything for another 2-3 minutes – the frosting will be very soft. Place the bowl in the fridge for about 45-60 minutes to cool the frosting (check notes as well). Once the frosting has cooled for some time, stir it with a rubber spatula – if the frosting keeps its shape and does not collapse, you can continue with the cake.
6. Place the first cake layer on a serving plate or cake stand. Add some frosting on top and spread evenly. Repeat with the remaining cake layers and stack them on top of each other. Place the cake layers in the fridge for about 30 minutes to make sure everything stays where it should be. To finish the cake spread the remaining frosting on the sides and on top of the cake to cover everything – make swirls and waves, you don’t have to create a super smooth surface ;)
7. To decorate the cake sprinkle some chocolate shavings on top (optional).
Notes
Note 1: Depending on how warm the ingredients for the frosting are (chocolate sauce and melted chocolate), it may take a little longer to cool completely. One time it took me more than one hour longer because the melted chocolate had warmed everything a little too much ;)
Note 2: Leftovers should be stored in the fridge (up to 3 days are fine) – however, I recommend leaving the cake out for some time before serving again. The texture and flavors will be better when the cake is not too cold.
Note 3: The frosting will look dull when the cake has been in the fridge for a while – the frosting hardens in the cold and loses its shine. As you can see – my cake in the photos is shiny – that’s because I warmed the surface of the frosting slightly before taking the pictures. A kitchen torch is all you need here (a hair dryer also works if you have not yet decorated it with chocolate shavings). You don’t have to heat up the whole cake – a tiny bit of heat is all you need to give the cake a shiny exterior ;P
Links marked with an asterisk (*) are affiliate links (advertising/Werbung) to Amazon Germany. If you click on one of those links and buy something via this link, I will get a commission for that sale. The price of whatever you buy is not affected in any way by this.
**I have partnered with Ritter Sport to bring you this delicious cake. That’s why I have to declare this here in Germany as Advertising. All I wrote in this article is still based on my own opinion and has not been affected by anybody.